前言
继续使用Azure B2C进行工作的周期。在本文中,我将讨论如何在React JS上启用身份验证。链接到相关文章步骤1
您必须安装react-aad-msal (npm i react-aad-msal)。将空的auth.html文件添加到公共目录第2步
在./src文件夹中
创建auth-provider.ts文件您还需要验证在Azure B2C中,在“ API权限”选项卡中是否授予了openid和配置文件的管理员权限。
import { MsalAuthProvider, LoginType } from 'react-aad-msal';
import { Configuration } from 'msal/lib-commonjs/Configuration';
export const config = (azurePolicy: string): Configuration => ({
auth: {
authority: `https://yourcompany.b2clogin.com/yourcompany.onmicrosoft.com/${azurePolicy}`,
validateAuthority: false,
clientId: '777aaa77a-7a77-7777-bb77-8888888aabc',
},
cache: {
cacheLocation: 'localStorage',
storeAuthStateInCookie: false,
},
});
const authenticationParameters = {
scopes: [
'https://myapp.onmicrosoft.com/777aaa77a-7a77-7777-bb77-8888888aabc/openid',
'https://myapp.onmicrosoft.com/777aaa77a-7a77-7777-bb77-8888888aabc/profile',
],
};
export const options = {
loginType: LoginType.Redirect,
tokenRefreshUri: `${window.location.origin}/auth.html`,
};
export const authProvider = (customConfig: Configuration): MsalAuthProvider => new MsalAuthProvider(customConfig, authenticationParameters, options);
在哪里可以找到策略名称,您可以在屏幕截图中看到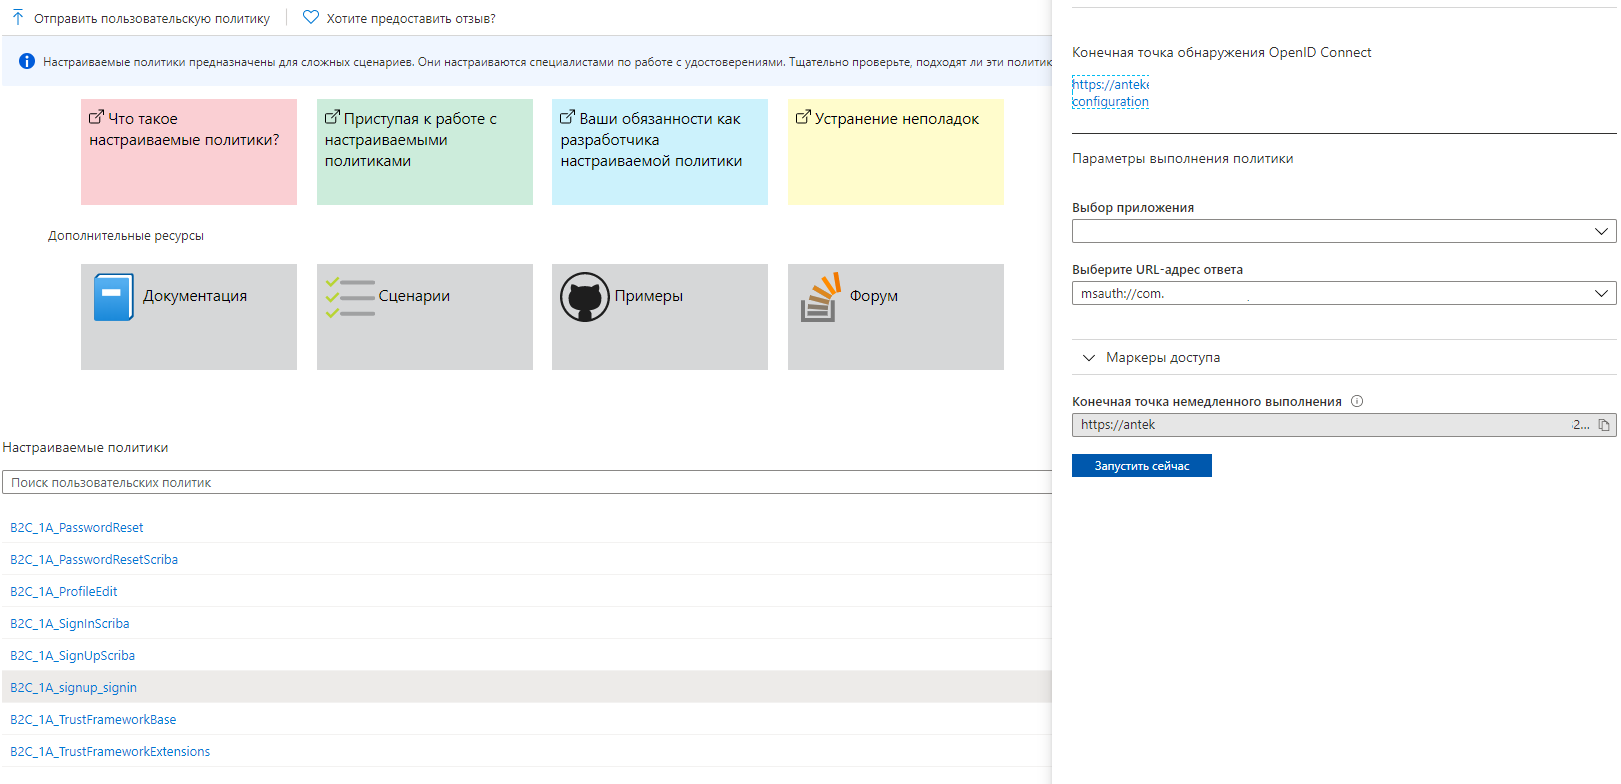
步骤3
在index.tsx文件中,您需要根据用户进入您的应用程序来处理脚本。 import * as React from 'react';
import * as ReactDOM from 'react-dom';
import { Provider } from 'react-redux';
import { AzureAD, AuthenticationState, IAzureADFunctionProps } from 'react-aad-msal';
import { authProvider, config } from './auth-provider';
import App from './App';
const store = configureStore();
const unauthenticatedFunction = () => (
<AzureAD provider={authProvider(config('B2C_1A_PasswordReset'))}>
{
({
login, logout, authenticationState, error, accountInfo,
}: IAzureADFunctionProps): React.ReactElement | void => {
switch (authenticationState) {
default:
login();
return <h1>Loading...</h1>;
}
}
}
</AzureAD>
);
ReactDOM.render(
<Provider store={store}>
//
<AzureAD provider={authProvider(config('B2C_1A_signup_signin'))} reduxStore={store}>
{
({
login, logout, authenticationState, error, accountInfo,
}: IAzureADFunctionProps): React.ReactElement | void => {
switch (authenticationState) {
case AuthenticationState.Authenticated:
console.log(accountInfo); // + JWT Token
return <App />;
case AuthenticationState.Unauthenticated:
if (!accountInfo && !error) {
login();
}
if (!accountInfo && error) {
//
// AADB2C90118
if (error.errorMessage.includes('AADB2C90118')) {
return unauthenticatedFunction();
}
// ,
// ( " " "")
if (error.errorMessage.includes('AADB2C90091')) {
login();
}
}
console.log('ERROR', error);
return <h1>Not authorized</h1>;
case AuthenticationState.InProgress:
return <h1>In progress</h1>;
default:
return <h1>Default</h1>;
}
}
}
</AzureAD>
</Provider>,
document.getElementById('root'),
);
registerServiceWorker();
第四步
在“应用程序注册”选项卡中
转到Azure AD B2C,然后选择要使用的应用程序,除了:IdentityExperienceFramework和ProxyIdentityExperienceFramework。如果尚未创建该应用程序,请转到“基本用户流”步骤。
接下来,进入身份验证并添加以下URI: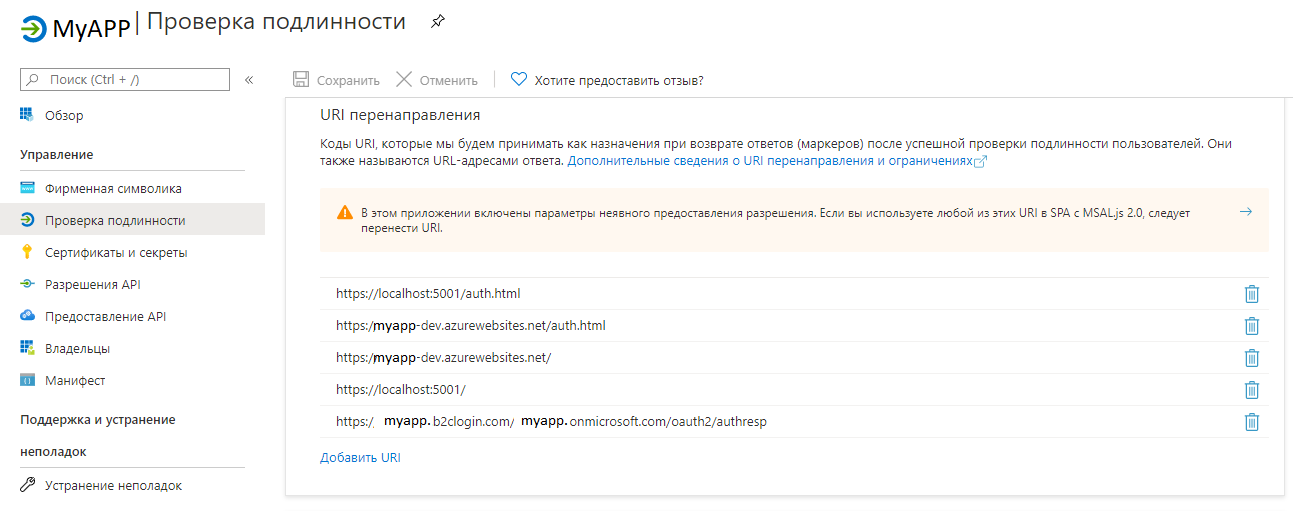
结论
完成工作的结果是,在下载应用程序时,用户将被转移到授权页面。感谢您的关注!