任务
在开发游戏The Unliving时,我们将自己的任务设定为使用粒子系统显示各种消息,例如所造成的损害,缺乏健康或精力,奖励价值,恢复的健康点数等。决定这样做是为了获得更多的机会来定制这种消息的外观效果和进一步的行为,这在使用Unity UI系统的标准元素时会出现问题。此外,这种方法意味着每种消息类型仅使用一个粒子系统实例,与使用Unity UI输出相同消息相比,生产率大大提高。损坏报告短信短缺决策算法
使用着色器,我们可以使用正确的UV坐标显示预先准备的纹理。带有UV坐标的信息通过两个流(顶点流)使用Vector4列表形式的ParticleSystem.SetCustomParticleData传输到ParticleSystem。我们的实现涉及使用包含10行10列字符的纹理。任何等宽字体都可以用作字体。这是为了避免消息字符之间的间距不同。→ PSD中的纹理源逐步实施
创建Vector4以传输到顶点流为了描述字符集,我们将使用SymbolsTextureData结构。必须手动填充chars数组,顺序是从左上角开始向其添加所有字体纹理符号。[Serializable]
public struct SymbolsTextureData
{
public Texture texture;
public char[] chars;
private Dictionary<char, Vector2> charsDict;
public void Initialize()
{
charsDict = new Dictionary<char, Vector2>();
for (int i = 0; i < chars.Length; i++)
{
var c = char.ToLowerInvariant(chars[i]);
if (charsDict.ContainsKey(c)) continue;
var uv = new Vector2(i % 10, 9 - i / 10);
charsDict.Add(c, uv);
}
}
public Vector2 GetTextureCoordinates(char c)
{
c = char.ToLowerInvariant(c);
if (charsDict == null) Initialize();
if (charsDict.TryGetValue(c, out Vector2 texCoord))
return texCoord;
return Vector2.zero;
}
}
结果,我们得到了TextRendererParticleSystem类。当您调用公共SpawnParticle方法时,粒子系统的一个粒子将生成到具有所需值,颜色和大小的所需位置。[RequireComponent(typeof(ParticleSystem))]
public class TextRendererParticleSystem : MonoBehaviour
{
private ParticleSystemRenderer particleSystemRenderer;
private new ParticleSystem particleSystem;
public void SpawnParticle(Vector3 position, string message, Color color, float? startSize = null)
{
}
}
Unity中的粒子系统允许您以2个Vector4流的形式传输自定义数据。我们有意添加了额外的UV2流,以避免流的坐标发生偏移。如果不这样做,则C#中Custom1-vector的X和Y坐标将对应于Z和W TEXCOORD0着色器。因此,Custom1.z = TEXCOORD1.x,Custom1.w = TEXCOORD1.y。将来会带来很多不便。如前所述,我们将使用两个Vector4传达消息的长度和字符的UV坐标。由于Vector4包含4个float类型的元素,因此默认情况下,我们可以将4 * 4 = 16字节的数据打包到其中。因为由于我们的消息仅包含消息长度(两位数)和字符坐标(每个字符两位数),因此字节类型(0-255)的范围对我们来说是多余的。虽然使用小数位会很好。浮点精度为6-9个字符,这意味着我们可以安全地使用每个Vector4坐标的6位,而不必担心数据的完整性和准确性。实际上,我们尝试打包7、8和9个字符,但浮点精度还不够。事实证明,与四个字节的标准版本相比,在每个浮点数中,使用小数位后,我们将打包多达6位数字。总共一个Vector4将包含24个个位数。我们可以在流中传输2个矢量,因此我们将同时使用这两个矢量来传输最长23个字符的消息:Custom1.xyzw-消息的前12个字符。Custom2.xyzw-消息的另外11个字符+消息的长度(最后2个字符)。例如,消息“ Hello”将如下所示。字符坐标对应于纹理中的列号和字符位置线。在代码中,将字符串包装在两个Vector4中将如下所示:
public float PackFloat(Vector2[] vecs)
{
if (vecs == null || vecs.Length == 0) return 0;
var result = vecs[0].y * 10000 + vecs[0].x * 100000;
if (vecs.Length > 1) result += vecs[1].y * 100 + vecs[1].x * 1000;
if (vecs.Length > 2) result += vecs[2].y + vecs[2].x * 10;
return result;
}
private Vector4 CreateCustomData(Vector2[] texCoords, int offset = 0)
{
var data = Vector4.zero;
for (int i = 0; i < 4; i++)
{
var vecs = new Vector2[3];
for (int j = 0; j < 3; j++)
{
var ind = i * 3 + j + offset;
if (texCoords.Length > ind)
{
vecs[j] = texCoords[ind];
}
else
{
data[i] = PackFloat(vecs);
i = 5;
break;
}
}
if (i < 4) data[i] = PackFloat(vecs);
}
return data;
}
public void SpawnParticle(Vector3 position, string message, Color color, float? startSize = null)
{
var texCords = new Vector2[24];
var messageLenght = Mathf.Min(23, message.Length);
texCords[texCords.Length - 1] = new Vector2(0, messageLenght);
for (int i = 0; i < texCords.Length; i++)
{
if (i >= messageLenght) break;
texCords[i] = textureData.GetTextureCoordinates(message[i]);
}
var custom1Data = CreateCustomData(texCords);
var custom2Data = CreateCustomData(texCords, 12);
}
准备好CustomData的向量。现在该手动生成具有所需参数的新粒子了。粒子生成我们需要做的第一件事是确保在粒子系统的“渲染器”设置中激活CustomData流:
if (particleSystem == null) particleSystem = GetComponent<ParticleSystem>();
if (particleSystemRenderer == null)
{
particleSystemRenderer = particleSystem.GetComponent<ParticleSystemRenderer>();
var streams = new List<ParticleSystemVertexStream>();
particleSystemRenderer.GetActiveVertexStreams(streams);
if (!streams.Contains(ParticleSystemVertexStream.UV2)) streams.Add(ParticleSystemVertexStream.UV2);
if (!streams.Contains(ParticleSystemVertexStream.Custom1XYZW)) streams.Add(ParticleSystemVertexStream.Custom1XYZW);
if (!streams.Contains(ParticleSystemVertexStream.Custom2XYZW)) streams.Add(ParticleSystemVertexStream.Custom2XYZW);
particleSystemRenderer.SetActiveVertexStreams(streams);
}
要创建粒子,我们使用ParticleSystem类的Emit()方法。
var emitParams = new ParticleSystem.EmitParams
{
startColor = color,
position = position,
applyShapeToPosition = true,
startSize3D = new Vector3(messageLenght, 1, 1)
};
if (startSize.HasValue) emitParams.startSize3D *= startSize.Value * particleSystem.main.startSizeMultiplier;
particleSystem.Emit(emitParams, 1);
var customData = new List<Vector4>();
particleSystem.GetCustomParticleData(customData, ParticleSystemCustomData.Custom1);
customData[customData.Count - 1] = custom1Data;
particleSystem.SetCustomParticleData(customData, ParticleSystemCustomData.Custom1);
particleSystem.GetCustomParticleData(customData, ParticleSystemCustomData.Custom2);
customData[customData.Count - 1] = custom2Data;
particleSystem.SetCustomParticleData(customData, ParticleSystemCustomData.Custom2);
将两个块都添加到SpawnParticle()方法中,C#部分准备就绪:消息在GPU中以Vertex Stream中两个Vector4的形式打包和传输。剩下的最有趣的事情是接受此数据并正确显示它。着色器代码Shader "Custom/TextParticles"
{
Properties
{
_MainTex ("Texture", 2D) = "white" {}
// 10,
_Cols ("Columns Count", Int) = 10
_Rows ("Rows Count", Int) = 10
}
SubShader
{
Tags { "RenderType"="Opaque" "PreviewType"="Plane" "Queue" = "Transparent+1"}
LOD 100
ZWrite Off
Blend SrcAlpha OneMinusSrcAlpha
Pass
{
CGPROGRAM
#pragma vertex vert
#pragma fragment frag
#include "UnityCG.cginc"
struct appdata
{
float4 vertex : POSITION;
fixed4 color : COLOR;
float4 uv : TEXCOORD0;
// customData
float4 customData1 : TEXCOORD1;
float4 customData2 : TEXCOORD2;
};
struct v2f
{
float4 vertex : SV_POSITION;
fixed4 color : COLOR;
float4 uv : TEXCOORD0;
float4 customData1 : TEXCOORD1;
float4 customData2 : TEXCOORD2;
};
uniform sampler2D _MainTex;
uniform uint _Cols;
uniform uint _Rows;
v2f vert (appdata v)
{
v2f o;
// w- ?
// .
// 100.
float textLength = ceil(fmod(v.customData2.w, 100));
o.vertex = UnityObjectToClipPos(v.vertex);
// UV , -
o.uv.xy = v.uv.xy * fixed2(textLength / _Cols, 1.0 / _Rows);
o.uv.zw = v.uv.zw;
o.color = v.color;
o.customData1 = floor(v.customData1);
o.customData2 = floor(v.customData2);
return o;
}
fixed4 frag (v2f v) : SV_Target
{
fixed2 uv = v.uv.xy;
//
uint ind = floor(uv.x * _Cols);
uint x = 0;
uint y = 0;
// ,
//0-3 - customData1
//4-7 - customData2
uint dataInd = ind / 3;
// 6 float
uint sum = dataInd < 4 ? v.customData1[dataInd] : v.customData2[dataInd - 4];
// float
for(int i = 0; i < 3; ++i)
{
if (dataInd > 3 & i == 3) break;
// , 10^2 = 99 ..
uint val = ceil(pow(10, 5 - i * 2));
x = sum / val;
sum -= x * val;
val = ceil(pow(10, 4 - i * 2));
y = sum / val;
sum -= floor(y * val);
if (dataInd * 3 + i == ind) i = 3;
}
float cols = 1.0 / _Cols;
float rows = 1.0 / _Rows;
// UV-, - , ,
//
uv.x += x * cols - ind * rows;
uv.y += y * rows;
return tex2D(_MainTex, uv.xy) * v.color;
}
ENDCG
}
}
}
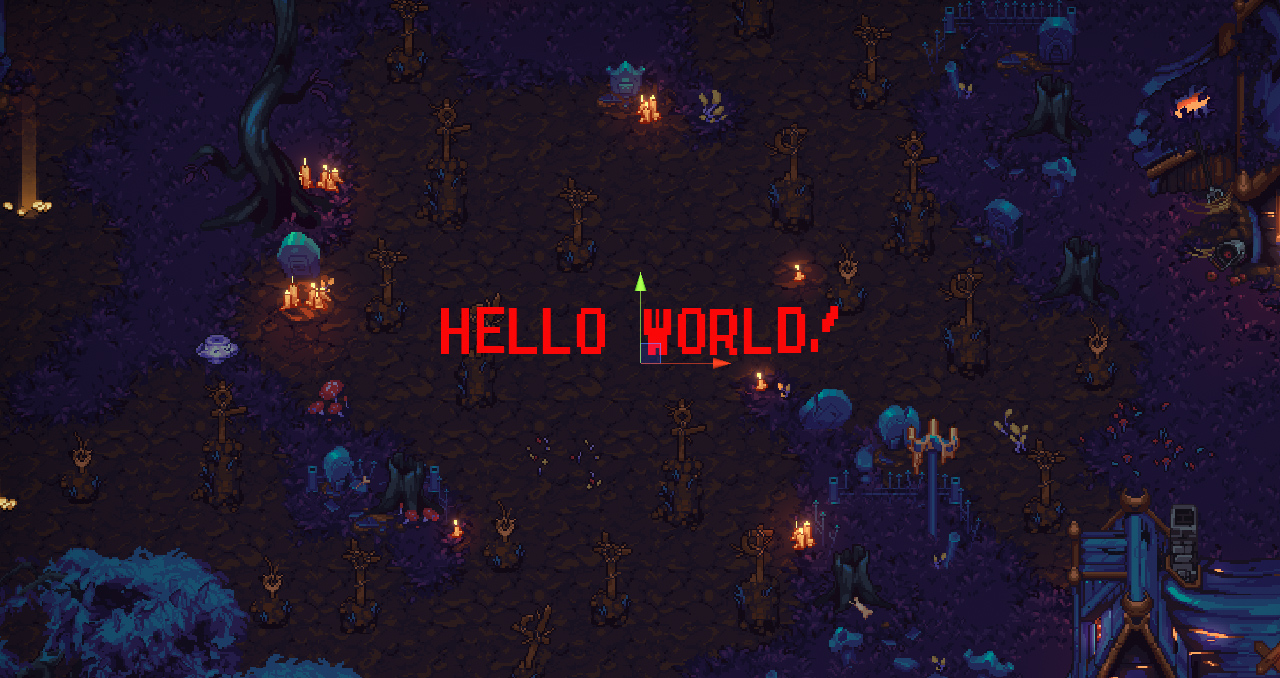
Unity编辑器创建材质并将其分配给我们的着色器。在场景中,使用ParticleSystem组件创建一个对象,分配创建的材质。然后,我们调整粒子行为并关闭“唤醒时播放”参数。从任何类中,我们都调用RendererParticleSystem.SpawnParticle()方法或使用讨价还价方法。[ContextMenu("TestText")]
public void TestText()
{
SpawnParticle(transform.position, "Hello world!", Color.red);
}
源代码,资源和用法示例可以在此处找到。消息系统在运行就这样。使用粒子系统的消息输出就绪!我们希望该解决方案将使Unity游戏开发人员受益。UPD:提议的解决方案的性能在一些人的评论中,人们对该方法的性能产生了疑问。由联合分析器专门进行的测量。条件是相同的-1000个移动的变色对象。使用标准UI(唯一的画布上只有1000个UI文本对象)的结果: 总帧时间至少为50ms,其中40ms用于更新画布。同时,对象甚至不会生成,而只是移动。使用我们的解决方案生成1000个粒子的结果:
 所有魔术都发生在GPU上,即使在生成1000个粒子时,该帧的计算时间也不到5毫秒。