 No último artigo, deixamos um espaço em branco com você, por assim dizer, a base sobre a qual nosso universo será criado, a visualização usando o console pode parecer boa, mas os caracteres de texto são chatos e não muito bonitos. Neste artigo, focaremos na visualização de nossos blocos usando Phaser.jsNo último artigo, nosso projeto ficou assim:
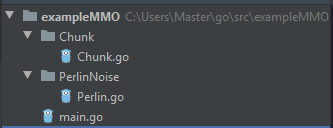 Agora usaremos outras ferramentas para desenvolvimento web, espero que você tenha o Node.js e o npm instalados, caso contrário, instale-o com urgência. E assim abrimos o terminal e iniciamos:
$ npm install phaser@3.22.0
Após a conclusão bem-sucedida da equipe, devemos ver o seguinte:+ phaser@3.22.0
added 15 packages from 48 contributors and audited 20 packages in 4.38s
 Tão bem, os módulos apareceram, agora vamos criar um diretório para o nosso cliente.
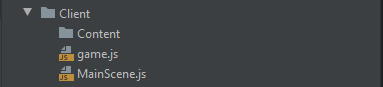 No Conteúdo, armazenaremos recursos do jogo, ou seja, nossos sprites. Também criaremos dois arquivos game.js e MainScene.js, no diretório raiz (onde o arquivo main.go está localizado) create index.htmlgame.js - armazena as principais configurações do jogoMainScene.js - ele conterá a classe da cena principal do jogoindex.html - a página em que a cena será renderizadaConecte imediatamente nossos scripts ao index.html e não voltaremos a este arquivo:
 <script src="node_modules/phaser/dist/phaser.js" type="module"></script>
<script src="Client/game.js" type="module"></script>
No MainScene.js, criaremos um pequeno modelo de classe para nossa cena futura:export {MainScene}
class MainScene extends Phaser.Scene{
constructor() {
super({key: 'MainScene'})
}
preload() {
}
create() {
}
update() {
}
}
No game.js adicione configurações típicas ao seu gosto, aqui estão as minhas:import {MainScene} from "./MainScene.js";
let config = {
type: Phaser.AUTO,
width: 800,
height: 600,
disableContextMenu: true,
background: 'black',
physics: {
default: 'arcade',
arcadePhysics: {
overlapBias: 1
}
},
scene:[MainScene],
pixelArt: true,
roundPixels: true,
antialias: true
}
let game = new Phaser.Game(config);
Agora precisamos de um servidor HTTP, isso é feito em poucas linhas. Vá para main.go e crie um servidor:package main
import (
"fmt"
"html/template"
"net/http"
)
func main() {
http.HandleFunc("/", indexHandler)
http.Handle("/node_modules/phaser/dist/", http.StripPrefix("/node_modules/phaser/dist/", http.FileServer(http.Dir("./node_modules/phaser/dist/"))))
http.Handle("/Client/", http.StripPrefix("/Client/", http.FileServer(http.Dir("./Client/"))))
http.Handle("/Client/Content/", http.StripPrefix("/Client/Content/", http.FileServer(http.Dir("./Client/Content/"))))
err := http.ListenAndServe(":8080", nil)
if err != nil {
fmt.Println(err.Error())
}
}
func indexHandler(w http.ResponseWriter, r *http.Request) {
fmt.Println("indexAction")
t, _ := template.ParseFiles("index.html")
err := t.Execute(w, "index")
if err != nil {
fmt.Println(err.Error())
}
}
Bem, nós temos nosso próprio servidor web e cliente! Vamos começar! Abra o console:$ go run main.go
Abrimos o navegador e tentamos conectar ao nosso servidor, no meu caso, élocalhost: 8080
 Se você viu uma tela preta, fez tudo certo.E assim, vamos criar outro manipulador pelo qual receberemos nossa parte no formato json. Crie um diretório separado e chame-o de GameController, aqui teremos todos os manipuladores trabalhando com os dados do jogo, crie o arquivo Map_Controller.go.Também precisamos de uma melhoria
Chunk.gopackage Chunk
import (
"exampleMMO/PerlinNoise"
"fmt"
)
var TILE_SIZE = 16
var CHUNK_SIZE = 16 * 16
var PERLIN_SEED float32 = 160
type Chunk struct {
ChunkID [2]int `json:"chunkID"`
Map map[Coordinate]Tile `json:"map"`
}
type Tile struct {
Key string `json:"key"`
X int `json:"x"`
Y int `json:"y"`
}
type Coordinate struct {
X int `json:"x"`
Y int `json:"y"`
}
func NewChunk(idChunk Coordinate) Chunk {
fmt.Println("New Chank", idChunk)
chunk := Chunk{ChunkID: [2]int{idChunk.X, idChunk.Y}}
var chunkXMax, chunkYMax int
var chunkMap map[Coordinate]Tile
chunkMap = make(map[Coordinate]Tile)
chunkXMax = idChunk.X * CHUNK_SIZE
chunkYMax = idChunk.Y * CHUNK_SIZE
switch {
case chunkXMax < 0 && chunkYMax < 0:
{
for x := chunkXMax + CHUNK_SIZE; x > chunkXMax; x -= TILE_SIZE {
for y := chunkYMax + CHUNK_SIZE; y > chunkYMax; y -= TILE_SIZE {
posX := float32(x - (TILE_SIZE / 2))
posY := float32(y + (TILE_SIZE / 2))
tile := Tile{}
tile.X = int(posX)
tile.Y = int(posY)
perlinValue := PerlinNoise.Noise(posX/PERLIN_SEED, posY/PERLIN_SEED)
switch {
case perlinValue < -0.01:
tile.Key = "Water"
case perlinValue >= -0.01 && perlinValue < 0:
tile.Key = "Sand"
case perlinValue >= 0 && perlinValue <= 0.5:
tile.Key = "Ground"
case perlinValue > 0.5:
tile.Key = "Mount"
}
chunkMap[Coordinate{X: tile.X, Y: tile.Y}] = tile
}
}
}
case chunkXMax < 0:
{
for x := chunkXMax + CHUNK_SIZE; x > chunkXMax; x -= TILE_SIZE {
for y := chunkYMax - CHUNK_SIZE; y < chunkYMax; y += TILE_SIZE {
posX := float32(x - (TILE_SIZE / 2))
posY := float32(y + (TILE_SIZE / 2))
tile := Tile{}
tile.X = int(posX)
tile.Y = int(posY)
perlinValue := PerlinNoise.Noise(posX/PERLIN_SEED, posY/PERLIN_SEED)
switch {
case perlinValue < -0.12:
tile.Key = "Water"
case perlinValue >= -0.12 && perlinValue <= 0.5:
tile.Key = "Ground"
case perlinValue > 0.5:
tile.Key = "Mount"
}
chunkMap[Coordinate{X: tile.X, Y: tile.Y}] = tile
}
}
}
case chunkYMax < 0:
{
for x := chunkXMax - CHUNK_SIZE; x < chunkXMax; x += TILE_SIZE {
for y := chunkYMax + CHUNK_SIZE; y > chunkYMax; y -= TILE_SIZE {
posX := float32(x + (TILE_SIZE / 2))
posY := float32(y - (TILE_SIZE / 2))
tile := Tile{}
tile.X = int(posX)
tile.Y = int(posY)
perlinValue := PerlinNoise.Noise(posX/PERLIN_SEED, posY/PERLIN_SEED)
switch {
case perlinValue < -0.12:
tile.Key = "Water"
case perlinValue >= -0.12 && perlinValue <= 0.5:
tile.Key = "Ground"
case perlinValue > 0.5:
tile.Key = "Mount"
}
chunkMap[Coordinate{X: tile.X, Y: tile.Y}] = tile
}
}
}
default:
{
for x := chunkXMax - CHUNK_SIZE; x < chunkXMax; x += TILE_SIZE {
for y := chunkYMax - CHUNK_SIZE; y < chunkYMax; y += TILE_SIZE {
posX := float32(x + (TILE_SIZE / 2))
posY := float32(y + (TILE_SIZE / 2))
tile := Tile{}
tile.X = int(posX)
tile.Y = int(posY)
perlinValue := PerlinNoise.Noise(posX/PERLIN_SEED, posY/PERLIN_SEED)
switch {
case perlinValue < -0.12:
tile.Key = "Water"
case perlinValue >= -0.12 && perlinValue <= 0.5:
tile.Key = "Ground"
case perlinValue > 0.5:
tile.Key = "Mount"
}
chunkMap[Coordinate{X: tile.X, Y: tile.Y}] = tile
}
}
}
}
chunk.Map = chunkMap
return chunk
}
Acabamos de adicionar chaves json às nossas estruturas e melhoramos um pouco a criaçãode partes . Voltamos ao Map_Controller,package GameController
import (
"encoding/json"
"exampleMMO/Chunk"
"fmt"
"net/http"
)
func Map_Handler(w http.ResponseWriter, r *http.Request) {
c:= Chunk.NewChunk(Chunk.Coordinate{1,1})
js, e :=json.Marshal(c)
if e!= nil {
fmt.Println(e.Error())
}
fmt.Println(string(js))
}
e adicione uma linha ao main.go http.HandleFunc("/map", GameController.Map_Handler)
Vamos tentar iniciar o servidor e ir para localhost: 8080 / mapSaída no terminal:New Chank {1 1}
json: unsupported type: map[Chunk.Coordinate]Chunk.Tile
Sim, esquecemos que em Golang, quando serializadas, as chaves do mapa devem ser uma sequência. Para serialização, o Go verifica se o tipo corresponde à interface TextMarshaler e chama seu método MarshalText (), apenas precisamos criar o método MarshalText () para o nosso tipo de coordenada. Voltamosao Chunk.go e adicionamos o seguinte código:func (t Coordinate) MarshalText() ([]byte, error) {
return []byte("[" + strconv.Itoa(t.X) + "," + strconv.Itoa(t.Y) + "]"), nil
}
Você pode escrever sua implementação, o mais importante é que esse método retorne uma string única. Usaremos essa chave para gerenciar blocos no cliente, agora vamos verificar como nosso controlador funciona, executar o servidor novamente e ver a saída para o console.Sim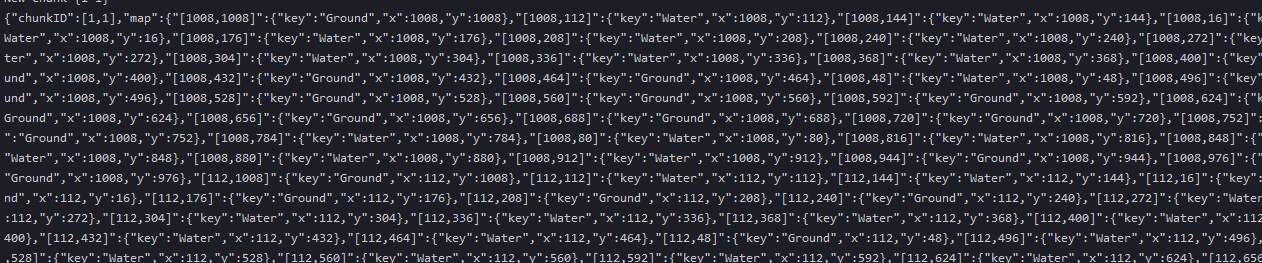 , está tudo bem, agora vamos concluir o fluxo e adicionar duas linhas no final do controlador:
	w.Header().Set("Content-Type", "application/json")
	w.Write(js)
Por enquanto, termine com Golang e volte para o cliente. precisaremos de três títulos, embora na verdade tenhamos quatro deles, mas por enquanto temos três, ou até dois.

 Adicione nossos blocos ao diretório Content e comece a trabalhar com MainScene.js. Para os primeiros resultados, precisamos de algumas funções:
class MainScene extends Phaser.Scene{
constructor() {
super({key: 'MainScene'})
}
preload() {
this.load.image("Ground", "Client/Content/sprGrass.png")
this.load.image("Water", "Client/Content/sprWater1.png")
this.load.image("Sand", "Client/Content/sprGrass.png")
}
create() {
this.getGameMap()
}
update() {
}
async getGameMap() {
let res = await fetch("/map")
let result = await res.json()
this.drawChunk(result.map)
}
drawChunk(map) {
for (let chunkKey in map) {
this.add.image(map[chunkKey].x,map[chunkKey].y, map[chunkKey].key)
}
}
}
O servidor retorna nossa parte na forma de um objeto json, você pode ver sua estrutura no console do navegador: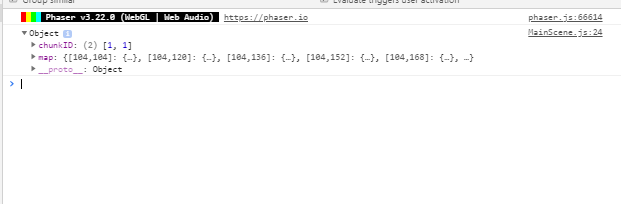 E assim a Phaser a processou no navegador:
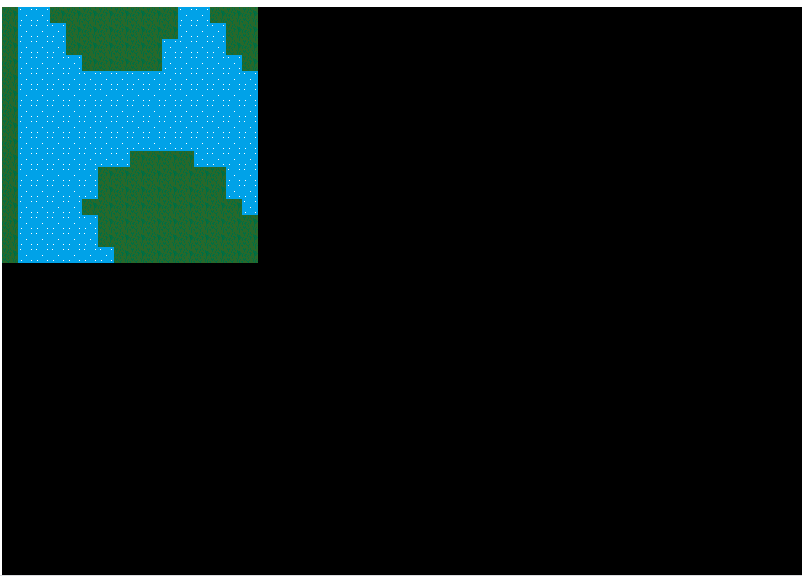 Examinamos o trabalho mais simples entre o servidor e o cliente. No próximo artigo, desenharemos imediatamente 9 partes e navegaremos Para o mundo. Veja todo o código e recursos do artigo aqui .