प्रस्तावना
एज़्योर बी 2 सी के साथ काम पर चक्र की निरंतरता। इस लेख में मैं सबसे कठिन और गैर-स्पष्ट बिंदु के बारे में बात करूंगा, अर्थात् पहचान अनुभव रूपरेखा।मुख्य लक्ष्य उन लोगों के लिए एक साथ एक तस्वीर रखना है जो इस विषय में बिल्कुल नहीं हैं और कुछ बुनियादी सुविधाओं को स्थापित करने में मदद करते हैं।संबंधित पोस्ट के लिंकबुनियादी सेटिंग
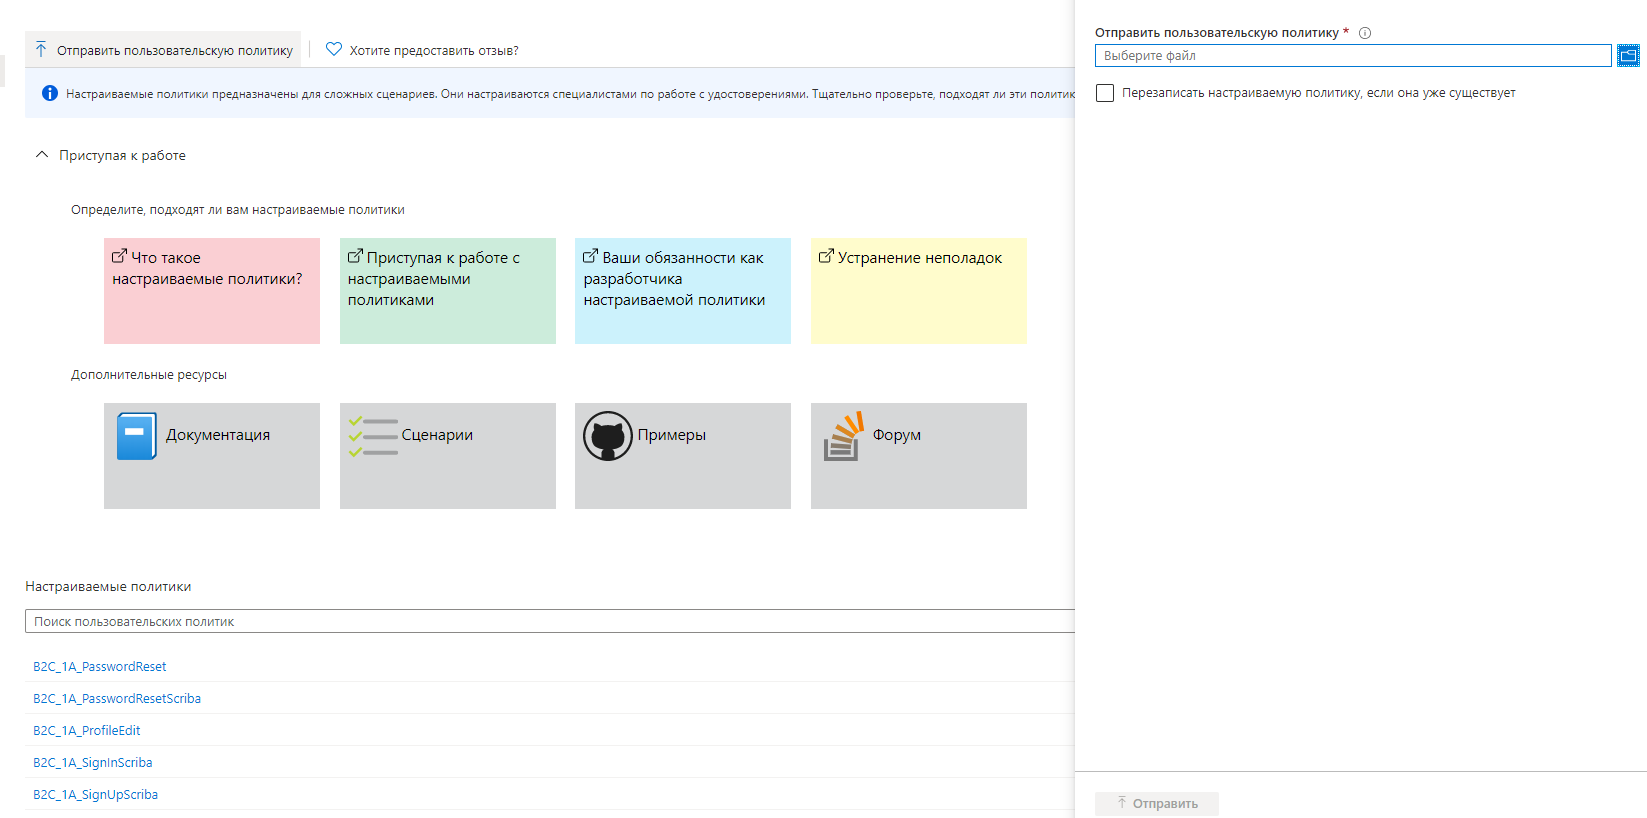
मूल सेटअप शुरू करने से पहले, मैं आपको बताना चाहता हूं कि नए नियमों को लोड करने की प्रक्रिया कैसे होती है:- आइडेंटिटी एक्सपीरियंस फ्रेमवर्क पर जाएं
- उपयोगकर्ता नीति भेजें पर क्लिक करें
- एक फ़ाइल का चयन करें ("पहले से मौजूद है, तो कस्टम नीति को अधिलेखित करें" पर क्लिक करना न भूलें)
- हम भेज रहे हैं
 वास्तव में, पिछली बार, BUT से कुछ भी नहीं बदला है:
यदि आप फ़ाइल को बदलते हैं TrustFrameworkExtension.xml या TrustFrameworkBase.xml - समय-समय पर उस फ़ाइल को डाउनलोड करें जो उन्हें संदर्भित करता है।
कभी-कभी, जब आप इनमें से किसी एक फ़ाइल में परिवर्तन करते हैं, तो आप परीक्षण करते हैं, ऐसा होता है कि आपके परिवर्तन दिखाई नहीं देते हैं। यह इस तथ्य के कारण है कि
आपने आधार फ़ाइल में कुछ बदल दिया है ताकि सत्यापन के दौरान बच्चे की फ़ाइल में त्रुटि हो।
पिछले लेख में, हमने इस तथ्य पर समझौता किया कि हमने निम्नलिखित फाइलें जोड़ीं:a.TrustFrameworkBase.xml
b.TrustFrameworkExtensions.xml
c.SignUpOrnignin। XML
d.ProfileEdit। XML
e.PasswordReset एक्सएमएल
अब मैं उनमें से प्रत्येक के बारे में विस्तार से बताना चाहूंगा।TrustFrameworkBase.xmlइस फ़ाइल में मूल सेटिंग है। वास्तव में, यह मूल बातें का आधार है, लेकिन ट्यूटोरियल में वे ज्यादातर कहते हैं "बेहतर इस फ़ाइल को स्पर्श न करें।" यह आंशिक रूप से सच है, लेकिन कुछ बिंदु हैं जिनके बारे में बात नहीं की जाती है:- कोई भी ट्यूटोरियल जो TrustFrameworkExtensions.xml में परिवर्तन करने के लिए कहता है, अनिवार्य रूप से TrustFrameworkBase.xml से नियमों को फिर से लिखता है।
- ऐसी स्थितियां हैं जब TrustFrameworkBase.xml में कुछ बदलना अधिक सुविधाजनक है ।
- यदि आप अन्य फ़ाइलों में किसी ऑब्जेक्ट का लिंक पाते हैं जो इन फ़ाइलों में नहीं है, तो यह TrustFrameworkBase.xml में 100% निहित है और आप इसे खोल सकते हैं और देख सकते हैं
अपने अनुभव से मैं कहूँगा - मैंने इस फ़ाइल में केवल दो चीजों को बदल दिया (स्थानीयकरण और एक फ़ील्ड को हटा दिया गया)।TrustFrameworkExtension.xmlइस फ़ाइल के साथ आप एक साथ बहुत समय बिताएंगे। वास्तव में, यह आपकी सेटिंग्स के लिए मुख्य फ़ाइल है। वह लगातार ट्यूटोरियल में उल्लिखित है।साइन अप करें या साइन इन करें। XML, ProfileEdit। XML, PasswordReset XMLये फाइलें लीफ पेज होती हैं। तुम शायद तुम्हारा जोड़ना चाहते हो। उनमें परिवर्तन की मात्रा कम से कम होगी।अब फाइल संरचना के बारे में बात करते हैं । सभी फ़ाइलों में एक समान संरचना होती है, इसलिए मैं इसे TrustFrameworkExtension.xml फ़ाइल के आधार पर वर्णन करूंगा ।फ़ाइल को कई मुख्य ब्लॉकों में विभाजित किया गया है<TrustFrameworkPolicy>
<BasePolicy>
<TenantId>customtenant.onmicrosoft.com</TenantId>
<PolicyId>B2C_1A_TrustFrameworkBase</PolicyId>
</BasePolicy>
<BuildingBlocks>
</BuildingBlocks>
<ClaimsProviders>
</ClaimsProviders>
<UserJourneys>
</UserJourneys>
</TrustFrameworkPolicy>
अब प्रत्येक ब्लॉक के बारे में अलग से।इमारत ब्लॉकों
इस ब्लॉक में हम "टूल्स" जोड़ते हैं जिनका उपयोग हम भविष्य के काम में कर सकते हैं।ClaimsSchemaतत्व ClaimsSchema उन प्रकार के कथनों को निर्धारित करता है, जिन्हें नीति के भीतर संदर्भित किया जा सकता है। <BuildingBlocks>
<ClaimsSchema>
<ClaimType Id="picture">
<DisplayName>Picture</DisplayName>
<DataType>string</DataType>
</ClaimType>
<ClaimType Id="country">
<DisplayName>Country</DisplayName>
<DataType>string</DataType>
<UserInputType>DropdownSingleSelect</UserInputType>
<Restriction>
<Enumeration Text="Russia" Value="russia" SelectByDefault="false" />
<Enumeration Text="Other" Value="other" SelectByDefault="false" />
</Restriction>
</ClaimType>
...
</ClaimsSchema>
विधेयविधेय और विधेय सत्यापन तत्वों मान्यता है कि केवल सही ढंग से गठित डेटा Azure सक्रिय निर्देशिका बी 2 सी ग्राहक (Azure AD बी 2 सी) में दर्ज किया जाता सुनिश्चित करने के लिए अनुमति देते हैं। <Predicates>
<Predicate Id="LengthRange" Method="IsLengthRange">
<UserHelpText>The password must be between 6 and 64 characters.</UserHelpText>
<Parameters>
<Parameter Id="Minimum">6</Parameter>
<Parameter Id="Maximum">64</Parameter>
</Parameters>
</Predicate>
<Predicate Id="Lowercase" Method="IncludesCharacters">
<UserHelpText>a lowercase letter</UserHelpText>
<Parameters>
<Parameter Id="CharacterSet">a-z</Parameter>
</Parameters>
</Predicate>
...
</Predicates>
PredicateValidations,जहां यह निर्धारित करता है कि क्या मुखर प्रकार मान्य है, PredicateValidations समूह एक सेट की भविष्यवाणी उपयोगकर्ता इनपुट जाँच बनाने के लिए करता है जो अभिकथन प्रकार से मेल खाता है। <PredicateValidations>
<PredicateValidation Id="CustomPassword">
<PredicateGroups>
<PredicateGroup Id="LengthGroup">
<PredicateReferences MatchAtLeast="1">
<PredicateReference Id="LengthRange" />
</PredicateReferences>
</PredicateGroup>
<PredicateGroup Id="CharacterClasses">
<UserHelpText>The password must have at least 1 of the following:</UserHelpText>
<PredicateReferences MatchAtLeast="2">
<PredicateReference Id="Lowercase" />
<PredicateReference Id="Uppercase" />
...
</PredicateReferences>
</PredicateGroup>
</PredicateGroups>
</PredicateValidation>
</PredicateValidations>
ClaimsTransformationsतत्व ClaimsTransformations में अभिक्रिया परिवर्तन कार्यों की एक सूची शामिल होती है, जो एक कस्टम पॉलिसी के भाग के रूप में उपयोगकर्ता इंटरैक्शन के तरीके में उपयोग की जा सकती है। <ClaimsTransformations>
<ClaimsTransformation Id="GenerateSendGridRequestBody" TransformationMethod="GenerateJson">
<InputClaims>
<InputClaim ClaimTypeReferenceId="email" TransformationClaimType="personalizations.0.to.0.email" />
<InputClaim ClaimTypeReferenceId="otp" TransformationClaimType="personalizations.0.dynamic_template_data.otp" />
<InputClaim ClaimTypeReferenceId="email" TransformationClaimType="personalizations.0.dynamic_template_data.email" />
</InputClaims>
<InputParameters>
<InputParameter Id="template_id" DataType="string" Value="d-b0000000000000000000000000000000" />
<InputParameter Id="from.email" DataType="string" Value="custom@email.com" />
<InputParameter Id="personalizations.0.dynamic_template_data.subject" DataType="string" Value="Welcome to Habr!"/>
</InputParameters>
<OutputClaims>
<OutputClaim ClaimTypeReferenceId="sendGridReqBody" TransformationClaimType="outputClaim" />
</OutputClaims>
</ClaimsTransformation>
...
</ClaimsTransformations>
ContentDefinitionsआपको अपने प्रत्येक पृष्ठ के लिए टेम्पलेट्स को परिभाषित करने की अनुमति देता है। <ContentDefinitions>
<ContentDefinition Id="api.signuporsignin">
<LoadUri>https://azure.blob.core.windows.net/yourblobstorage/pagelayoutfile.html</LoadUri>
<RecoveryUri>~/common/default_page_error.html</RecoveryUri>
<DataUri>urn:com:microsoft:aad:b2c:elements:contract:unifiedssp:1.2.0</DataUri>
</ContentDefinition>
...
</ContentDefinitions>
DisplayControlsप्रदर्शन नियंत्रण एक उपयोगकर्ता इंटरफ़ेस तत्व है जिसमें विशेष सुविधाएँ हैं और Azure सक्रिय निर्देशिका B2C सर्वर सेवा (Azure AD B2C) के साथ सहभागिता करता है <DisplayControls>
<DisplayControl Id="emailVerificationControl" UserInterfaceControlType="VerificationControl">
<DisplayClaims>
<DisplayClaim ClaimTypeReferenceId="email" Required="true" />
<DisplayClaim ClaimTypeReferenceId="verificationCode" ControlClaimType="VerificationCode" Required="true" />
</DisplayClaims>
<OutputClaims>
<OutputClaim ClaimTypeReferenceId="email" />
</OutputClaims>
<Actions>
<Action Id="SendCode">
<ValidationClaimsExchange>
<ValidationClaimsExchangeTechnicalProfile TechnicalProfileReferenceId="GenerateOtp" />
<ValidationClaimsExchangeTechnicalProfile TechnicalProfileReferenceId="SendGrid" />
</ValidationClaimsExchange>
</Action>
...
</Actions>
</DisplayControl>
...
</DisplayControls>
</BuildingBlocks>
ClaimsProviders
इस ब्लॉक में, हम पृष्ठ स्वयं या उनकी सामग्री बनायेंगे। यहां हम इंगित करेंगे कि पृष्ठ में इनपुट और आउटपुट डेटा क्या है।ClaimsProvider दावों के प्रदाता के लिए तकनीकी प्रोफाइल जोड़ता है। <ClaimsProviders>
<ClaimsProvider>
<DisplayName>Self Asserted</DisplayName>
TechnicalProfiles
तत्व में दावे प्रदाता द्वारा समर्थित तकनीकी प्रोफाइल का एक सेट होता है। <TechnicalProfiles>
<TechnicalProfile Id="SelfAsserted-Social">
<DisplayName>User ID signup</DisplayName>
<Protocol Name="Proprietary" Handler="Web.TPEngine.Providers.SelfAssertedAttributeProvider, Web.TPEngine, Version=1.0.0.0, Culture=neutral, PublicKeyToken=null" />
<Metadata>
<Item Key="ContentDefinitionReferenceId">api.selfasserted</Item>
</Metadata>
<CryptographicKeys>
<Key Id="issuer_secret" StorageReferenceId="B2C_1A_TokenSigningKeyContainer" />
</CryptographicKeys>
<InputClaims>
<InputClaim ClaimTypeReferenceId="givenName" />
<InputClaim ClaimTypeReferenceId="surname" />
</InputClaims>
<OutputClaims>
<OutputClaim ClaimTypeReferenceId="objectId" />
<OutputClaim ClaimTypeReferenceId="newUser" />
<OutputClaim ClaimTypeReferenceId="executed-SelfAsserted-Input" DefaultValue="true" />
<OutputClaim ClaimTypeReferenceId="givenName" Required="true"/>
<OutputClaim ClaimTypeReferenceId="surname" Required="true"/>
<OutputClaim ClaimTypeReferenceId="country" Required="true"/>
</OutputClaims>
</TechnicalProfile>
</ClaimsProvider>
फेसबुक पहचान प्रदाताओं को जोड़ने का उदाहरण <ClaimsProvider>
<DisplayName>Facebook</DisplayName>
<TechnicalProfiles>
<TechnicalProfile Id="Facebook-OAUTH">
<Metadata>
<Item Key="client_id">FACEBOOK_ID</Item>
<Item Key="scope">email public_profile</Item>
<Item Key="ClaimsEndpoint">https://graph.facebook.com/me?fields=id,first_name,last_name,name,email,picture</Item>
</Metadata>
<OutputClaims>
<OutputClaim ClaimTypeReferenceId="picture" PartnerClaimType="picture" />
</OutputClaims>
</TechnicalProfile>
</TechnicalProfiles>
</ClaimsProvider>
TrustFrameworkBase.xml
<ClaimsProvider>
<Domain>facebook.com</Domain>
<DisplayName>Facebook</DisplayName>
<TechnicalProfiles>
<TechnicalProfile Id="Facebook-OAUTH">
<DisplayName>Facebook</DisplayName>
<Protocol Name="OAuth2" />
<Metadata>
<Item Key="ProviderName">facebook</Item>
<Item Key="authorization_endpoint">https://www.facebook.com/dialog/oauth</Item>
<Item Key="AccessTokenEndpoint">https://graph.facebook.com/oauth/access_token</Item>
<Item Key="HttpBinding">GET</Item>
<Item Key="UsePolicyInRedirectUri">0</Item>
<Item Key="AccessTokenResponseFormat">json</Item>
</Metadata>
<CryptographicKeys>
<Key Id="client_secret" StorageReferenceId="B2C_1A_FacebookSecret" />
</CryptographicKeys>
<InputClaims />
<OutputClaims>
<OutputClaim ClaimTypeReferenceId="issuerUserId" PartnerClaimType="id" />
<OutputClaim ClaimTypeReferenceId="givenName" PartnerClaimType="first_name" />
<OutputClaim ClaimTypeReferenceId="surname" PartnerClaimType="last_name" />
<OutputClaim ClaimTypeReferenceId="displayName" PartnerClaimType="name" />
<OutputClaim ClaimTypeReferenceId="email" PartnerClaimType="email" />
<OutputClaim ClaimTypeReferenceId="identityProvider" DefaultValue="facebook.com" AlwaysUseDefaultValue="true" />
<OutputClaim ClaimTypeReferenceId="authenticationSource" DefaultValue="socialIdpAuthentication" AlwaysUseDefaultValue="true" />
</OutputClaims>
<OutputClaimsTransformations>
<OutputClaimsTransformation ReferenceId="CreateRandomUPNUserName" />
<OutputClaimsTransformation ReferenceId="CreateUserPrincipalName" />
<OutputClaimsTransformation ReferenceId="CreateAlternativeSecurityId" />
</OutputClaimsTransformations>
<UseTechnicalProfileForSessionManagement ReferenceId="SM-SocialLogin" />
</TechnicalProfile>
</TechnicalProfiles>
</ClaimsProvider>
Userjourneys
उपयोगकर्ता की UserJourneys स्पष्ट रास्तों के माध्यम से जो नीति की आवश्यकता दावे के साथ उपयोगकर्ता प्रदान करने के लिए दावा है आधारित अनुप्रयोग की अनुमति देता है संकेत मिलता है।नीचे मैंने कुछ सरल चीजों को जोड़ा, बाकी को नीचे दिए गए ट्यूटोरियल में खोजना आसान है। <UserJourneys>
<UserJourney Id="SignUp">
<OrchestrationSteps>
<OrchestrationStep Order="1" Type="ClaimsExchange" ContentDefinitionReferenceId="api.localaccountsignup">
<ClaimsExchanges>
<ClaimsExchange Id="SignUpWithLogonEmailExchange" TechnicalProfileReferenceId="LocalAccountSignUpWithLogonEmail-2" />
</ClaimsExchanges>
</OrchestrationStep>
<OrchestrationStep Order="2" Type="SendClaims" CpimIssuerTechnicalProfileReferenceId="JwtIssuer" />
</OrchestrationSteps>
<ClientDefinition ReferenceId="DefaultWeb" />
</UserJourney>
<UserJourney Id="PasswordReset">
<OrchestrationSteps>
<OrchestrationStep Order="1" Type="ClaimsExchange">
<ClaimsExchanges>
<ClaimsExchange Id="PasswordResetUsingEmailAddressExchange" TechnicalProfileReferenceId="LocalAccountDiscoveryUsingEmailAddress" />
</ClaimsExchanges>
</OrchestrationStep>
<OrchestrationStep Order="2" Type="ClaimsExchange">
<ClaimsExchanges>
<ClaimsExchange Id="NewCredentials" TechnicalProfileReferenceId="LocalAccountWritePasswordUsingObjectId" />
</ClaimsExchanges>
</OrchestrationStep>
<OrchestrationStep Order="3" Type="SendClaims" CpimIssuerTechnicalProfileReferenceId="JwtIssuer" />
</OrchestrationSteps>
<ClientDefinition ReferenceId="DefaultWeb" />
</UserJourney>
...
</UserJourneys>
ClaimsExchange Exchange उदाहरणClaimsExchanges .
    <ClaimsProviderSelections>
      <ClaimsProviderSelection TargetClaimsExchangeId="FacebookExchange" />
      <ClaimsProviderSelection TargetClaimsExchangeId="GoogleExchange" />
      <ClaimsProviderSelection ValidationClaimsExchangeId="LocalAccountSigninEmailExchange" />
    </ClaimsProviderSelections>
    <ClaimsExchanges>
      <ClaimsExchange Id="LocalAccountSigninEmailExchange" TechnicalProfileReferenceId="SelfAsserted-LocalAccountSignin-Email" />
    </ClaimsExchanges>
विशिष्ट कार्य
उपरोक्त के परिणामस्वरूप, नीचे दिए गए ट्यूटोरियल को समझना आपके लिए आसान होगा।SignUpOrSignin.XML, ProfileEdit.XML, PasswordReset.XML
ये अंतिम फाइलें हैं जहां आप बिल्डिंगब्लॉक को अधिलेखित कर सकते हैं और जहां हम संकेत देते हैं कि टोकन में क्या डेटा जोड़ना है। <?xml version="1.0" encoding="UTF-8" standalone="yes"?>
<TrustFrameworkPolicy xmlns:xsi="http://www.w3.org/2001/XMLSchema-instance"
xmlns:xsd="http://www.w3.org/2001/XMLSchema"
xmlns="http://schemas.microsoft.com/online/cpim/schemas/2013/06" PolicySchemaVersion="0.3.0.0" TenantId="antekesd.onmicrosoft.com" PolicyId="B2C_1A_signup_signin" PublicPolicyUri="http://antekesd.onmicrosoft.com/B2C_1A_signup_signin">
<BasePolicy>
<TenantId>antekesd.onmicrosoft.com</TenantId>
<PolicyId>B2C_1A_TrustFrameworkExtensions</PolicyId>
</BasePolicy>
<BuildingBlocks>
<ContentDefinitions>
<ContentDefinition Id="api.signuporsignin">
<LoadUri>https://some.blob.core.windows.net/some/some.html</LoadUri>
<RecoveryUri>~/common/default_page_error.html</RecoveryUri>
<DataUri>urn:com:microsoft:aad:b2c:elements:contract:unifiedssp:1.2.0</DataUri>
</ContentDefinition>
</ContentDefinitions>
</BuildingBlocks>
<RelyingParty>
<DefaultUserJourney ReferenceId="SignUpOrSignIn" />
<TechnicalProfile Id="PolicyProfile">
<DisplayName>PolicyProfile</DisplayName>
<Protocol Name="OpenIdConnect" />
<OutputClaims>
<OutputClaim ClaimTypeReferenceId="signInName" PartnerClaimType="email"/>
<OutputClaim ClaimTypeReferenceId="givenName" Required="true"/>
<OutputClaim ClaimTypeReferenceId="surname" Required="true"/>
<OutputClaim ClaimTypeReferenceId="email" />
<OutputClaim ClaimTypeReferenceId="objectId" PartnerClaimType="sub"/>
<OutputClaim ClaimTypeReferenceId="identityProvider" />
<OutputClaim ClaimTypeReferenceId="tenantId" AlwaysUseDefaultValue="true" DefaultValue="{Policy:TenantObjectId}" />
<OutputClaim ClaimTypeReferenceId="picture" />
<OutputClaim ClaimTypeReferenceId="country" Required="true"/>
</OutputClaims>
<SubjectNamingInfo ClaimType="sub" />
</TechnicalProfile>
</RelyingParty>
</TrustFrameworkPolicy>
परिक्षण
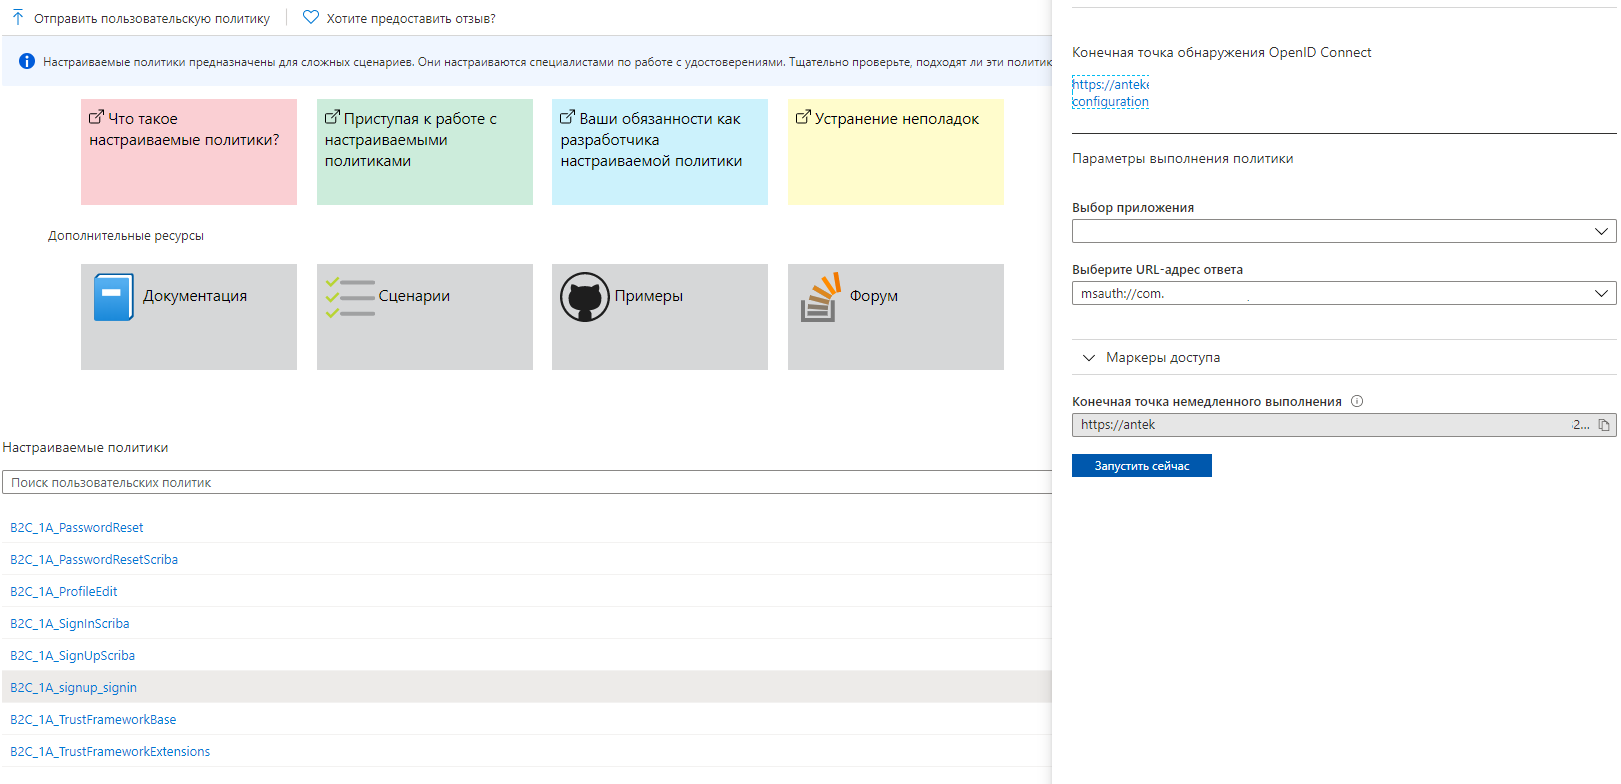
आपको आवश्यक नवीनतम परिवर्तनों का परीक्षण करने के लिए:- आइडेंटिटी एक्सपीरियंस फ्रेमवर्क पर जाएं
- उस नीति का चयन करें जिसका आप परीक्षण करना चाहते हैं।
- "अब चलाएं" पर क्लिक करें
निष्कर्ष
परिणामस्वरूप, आपको एक प्राधिकरण फ़ॉर्म प्राप्त होगा जो पूरी तरह से (या लगभग) आपके / ग्राहक की आवश्यकताओं को पूरा करता है।ध्यान देने के लिए आपको धन्यवाद!