अपने एंड्रॉइड ऐप के लिए उपयोगकर्ता रंग चयन को लागू करने की आवश्यकता है? यह लाइब्रेरी एक शानदार विकल्प है। लंबे परिचय के बिना, चलो शुरू करें।हमेशा की तरह, शुरुआत के लिए, लाइब्रेरी को एप्लिकेशन में जोड़ें (फ़ाइल build.gradle (मॉड्यूल.app)): हमनेimplementation 'com.jaredrummler:colorpicker:1.1.0'यह पता लगाया। अब हम सीधे रंग की पसंद के कार्यान्वयन के लिए आगे बढ़ते हैं।मार्कअप बनाएँ:<?xml version="1.0" encoding="utf-8"?>
<RelativeLayout xmlns:android="http://schemas.android.com/apk/res/android"
xmlns:app="http://schemas.android.com/apk/res-auto"
xmlns:tools="http://schemas.android.com/tools"
android:layout_width="match_parent"
android:layout_height="match_parent"
android:id="@+id/activityMain"
tools:context=".MainActivity">
<Button
android:id="@+id/firstButton"
android:layout_width="match_parent"
android:layout_height="wrap_content"
android:text="Color picker №1"
android:layout_margin="5dp"
android:onClick="onClickButton"
/>
<Button
android:id="@+id/secondButton"
android:layout_width="match_parent"
android:layout_height="wrap_content"
android:text="Color picker №2"
android:layout_below="@id/firstButton"
android:layout_margin="5dp"
android:onClick="onClickButton"
/>
<TextView
android:id="@+id/firstText"
android:layout_width="wrap_content"
android:layout_height="wrap_content"
android:layout_centerInParent="true"
android:text="First text"
android:textSize="40sp"
android:textColor="@android:color/black"
/>
<TextView
android:id="@+id/secondText"
android:layout_width="wrap_content"
android:layout_height="wrap_content"
android:text="Second text"
android:textSize="40sp"
android:layout_below="@+id/firstText"
android:layout_centerInParent="true"
android:textColor="@android:color/black"
/>
</RelativeLayout>
हमारे पास 2 बटन हैं, जिस पर क्लिक करके एक रंग चुनने के लिए एक संवाद बॉक्स खुल जाएगा। जब हमने एक रंग का चयन किया, तो यह हमारे दो TextViews में बदल जाएगा।हमारे क्षेत्रों को मुख्यता में जोड़ें: Button firstButton,secondButton;
TextView firstText,secondText;
private static final int firstId = 1,secondId = 2;
... और उन्हें प्रारंभ में बनाएँ ():
        firstButton = findViewById(R.id.firstButton);
        secondButton = findViewById(R.id.secondButton);

        firstText = findViewById(R.id.firstText);
        secondText = findViewById(R.id.secondText);
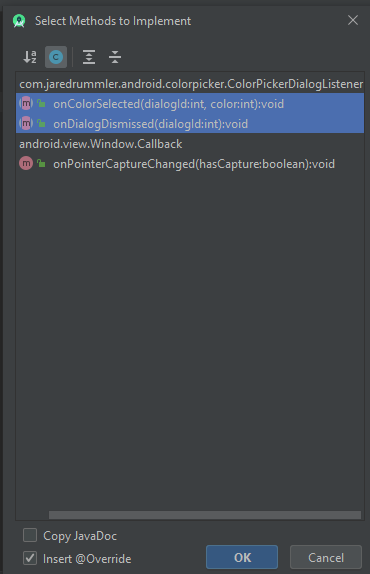
महत्वपूर्ण : यह भी आवश्यक है कि MainActivity ColorPickerDialogListener इंटरफ़ेस के तरीकों को लागू करे:
 अब हम एक संवाद बॉक्स और XML मार्कअप में निर्दिष्ट ऑनक्लिक विधि बनाने के लिए एक विधि बनाएंगे:
private void createColorPickerDialog(int id) {
ColorPickerDialog.newBuilder()
.setColor(Color.RED)
.setDialogType(ColorPickerDialog.TYPE_PRESETS)
.setAllowCustom(true)
.setAllowPresets(true)
.setColorShape(ColorShape.SQUARE)
.setDialogId(id)
.show(this);
}
public void onClickButton(View view) {
switch (view.getId()) {
case R.id.firstButton:
createColorPickerDialog(firstId);
break;
case R.id.secondButton:
createColorPickerDialog(secondId);
break;
}
}
 ColorPickerDialog वर्ग की सभी विशेषताएँआपको ColorPickerDialogListener इंटरफ़ेस के तरीकों को भी लागू करना चाहिए:
@Override
public void onColorSelected(int dialogId, int color) {
switch (dialogId) {
case firstId:
firstText.setTextColor(color);
break;
case secondId:
secondText.setTextColor(color);
break;
}
}
@Override
public void onDialogDismissed(int dialogId) {
Toast.makeText(this, "Dialog dismissed", Toast.LENGTH_SHORT).show();
}
लॉन्च और ... किया!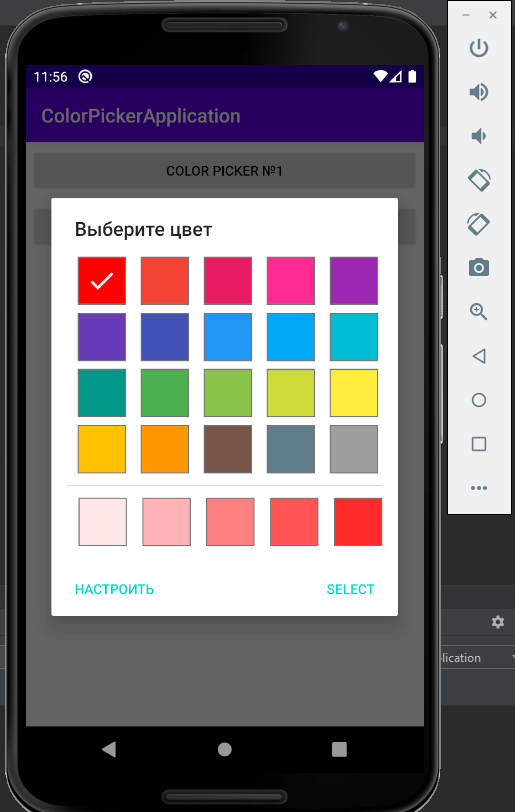
 हालांकि, यह ColorPicker लाइब्रेरी की सभी संभावनाएं नहीं हैं। वह वरीयतास्क्रीन के लिए वरीयता भी जोड़ता है। यह आपको सेटिंग्स में रंग चयन को लागू करने की अनुमति देता है। आइए देखें कि यह कैसे काम करता है।1) एक नई सेटिंग बनाएं:
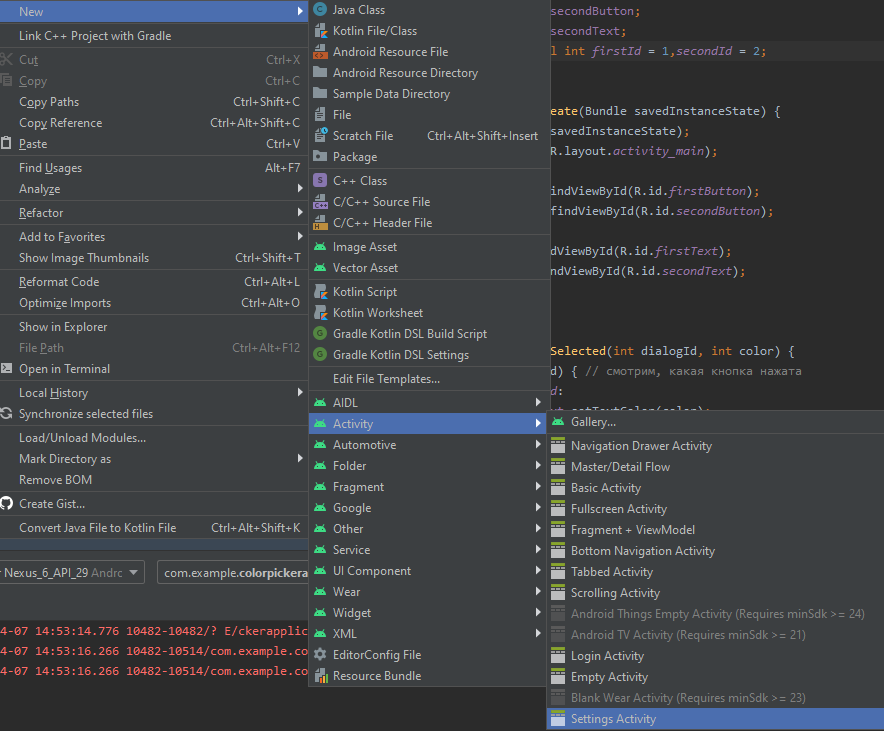 सक्रियता : 2) root_preferences.xml फ़ाइल खोलें और इसे निम्नानुसार बदलें:
<PreferenceScreen xmlns:app="http://schemas.android.com/apk/res-auto"
    xmlns:android="http://schemas.android.com/apk/res/android">
    <PreferenceCategory app:title=" ">
        <com.jaredrummler.android.colorpicker.ColorPreferenceCompat
            android:key="color_picker"
            app:title=" "
            />
    </PreferenceCategory>

</PreferenceScreen>
जैसा कि आप देख सकते हैं, हमने एक प्रकार का रंग ColorPreferenceCompat3 बनाया) अपनी सेटिंग में जाने के लिए activity_main.xml में एक बटन बनाएँ:<Button
android:id="@+id/settingsButton"
android:layout_width="wrap_content"
android:layout_height="wrap_content"
android:text=""
android:layout_alignParentBottom="true"
android:layout_alignParentRight="true"
android:layout_margin="5dp"
android:onClick="openSettingsActivity"
/>
4) MainActivity में एक OpenSettingsActivity विधि बनाएं और इसे इस फाइल के "onClick" फ़ील्ड में निर्दिष्ट करें:public void openSettingsActivity(View view) {
startActivity(new Intent(this,SettingsActivity.class));
}
उसी MainActivity में, एक ऐसा तरीका बनाएं जो सेटिंग्स में चुने गए रंग के आधार पर इसकी पृष्ठभूमि को बदल दे और इस फ़िल्टर को ऑनरिट में कॉल करें:private void setBackgroundColorFromSettingsActivity() {
SharedPreferences sp = PreferenceManager.getDefaultSharedPreferences(this);
//SharedPreferences
// - :
//https://developer.android.com/reference/android/content/SharedPreferences?hl=ru
int color = sp.getInt("color_picker",Color.GREEN);
RelativeLayout layout = findViewById(R.id.activityMain);
layout.setBackgroundColor(color);
}
OnResume विधि को फिर से परिभाषित करें (अधिक विवरण यहां ):@Override
protected void onResume() {
setBackgroundColorFromSettingsActivity();
super.onResume();
}
5) एप्लिकेशन चलाएं और देखें कि क्या हुआ:
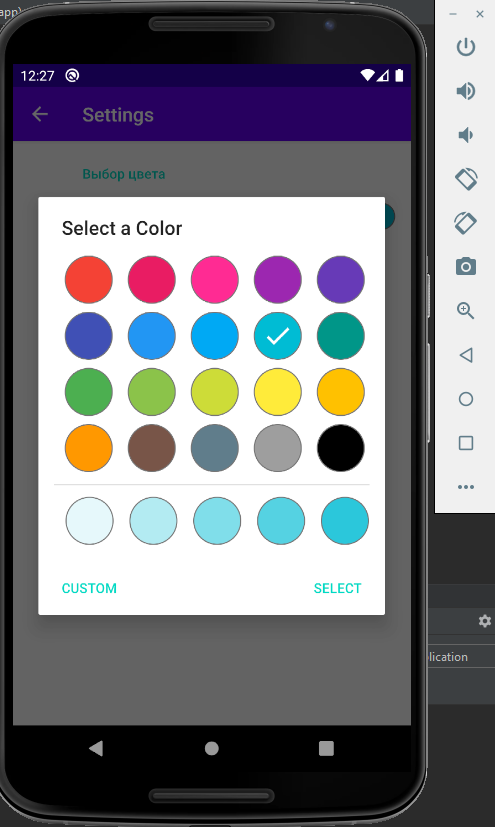
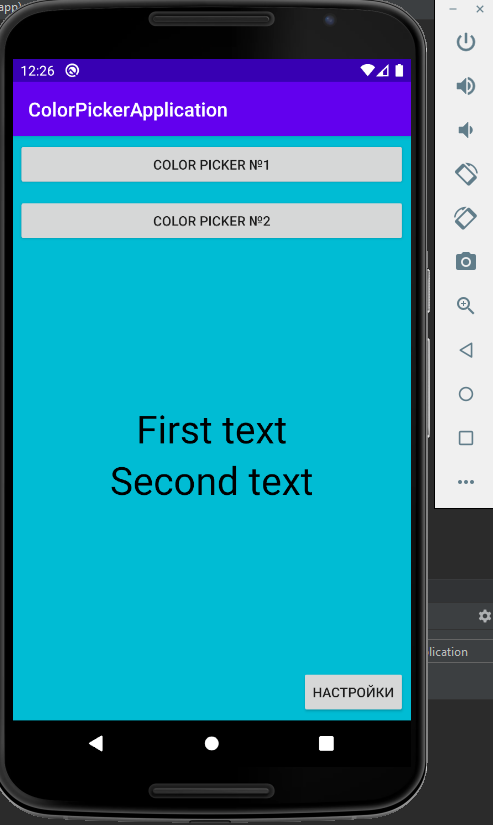 जैसा कि आप देख सकते हैं, सब कुछ सही ढंग से काम करता है।पुनश्च: उपयोगी लिंक:PSS: गिटहब एप्लीकेशन कोड