Besoin de mettre en œuvre la sélection des couleurs utilisateur pour votre application Android? Cette bibliothèque est un excellent choix. Sans une longue introduction, commençons.Comme toujours, pour commencer, ajoutez la bibliothèque à l'application (fichier build.gradle (module.app)): Nous l'avonsimplementation 'com.jaredrummler:colorpicker:1.1.0'compris. Maintenant, nous procédons directement à la mise en œuvre du choix de la couleur.Créez le balisage:<?xml version="1.0" encoding="utf-8"?>
<RelativeLayout xmlns:android="http://schemas.android.com/apk/res/android"
xmlns:app="http://schemas.android.com/apk/res-auto"
xmlns:tools="http://schemas.android.com/tools"
android:layout_width="match_parent"
android:layout_height="match_parent"
android:id="@+id/activityMain"
tools:context=".MainActivity">
<Button
android:id="@+id/firstButton"
android:layout_width="match_parent"
android:layout_height="wrap_content"
android:text="Color picker №1"
android:layout_margin="5dp"
android:onClick="onClickButton"
/>
<Button
android:id="@+id/secondButton"
android:layout_width="match_parent"
android:layout_height="wrap_content"
android:text="Color picker №2"
android:layout_below="@id/firstButton"
android:layout_margin="5dp"
android:onClick="onClickButton"
/>
<TextView
android:id="@+id/firstText"
android:layout_width="wrap_content"
android:layout_height="wrap_content"
android:layout_centerInParent="true"
android:text="First text"
android:textSize="40sp"
android:textColor="@android:color/black"
/>
<TextView
android:id="@+id/secondText"
android:layout_width="wrap_content"
android:layout_height="wrap_content"
android:text="Second text"
android:textSize="40sp"
android:layout_below="@+id/firstText"
android:layout_centerInParent="true"
android:textColor="@android:color/black"
/>
</RelativeLayout>
Nous avons 2 boutons, en cliquant sur lequel une boîte de dialogue pour choisir une couleur s'ouvrira. Lorsque nous avons sélectionné une couleur, elle changera dans nos deux TextViews.Ajoutez nos champs à MainActivity: Button firstButton,secondButton;
TextView firstText,secondText;
private static final int firstId = 1,secondId = 2;
... et initialisez-les dans onCreate ():
        firstButton = findViewById(R.id.firstButton);
        secondButton = findViewById(R.id.secondButton);

        firstText = findViewById(R.id.firstText);
        secondText = findViewById(R.id.secondText);
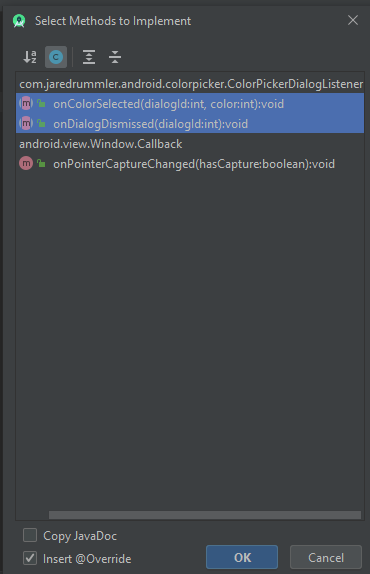
IMPORTANT : Il est également nécessaire que MainActivity implémente les méthodes de l'interface ColorPickerDialogListener:
 Nous allons maintenant créer une méthode pour créer une boîte de dialogue et la méthode onClick spécifiée dans le balisage XML:
private void createColorPickerDialog(int id) {
ColorPickerDialog.newBuilder()
.setColor(Color.RED)
.setDialogType(ColorPickerDialog.TYPE_PRESETS)
.setAllowCustom(true)
.setAllowPresets(true)
.setColorShape(ColorShape.SQUARE)
.setDialogId(id)
.show(this);
}
public void onClickButton(View view) {
switch (view.getId()) {
case R.id.firstButton:
createColorPickerDialog(firstId);
break;
case R.id.secondButton:
createColorPickerDialog(secondId);
break;
}
}
 tous les attributs de la classe ColorPickerDialogVous devez également implémenter les méthodes de l'interface ColorPickerDialogListener:
@Override
public void onColorSelected(int dialogId, int color) {
switch (dialogId) {
case firstId:
firstText.setTextColor(color);
break;
case secondId:
secondText.setTextColor(color);
break;
}
}
@Override
public void onDialogDismissed(int dialogId) {
Toast.makeText(this, "Dialog dismissed", Toast.LENGTH_SHORT).show();
}
Lancez et ... terminé!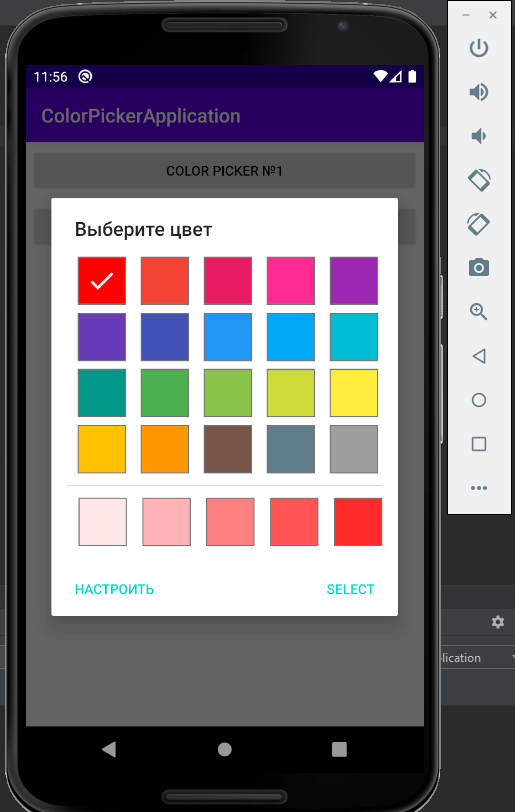
 Cependant, ce ne sont pas toutes les possibilités de la bibliothèque ColorPicker. Elle ajoute également une préférence pour PreferenceScreen. Cela vous permet d'implémenter la sélection des couleurs dans les paramètres. Voyons voir comment ça fonctionne.1) Créez une nouvelle SettingsActivity:
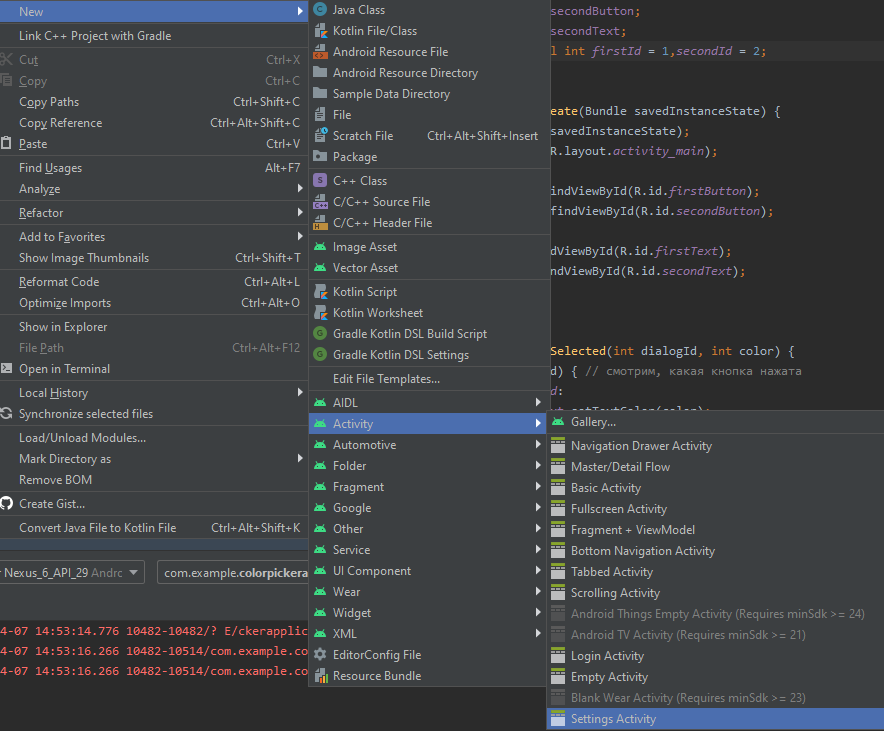 2) Ouvrez le fichier root_preferences.xml et modifiez-le comme suit:
<PreferenceScreen xmlns:app="http://schemas.android.com/apk/res-auto"
    xmlns:android="http://schemas.android.com/apk/res/android">
    <PreferenceCategory app:title=" ">
        <com.jaredrummler.android.colorpicker.ColorPreferenceCompat
            android:key="color_picker"
            app:title=" "
            />
    </PreferenceCategory>

</PreferenceScreen>
Comme vous pouvez le voir, nous avons créé une préférence de type ColorPreferenceCompat3) Créez un bouton dans activity_main.xml pour accéder à notre SettingsActivty:<Button
android:id="@+id/settingsButton"
android:layout_width="wrap_content"
android:layout_height="wrap_content"
android:text=""
android:layout_alignParentBottom="true"
android:layout_alignParentRight="true"
android:layout_margin="5dp"
android:onClick="openSettingsActivity"
/>
4) Créez une méthode openSettingsActivity dans MainActivity et spécifiez-la dans le champ «onClick» de ce bouton:public void openSettingsActivity(View view) {
startActivity(new Intent(this,SettingsActivity.class));
}
Dans la même MainActivity, créez une méthode qui change son arrière-plan en fonction de la couleur sélectionnée dans les paramètres et appelez ce filtre dans onCreate:private void setBackgroundColorFromSettingsActivity() {
SharedPreferences sp = PreferenceManager.getDefaultSharedPreferences(this);
//SharedPreferences
// - :
//https://developer.android.com/reference/android/content/SharedPreferences?hl=ru
int color = sp.getInt("color_picker",Color.GREEN);
RelativeLayout layout = findViewById(R.id.activityMain);
layout.setBackgroundColor(color);
}
Redéfinissez la méthode onResume (plus de détails ici ):@Override
protected void onResume() {
setBackgroundColorFromSettingsActivity();
super.onResume();
}
5) Exécutez l'application et voyez ce qui s'est passé:
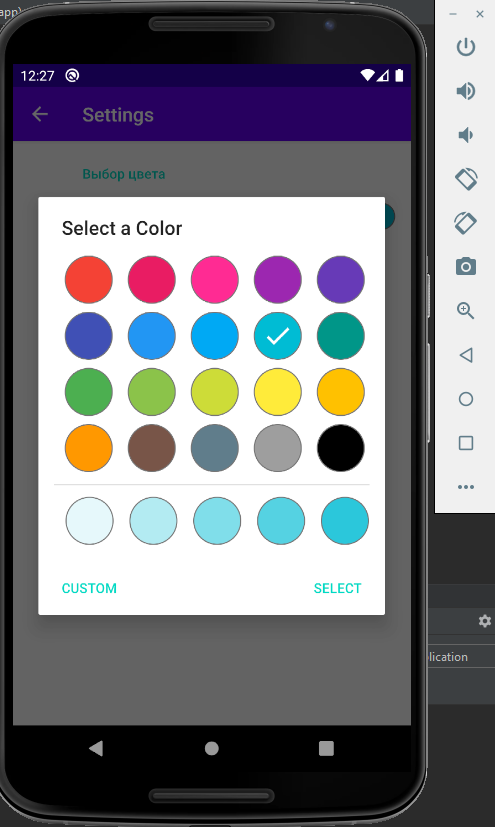
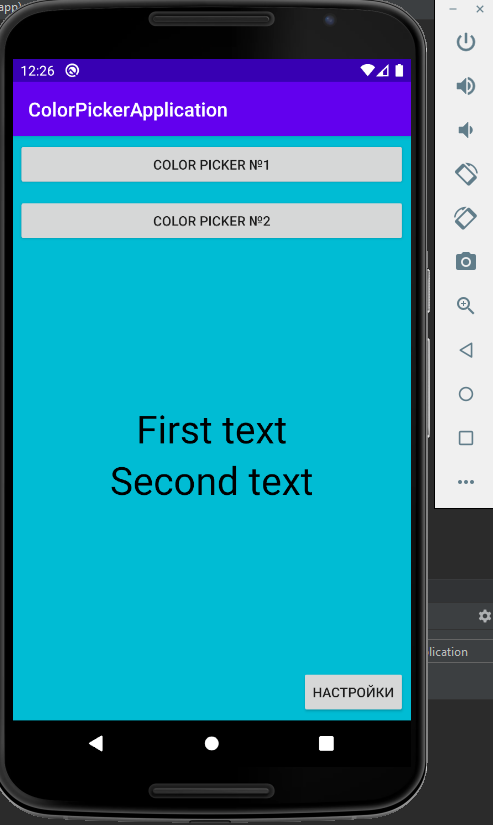 Comme vous pouvez le voir, tout fonctionne correctement.PS: Liens utiles:PSS: Code d'application GitHub