 En el último artículo, pusimos un espacio en blanco con usted, por así decirlo, la base sobre la cual se creará nuestro universo, la visualización usando la consola puede verse bien, pero los caracteres de texto son aburridos y no muy hermosos, en este artículo nos enfocaremos en visualizar nuestros mosaicos usando Phaser.jsEn un artículo anterior, nuestro proyecto se veía así:
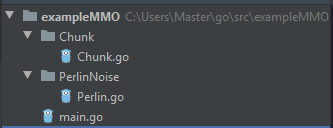 ahora usaremos otras herramientas para el desarrollo web, espero que tenga Node.js y npm instalados, si no, instale con urgencia. Y entonces abrimos la terminal y comienza:
$ npm install phaser@3.22.0
Al completar con éxito el equipo, deberíamos ver lo siguiente:+ phaser@3.22.0
added 15 packages from 48 contributors and audited 20 packages in 4.38s
 Muy bien, aparecieron los módulos, ahora crearemos un directorio para nuestro cliente.
 En Contenido almacenaremos recursos del juego, es decir nuestros sprites También crearemos dos archivos game.js y MainScene.js, en el directorio raíz (donde se encuentra el archivo main.go) create index.htmlgame.js - almacena la configuración principal del juegoMainScene.js - contendrá la clase de la escena principal del juegoindex.html - la página donde se representará la escenaConecte inmediatamente nuestros scripts a index.html y ya no volveremos a este archivo:
 <script src="node_modules/phaser/dist/phaser.js" type="module"></script>
<script src="Client/game.js" type="module"></script>
En MainScene.js crearemos una pequeña plantilla de clase para nuestra escena futura:export {MainScene}
class MainScene extends Phaser.Scene{
constructor() {
super({key: 'MainScene'})
}
preload() {
}
create() {
}
update() {
}
}
En game.js agregue configuraciones típicas a su gusto, aquí están las mías:import {MainScene} from "./MainScene.js";
let config = {
type: Phaser.AUTO,
width: 800,
height: 600,
disableContextMenu: true,
background: 'black',
physics: {
default: 'arcade',
arcadePhysics: {
overlapBias: 1
}
},
scene:[MainScene],
pixelArt: true,
roundPixels: true,
antialias: true
}
let game = new Phaser.Game(config);
Ahora necesitamos un servidor HTTP, esto se hace en unas pocas líneas. Vaya a main.go y cree un servidor:package main
import (
"fmt"
"html/template"
"net/http"
)
func main() {
http.HandleFunc("/", indexHandler)
http.Handle("/node_modules/phaser/dist/", http.StripPrefix("/node_modules/phaser/dist/", http.FileServer(http.Dir("./node_modules/phaser/dist/"))))
http.Handle("/Client/", http.StripPrefix("/Client/", http.FileServer(http.Dir("./Client/"))))
http.Handle("/Client/Content/", http.StripPrefix("/Client/Content/", http.FileServer(http.Dir("./Client/Content/"))))
err := http.ListenAndServe(":8080", nil)
if err != nil {
fmt.Println(err.Error())
}
}
func indexHandler(w http.ResponseWriter, r *http.Request) {
fmt.Println("indexAction")
t, _ := template.ParseFiles("index.html")
err := t.Execute(w, "index")
if err != nil {
fmt.Println(err.Error())
}
}
Bueno, ¡tenemos nuestro propio servidor web y cliente! ¡Vamos a ponerlo en marcha! Abre la consola:$ go run main.go
Abrimos el navegador e intentamos conectarnos a nuestro servidor, en mi caso eslocalhost: 8080
 Si vio una pantalla en negro, hizo todo bien.Y así, creemos otro controlador por el cual recibiremos nuestro fragmento en formato json. Crea un directorio separado y llámalo GameController, aquí tendremos todos los controladores trabajando con los datos del juego, crea el archivo Map_Controller.goTambién necesitamos un mejor
Chunk.gopackage Chunk
import (
"exampleMMO/PerlinNoise"
"fmt"
)
var TILE_SIZE = 16
var CHUNK_SIZE = 16 * 16
var PERLIN_SEED float32 = 160
type Chunk struct {
ChunkID [2]int `json:"chunkID"`
Map map[Coordinate]Tile `json:"map"`
}
type Tile struct {
Key string `json:"key"`
X int `json:"x"`
Y int `json:"y"`
}
type Coordinate struct {
X int `json:"x"`
Y int `json:"y"`
}
func NewChunk(idChunk Coordinate) Chunk {
fmt.Println("New Chank", idChunk)
chunk := Chunk{ChunkID: [2]int{idChunk.X, idChunk.Y}}
var chunkXMax, chunkYMax int
var chunkMap map[Coordinate]Tile
chunkMap = make(map[Coordinate]Tile)
chunkXMax = idChunk.X * CHUNK_SIZE
chunkYMax = idChunk.Y * CHUNK_SIZE
switch {
case chunkXMax < 0 && chunkYMax < 0:
{
for x := chunkXMax + CHUNK_SIZE; x > chunkXMax; x -= TILE_SIZE {
for y := chunkYMax + CHUNK_SIZE; y > chunkYMax; y -= TILE_SIZE {
posX := float32(x - (TILE_SIZE / 2))
posY := float32(y + (TILE_SIZE / 2))
tile := Tile{}
tile.X = int(posX)
tile.Y = int(posY)
perlinValue := PerlinNoise.Noise(posX/PERLIN_SEED, posY/PERLIN_SEED)
switch {
case perlinValue < -0.01:
tile.Key = "Water"
case perlinValue >= -0.01 && perlinValue < 0:
tile.Key = "Sand"
case perlinValue >= 0 && perlinValue <= 0.5:
tile.Key = "Ground"
case perlinValue > 0.5:
tile.Key = "Mount"
}
chunkMap[Coordinate{X: tile.X, Y: tile.Y}] = tile
}
}
}
case chunkXMax < 0:
{
for x := chunkXMax + CHUNK_SIZE; x > chunkXMax; x -= TILE_SIZE {
for y := chunkYMax - CHUNK_SIZE; y < chunkYMax; y += TILE_SIZE {
posX := float32(x - (TILE_SIZE / 2))
posY := float32(y + (TILE_SIZE / 2))
tile := Tile{}
tile.X = int(posX)
tile.Y = int(posY)
perlinValue := PerlinNoise.Noise(posX/PERLIN_SEED, posY/PERLIN_SEED)
switch {
case perlinValue < -0.12:
tile.Key = "Water"
case perlinValue >= -0.12 && perlinValue <= 0.5:
tile.Key = "Ground"
case perlinValue > 0.5:
tile.Key = "Mount"
}
chunkMap[Coordinate{X: tile.X, Y: tile.Y}] = tile
}
}
}
case chunkYMax < 0:
{
for x := chunkXMax - CHUNK_SIZE; x < chunkXMax; x += TILE_SIZE {
for y := chunkYMax + CHUNK_SIZE; y > chunkYMax; y -= TILE_SIZE {
posX := float32(x + (TILE_SIZE / 2))
posY := float32(y - (TILE_SIZE / 2))
tile := Tile{}
tile.X = int(posX)
tile.Y = int(posY)
perlinValue := PerlinNoise.Noise(posX/PERLIN_SEED, posY/PERLIN_SEED)
switch {
case perlinValue < -0.12:
tile.Key = "Water"
case perlinValue >= -0.12 && perlinValue <= 0.5:
tile.Key = "Ground"
case perlinValue > 0.5:
tile.Key = "Mount"
}
chunkMap[Coordinate{X: tile.X, Y: tile.Y}] = tile
}
}
}
default:
{
for x := chunkXMax - CHUNK_SIZE; x < chunkXMax; x += TILE_SIZE {
for y := chunkYMax - CHUNK_SIZE; y < chunkYMax; y += TILE_SIZE {
posX := float32(x + (TILE_SIZE / 2))
posY := float32(y + (TILE_SIZE / 2))
tile := Tile{}
tile.X = int(posX)
tile.Y = int(posY)
perlinValue := PerlinNoise.Noise(posX/PERLIN_SEED, posY/PERLIN_SEED)
switch {
case perlinValue < -0.12:
tile.Key = "Water"
case perlinValue >= -0.12 && perlinValue <= 0.5:
tile.Key = "Ground"
case perlinValue > 0.5:
tile.Key = "Mount"
}
chunkMap[Coordinate{X: tile.X, Y: tile.Y}] = tile
}
}
}
}
chunk.Map = chunkMap
return chunk
}
Acabamos de agregar claves json a nuestras estructuras y mejoramos un poco la creación de fragmentos. Volvemosa Map_Controller,package GameController
import (
"encoding/json"
"exampleMMO/Chunk"
"fmt"
"net/http"
)
func Map_Handler(w http.ResponseWriter, r *http.Request) {
c:= Chunk.NewChunk(Chunk.Coordinate{1,1})
js, e :=json.Marshal(c)
if e!= nil {
fmt.Println(e.Error())
}
fmt.Println(string(js))
}
y agregue una línea a main.go http.HandleFunc("/map", GameController.Map_Handler)
Intentemos iniciar el servidor e ir a localhost: 8080 / map.Salida en la terminal:New Chank {1 1}
json: unsupported type: map[Chunk.Coordinate]Chunk.Tile
Sí, olvidamos que en Golang, cuando se serializan, las teclas del mapa deben ser una cadena. Para la serialización, Go comprueba si el tipo coincide con la interfaz TextMarshaler y llama a su método MarshalText (), solo necesitamos crear el método MarshalText () para nuestro tipo Coordinate. Regresamosa Chunk.go y agregamos el siguiente código:func (t Coordinate) MarshalText() ([]byte, error) {
return []byte("[" + strconv.Itoa(t.X) + "," + strconv.Itoa(t.Y) + "]"), nil
}
Puede escribir su implementación, lo más importante es que este método devuelve una cadena única. Usaremos esta clave para administrar fragmentos en el cliente, ahora verifiquemos cómo funciona nuestro controlador, iniciemos el servidor nuevamente y veamos la salida a la consola.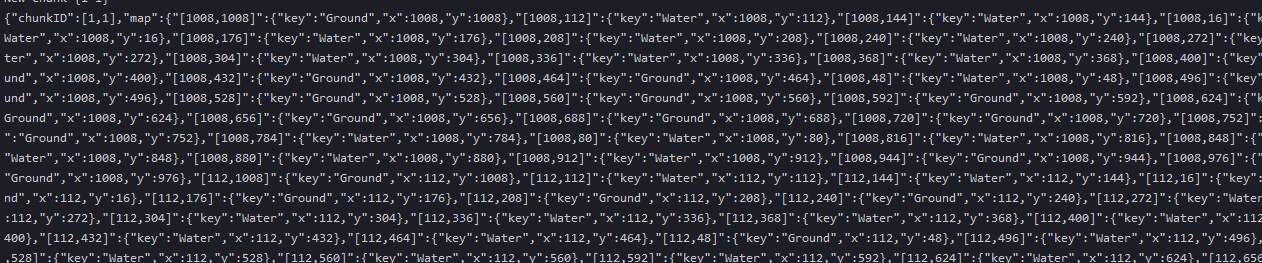 Sí, todo está bien, ahora hagamos una conclusión al flujo, agreguemos dos líneas al final de nuestro controlador:
	w.Header().Set("Content-Type", "application/json")
	w.Write(js)
Por ahora, termine con Golang y regrese al cliente. Necesitaremos tres títulos, aunque en realidad tenemos 4 de ellos, pero por ahora tenemos tres, o incluso dos.

 Agregue nuestros mosaicos al directorio de Contenido y comience a trabajar con MainScene.js, para los primeros resultados necesitamos algunas funciones:
class MainScene extends Phaser.Scene{
constructor() {
super({key: 'MainScene'})
}
preload() {
this.load.image("Ground", "Client/Content/sprGrass.png")
this.load.image("Water", "Client/Content/sprWater1.png")
this.load.image("Sand", "Client/Content/sprGrass.png")
}
create() {
this.getGameMap()
}
update() {
}
async getGameMap() {
let res = await fetch("/map")
let result = await res.json()
this.drawChunk(result.map)
}
drawChunk(map) {
for (let chunkKey in map) {
this.add.image(map[chunkKey].x,map[chunkKey].y, map[chunkKey].key)
}
}
}
El servidor nos devuelve nuestro fragmento en forma de un objeto json, puede ver su estructura en la consola del navegador: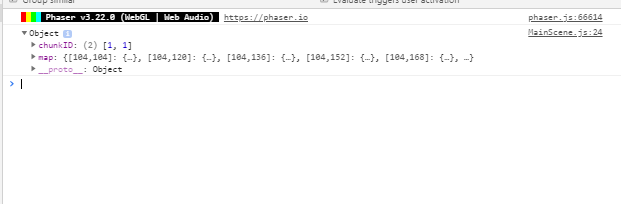 Y Phaser lo procesó en el navegador:
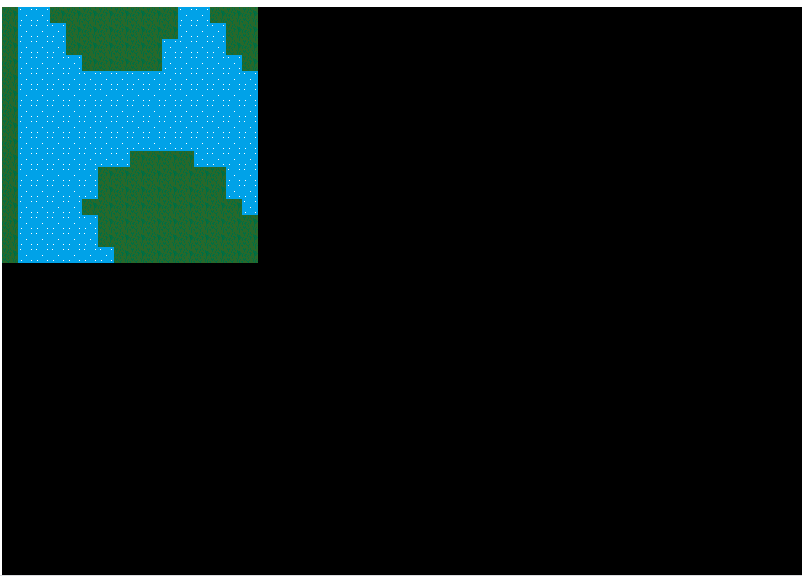 Examinamos el trabajo más simple entre el servidor y el cliente, en el próximo artículo dibujaremos inmediatamente 9 fragmentos y navegaremos al mundo. Vea todo el código y los recursos del artículo aquí .