 On the Internet, there is countless information on setting up a server on Ubuntu, but at every step you can find moments that are not obvious to a beginner. I want to share my experience and possibly solve someone's problem. The article will tell you how to configure a multiport server (6 ports): Netplan, DHCP server, UFW (Uncomplicated Firewall). And now, first things first.
Introduction
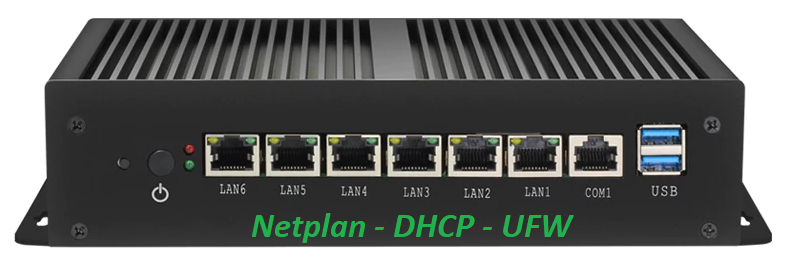
I updated the Internet to 500 Mbit / s, and it was time to tackle the 100 Mbit server, which was running on Pentium 3 and was already on the edge. The choice fell on the Chinese beast . All that is needed is available, consumption in normal mode does not exceed 15W, there is a margin of performance for additional tasks.For calm added active cooling: I will not paint the OS installation ("OK - Next - Next"), I only note that during installation it is required to configure at least one network interface for accessing the Internet.For convenience, I use Midnight Commander and its text editor. We will work from the root user:sudo su
Install MC:apt-get install mc
So, we have installed Ubuntu Server, let's start by configuring the remaining network interfaces.Netplan
In recent versions of Ubuntu, Netplan utility has appeared, which allows you to configure the network in a unified format and choose a network manager to work with. By default, Systemd-networkd is used, but I chose NetworkManager, because I installed the Cockpit Web interface, which uses NM to display part of the information.Netplan configuration syntax is very strict and an extra space or tab can cause an error.More details about the functionality have already been described by habr.com/en/post/448400 , as well various examples are on the site netplan.io/examples .Let's see the names of the interfaces:ip a
Go to the / etc / netplan directory and open (F4 for MS) the 50-cloud-init.yaml file . For the network interface that will be used to connect to the Internet, we determine the receipt of the settings by dhcp ( dhcp4: true ). In my case it is enp6s0. For the rest, specify false and add the optional: true parameter , because the interface may not be connected to anything.I used bridge to connect the interfaces to the local network, but perhaps it would be more correct to use vlan. Let's create a lan-br bridge , set a common IP address, a DNS server and specify the interfaces to be combined: bridges:
lan-br:
dhcp4: false
addresses: [ 192.168.13.1/24 ]
nameservers:
addresses: [ 192.168.13.1 ]
interfaces: [ enp1s0, enp2s0, enp3s0, enp4s0, enp5s0 ]
I will have my own DNS server, so I specify the address of my server in the nameservers field , for example, you can specify 8.8.8.8 (Google). We indicate the version and manager. The result should be something like this:network:
ethernets:
enp1s0:
dhcp4: false
optional: true
enp2s0:
dhcp4: false
optional: true
enp3s0:
dhcp4: false
optional: true
enp4s0:
dhcp4: false
optional: true
enp5s0:
dhcp4: false
optional: true
enp6s0:
dhcp4: true
nameservers:
addresses:
- 127.0.0.1
- 192.168.13.1
  bridges:
    lan-br:
      dhcp4: false
      addresses: [ 192.168.13.1/24 ]
      nameservers:
        addresses: [ 192.168.13.1 ]
      interfaces: [ enp1s0, enp2s0, enp3s0, enp4s0, enp5s0 ]
version: 2
renderer: NetworkManager
We save the file and check / apply the configuration:netplan try
If everything is done correctly, then 'ip a' will show something like this:1: lo: <LOOPBACK,UP,LOWER_UP> mtu 65536 qdisc noqueue state UNKNOWN group default qlen 1000
link/loopback 00:00:00:00:00:00 brd 00:00:00:00:00:00
inet 127.0.0.1/8 scope host lo
valid_lft forever preferred_lft forever
inet6 ::1/128 scope host
valid_lft forever preferred_lft forever
2: enp1s0: <BROADCAST,MULTICAST,UP,LOWER_UP> mtu 1500 qdisc fq_codel master lan-br state UP group default qlen 1000
link/ether 0c:e8:2c:68:5b:57 brd ff:ff:ff:ff:ff:ff
3: enp2s0: <BROADCAST,MULTICAST,UP,LOWER_UP> mtu 1500 qdisc fq_codel master lan-br state UP group default qlen 1000
link/ether 0c:e8:2c:68:5b:58 brd ff:ff:ff:ff:ff:ff
4: enp3s0: <BROADCAST,MULTICAST,UP,LOWER_UP> mtu 1500 qdisc fq_codel master lan-br state UP group default qlen 1000
link/ether 0c:e8:2c:68:5b:59 brd ff:ff:ff:ff:ff:ff
5: enp4s0: <NO-CARRIER,BROADCAST,MULTICAST,UP> mtu 1500 qdisc fq_codel state DOWN group default qlen 1000
link/ether 0c:e8:2c:68:5b:5a brd ff:ff:ff:ff:ff:ff
6: enp5s0: <NO-CARRIER,BROADCAST,MULTICAST,UP> mtu 1500 qdisc fq_codel state DOWN group default qlen 1000
link/ether 0c:e8:2c:68:5b:5b brd ff:ff:ff:ff:ff:ff
7: enp6s0: <BROADCAST,MULTICAST,UP,LOWER_UP> mtu 1500 qdisc fq_codel state UP group default qlen 1000
link/ether 0c:e8:2c:68:5b:5c brd ff:ff:ff:ff:ff:ff
inet 188.32.236.197/19 brd 188.32.255.255 scope global dynamic noprefixroute enp6s0
valid_lft 2898sec preferred_lft 2898sec
inet6 fe80::ee8:2cff:fe68:5b5c/64 scope link
valid_lft forever preferred_lft forever
8: lan-br: <BROADCAST,MULTICAST,UP,LOWER_UP> mtu 1500 qdisc noqueue state UP group default qlen 1000
link/ether 0c:e8:2c:68:5b:57 brd ff:ff:ff:ff:ff:ff
inet 192.168.13.1/24 brd 192.168.13.255 scope global noprefixroute lan-br
valid_lft forever preferred_lft forever
inet6 fe80::ee8:2cff:fe68:5b58/64 scope link
valid_lft forever preferred_lft forever
DHCP server
Configure a DHCP server so that clients can receive IP addresses automatically.apt-get install isc-dhcp-server
In the file / etc / default / isc-dhcp-server, edit the line:INTERFACESv4="lan-br"
Go to / etc / dhcp , open dhcpd.conf and prescribe the settings:option domain-name "your-domain-name";
option domain-name-servers 192.168.13.1;
subnet 192.168.13.0 netmask 255.255.255.0 {
range 192.168.13.100 192.168.13.250;
option subnet-mask 255.255.255.0;
option routers 192.168.13.1;
option broadcast-address 192.168.13.255;
}
Restart the DHCP server:service isc-dhcp-server restart
Customers should now receive addresses automatically.Ufw
UFW (Uncomplicated Firewall) - a tool for easier iptables setup. Set up a firewall and packet forwarding between interfaces. Go to / etc / ufw and uncomment the line in the sysctl.conf file:net/ipv4/ip_forward=1
If you are connected via ssh, open port 22 before starting:ufw allow ssh
Turn on UFW, check the status:ufw enable
ufw status verbose
Set the default policies:ufw default deny incoming
ufw default allow outgoing
ufw default allow routed
Allow access from the local network:ufw allow in on lan-br to any
Configure NAT. Open the before.rules file and write the following before the * filter block :*nat
:POSTROUTING ACCEPT [0:0]
-A POSTROUTING -s 192.168.13.0/24 -o enp6s0 -j MASQUERADE
COMMIT
Save and restart ufw:ufw disable
ufw enable
Let's check iptables, our line should appear:iptables -t nat -L -v
On this, the basic server configuration can be considered complete.Conclusion
I did not raise the issue of configuring the DNS server, as I plan to release the second part, which will describe the configuration of Dnscrypt-proxy as a DNS server for the local network.More detailed information: