Foreword
Continuation of the cycle on work with Azure B2C. In this article I will talk about how to enable authentication on React JS.Links to related postsSTEP 1
You must install react-aad-msal (npm i react-aad-msal) .Add empty auth.html file to public directorySTEP 2
Create auth-provider.ts file in ./src folderYou also need to verify that in Azure B2C, administrator permissions for openid and profile are granted in the API Permissions tab .
import { MsalAuthProvider, LoginType } from 'react-aad-msal';
import { Configuration } from 'msal/lib-commonjs/Configuration';
export const config = (azurePolicy: string): Configuration => ({
auth: {
authority: `https://yourcompany.b2clogin.com/yourcompany.onmicrosoft.com/${azurePolicy}`,
validateAuthority: false,
clientId: '777aaa77a-7a77-7777-bb77-8888888aabc',
},
cache: {
cacheLocation: 'localStorage',
storeAuthStateInCookie: false,
},
});
const authenticationParameters = {
scopes: [
'https://myapp.onmicrosoft.com/777aaa77a-7a77-7777-bb77-8888888aabc/openid',
'https://myapp.onmicrosoft.com/777aaa77a-7a77-7777-bb77-8888888aabc/profile',
],
};
export const options = {
loginType: LoginType.Redirect,
tokenRefreshUri: `${window.location.origin}/auth.html`,
};
export const authProvider = (customConfig: Configuration): MsalAuthProvider => new MsalAuthProvider(customConfig, authenticationParameters, options);
Where to get the names of policies you can see in the screenshot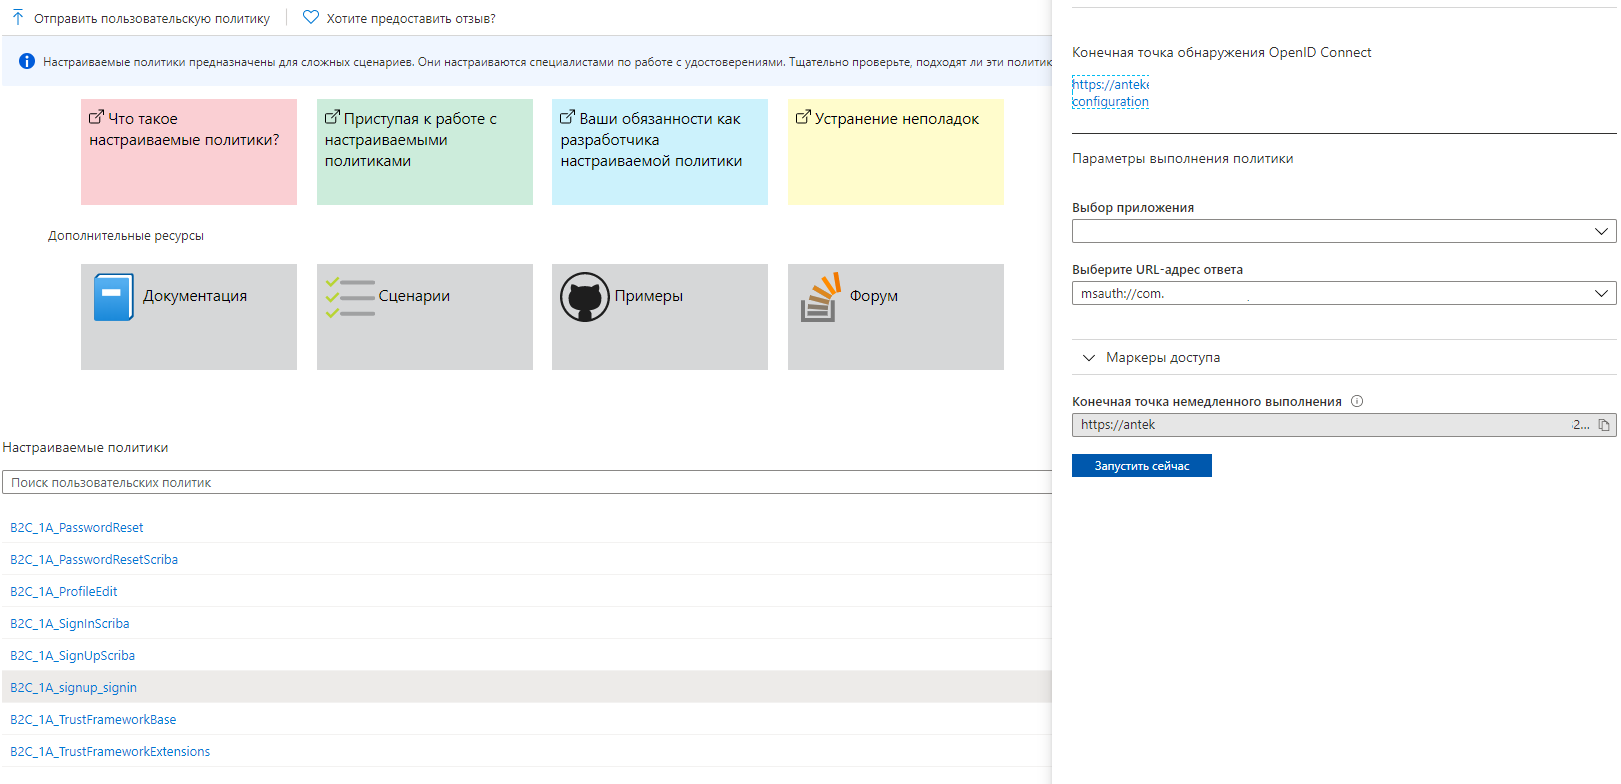
STEP 3
In the index.tsx file, you need to process the scripts according to which the user will enter your application. import * as React from 'react';
import * as ReactDOM from 'react-dom';
import { Provider } from 'react-redux';
import { AzureAD, AuthenticationState, IAzureADFunctionProps } from 'react-aad-msal';
import { authProvider, config } from './auth-provider';
import App from './App';
const store = configureStore();
const unauthenticatedFunction = () => (
<AzureAD provider={authProvider(config('B2C_1A_PasswordReset'))}>
{
({
login, logout, authenticationState, error, accountInfo,
}: IAzureADFunctionProps): React.ReactElement | void => {
switch (authenticationState) {
default:
login();
return <h1>Loading...</h1>;
}
}
}
</AzureAD>
);
ReactDOM.render(
<Provider store={store}>
//
<AzureAD provider={authProvider(config('B2C_1A_signup_signin'))} reduxStore={store}>
{
({
login, logout, authenticationState, error, accountInfo,
}: IAzureADFunctionProps): React.ReactElement | void => {
switch (authenticationState) {
case AuthenticationState.Authenticated:
console.log(accountInfo); // + JWT Token
return <App />;
case AuthenticationState.Unauthenticated:
if (!accountInfo && !error) {
login();
}
if (!accountInfo && error) {
//
// AADB2C90118
if (error.errorMessage.includes('AADB2C90118')) {
return unauthenticatedFunction();
}
// ,
// ( " " "")
if (error.errorMessage.includes('AADB2C90091')) {
login();
}
}
console.log('ERROR', error);
return <h1>Not authorized</h1>;
case AuthenticationState.InProgress:
return <h1>In progress</h1>;
default:
return <h1>Default</h1>;
}
}
}
</AzureAD>
</Provider>,
document.getElementById('root'),
);
registerServiceWorker();
STEP 4
Go to Azure AD B2C in the "Application Registration" tab and select the application that you want to use, except:IdentityExperienceFramework and ProxyIdentityExperienceFramework .If you have not created the application, then go to the “Basic User Streams” step
Next, go into authentication and add the following URIs: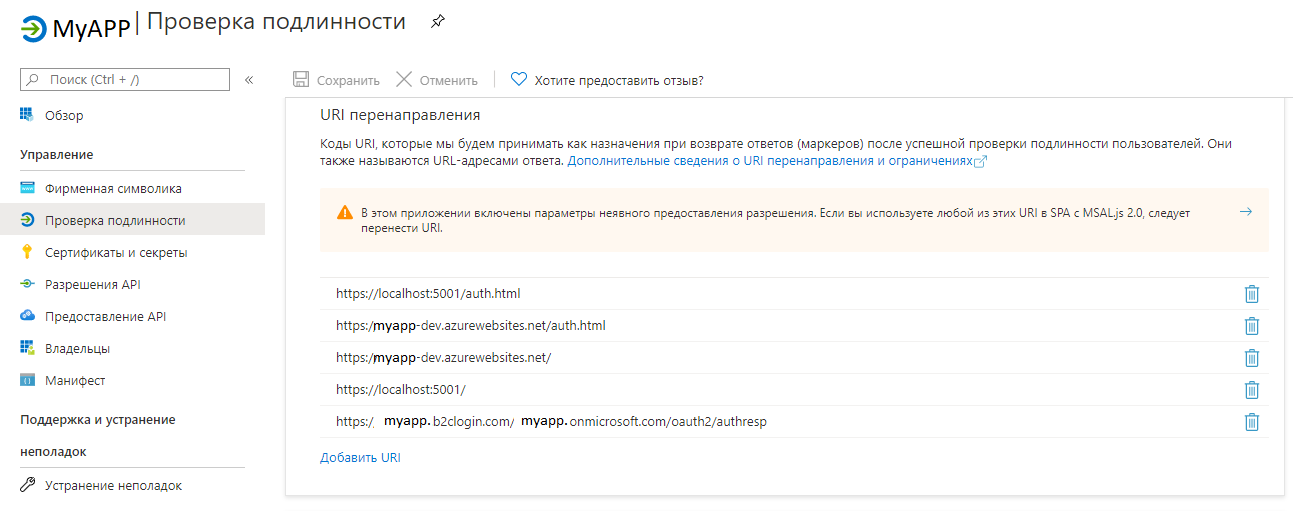
Conclusion
As a result of the work done, when downloading the application, the user will be transferred to the authorization page.Thank you for the attention!