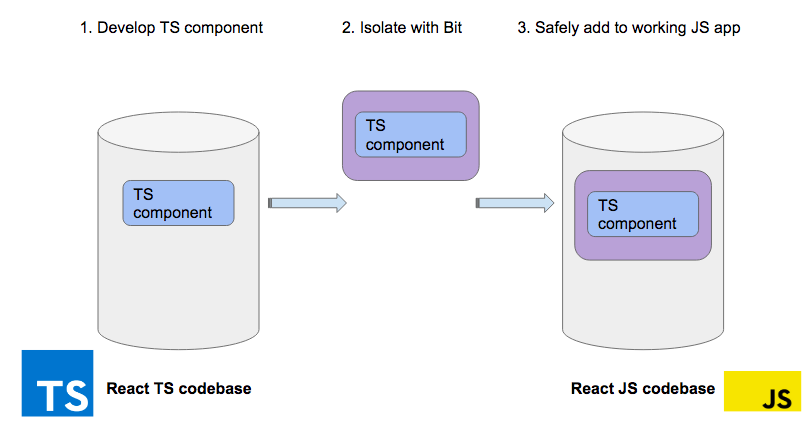
Hello, Habr!Recently, in the field of front-end, the combination of React + TypeScript has become especially popular. Accordingly, the relevance of competent migration from JavaScript to TypeScript is increasing, preferably in a short time. Today we would like to discuss this topic with you. How to safely build and inject React TypeScript components into your React JS project.Why might you need to migrate from JS to TS? There may be many reasons for this, but that is not the point. The (hypothetical) fact is this: you need to start using TypeScript, and you need an easy way to implement it in your project. Moreover, all this needs to be done somehow, without violating the structure of all available code, and convincing the team of the need for such a transition.Here we will demonstrate a step-by-step refactoring: how to embed React components in another code base, and then use Bit to safely enter them into a working React JavaScript application .
Securely embed TS components in a JS project using Bit
 There are many ways to upgrade from React JS to React TS. The essence of this article is to show how this is done progressively. A similar method is applicable in other cases.The basic idea is to get the most out of your React + components with Bit to isolate them from each other in your own Bit development environment. Together, this allows you to assemble TS components and safely inject them into a fully functional React JS application.BitIs an open source tool for extracting components from Git repositories. Bit allows you to build TS components outside of a project written in JS, allocating for each stand-alone isolated development environment, which can work in other projects, regardless of their configurations. Then you can simply version and “bit-import” these components into your JS project and they will work.Along with Bit, there is Bit.dev , a remote hub where you can store these components and then reuse them. We will keep TS components in Bit.dev, and from there we will begin to introduce them into our React JS project.
 Example: searching for React shared components in bit.dev
Usage example
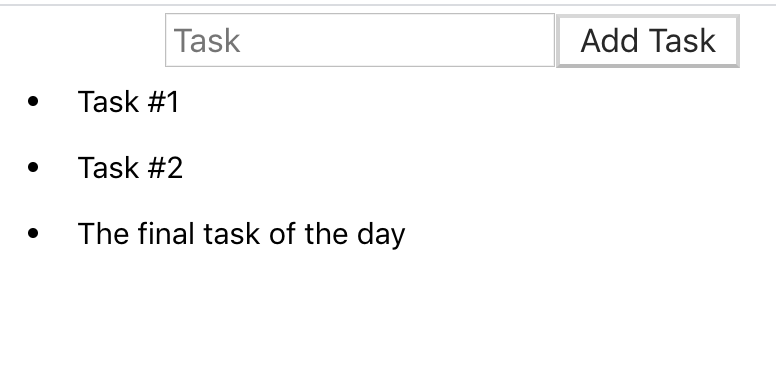
For the purposes of this article, we’ll analyze an example that in the front-end world is comparable to the classic “hello world”: we will talk about an application for planning cases.Don’t worry, I'm not going to tell you how to write such an application for React. I suppose you already know how to do this and, to be honest, the topic is far from new, so dismiss.But I will use this application as an example - you can rightfully fork it, or at least open a link and see all its code. github.com/deleteman/react-todo-demoThis code base consists of the following components:TodoList: This is the main component displayed in the form of a text input field with the usual button. Everything is in the form, after sending which the text is added to the list supported by the main application. The code for this component is very simple:
import React, { Component } from 'react'

class TodoList extends Component {
  render() {
    return (
      <div className="todoListMain">
        <div className="header">
          <form onSubmit={this.props.addItem}>
            <input placeholder="Task"
            ref={this.props.inputElement}
            value={this.props.currentItem.text}
            onChange={this.props.handleInput}
             />
            <button type="submit"> Add Task </button>
          </form>
        </div>
      </div>
    )
  }
}

export default TodoList
TodoItems : A very simple list component used to display an internal list of items added through the previous component. Each of the elements is clickable, and after clicking on it it is removed from the list. The code is also quite simple:import React, { Component } from 'react'
class TodoItems extends Component {
createTasks(item) {
return <li key={item.key} onClick={() => this.props.deleteItem(item.key)}>{item.text}</li>
}
render() {
const todoEntries = this.props.entries || []
const listItems = todoEntries.map(this.createTasks.bind(this))
return <ul className="theList">{listItems}</ul>
}
}
export default TodoItems
In both cases, the corresponding methods are accepted as properties (Props) from the main component of the App. The full code for this component is given here.I agree that this application is very simple, but, I emphasize again, there could potentially be any React application that you are currently working on - and suddenly you get the task to start migrating to TypeScript. What to do?- Option # 1: Having wiped away the tears, you begin to rewrite the entire base of the source code.
- Option # 2: Rename all your .js files to .ts, configure the necessary steps in the assembly process and wash your hands.
- Option # 3: You decide it’s really time to move on to the gradual migration of all the old code, and write all the new code directly on TypeScript.
I want to discuss option # 3 in more detail, but, in principle, I do not refuse you that in the same application you can coexist components written in pure JavaScript as well as in TypeScript.Enter TypeScript
So, as an example, suppose we are tasked with adding a toggle button to each component in our to-do list. After clicking on an item, it must be switched in the background.Nothing supernatural, but as you remember, in this case we are interested in the process, not the code as such.So, we will not try to add TypeScript to your customized project, so as not to accidentally break your existing assembly into several days, but create a completely new project using pure TypeScript:$ npx create-react-app ts-components --template typescript
Please note: to use npx, you only need the new version of NPM, and it is included in the installation process in version 5.2.0 and higher.Just as before, in this case a template is created for the project, but this time we use TypeScript as the base language.Plus, a simple switch component, suitable for insertion into another project, without introducing additional dependencies. If you're curious about how to do this, read the next article on how to write reusable components .import React, {useState} from 'react';
interface IActionProps {
action: (status:boolean) => void,
buttonText?: string
}
const Toggle = ({action, buttonText="Toggle"}: IActionProps) => {
const [isSelected, setSelected] = useState(false)
return (
<button onClick={() => {
setSelected(!isSelected)
action(isSelected)
}} >{buttonText}</button>
)
}
export default Toggle
Now that this component is written, you can use Bit (this is an open source tool for versioning and publishing individual components) to extract this specific component and share it so that you can later import it from our JavaScript-based project.// Bit
$ yarn global add bit-bin
$ bit init --package-manager yarn// ( , bit.dev)
$ bit login//
$ bit add src/components/Toggle.tsx // ( env)
$ bit import bit.envs/compilers/react-typescript --compiler//
$ bit tag –all
So you configure your project and configure the new Toggle component (switch) in it so that it can be shared with other projects. But, before you can do this in practice, you need to log in to Bit.dev (this is a component hub - a site with a registry and documentation that complements Bit as a platform for publishing and previewing components).Once logged in, just create a new collection called “toggler”, make it public, and then run the following command in the terminal window:$ bit export user-name.toggler
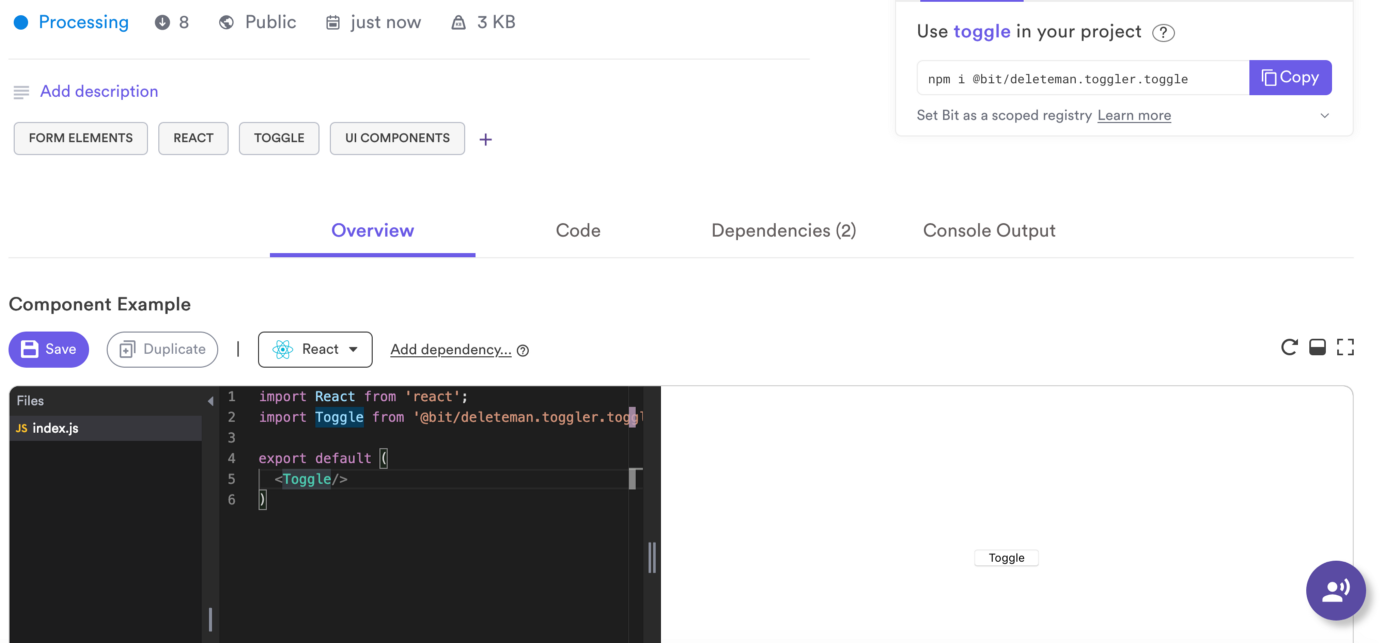
If “user-name” is really your username, then the component will be exported as a result, and you can see it on Bit.dev. It should look something like this: Note how, by default, the program creates a sample file
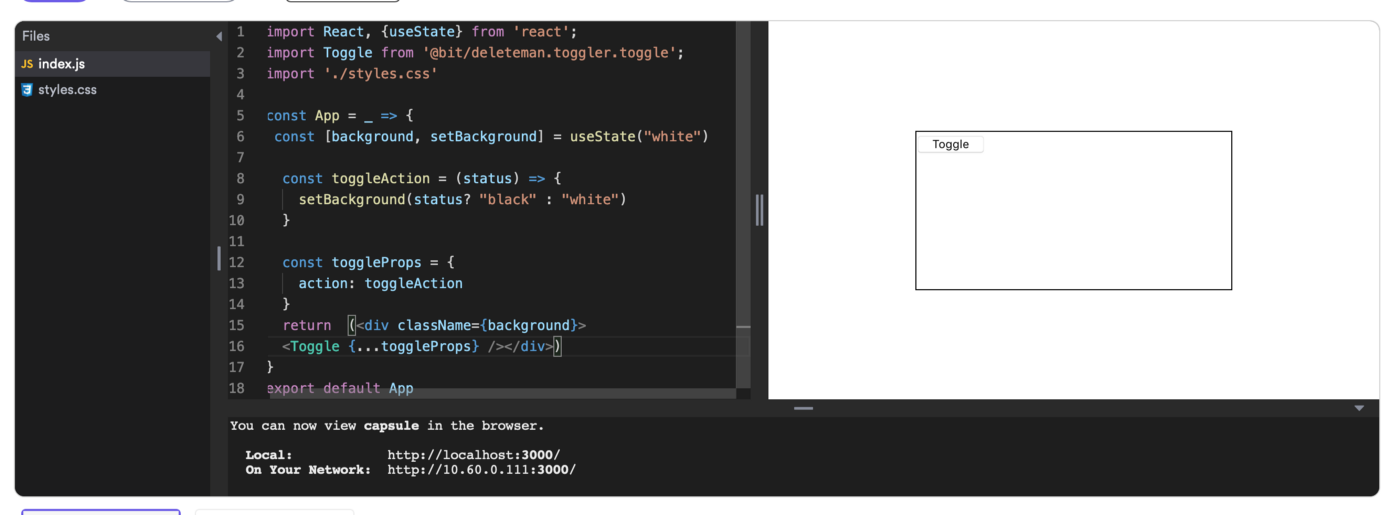
 index.jsto test the component. At the same time, the content written to this file by default may not be ideal, so the platform makes it easy to add additional code to it, so that others will understand how to use your public component in their code.For example, here I updated my sample file, adding explanations on how to use the Toggler component (just remember to click the “Save” button when you're done!): Now let's take a look at how to import this new component into your own JS-based React application.
Import an external component
Bit takes care of compiling your TypeScript code in JavaScript thanks to the compiler we added. This solves all our problems, and all that remains for us is to add this component to your project as a dependency.For all purposes, I used Yarn here, but you could use NPM with the same success, all you need for this:$ yarn add @bit/your-username.your-collection.your-component
In my case, this code turns into:$ yarn add @bit/deleteman.toggler.toggle
Please note: you will not be able to install components without logging in (remember the part about $ bit loginin this guide?). If you would like to install components from the Bit registry, then you need to configure the registry manually, like this:$ npm config set '@bit:registry' https://node.bit.dev
Thus, your TypeScript component (already compiled in JavaScript) will be included in the project, and you will be able to refer to this component of their code as follows:import React, { Component, useState } from 'react'
import Toggle from '@bit/deleteman.toggler.toggle';
const TodoItem = ({text, itemKey}) => {
const [iClass, setIClass] = useState("white")
const toggleBackground = status => {
setIClass(status ? "white" : "black")
}
const toggleProps = {
action: toggleBackground,
buttonText: "Select"
}
return <li className={iClass} key={itemKey} >{text}<Toggle {...toggleProps}/></li>
}
export default TodoItem
Pay attention to line 2, where I import the external component that I intend to use as part of the return statement. Nothing complicated, no additional configuration changes are required in your project or anywhere else.Congratulations, now you have a working project that uses both TypeScript and JavaScript, you could potentially do this so that you would not even notice it!As I mentioned above, the full project code is posted on GitHub !Conclusion
If you are interested in migrating to TypeScript, or if you just want to experiment with it and see how it works, then this is the way it is convenient to gradually introduce the language into an existing project without risking bringing down the entire assembly process.Pay attention to Bit and look at Bit.dev, find other components written in JavaScript and TypeScript at the same time to understand how others write them!