 Recently I came across a fresh article in which the guys tried to reproduce an interesting concept using SwiftUI. Here's what they did:
 I studied their code with interest, but experienced some frustration. No, not in the sense that they did something wrong, not at all. It’s just that I didn’t learn anything new from their code. Their implementation is more about Combine than about animation. And I decided to
 build my lunopark to write my article on animation in SwiftUI, implementing about the same concept, but using 100% of the capabilities of the built-in animation, even if it is not very effective. To study - so to the end. To experiment - so with a twinkle :)Here's what I got:However, for a full disclosure of the topic, I had to talk in some detail about the very basics. The text turned out to be voluminous, and therefore, I broke it into two articles. Here is the first part of it - rather, a tutorial on animation in general, not directly related to rainbow animation, which I will discuss in detail in the next article.In this article, I will talk about the basics, without which you can easily get confused in more complex examples. Much of what I will talk about, in one form or another, has already been described in English-language articles such as this series ( 1 , 2 , 3 , 4) I, on the other hand, focused not so much on enumerating the ways of working as on describing how exactly this works. And as always, I experimented a lot, so I hasten to share the most interesting results.warning: under the cat there are a lot of pictures and gif-animations.TLDR
The project is available on github . You can see the current result with rainbow animation in TransitionRainbowView (), but I would not rush in your place, but I waited for the next article. In addition, when preparing it, I comb the code a bit.In this article, we will discuss only the basics, and affect only the contents of the Bases folder.Introduction
I admit, I was not going to write this article now. I had a plan according to which an article about animation was supposed to be the third or even the fourth in a row. However, I could not resist, I really wanted to provide an alternative point of view.I want to make a reservation right away. I do not believe that any errors were made in the mentioned article, or the approach used in it is incorrect. Not at all. It builds an object model of the process (animation), which, responding to the received signal, starts to do something. However, as for me, this article most likely reveals work with the Combine framework. Yes, this framework is an important part of SwiftUI, but it's more about react-like style in general than about animation.My option is certainly not more elegant, faster and easier to maintain. However, it reveals much better what is under the hood of SwiftUI, and indeed this was the purpose of the article - to figure it out first.As I said in a previous articleby SwiftUI, I began my dive into the world of mobile development right away with SwiftUI, ignoring UIKit. This, of course, has a price, but there are advantages. I am not trying to live in a new monastery according to the old charter. Honestly, I don’t yet know any charters, so I don’t have a rejection of the new. That is why, this article, it seems to me, can be of value not only for beginners, like me, but also for those who study SwiftUI already having background in the form of development on UIKit. It seems to me that many people lack a fresh look. Do not do the same thing, trying to fit a new tool into the old drawings, but change your vision according to new possibilities.We 1c-nicks went through this with “controlled forms”. This is a kind of SwiftUI in the world of 1s, which happened more than 10 years ago. In fact, the analogy is pretty accurate, because managed forms are just a new way to draw an interface. However, he completely changed the client-server interaction of the application as a whole, and the picture of the world in the minds of developers in particular. This was not easy, I myself did not want to study it for about 5 years, because I thought that many of the opportunities that were cut off there were simply necessary for me. But, as practice has shown, coding on managed forms is not only possible, but only necessary.However, let's not talk about it anymore. I got a detailed, independent guide that does not have any references, or other links with the mentioned article or the 1st past. Step by step, we will dive into the details, features, principles and limitations. Go.Animating Shape
How animation works in general
So, the main idea of animation is the transformation of a particular, discrete change into a continuous process. For example, the radius of the circle was 100 units, became 50 units. Without animation, the change will happen instantly, with animation - smoothly. How it works? Very simple. For smooth changes, we need to interpolate several values within the “It was ... It has become” segment. In the case of the radius, we will have to draw several intermediate circles with a radius of 98 units, 95 units, 90 units ... 53 units and, finally, 50 units. SwiftUI can do this easily and naturally, just wrap the code that performs this change in withAnimation {...}. It seems magic ... Until you want to implement something a little more complicated than “hello world”.Let's move on to the examples. The simplest and most understandable object for animation is considered to be animation of forms. Shape (I will still call the structure conforming to the shape form protocol) in SwiftUI is a structure with parameters that can fit itself into these boundaries. Those. it is a structure that has the function body (in rect: CGRect) -> Path. All the runtime needs to draw this form is to request its outline (the result of the function is an object of type Path, in fact, it is a Bezier curve) for the required size (specified as a function parameter, a rectangle of type CGRect).Shape is a stored structure. By initializing it, you store in the parameters everything you need to draw its outline. The size of the selection for this form can change, then all that is needed is to get a new Path value for the new CGRect frame, and voila.Let's start coding already:struct CircleView: View{
var radius: CGFloat
var body: some View{
Circle()
.fill(Color.green)
.frame(height: self.radius * 2)
.overlay(
Text("Habra")
.font(.largeTitle)
.foregroundColor(.gray)
)
}
}
struct CustomCircleView: View{
var radius: CGFloat
var body: some View{
CustomCircle()
.fill(Color.gray)
.frame(width: self.radius * 2, height: self.radius * 2)
.overlay(
Text("Habr")
.font(.largeTitle)
.foregroundColor(.green)
)
}
}
struct CustomCircleTestView: View {
@State var radius: CGFloat = 50
var body: some View {
VStack{
CircleView(radius: radius)
.frame(height: 200)
Slider(value: self.$radius, in: 42...100)
Button(action: {
withAnimation(.linear(duration: 1)){
self.radius = 50
}
}){
Text("set default radius")
}
}
}
}
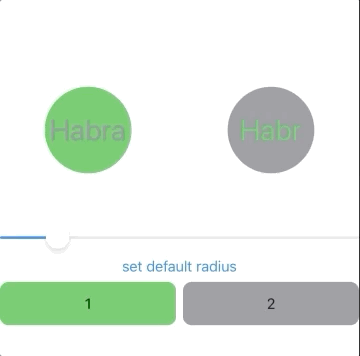
 So, we have a circle (Circle ()), the radius of which we can change using the slider. This happens smoothly, as the slider gives us all the intermediate values. However, when you click the “set default radius” button, the change also does not occur instantly, but according to the withAnimation (.linear (duration: 1)) instruction. Linearly, without acceleration, stretched for 1 second. Class! We mastered the animation! We disagree :)But what if we want to implement our own form and animate its changes? Is it hard to do this? Let's check.I made a copy of Circle as follows:
struct CustomCircle: Shape{
    public func path(in rect: CGRect) -> Path{
        let radius = min(rect.width, rect.height) / 2
        let center = CGPoint(x: rect.width / 2, y: rect.height / 2)
        return Path(){path in
            if rect.width > rect.height{
                path.move(to: CGPoint(x: center.x, y: 0))
                let startAngle = Angle(degrees: 270)
                path.addArc(center: center, radius: radius, startAngle: startAngle, endAngle:  startAngle + Angle(degrees: 360), clockwise: false)
            }else{
                path.move(to: CGPoint(x: 0, y: center.y))
                let startAngle = Angle(degrees: 0)
                path.addArc(center: center, radius: radius, startAngle: startAngle, endAngle:  startAngle + Angle(degrees: 360), clockwise: false)
            }
            path.closeSubpath()
        }
    }
}
The radius of the circle is calculated as half the smaller of the width and height of the border of the screen area allocated to us. If the width is greater than the height, we start from the middle of the upper border (Note 1), describe the full circle in a clockwise direction (Note 2), and close our outline on this. If the height is greater than the width, we start from the middle of the right border, we also describe the full circle clockwise and close the contour.Note 1Apple ( ) . , (0, 0), (x, y), x — , y — . .. y. y — . , . 90 , 180 — , 270 — .
Note 21 , “ ” “ ” .
Core Graphics (SwiftUI ):
In a flipped coordinate system (the default for UIView drawing methods in iOS), specifying a clockwise arc results in a counterclockwise arc after the transformation is applied.
Let's check how our new circle will respond to changes in the withAnimation block:struct CustomCircleView: View{
var radius: CGFloat
var body: some View{
CustomCircle()
.fill(Color.gray)
.frame(width: self.radius * 2, height: self.radius * 2)
.overlay(
Text("Habr")
.font(.largeTitle)
.foregroundColor(.green)
)
}
}
struct CustomCircleTestView: View {
@State var radius: CGFloat = 50
var body: some View {
VStack{
HStack{
CircleView(radius: radius)
.frame(height: 200)
CustomCircleView(radius: radius)
.frame(height: 200)
}
Slider(value: self.$radius, in: 42...100)
Button(action: {
withAnimation(.linear(duration: 1)){
self.radius = 50
}
}){
Text("set default radius")
}
}
}
}
Wow! We learned how to make our own free-form pictures and animate them! It is so?Not really. All the work here is done by the .frame modifier (width: self.radius * 2, height: self.radius * 2). Inside the withAnimation block {...} we changeStatea variable, it sends a signal to reinitialize CustomCircleView () with a new radius value, this new value falls into the .frame () modifier, and this modifier already can animate parameter changes. Our CustomCircle () form reacts to this with animation, because it does not depend on anything other than the size of the area selected for it. Changing the area occurs with the animation, (i.e. gradually, interpolating the intermediate values between it was-has become), therefore our circle is drawn with the same animation.Let's simplify (or still complicate?) Our form a little. We will not calculate the radius based on the size of the available area, but we will transfer the radius in the finished form, i.e. make it a stored structure parameter.struct CustomCircle: Shape{
var radius: CGFloat
public func path(in rect: CGRect) -> Path{
...
}
}
struct CustomCircleView: View{
var radius: CGFloat
var body: some View{
CustomCircle(radius: radius)
.fill(Color.gray)
...
}
}
Well, magic is irretrievably lost.We excluded the frame () modifier from our CustomCircleView (), shifting the responsibility for the size of the circle to the shape itself, and the animation disappeared. But it doesn’t matter; to teach a form to animate changes in its parameters is not too difficult. To do this, you need to implement the requirements of the Animatable protocol:struct CustomCircle: Shape, Animatable{
var animatableData: CGFloat{
get{
radius
}
set{
print("new radius is \(newValue)")
radius = newValue
}
}
var radius: CGFloat
public func path(in rect: CGRect) -> Path{
...
}
Voila! The magic is back again!And now we can confidently say that our form is really animated - it can reflect changes in its parameters with animation. We gave the system a window where it can cram the interpolated values needed for the animation. If there is such a window, the changes are animated. If it is not, the changes take place without animation, i.e. instantly. Nothing complicated, right?AnimatableModifier
How to animate changes inside a View
But let's go directly to View. Suppose we want to animate the position of an element inside a container. In our case, it will be a simple rectangle of green color and a width of 10 units. We will animate its horizontal position.struct SimpleView: View{
@State var position: CGFloat = 0
var body: some View{
VStack{
ZStack{
Rectangle()
.fill(Color.gray)
BorderView(position: position)
}
Slider(value: self.$position, in: 0...1)
Button(action: {
withAnimation(.linear(duration: 1)){
self.position = 0
}
}){
Text("set to 0")
}
}
}
}
struct BorderView: View, Animatable{
public var animatableData: CGFloat {
get {
print("Reding position: \(position)")
return self.position
}
set {
self.position = newValue
print("setting position: \(position)")
}
}
let borderWidth: CGFloat
init(position: CGFloat, borderWidth: CGFloat = 10){
self.position = position
self.borderWidth = borderWidth
print("BorderView init")
}
var position: CGFloat
var body: some View{
GeometryReader{geometry in
Rectangle()
.fill(Color.green)
.frame(width: self.borderWidth)
.offset(x: self.getXOffset(inSize: geometry.size), y: 0)
}
}
func getXOffset(inSize: CGSize) -> CGFloat{
print("calculating position: \(position)")
return -inSize.width / 2 + inSize.width * position
}
}

BorderView init
calculating position: 0.4595176577568054
BorderView init
calculating position: 0.468130886554718
BorderView init
calculating position: 0.0
Firstly, each change in the position value using the slider causes the BorderView to reinitialize with the new value. That is why we see a smooth movement of the green line after the slider, the slider simply very often reports a change in the variable, and it looks like an animation, but it is not. Using the slider is really convenient when you debug animation. You can use it to track some transitional states.Secondly, we see that the calculating position simply became equal to 0, and no intermediate logs, as was the case with the correct animation of the circle. Why?The thing, as in the previous example, is in the modifier. This time, the .offset () modifier gets the new indent value, and it animates the change itself. Those. in fact, it’s not the change in the position parameter that we intended to be animated, but the horizontal change of the indent in the .offset () modifier derived from it. In this case, this is a harmless replacement, the result is the same. But since they have come, let's dig deeper. Let's make our own modifier, which will receive position (from 0 to 1) at the input, it will receive the size of the available area and calculate the indent.struct BorderPosition: ViewModifier{
var position: CGFloat
func body(content: Content) -> some View {
GeometryReader{geometry in
content
.offset(x: self.getXOffset(inSize: geometry.size), y: 0)
.animation(nil)
}
}
func getXOffset(inSize: CGSize) -> CGFloat{
let offset = -inSize.width / 2 + inSize.width * position
print("at position \(position) offset is \(offset)")
return offset
}
}
extension View{
func borderIn(position: CGFloat) -> some View{
self.modifier(BorderPosition(position: position))
}
}
In the original BorderView, respectively, the GeometryReader is no longer needed, as well as the function for calculating the indent:struct BorderView: View, Animatable{
...
var body: some View{
Rectangle()
.fill(Color.green)
.frame(width: self.borderWidth)
.borderIn(position: position)
}
}
Yes, we still use the .offset () modifier inside our modifier, but after it we added the .animation (nil) modifier, which blocks our own offset animation. I understand that at this stage you can decide that it is enough to remove this lock, but then we will not get to the bottom of the truth. And the truth is that our trick with animatableData for BorderView does not work. In fact, if you look at the documentation for the Animatable protocol , you will notice that the implementation of this protocol is supported only for AnimatableModifier, GeometryEffect and Shape. View is not among them.The right approach is to animate modifications
The approach itself, when we ask View to animate some changes, was incorrect. For View, you cannot use the same approach as for forms. Instead, the animation needs to be embedded in each modifier. Most built-in modifiers already support animation out of the box. If you want animation for your own modifiers, you can use the AnimatableModifier protocol instead of ViewModifier. And there you can implement the same thing as when animating shape changes, as we did above.struct BorderPosition: AnimatableModifier {
var position: CGFloat
let startDate: Date = Date()
public var animatableData: CGFloat {
get {
print("reading position: \(position) at time \(Date().timeIntervalSince(startDate))")
return position
}
set {
position = newValue
print("setting position: \(position) at time \(Date().timeIntervalSince(startDate))")
}
}
func body(content: Content) -> some View {
...
}
...
}
Now everything is right. Messages in the console help to understand that our animation really works, and .animation (nil) inside the modifier does not interfere with it at all. But let's still figure out exactly how it works.First, you need to understand what a modifier is.
Here we have a View. As I said in the previous part, this is a structure with stored parameters and assembly instructions. This instruction, by and large, does not contain a sequence of actions, which is the usual code that we write in a non-declarative style, but a simple list. It lists the other View, the modifiers applied to them, and the containers in which they are included. We are not interested in containers yet, but let's talk more about modifiers.A modifier is again a structure with stored parameters, and View processing instructions. This is actually the same instruction as the View - we can use other modifiers, use containers (for example, I used the GeometryReader a little higher) and even other View. But we only have incoming content, and we need to somehow change it using this instruction. Modifier parameters are part of the instruction. But the most interesting is that they are stored.In a previous article, I said that the instruction itself is not stored, that it is thrown every time after the View is updated. Everything is so, but there is a nuance. As a result of the work of this instruction, we get not quite a picture, as I said earlier - it was a simplification. Modifiers do not disappear after the operation of this instruction. They remain so while the parent View exists.Some primitive analogies
How would we describe a table in a declarative style? Well, we would list 4 legs and a countertop. They would combine them into some kind of container, and with the help of some modifiers would prescribe how they are fastened to each other. For example, each leg would indicate the orientation with respect to the countertop, and the position - which leg is pinned to which corner. Yes, we can throw out the instructions after assembly, but the nails will remain in the table. So are the modifiers. At the exit from the body function, we have not quite a table. Using body, we create table elements (view), and fasteners (modifiers), and lay it all out in drawers. The table itself is assembled by a robot. What fasteners you put in a box to each leg, you will get such a table.The .modifier (BorderPosition (position: position)) function, with which we turned the BorderPosition structure into a modifier, only puts an additional screw in the drawer to the table leg. The BorderPosition structure is this screw. The render, at the time of rendering, takes this box, takes out a leg from it (Rectangle () in our case), and sequentially gets all modifiers from the list, with the values stored in them. The body function of each modifier is an instruction on how to screw a leg to a tabletop with this screw, and the structure itself with stored properties, this is that screw.Why is it important to understand this in the context of animation? Because the animation allows you to change the parameters of one modifier without affecting the others, and then re-render the image. If you do the same by changing some@Stateparameters - this will cause reinitialization of nested View, modifier structures, and so on, all along the chain. But the animation is not.In fact, when we change the value of position when we press a button, it changes. Right to the end. No intermediate states are stored in the variable itself, which cannot be said about the modifier. For each new frame, the values of the modifier parameters change according to the progress of the current animation. If the animation lasts 1 second, then every 1/60 of a second (the iphone shows exactly that number of frames per second), the animatableData value inside the modifier will change, then it will be read by the render for rendering, after which, after another 1/60 of a second it will be changed again, and read again by the render.Typically, we first get the final state of the entire View, remember it, and only then the animation mechanism begins to palm off the interpolated position values into the modifier. The initial state is not stored anywhere. Somewhere in the bowels of SwiftUI, only the difference between the initial and final state is stored. This difference is each time multiplied by the fraction of elapsed time. This is how the interpolated value is calculated, which is subsequently substituted into animatableData.Difference =Steel
- Was Current Value = Steel - Difference * (1 - Time Elapsed) Time Elapsed = Time From StartAnimations / DurationAnimations Thecurrent value needs to be calculated as many times as the number of frames we need to show.Why is the “Was” not used explicitly? The fact is that SwiftUI does not store the initial state. Only the difference is stored: so, in the event of some kind of failure, you can simply turn off the animation, and go to the current state of “become”.This approach allows you to make the animation reversible. Suppose, somewhere in the middle of one animation, the user pressed a button again, and we again changed the value of the same variable. In this case, all we need to do to beat this change beautifully is to use the “Current” value inside the animation at the time of the new change, remember the new Difference, and start a new animation based on the new “Became” and the new “Difference” . Yes, in fact, these transitions from one animation to another may be a little more difficult to simulate inertia, but the meaning, I think, is understandable.What is interesting is that the animation each frame asks for the current value inside the modifier (using a getter). This, as you can see from the service records in the log, is responsible for the status of “Steel”. Then, using the setter, we set the new state that is current for this frame. After that, for the next frame, the current value from the modifier is again requested - and it again “Has become”, i.e. The final value to which the animation is moving. It is likely that copies of modifier structures are used for animation, and a getter of one structure (a real modifier of the actual View) is used to get the value “Steel”, and a setter of another (a temporary modifier used for animation) is used. I haven’t come up with a way to make sure of this, but by indirect indications everything looks just like that. Anyway,changes within the animation do not affect the stored value of the modifier structure of the current View. If you have ideas on how to find out exactly what exactly happens with the getter and setter, write about it in the comments, I will update the article.Several parameters
Until this moment, we had only one parameter for animation. The question may arise, but what about if more than one parameter is passed to the modifier? And if both of them need to be animated at the same time? Here's how with the frame modifier (width: height :) for example. After all, we can simultaneously change both the width and the height of this View, and we want the change to occur in one animation, how to do it? After all, the AnimatableData parameter is one, what can I substitute into it?If you look, Apple has only one requirement for animatableData. The data type that you substitute into it must satisfy the VectorArithmetic protocol. This protocol requires the object to ensure the minimum arithmetic operations that are necessary in order to be able to form a segment of two values, and interpolate the points inside this segment. The operations necessary for this are addition, subtraction and multiplication. The difficulty is that we must perform these operations with a single object that stores several parameters. Those. we must pack the entire list of our parameters in a container that will be a vector. Apple provide such an object out of the box, and offer us to use a turnkey solution for not very difficult cases. It is called AnimatablePair.Let's change the task a bit. We need a new modifier that will not only move the green bar, but also change its height. These will be two independent modifier parameters. I will not give the full code of all the changes that need to be done, you can see it on the github in the SimpleBorderMove file. I will show only the modifier itself:struct TwoParameterBorder: AnimatableModifier {
var position: CGFloat
var height: CGFloat
let startDate: Date = Date()
public var animatableData: AnimatablePair<CGFloat, CGFloat> {
get {
print("animation read position: \(position), height: \(height)")
return AnimatablePair(position, height)
}
set {
self.position = newValue.first
print("animating position at \(position)")
self.height = newValue.second
print("animating height at \(height)")
}
}
init(position: CGFloat, height: CGFloat){
self.position = position
self.height = height
}
func body(content: Content) -> some View {
GeometryReader{geometry in
content
.animation(nil)
.offset(x: -geometry.size.width / 2 + geometry.size.width * self.position, y: 0)
.frame(height: self.height * (geometry.size.height - 20) + 20)
}
}
}
I added another slider and a button for randomly changing both parameters at once in the parent view of SimpleView, but there’s nothing interesting, so for the full code, welcome to the github.Everything works, we really get a consistent change in the pair of parameters packed in the AnimatablePair tuple. Not bad.Nothing confuses in this implementation? Personally, I tensed up when I saw this design:
self.position = newValue.first
self.height = newValue.second
I didn’t indicate anywhere which of these parameters should go first and which second. How does SwiftUI decide which value to put in first and which value in second? Well, doesn’t it match the names of the parameters of the function with the names of the attributes of the structure?The first idea was the order of the attributes in the parameters of the function and their types, as happens with @EnvironmentObject. There, we simply put the values in the box, without assigning them any labels, and then we get them out of there, also without indicating any labels. There, type matters, and within one type, order. In what order they put in the box, in the same way and get it. I tried a different order of the arguments of the function, the order of the arguments to initialize the structure, the order of the attributes of the structure itself, generally banged my head against the wall, but could not confuse SwiftUI so that it began to animate the position with height values and vice versa.Then it dawned on me. I myself indicate which parameter will be the first and which second in the getter. SwiftUI does not need to know exactly how we initialize this structure. He can get the animatableData value before the change, get it after the change, calculate the difference between them, and return the same difference, scaled in proportion to the elapsed time interval, to our setter. It generally does not need to know anything about the value itself inside AnimatableData. And if you do not confuse the order of variables in two adjacent lines, then everything will be in order, no matter how complicated the structure of the rest of the code.But let's check it out. After all, we can create our own container vector (oh, I love it, create our own implementation of existing objects, you might have noticed this from a previous article). We describe the elementary structure, declare support for the VectorArithmetic protocol, open the error about the protocol not conforming, click fix, and we get the declaration of all the required functions and calculated parameters. It remains only to fill them.In the same way, we fill our object with the required methods for the AdditiveArithmetic protocol (VectorArithmetic includes its support).
struct MyAnimatableVector: VectorArithmetic{
    static func - (lhs: MyAnimatableVector, rhs: MyAnimatableVector) -> MyAnimatableVector {
        MyAnimatableVector(position: lhs.position - rhs.position, height: lhs.height - rhs.height)
    }

    static func + (lhs: MyAnimatableVector, rhs: MyAnimatableVector) -> MyAnimatableVector {
        MyAnimatableVector(position: lhs.position + rhs.position, height: lhs.height + rhs.height)
    }

    mutating func scale(by rhs: Double) {
        self.position = self.position * CGFloat(rhs)
        self.height = self.height * CGFloat(rhs)
    }

    var magnitudeSquared: Double{
         Double(self.position * self.position) + Double(self.height * self.height)
    }

    static var zero: MyAnimatableVector{
        MyAnimatableVector(position: 0, height: 0)
    }

    var position: CGFloat
    var height: CGFloat
}
- I think why we need + and - obviously.
- scale is a function of scaling. We take the difference “It was - It has become” and multiply it by the current stage of the animation (from 0 to 1). “It became + Difference * (1 - Stage)” and there will be a current value which we should palm off in animatableData
- Zero is probably needed to initialize new objects whose values will be used for animation. The animation uses .zero at the very beginning, but I could not figure out exactly how. However, I do not think that this is important.
- magnitudeSquared is a scalar product of a given vector with itself. For two-dimensional space, this means the length of the vector squared. This is probably used to be able to compare two objects with each other, not elementwise, but as a whole. It seems to be not used for animation purposes.
Generally speaking, the “- =” “+ =” functions are also included in the protocol support, but for the structure they can be generated automatically in this form static func -= (lhs: inout MyAnimatableVector, rhs: MyAnimatableVector) {
lhs = lhs - rhs
}
static func += (lhs: inout MyAnimatableVector, rhs: MyAnimatableVector) {
lhs = lhs + rhs
}
For clarity, I set out all this logic in the form of a diagram. The picture is clickable. What we get during the animation is highlighted in red - every next tick (1/60 second) the timer gives a new value of t, and we, in the setter of our modifier, get a new value of animatableData. That's how animation works under the hood. At the same time, it is important to understand that a modifier is a stored structure, and a copy of the current modifier with a new, current state is used to display the animation.
Why AnimatableData can only be a structure
There is one more point. You cannot use classes as an AnimatableData object. Formally, you can describe for a class all the necessary methods of the corresponding protocol, but this will not take off, and here's why. As you know, a class is a reference data type, and a structure is a value-based data type. When you create one variable based on another, in the case of a class, you copy a link to this object, and in the case of a structure, you create a new object based on the values of the existing one. Here is a small example illustrating this difference: struct TestStruct{
var value: CGFloat
mutating func scaled(by: CGFloat){
self.value = self.value * by
}
}
class TestClass{
var value: CGFloat
func scaled(by: CGFloat){
self.value = self.value * by
}
init(value: CGFloat){
self.value = value
}
}
var stA = TestStruct(value: 5)
var stB = stA
stB.scaled(by: 2)
print("structs: a = \(stA.value), b = \(stB.value))")
var clA = TestClass(value: 5)
var clB = clA
clB.scaled(by: 2)
print("classes: a = \(clA.value), b = \(clB.value))")
With animation exactly the same thing happens. We have an AnimatableData object representing the difference between “was” and “became”. We need to calculate part of this difference to reflect on the screen. To do this, we must copy this difference and multiply it by a number representing the current stage of the animation. In the case of the structure, this will not affect the difference itself, but in the case of the class it will. The first frame that we draw is the “was” state. To do this, we need to calculate Steel + Difference * Current Stage - Difference. In the case of the class, in the first frame we multiply the difference by 0, zeroing it, and all subsequent frames are drawn so that the difference = 0. i.e. the animation seems to be drawn correctly, but in fact we see an instant transition from one state to another, as if there was no animation.You can probably write some kind of low-level code that creates new memory addresses for the multiplication result - but why? You can just use structures - they are created for that.For those who want to thoroughly understand exactly how SwiftUI calculates intermediate values, by what operations and at what moment, messages are pushed into the console in the project . In addition, I inserted sleep 0.1 second there to simulate resource-intensive calculations inside the animation, have fun :)Screen animation: .transition ()
Up to this point, we talked about animating a change in a value passed to a modifier or form. These are pretty powerful tools. But there is another tool that also uses animation - this is the animation of the appearance and disappearance of the View.In the last article, we talked about the fact that in the declarative style of if-else, this is not at all control over the flow of code in runtime, but rather a view of Schrödinger. This is a container containing two View at the same time, which decides which one to show in accordance with a certain condition. If you miss the else block, then EmptyView is displayed instead of the second view.Switching between the two View can also be animated. To do this, use the .transition () modifier.struct TransitionView: View {
let views: [AnyView] = [AnyView(CustomCircleTestView()), AnyView(SimpleBorderMove())]
@State var currentViewInd = 0
var body: some View {
VStack{
Spacer()
ZStack{
ForEach(views.indices, id: \.self){(ind: Int) in
Group{
if ind == self.currentViewInd{
self.views[ind]
}
}
}
}
HStack{
ForEach(views.indices, id: \.self){(ind: Int) in
RoundedRectangle(cornerRadius: 10)
.fill(ind == self.currentViewInd ? Color.green : Color.gray)
.overlay(
Text("\(ind + Int(1))"))
.onTapGesture{
withAnimation{
self.currentViewInd = ind
}
}
}
}
.frame(height: 50)
Spacer()
}
}
}
Let's watch how it works. First of all, in advance, even at the initialization stage of the parent view, we created and placed several Views in the array. The array is of type AnyView, because the elements of the array must have the same type, otherwise they cannot be used in ForEach. Opaque result type from the previous article , remember?Next, we prescribed enumeration of the indices of this array, and for each of them we display view by this index. We are forced to do this, and not iterate over View immediately, because to work with ForEach, we need to assign an internal identifier to each element so that SwiftUI can iterate over the contents of the collection. As an alternative, we would have to create a proxy identifier in each View, but why, if indexes can be used?We wrap each view from the collection in a condition, and show it only if it is active. However, the if-else construct just cannot exist here, the compiler takes it for control of the flow, so we enclose all this in Group so that the compiler understands exactly what it is View, or more precisely, instructions for ViewBuilder to create an optional container ConditionalContent <View1, View2>.Now, when changing the value of currentViewInd, SwiftUI hides the previous active view, and shows the current one. How do you like this navigation inside the application?All that remains to be done is to put the currentViewInd change in the withAnimation wrapper, and switching between windows will become smooth.Add the .transition modifier, specifying .scale as the parameter. This will make the animation of the appearance and disappearance of each of these views different - using the scaling rather than transparency used by default SwiftUI. ForEach(views.indices, id: \.self){(ind: Int) in
Group{
if ind == self.currentViewInd{
self.views[ind]
.transition(.scale)
}
}
}
Note that the view appears and disappears with the same animation, only the disappearance scrolls in the reverse order. In fact, we can individually assign animations for both the appearance and the disappearance of a view. An asymmetric transition is used for this. Group{
if ind == self.currentViewInd{
self.views[ind]
.transition(.asymmetric(
insertion: insertion: AnyTransition.scale(scale: 0.1, anchor: .leading).combined(with: .opacity),
removal: .move(edge: .trailing)))
}
}
The same .scale animation is used to appear on the screen, but now we have specified the parameters for its use. It does not begin with a size zero (point), but with a size of 0.1 from the usual one. And the starting position of the small window is not in the center of the screen, but shifted to the left edge. In addition, not one transition is responsible for the appearance, but two. They can be combined with .combined (with :). In this case, we have added transparency.The disappearance of the view is now rendered by another animation - sweeping the right edge of the screen. I made the animation a little slower so you can take a look at it.And as always, I can’t wait to write my own version of transit animation. This is even simpler than animated forms or modifiers.struct SpinTransitionModifier: ViewModifier {
let angle: Double
let anchor: UnitPoint
func body(content: Content) -> some View {
content
.rotationEffect(Angle(degrees: angle), anchor: anchor)
.clipped()
}
}
extension AnyTransition {
static func spinIn(anchor: UnitPoint) -> AnyTransition {
.modifier(
active: SpinTransitionModifier(angle: -90, anchor: anchor),
identity: SpinTransitionModifier(angle: 0, anchor: anchor))
}
static func spinOut(anchor: UnitPoint) -> AnyTransition {
.modifier(
active: SpinTransitionModifier(angle: 90, anchor: anchor),
identity: SpinTransitionModifier(angle: 0, anchor: anchor))
}
}
Group{
if ind == self.currentViewInd{
Rectangle()
.fill(Color.gray)
.frame(width: 100, height: 100)
.border(Color.black, width: 2)
.overlay(Text("\(ind + 1)"))
.transition(.asymmetric(
insertion: .spinIn(anchor: .bottomTrailing),
removal: .spinOut(anchor: .bottomTrailing)))
}
}
And to make this movement even better, I removed .clipped () from the SpinTransitionModifier modifier:struct SpinTransitionModifier: ViewModifier {
let angle: Double
let anchor: UnitPoint
func body(content: Content) -> some View {
content
.rotationEffect(Angle(degrees: angle), anchor: anchor)
}
}
By the way, now we need SpinTransitionModifier in our own modifier altogether. It was created only in order to combine the two modifiers, rotationEffect and clipped () into one, so that the rotation animation does not go beyond the scope selected for our View. Now, we can use .rotationEffect () directly inside .modifier (), we do not need an intermediary in the form of SpinTransitionModifier.When View Dies
An interesting point is the View life cycle if it is placed in an if-else. View, although initiated, and recorded as an array element, is not stored in memory. All herStateparameters are reset to default the next time they appear on the screen. This is almost the same as initialization. Despite the fact that the object-structure itself still exists, the render removed it from its field of view, for it it is not. On the one hand, this reduces memory usage. If you have a large number of complex Views in the array, the render would have to draw them all constantly, reacting to changes - this negatively affected the performance. If I am not mistaken, that was the case before the Xcode 11.3 update. Now, inactive views are unloaded from the render memory.On the other hand, we must move all important state beyond the scope of this View. For this, it is best to use @EnvironmentObject variables.Returning to the life cycle, it should also be noted that the .onAppear {} modifier, if one is registered inside this View, works immediately after changing the condition and the appearance of the View on the screen, even before the animation starts. Accordingly, onDisappear {} is triggered after the end of the disappearance animation. Keep this in mind if you plan to use them with transition animation.What's next?
Phew It turned out quite voluminously, but in detail, and, I hope, intelligibly. Honestly, I was hoping to talk about rainbow animation as part of one article, but I could not stop in time with the details. So wait for the continuation.The next part expects us:- use of gradients: linear, circular and angular - everything will come in handy
- Color is not color at all: choose wisely.
- looped animation: how to start and how to stop, and how to stop immediately (without animation, changing the animation - yes, there is one too)
- current stream animation: priorities, overrides, different animation for different objects
- details about animation timings: we will drive timings both in the tail and in the mane, right up to our own implementation of timingCurve (oh, keep me seven :))
- how to find out the current moment of the played animation
- If SwiftUI is not enough
I will talk about all this in detail using the example of creating rainbow animation, as in the picture:I did not go the easy way, but collected all the rakes I could reach, embodying this animation on the principles described above. The story about this should turn out to be very informative, and rich in tricks and all kinds of hacks, about which there were few reports, and which will be useful to those who decide to become a pioneer in SwiftUI. It will appear approximately in a week or two. By the way, you can subscribe so as not to miss. But this, of course, only if the material seems useful to you, and the method of presentation is approved. Then, your subscription will help to quickly bring new articles to the top, bringing them to a wider audience early. Otherwise, write in the comments what is wrong.