 polargraph.co.ukThey say that Russians harness for a long time, but go fast. The idea to collect a half-paragraph came to me 5 years ago after reading an article about a player on floppy drives . First I found a drawbot on floppy, and then a half-paragraph. Do not ask what is the relationship between this, it is not. Mostly used the manual with instructables .
Accessories
- Arduino uno
- AdaFruit's Motorshield Motor Driver. I had a Motor Drive Shield L293D for Arduino / Wze.
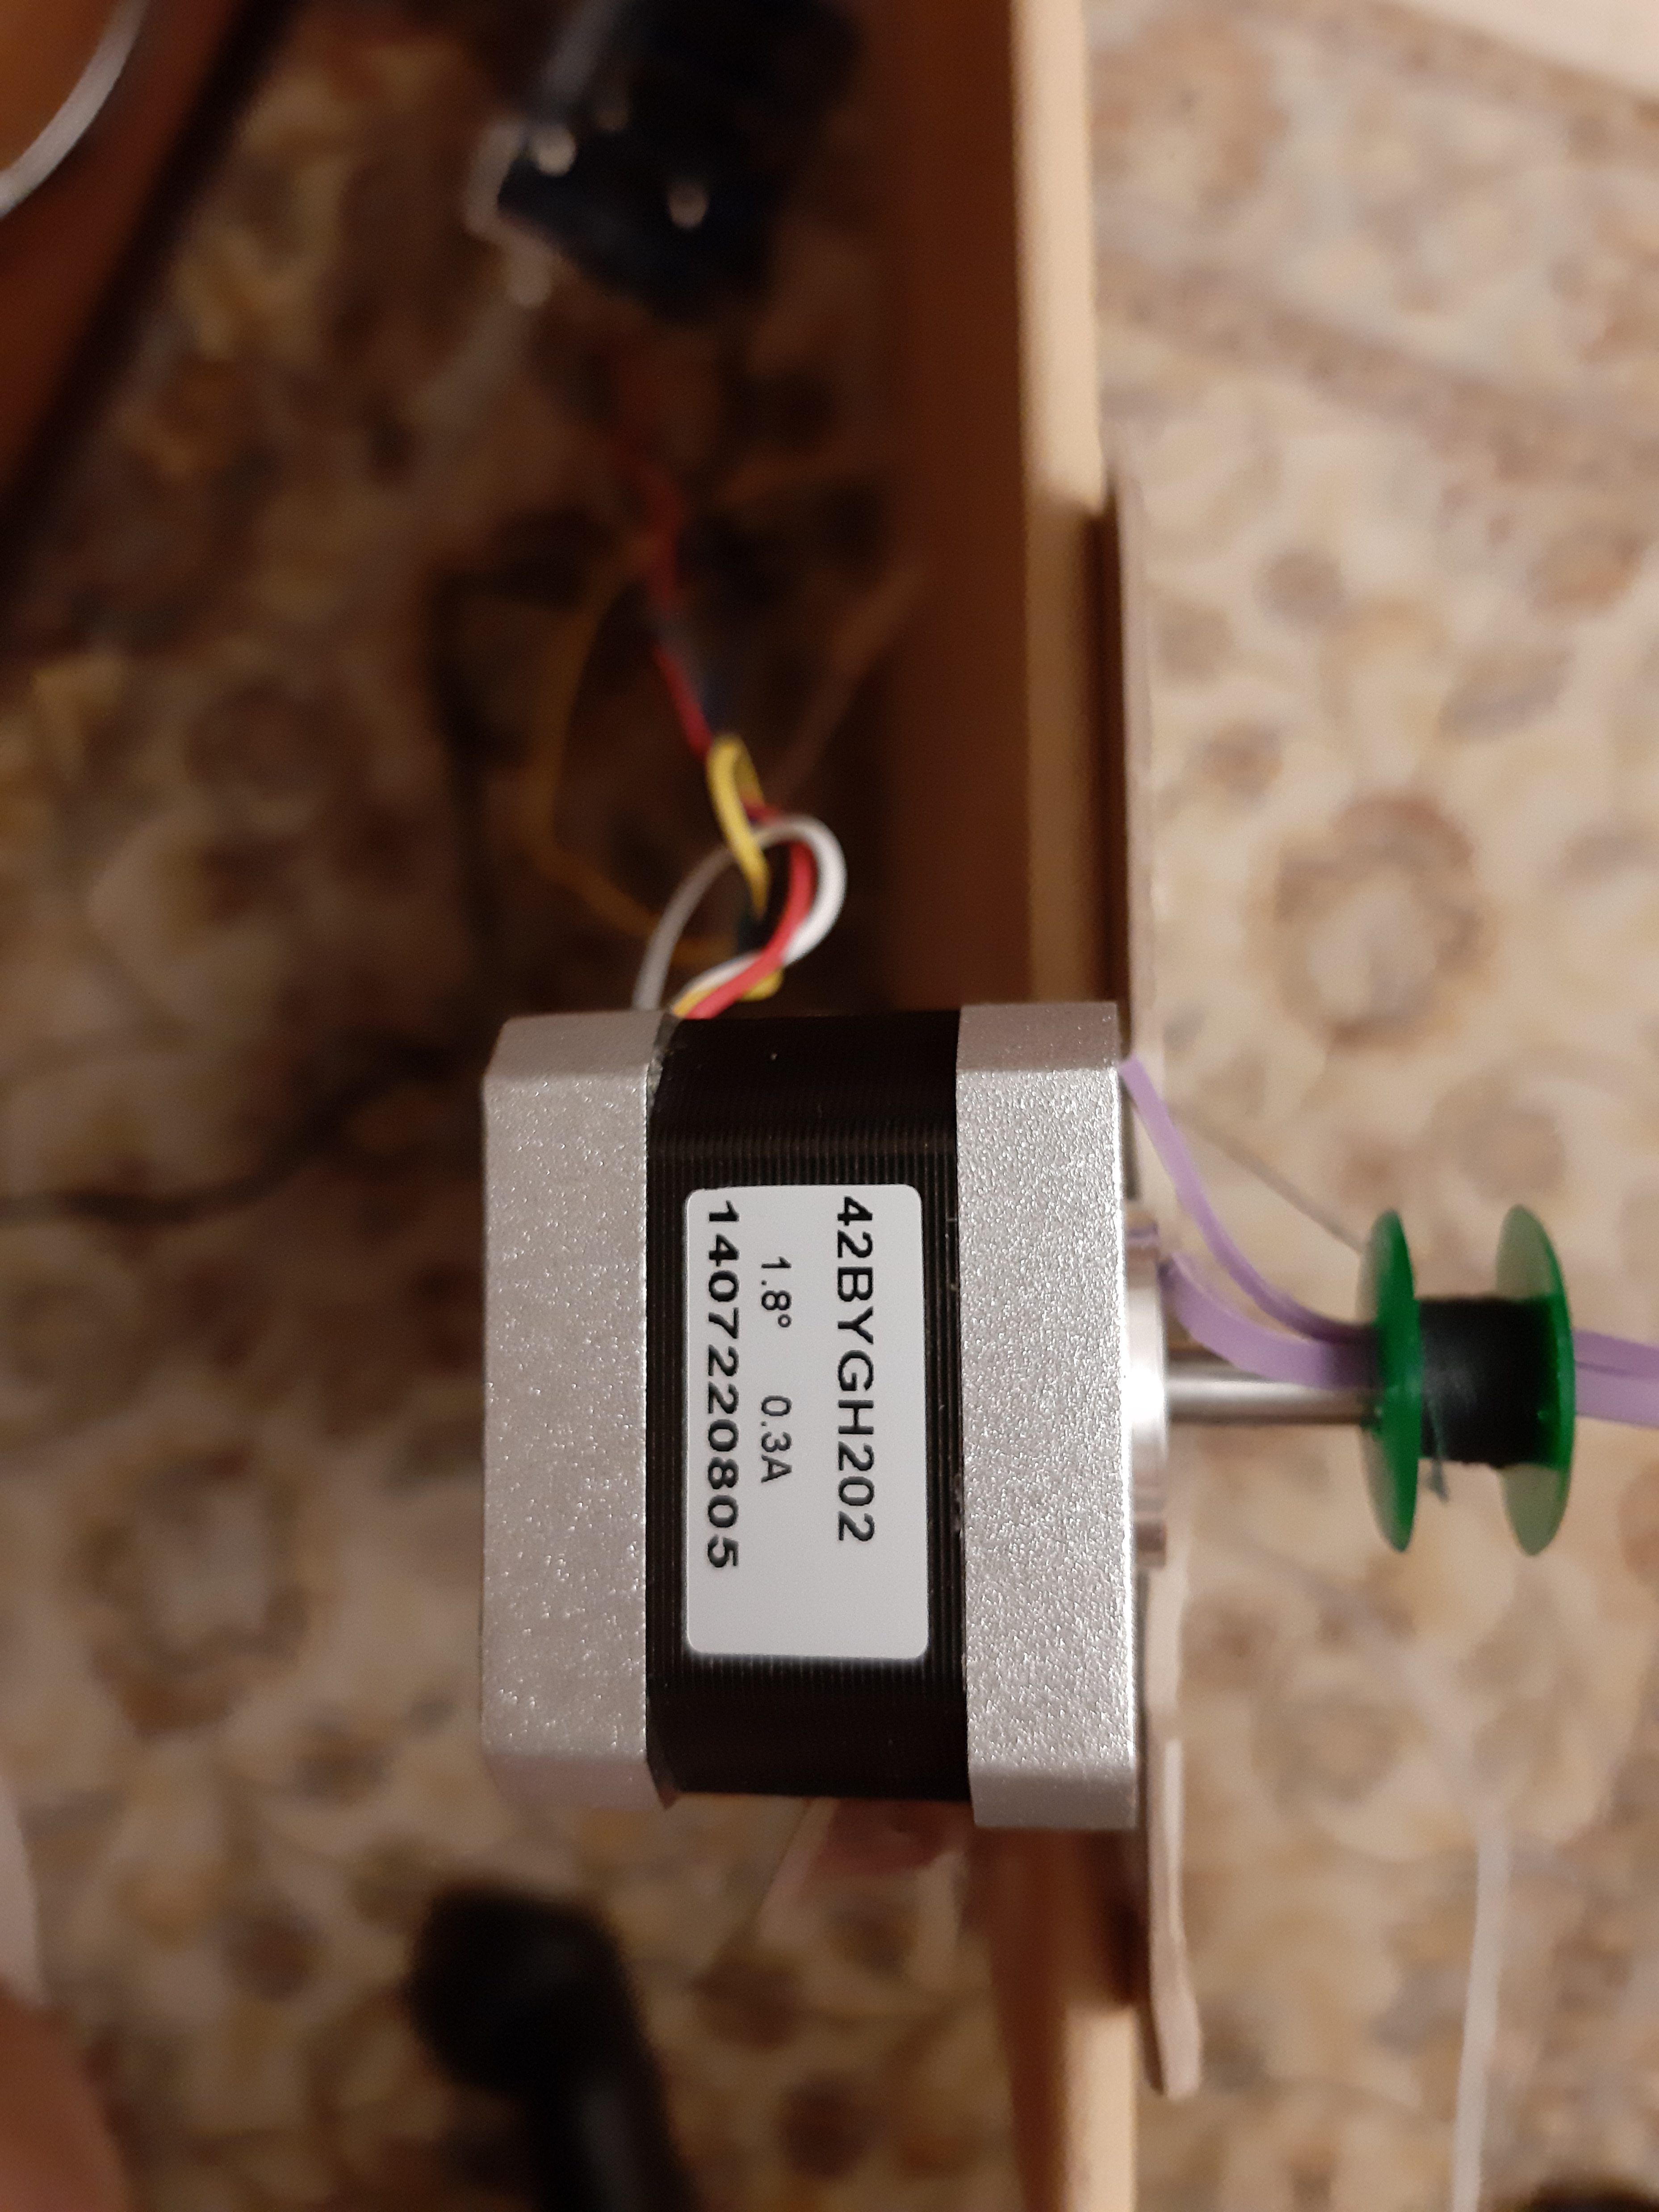
- 2 stepper motors NEMA-17. I used the Hybrid Stepping Motor 42BYGH202 / Wze.
- AC / DC power supply
- Gondola. I made it from a disk stand, I need to make two holes for attaching the cords, and the third for the load.

instructables.com - Chassis from bobbins from the sewing machine (there is a gap between the bobbin and the axis of the engine, I put a piece of rubber). Better to use fishing line, rather than thread.
- The surface on which the motors are mounted. The bigger, the better. The author with instructables used motor supports (brackets), I just attached them to the cardboard that I glued to the A2 tablet.
Arduino
Install the latest version of the Arduino IDE (the old one cannot load the code). Set the path to the folder with the sketches (/ sketches /): File -> Settings -> Location of the sketch folder.Download the code from the euphy github .Unpack the archive. Copy the Adafruit and AccelStepper libraries to the / sketches / libraries / folder, the polargraph_server_a1 folder to the / sketches / folder.Launch the Arduino IDE. File -> Folder with sketches -> polargraph_server_a1. We compile, upload to the board.Stepper motors
About stepper motors there is a wonderful article on Habr. By trial and error, I connected them to the board: the left engine - to the terminals M1, M2, the right - M3, M4.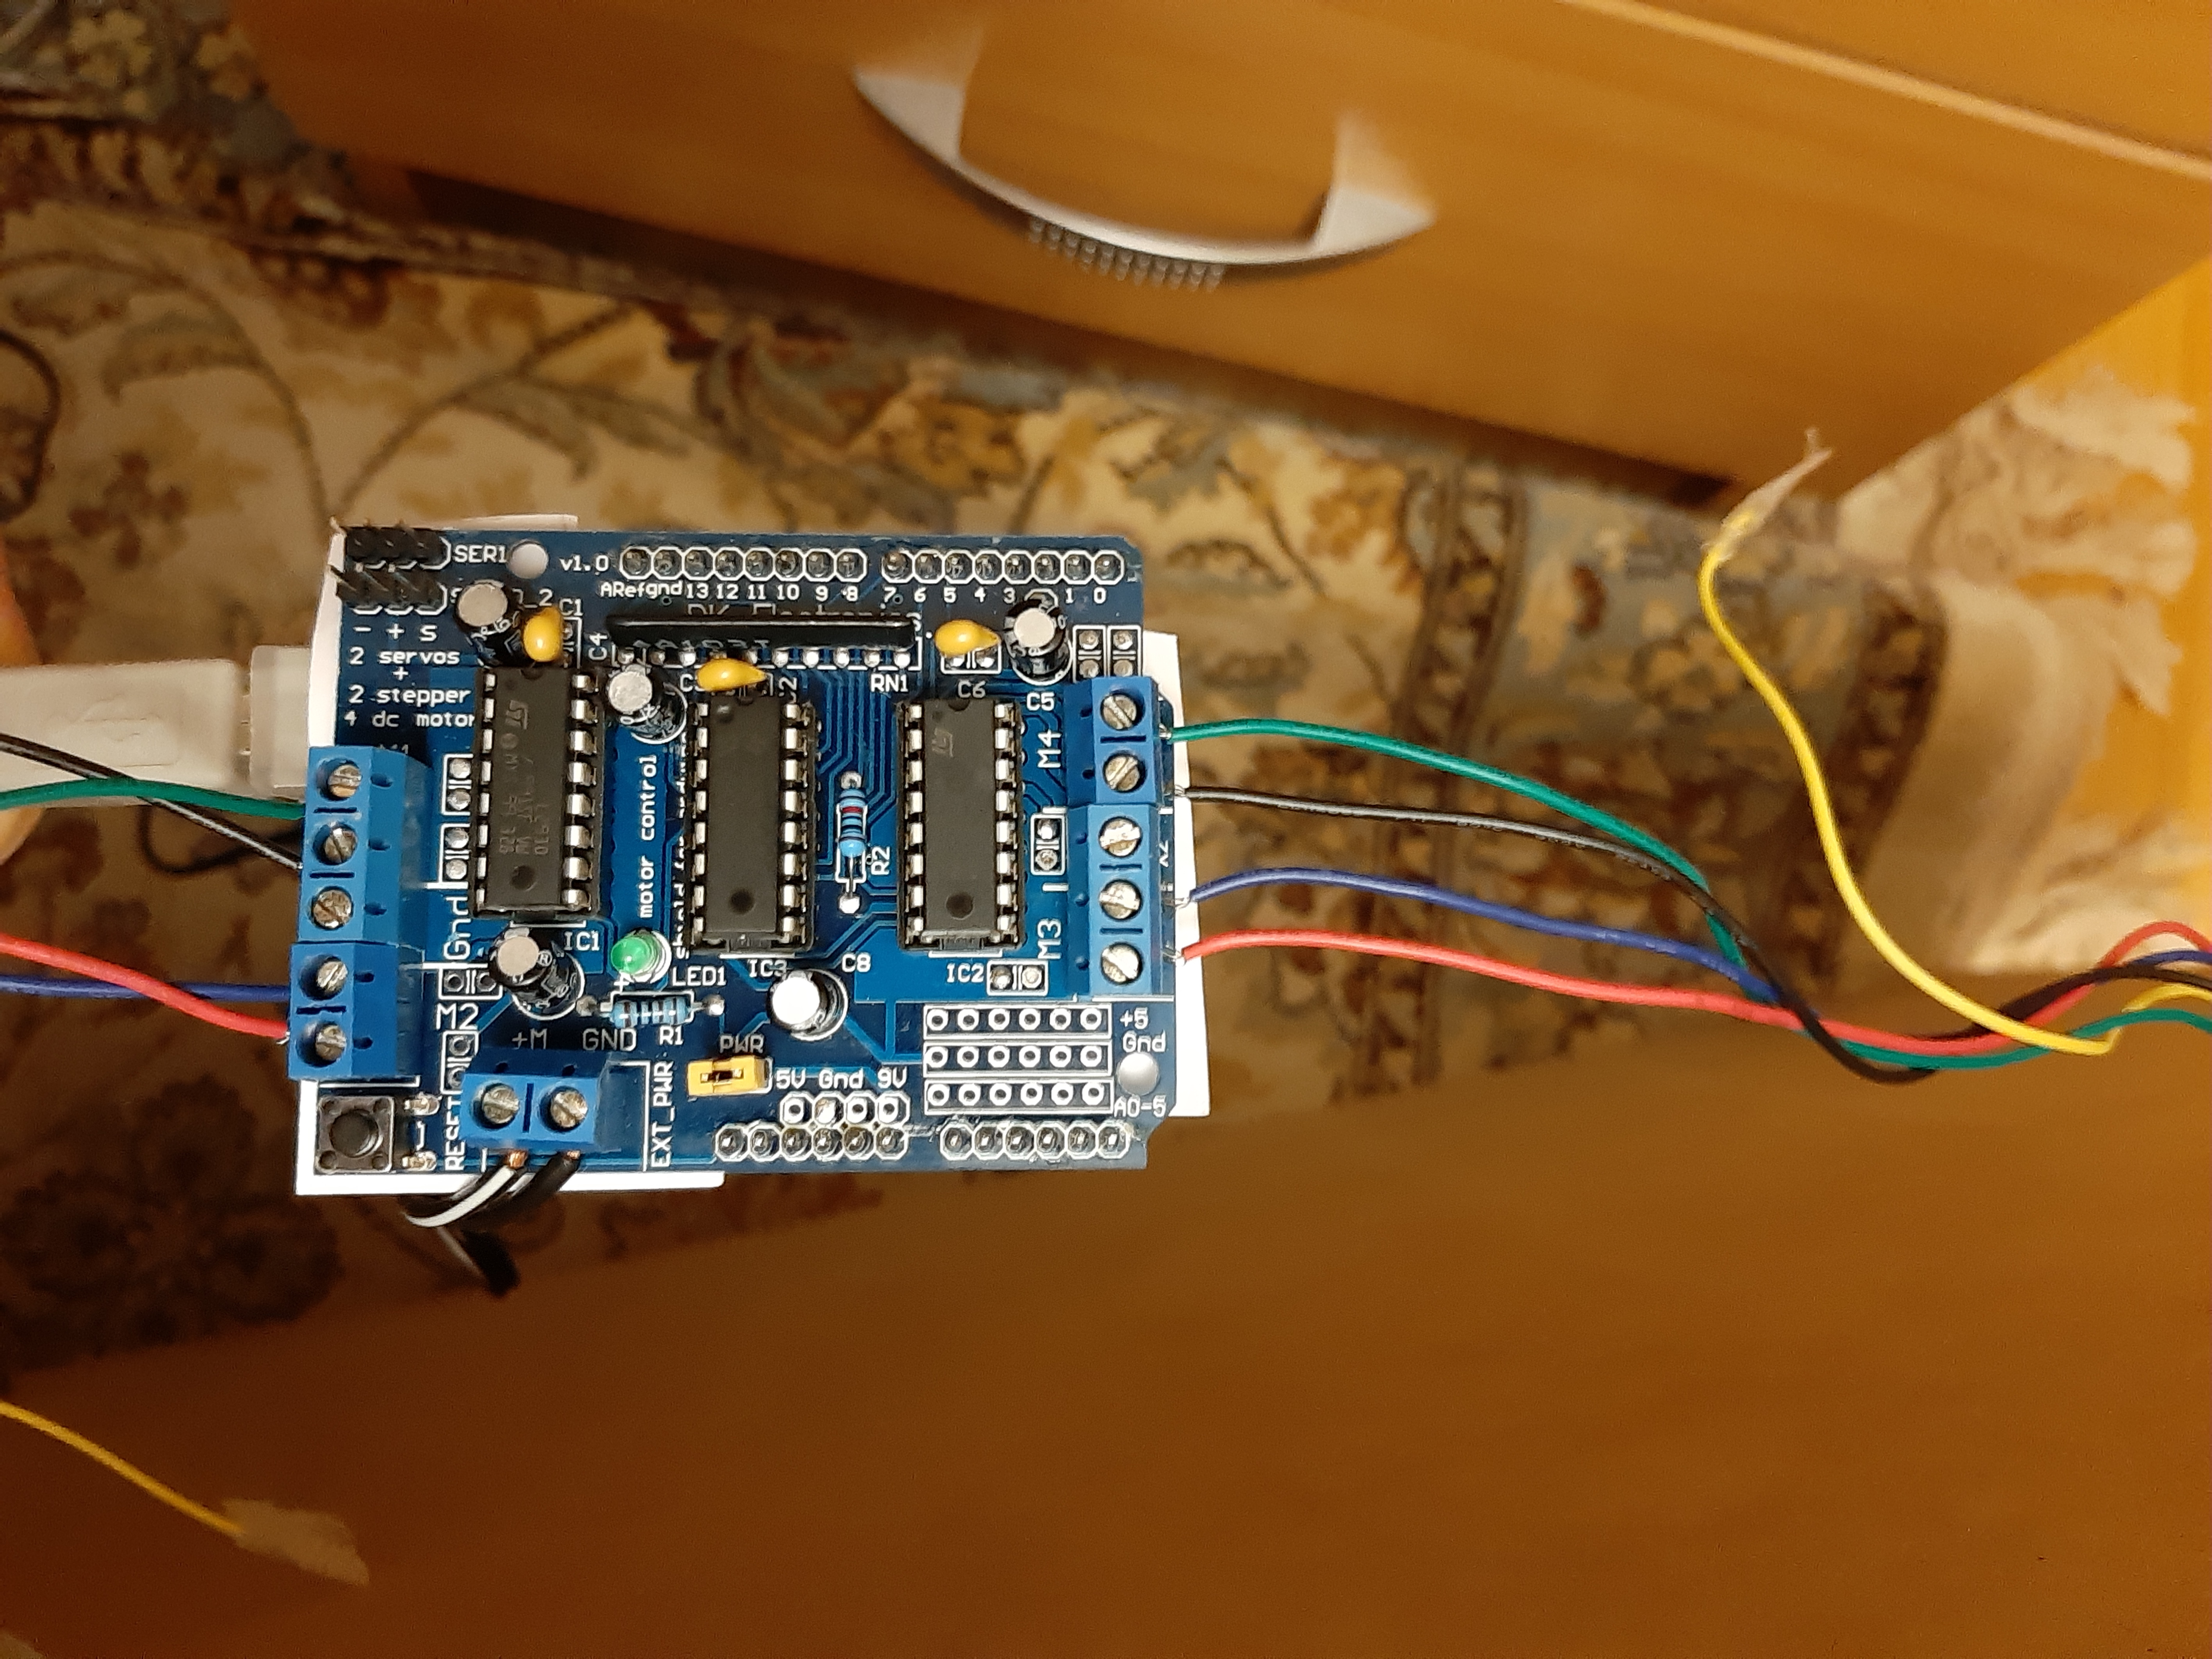
Software installation
From the previously downloaded euphy archive, unpack the / controller / folder.In the default.properties.txt file, specify the necessary dimensions: width and length of the machine, width and length of the sheet, home point. They need to be measured quite accurately, to the millimeter, otherwise there will be distortions in the image. I’ll show an example below, it turned out that way.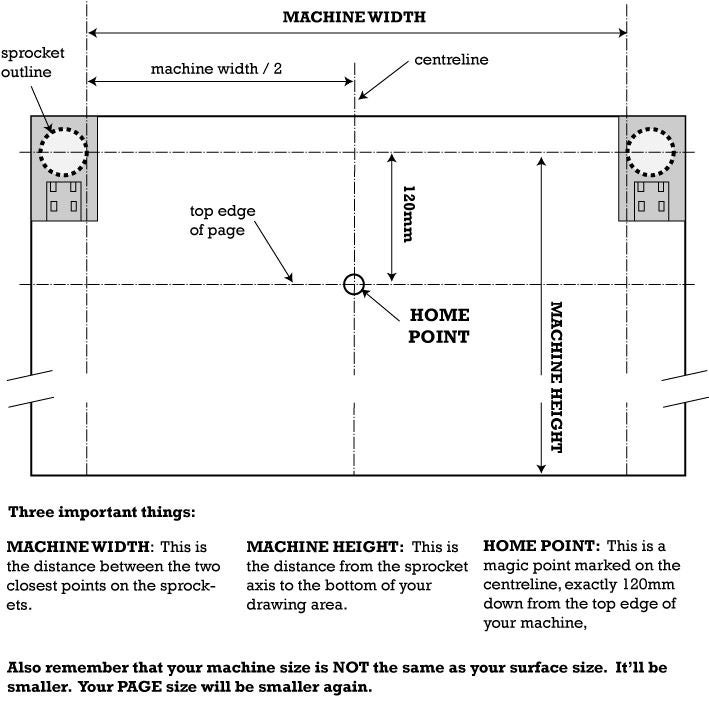 instructables.comLaunch the application:
sudo chmod +x polargraphcontroller
./polargraphcontroller
 In the SETUP tab, select the desired port (SERIAL PORT). A green inscription should appear at the top that the poshraf is ready. Set the gondola to the HOME POINT point.On the INPUT tab, select LOAD IMAGE. Upload image, resize if necessary (RESIZE IMAGE). Move the image (MOVE IMAGE) to the sheet area, select the desired fragment (SELECT AREA), reduce the GRID SIZE if necessary and press RENDER PIXELS. In the pop-up window, you need to choose where drawing (TOP-RIGHT) and style (VARIABLE SIZE SQUARE WAVE) begin.
 On the right, to start the command queue, click on the red inscription (turns green): ommandQueue: QUEUE RUNNING.It took me about an hour to draw the inscription. Doodle at the top right, because I first chose the SCRIBBLE style. Y axis compression is visible due to inaccurate measurements.
 The speed of the polargraph.