Hello everyone!In this article, I would like to talk about SIL again . We all know that SIL has a large number of functions that greatly facilitate the automation of our actions in Atlassian Jira and Confluence.We write SIL scripts in the SIL Manager menu item and most of us do not pay attention to the rest of the menu items. I’m talking about these menu items: In this article I will go through each menu item and tell you what you can get from each item.I also want to note that we are now talking about the SIL engine , which means that all these features are available to you for free.
Custom field usage
This menu provides information on how each custom field is used in your Jira instance. Information from the vendor can be found here .You can see all the fields in your Jira if you go to the gear -> Issues -> Custom Fields. This is what the screen looks like if you go to the Custom Field Usage menu:
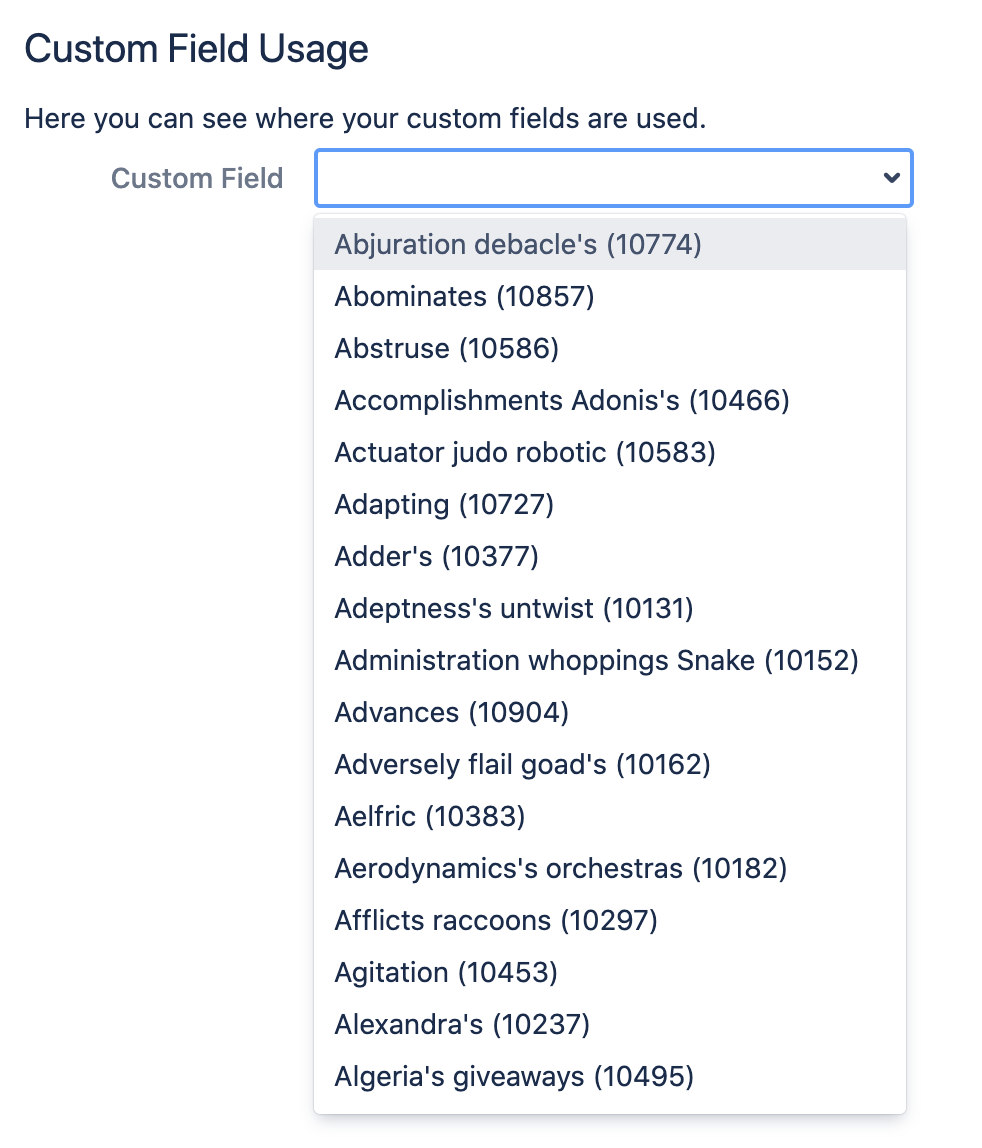 As you can see, you can select any custom field and get information on it. In order to filter the available fields, just start typing the characters and the list of custom fields will be filtered by these characters.
 After you see your field, click on it:
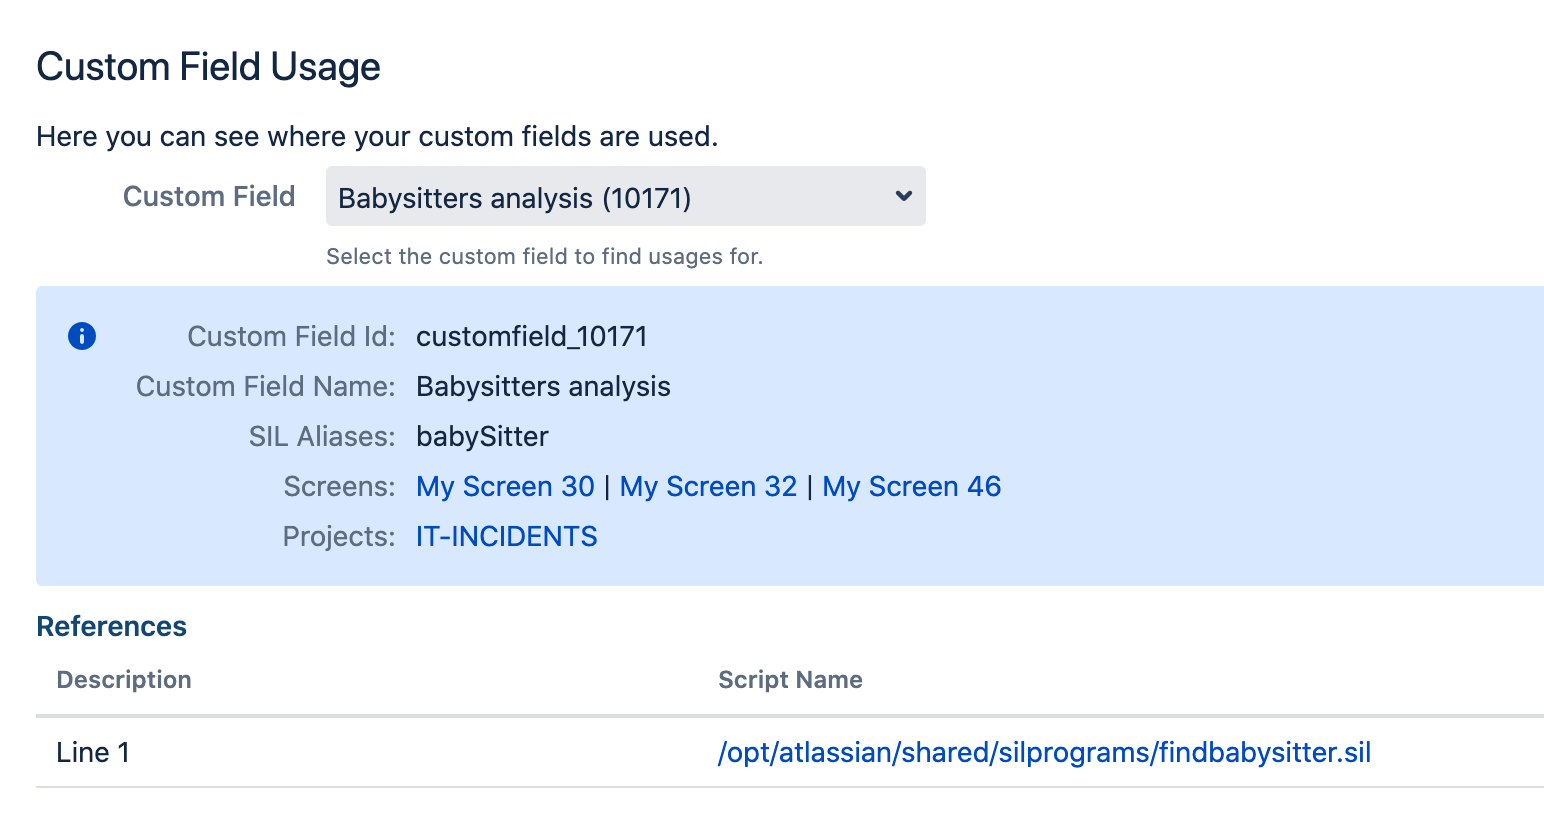 You can see the following information on this field:
- Sil aliases
- Screens and projects in which the field is used.
- Line numbers of scripts in which this field is used.
At the time of writing, there is such a bug CADS-6237 , which says that information about the use of the field in scripts is not displayed on the screen. The way it is. I have this info because I modified the code.Redirect Page Configuration
This option allows you to intelligently manage the redirect to pages in Jira. You can find information from the vendor here . To tell you the truth, it took me hours to understand why this option was needed and how to use it, so I will explain this option with an example.Here is an example.Suppose in our Jira every employee every month enters an invoice for receiving money in the form of a ticket in the INV project. As you can see, Alexey Matveev opened two accounts for March and April.But the personnel department does not work in Jira, but in some external system, and they have a page in this external system for each employee with a link in Jira, which leads to the employee’s ticket with the last account.What will this link look like?Of course, we can make the link like thishttp: // localhost: 2990 / jira / browse / INV-2 . But INV-2 will be the last score for April. In May there will be a ticket with a different account. We could change the link every month on the page of an employee of the human resources department, but this is too complicated. Something simpler is needed.And just Redirect Page Configuration comes to our aid.Let's configure.In our HR department system, the link will look like this:
http:
We are not referring to a ticket, but to the plugins / servlet / kredi servlet, which will redirect the ticket we need. We will pass the full username as a parameter, and based on this parameter, our servlet will redirect to the desired ticket.We made the link, now we need to make the logic. And we just do the logic in the Redirect Page Configuration menu. Open the menu and enter the following code:string userName = argv["userName"];
if (isNull(userName)) {
return "/plugins/servlet/kredierror?customErrorTitle=User Not Provided&customErrorMessage=Provide user with userName parameter";
}
if (isNull(getUserByFullName(userName))) {
return "/plugins/servlet/kredierror?customErrorTitle=User Not Found&customErrorMessage=User " + userName + " not found";
}
string [] k = selectIssues("project = INV and reporter = " + getUserByFullName(userName).username + " order by \"Invoice Date\" desc");
if (size(k) == 0) {
return "/plugins/servlet/kredierror?customErrorTitle=Invoice Not Found&customErrorMessage=No invoices for "+ userName;
}
return "/browse/" + k[0];
The code does the following:- we get the value of the userName parameter, which contains the full name of the user.
- we check that the parameter is passed, if not passed, then we redirect to the error page.
- we verify that the user with that full name is logged in to Jira. If not, then redirect to the error page.
- select the last ticket with an account for this user. If no tickets are found, then we redirect to the error page.
- make a redirect to the ticket with the last count.
Now check!First we’ll make such a link and click on it:http:
We will see such a screen: That's right! This is my last count.Now we will not pass the user as a parameter:
http:
And we got an error page: That's right!Now let's pass in a user who is not in Jira:
http:
We saw a page with an error: Again, everything is true!And now we’ll transfer the user who did not create a single ticket with an account:
http:
And we got a page with an error: Everything works correctly!Thus, we brought all the redirect logic to the correct page in Jira. And it is very convenient, so in this case we write all the logic in SIL, which is much easier than writing the same logic in an external system.
Switch user
This menu item allows the administrator to work under any registered user in Jira without knowing the password of this user. You can read the information from the vendor here .This is necessary, for example, when a user says that Jira is behaving incorrectly, and the administrator cannot reproduce it. In this case, the administrator can log in to Jira as this user and see what happens.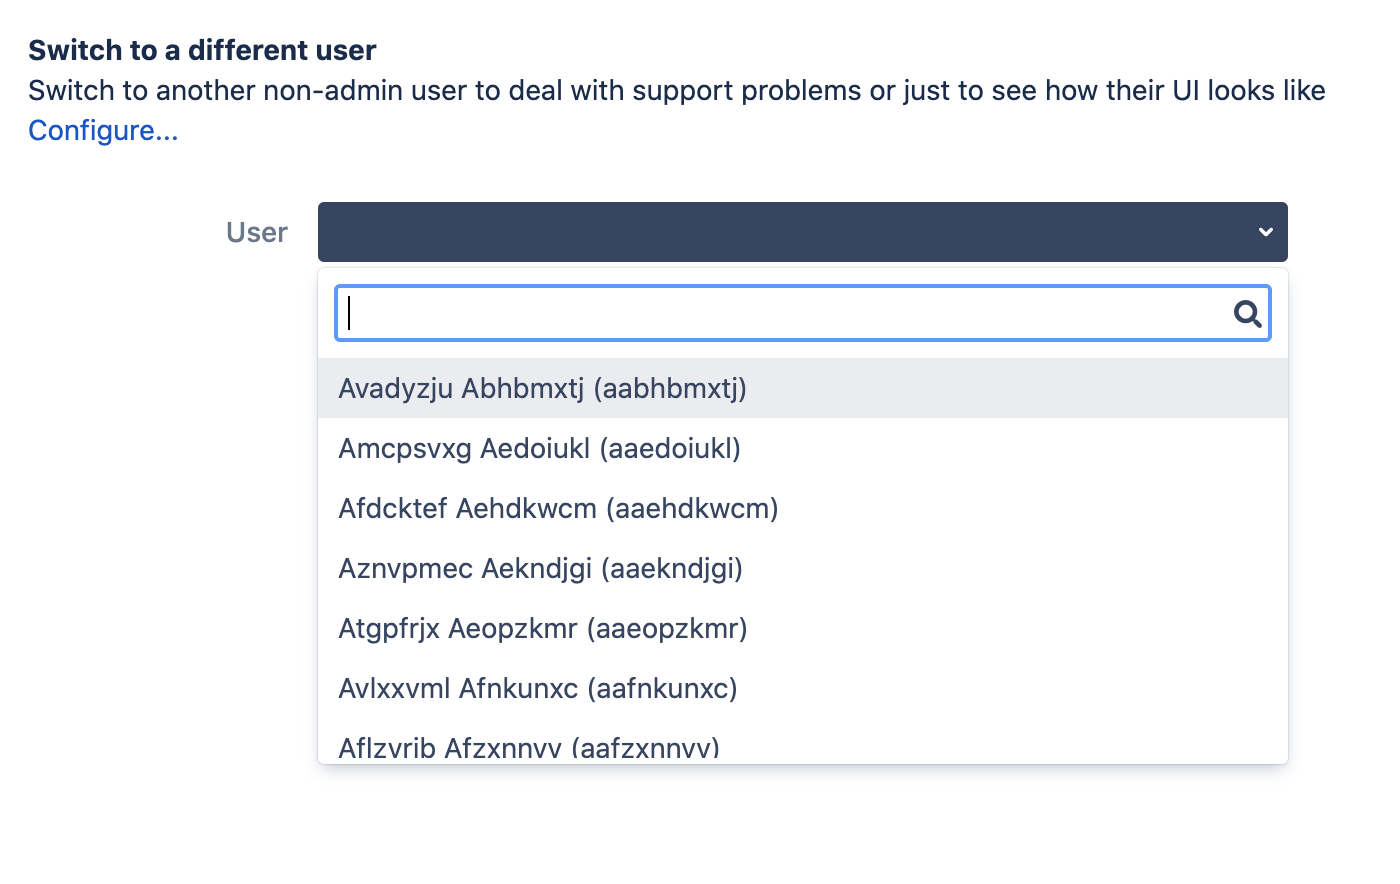 In order to quickly find the user you need, just start typing the characters that are in the name of this user, and the list will be filtered by these characters:
 Select the desired user and click on the Switch button! .. You will be logged in under this user.In order to login back under your user, select the Switch BackTo option :
Sil configuration
This menu allows you to configure SIL. Information from the vendor can be found here . SIL Home Directory allows you to specify the directory in which all scripts will be stored. The default is JIRA_HOME / silprograms.Charset allows you to determine in which encoding your scripts will be stored. It is better to leave the encoding in UTF-8. I have a poor idea of why this setting might be needed.S IL Cache size allows you to specify the number of scripts whose code has been converted to Java byte code and stored in the SIL cache.Why do we need a SIL cache?Here is a sample SIL code:
string message = "My message";
runnerLog(message);
In order to execute this code, we need to translate it into Java byte code. SIL contains a large number of constructs: structures, functions, loops, conditions, assignment, and so on, so in order to translate all this into Java byte code, you need time, and the SIL cache just allows you to save this time. The code is converted to Java byte code once and stored in the cache. If this code needs to be executed again, then the ready-made Java byte code is taken from the SIL cache.Therefore, if you have thousands of SIL scripts, then it makes sense to increase the size of the cache.Datasources
This menu item allows you to configure data sources for databases and use these sources in your code.This is convenient because you don’t have to use the database access parameters and user password in the code. You can find vendor information here . Let's configure the database source.Click on the Add Datasource button and enter the settings for the database:
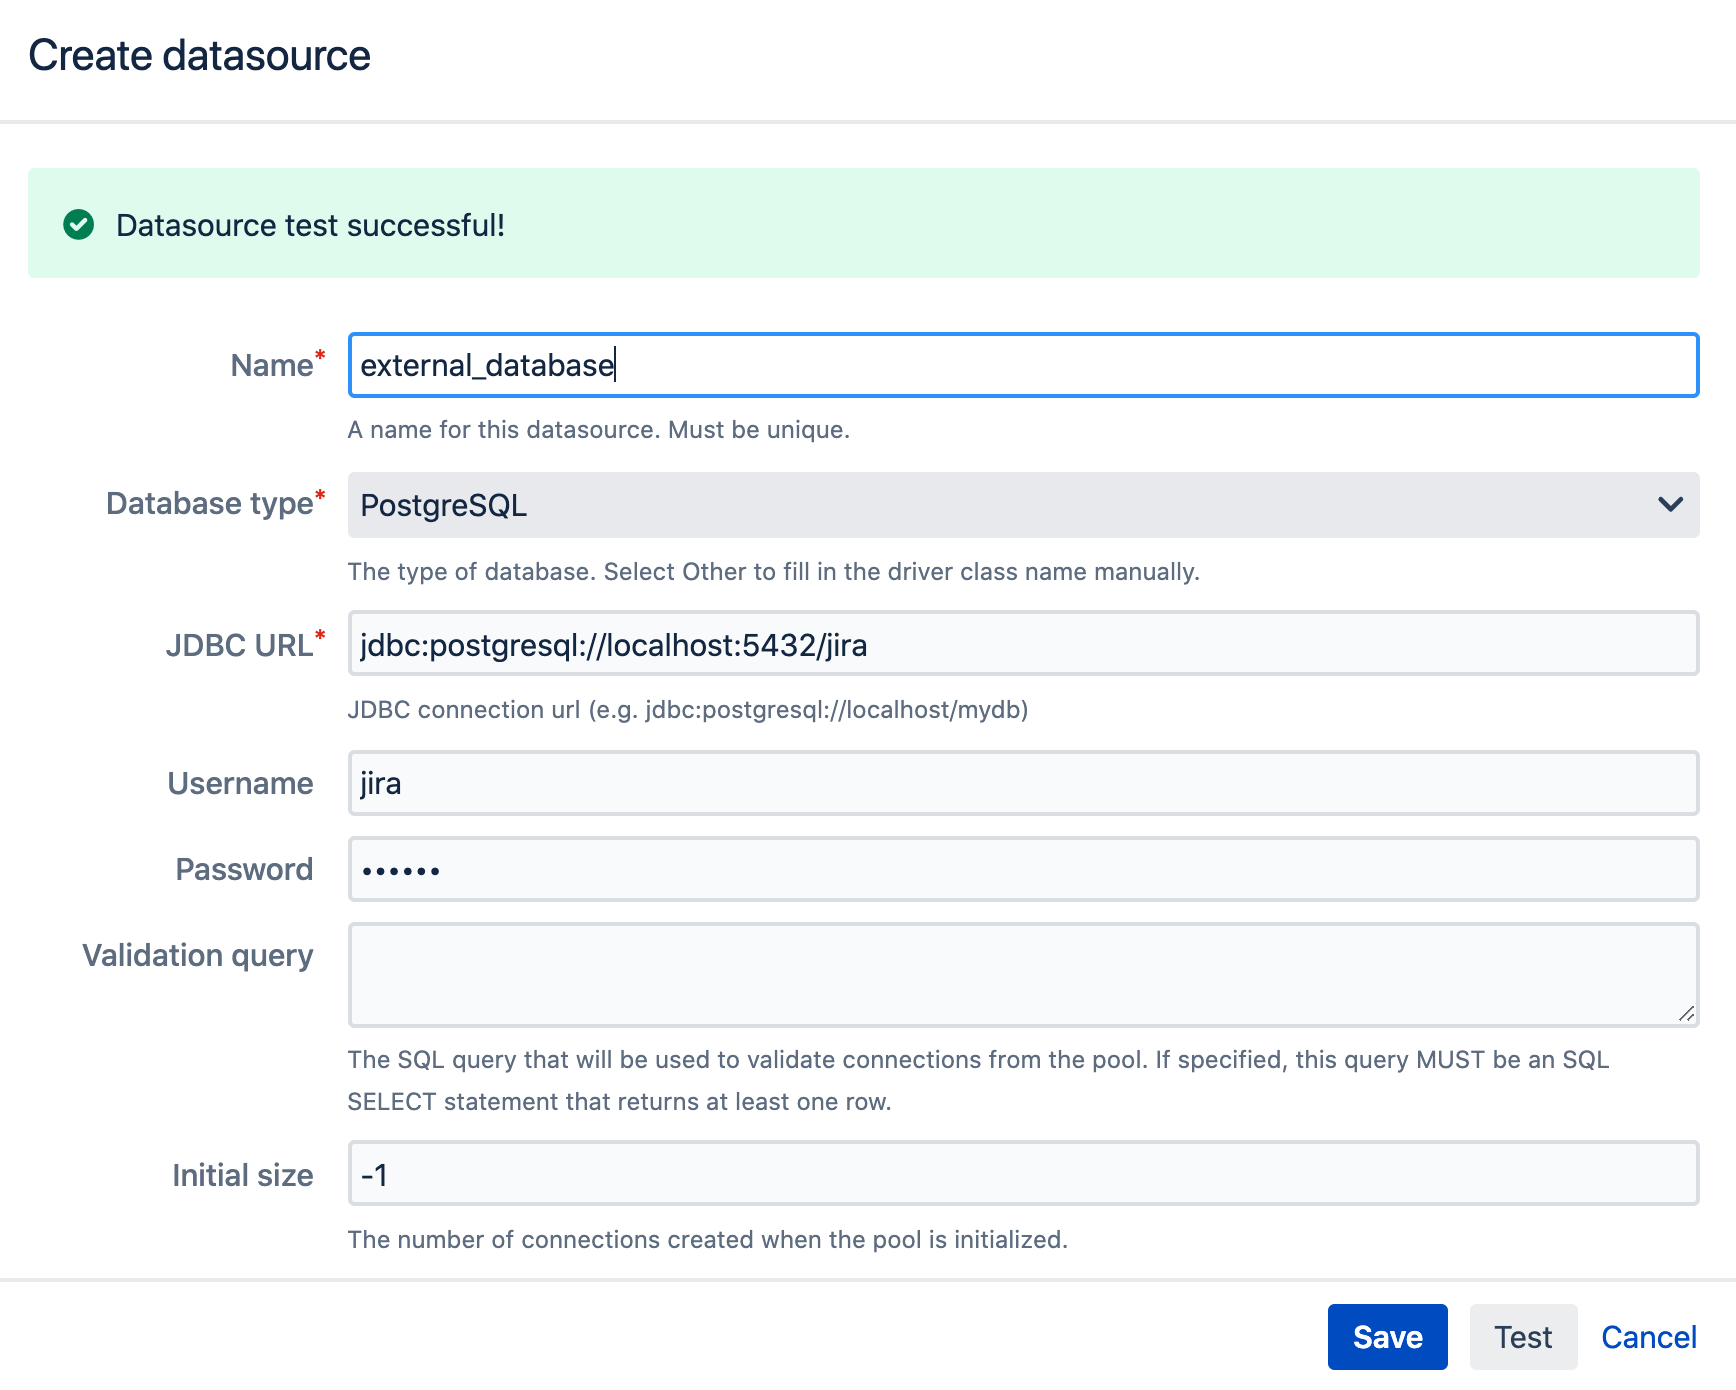 I have another Jira installed on my computer and I want to get data from the database of this Jira.It is important to note that SIL does not contain jdbc drivers in its distribution. Therefore, you must ensure the availability of these drivers in Jira yourself. Here here you can read how to do it.Now click on the Save button and the database source called external_database will be created:
 Now let's use this database source in our script:
string [] results = sql("external_database", "select * from cwd_group");
runnerLog(results);
I execute a query in this sql script and get the result:
Mail sender configuration
This menu item made me suffer in due time. Information from the vendor can be found here .You can send emails using sendEmail and in this menu item you specify the parameters for this function.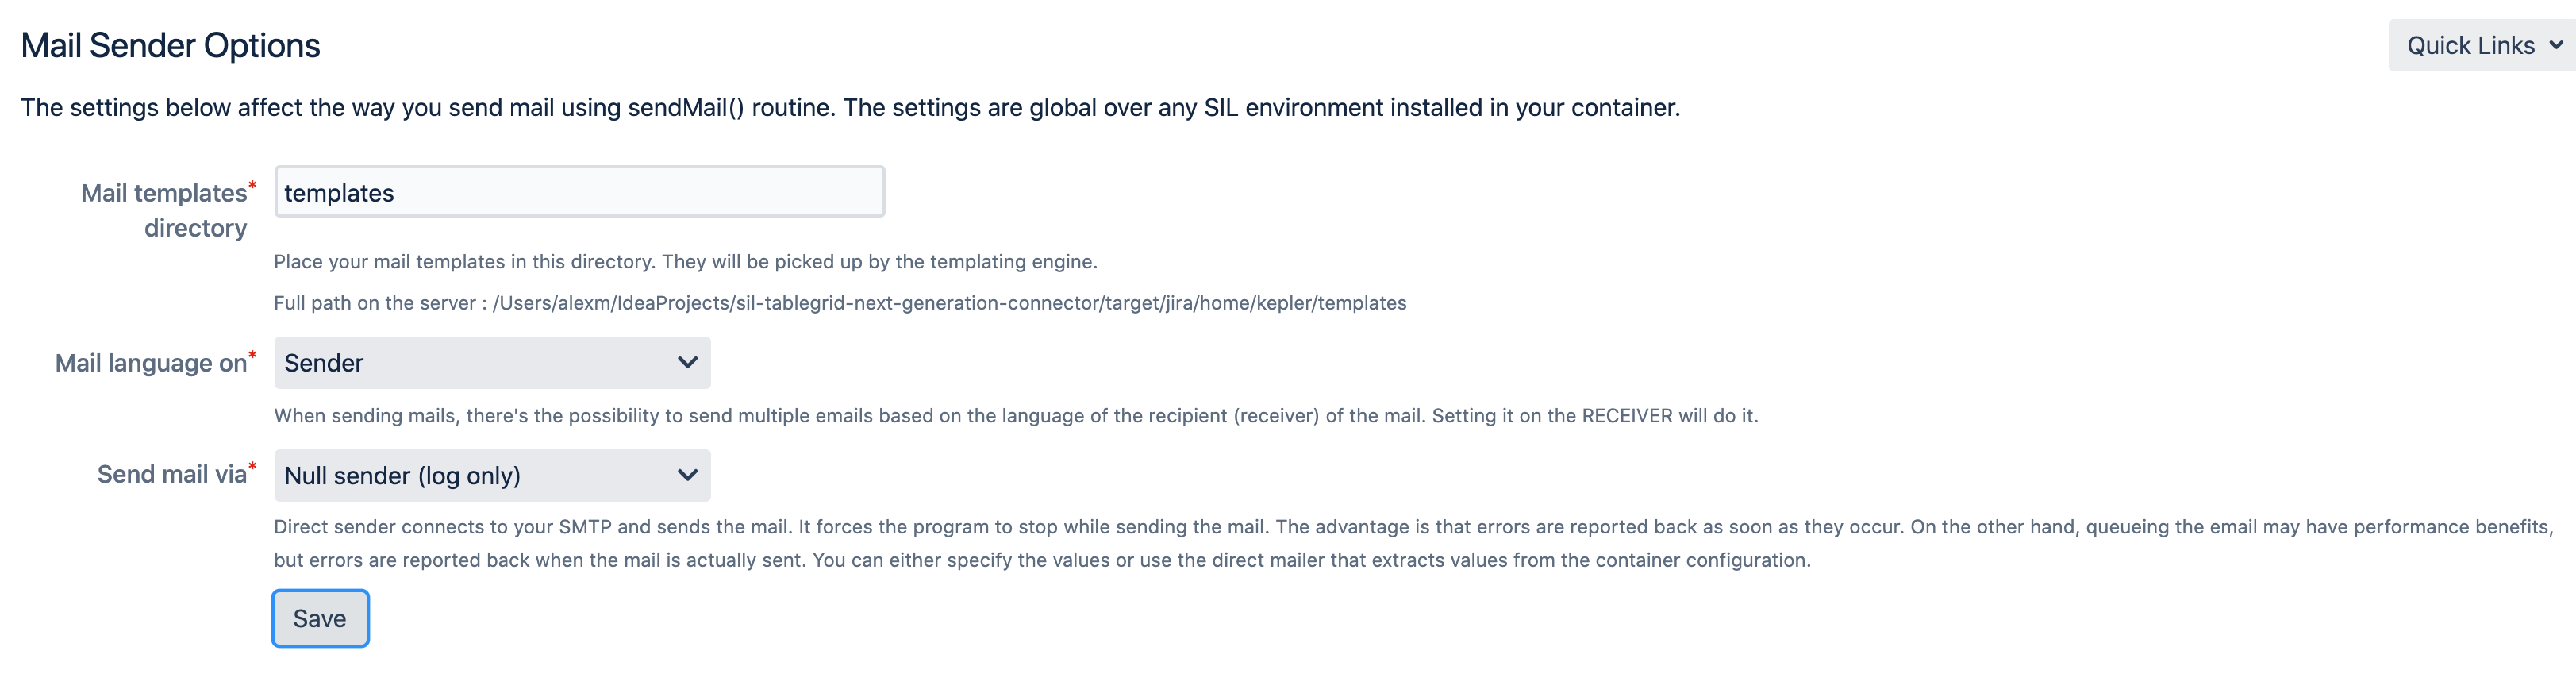 My templates directory allows you to specify the path to email templates .Mail language on allows you to specify, based on the Sender or Recipient, the language of the email template. If you use email templates, you can create the same template for different languages. You can read more about it here .Send mail viaallows you to specify how the email will be sent. Here are the available options:
- Container Sender - the message will be sent through the standard Jira email queue.
 And besides, you can see error messages and debug messages when sending email in the atlassian-jira-outgoing-mail.log file. To do this, you still need to configure the logging of sending email messages to Jira. You can read more about configuring logging in Jira here . I prefer to use this particular option.
- Direct sender, custom - you can specify your own mail server for sending messages:
 In this case, you will not see error messages or debugging messages in the atlassian-jira-outgoing-mail.log file, but you will see messages in the atlassian-jira.log file.
- Direct sender, default — , , Jira. atlassian-jira-outgoing-mail.log, atlassian-jira.log.
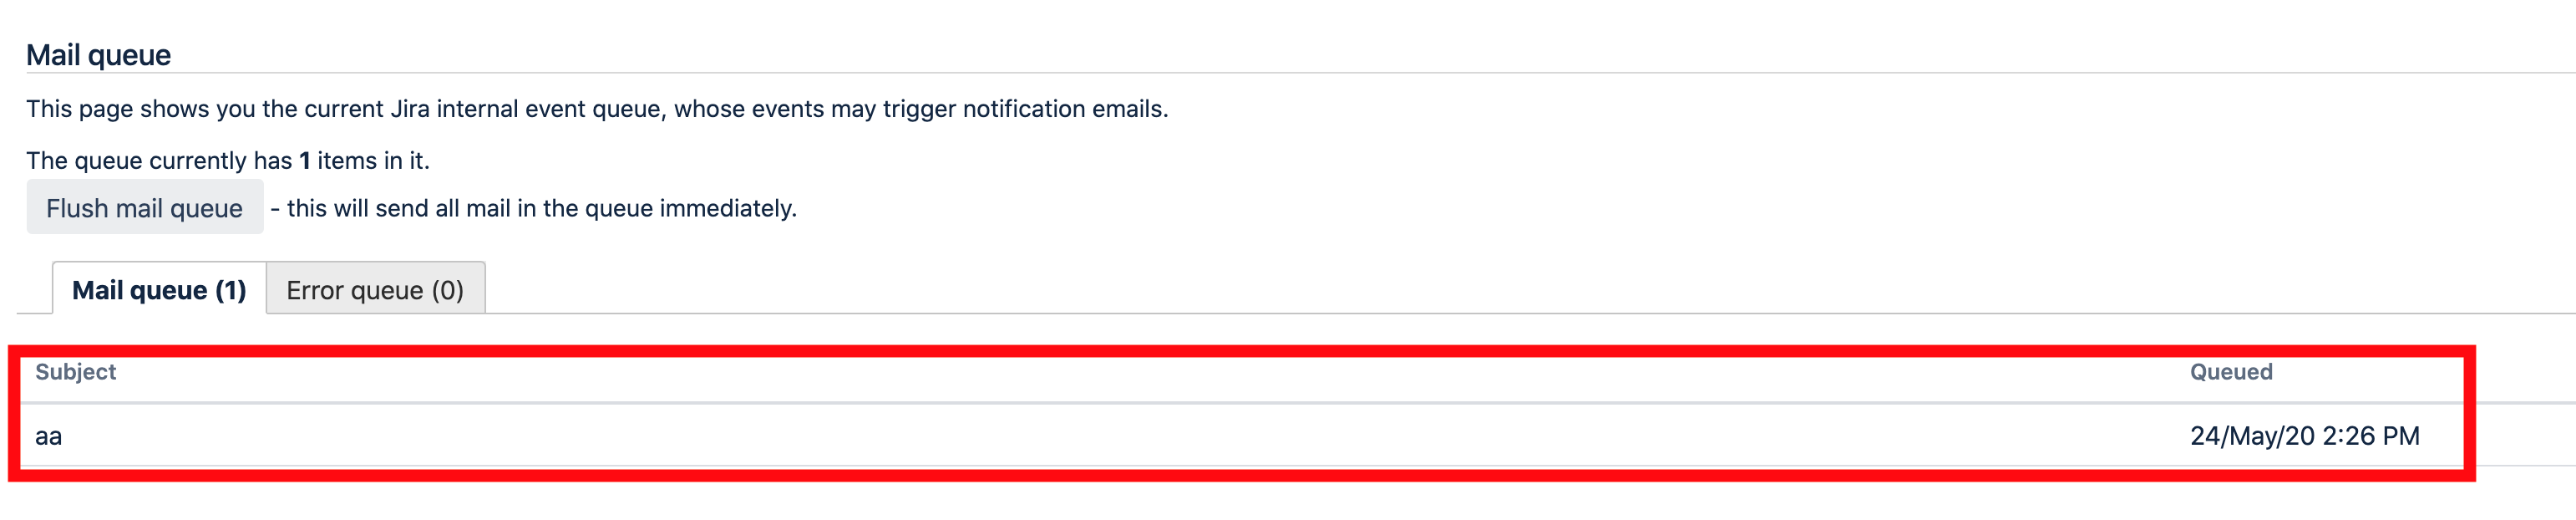
- Null sender (log only) — atlassian-jira.log. . . com.keplerinfo ERROR, , . , , . , INFO com.keplerinfo. . :
2020-05-24 14:19:53,601+0300 pool-42-thread-8 INFO admin 859x6032x1 aizaws 0:0:0:0:0:0:0:1 /rest/keplerrominfo/refapp/latest/async-script/runScriptFromEditor [c.k.r.sil.impl.MailConfigurationAccessor] NULL MAILER (log only mail sender) : Subject: aa, From: null, To: [alex@gmail.com], CC: [alex@bk.ru], Body:
aa
Asynchronous Runner
You can read the information from the vendor here : Threads sets the number of threads for SIL. By default, the number of threads is 10, which means that only 10 scripts will be executed at a time. The rest will stand in line and wait until one of the threads is free. If you have a large number of scripts running at the same time, then increase this parameter.Time To Live (TTL) sets the lifetime of the thread. The default value is 1 hour. This means that if the script is executed for more than an hour, it will be killed and the results of the script will be only those that managed to be completed in this hour. If you have long-running scripts, then increase this parameter.Checkpoint intervaldetermines how often SIL will check if there are scripts that run longer than the TTL time parameter. And if such scripts are found, then they will be killed.Also on this screen you can see all the scripts that are currently running.
Remote systems
The Remote Systems menu allows you to:- Add connections to external Jira instances and run SIL scripts on those instances.
- Set permissions to execute SIL scripts through the SIL REST API for users who are not Jira administrators.
You can read the information from the vendor here .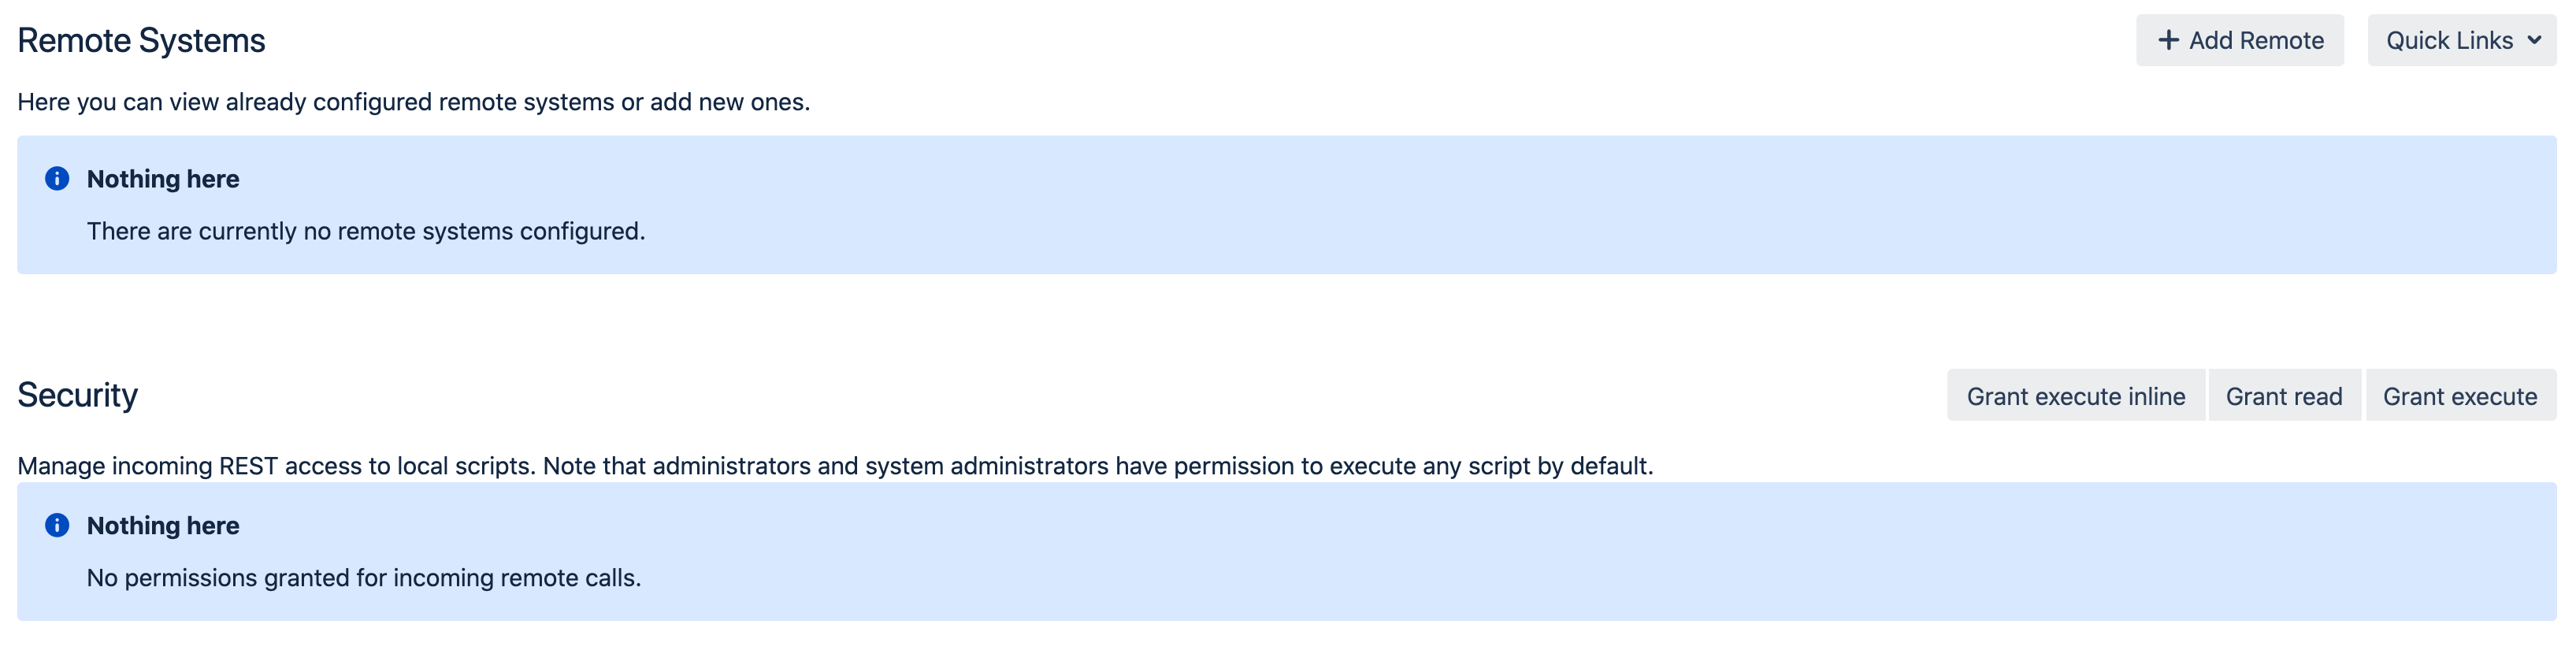 Let's first create a remote connection to Jira and execute a SIL script on it.I have raised two instances of Jira: localhost: 2990 / jira and localhost: 8080.I created this script on localhost: 8080 and called this script test.sil:
logPrint("ERROR", "I am called from " + argv[0]);
This script takes a parameter and displays a message with this parameter in the atlassian-jira.log log.Now on localhost: 2990 / jira I will create a remote connection. I’ll go to the gear -> Manage Apps -> Remote Systems, click the Add Remote button and enter the Jira data for localhost: 8080: Now I click on the Save button button and on the same Jira instance (localhost: 2990 / jira) I’ll create a script that will call script with localhost: 8080:
call("my_ext_jira", "test.sil", "localhost:2990/jira")
The first parameter is the remote connection I created: my_ext_jira.The second parameter is the name of the script that will be executed on the remote system (localhost: 8080): test.sil.The third parameter is the string that will be passed to test.sil: localhost: 2990 / jira.Now execute this script (the one on localhost: 2990 / jira) and see the logs on the remote system (localhost: 8080). We will see this line:2020-05-25 08:30:57,944+0000 pool-38-thread-2 ERROR admin 510x101x1 3sauem 172.26.0.1 /rest/keplerrominfo/refapp/latest/async-script/runScript [c.k.s.lang.routines.LogPrintRoutine] I am called from localhost:2990/jira
This means that we successfully invoked the SIL script on the localhost: 8080 remote system with localhost: 2990 / jira.Now let's look at the Security section on the screen that we see after selecting the Remote Systems menu item.Suppose we have two scripts on localhost: 2990 / jira.test.silcall("my_ext_jira", "test.sil", "localhost:2990/jira")
test1.silrunerLog("Hello World");
And we have the user user1, which does not have administrator rights.We want to call inline scripts and scripts that are on the file system by this user.Here is the Remote Systems menu screen: We will work with the Grant execute inline, Grand read and Grant execute buttons from the Security section.First, try calling the inline script as user1. We will call the inline script using this SIL REST API method.
http:
Here with this JSON:{
"source" : {
"type": "INLINE",
"code": "return 1;"
}
}
And we get such a 403 Forbidden error.Now press the Grant execute inline button and give a grant to user1: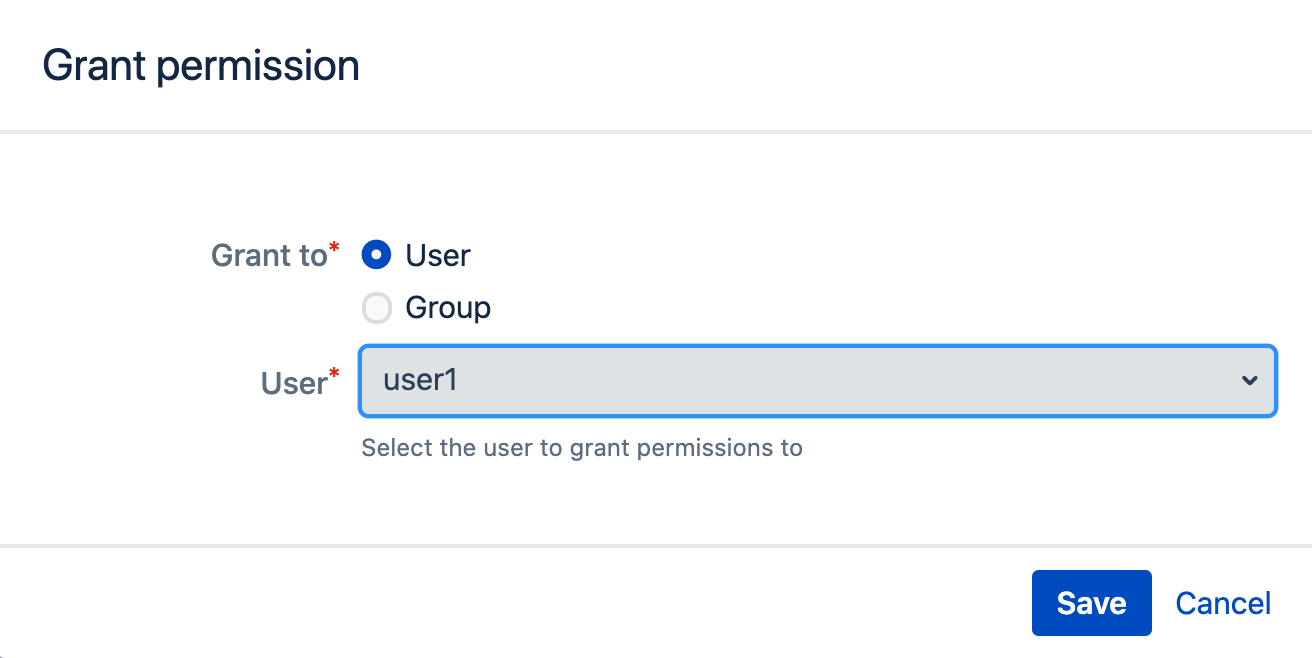 And we will get a 200 response code, which means that we completed the inline script successfully.Now let's run the test1.sil script under user1. This time, JSON will be like this:
{
   "source": {
        "type": "FILE",
        "code": "test1.sil"
    }
}
And again, we get this 403 Forbidden error.Now we give the rights to user1 to execute test1.sil script. Click on the Grant execute button: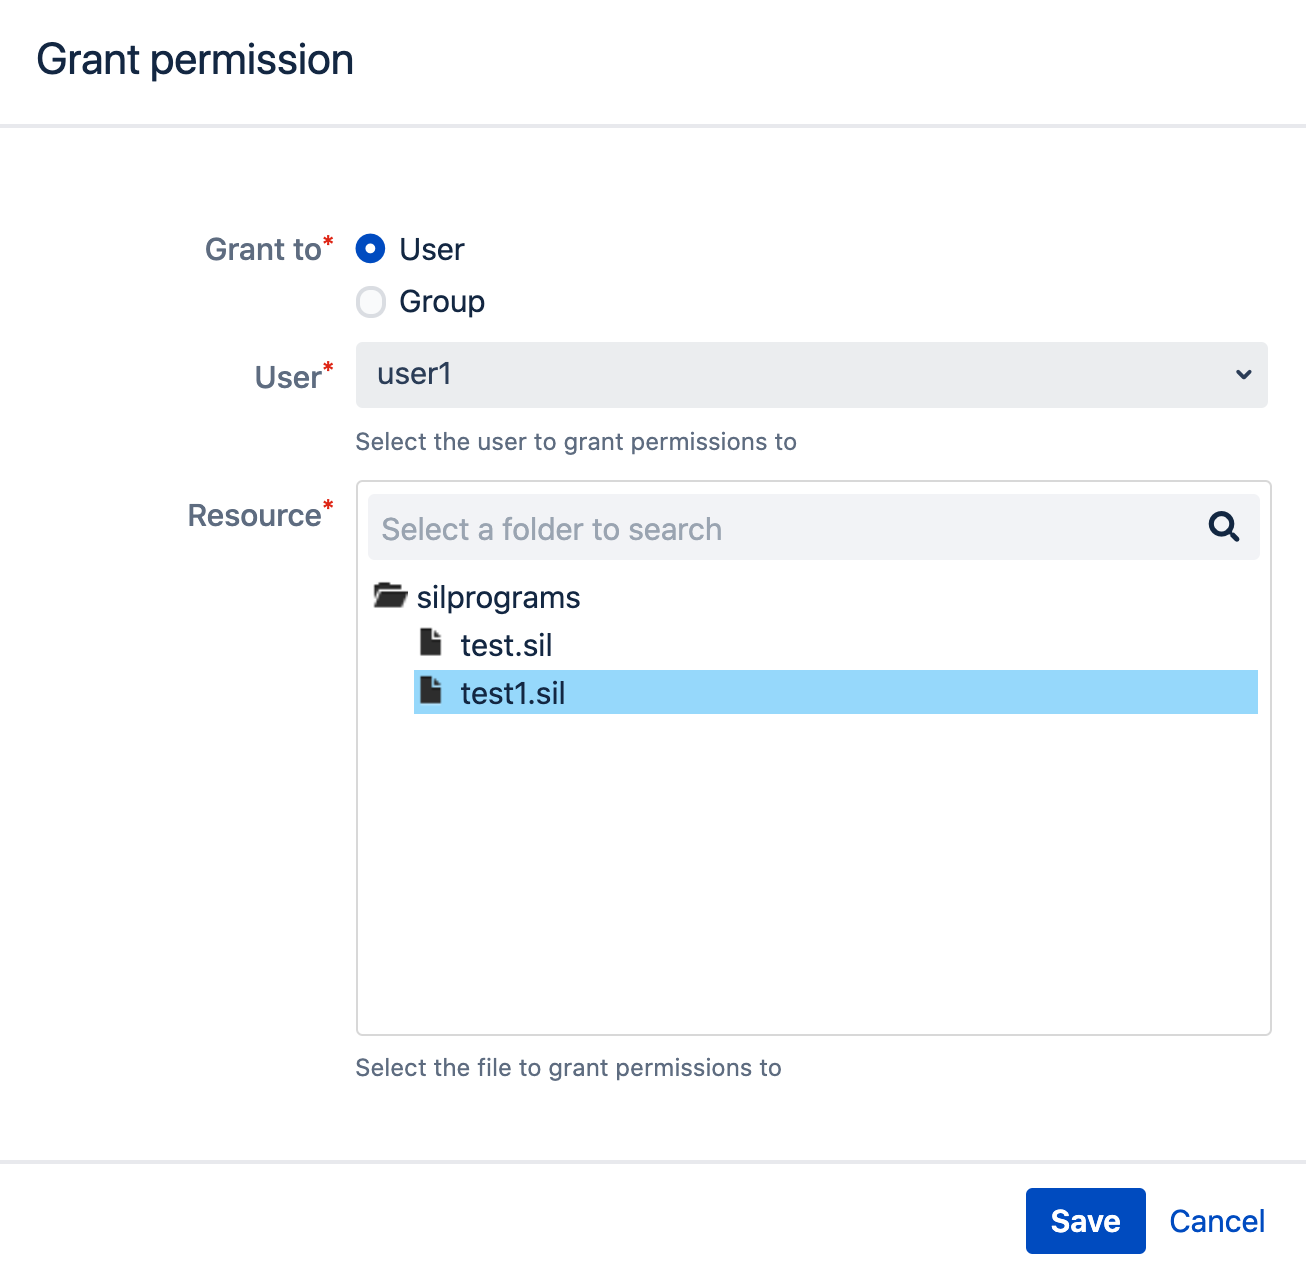 This time, the response code is 200. Everything worked out.
LDAP Configuration
You can configure the connection to LDAP. Vendor information can be found here . I start the ldap server in docker from here .
docker run -p 389:389 -p 636:636 --name my-openldap-container --env LDAP_ADMIN_PASSWORD="adminadmin" --detach osixia/openldap:1.3.0
The ldap server is running.Now let's click on the Add LDAP button and configure the connection: Only Active Directory is available for the Directory field. But this does not mean that you can only connect to Microsoft Active Directory. You can connect to any ldap server. I connected to open ldap.Now, let's select users from LDAP using ldapUserList :
runnerLog(ldapUserList({"cn", "uid"}, "objectClass=*", "myldap"));
And we got the result: This means that everything worked out for us.
Script storage
This menu item allows you to specify where you will store SIL scripts. You can read information from the vendor here .By default, scripts are stored in the file system (option disk):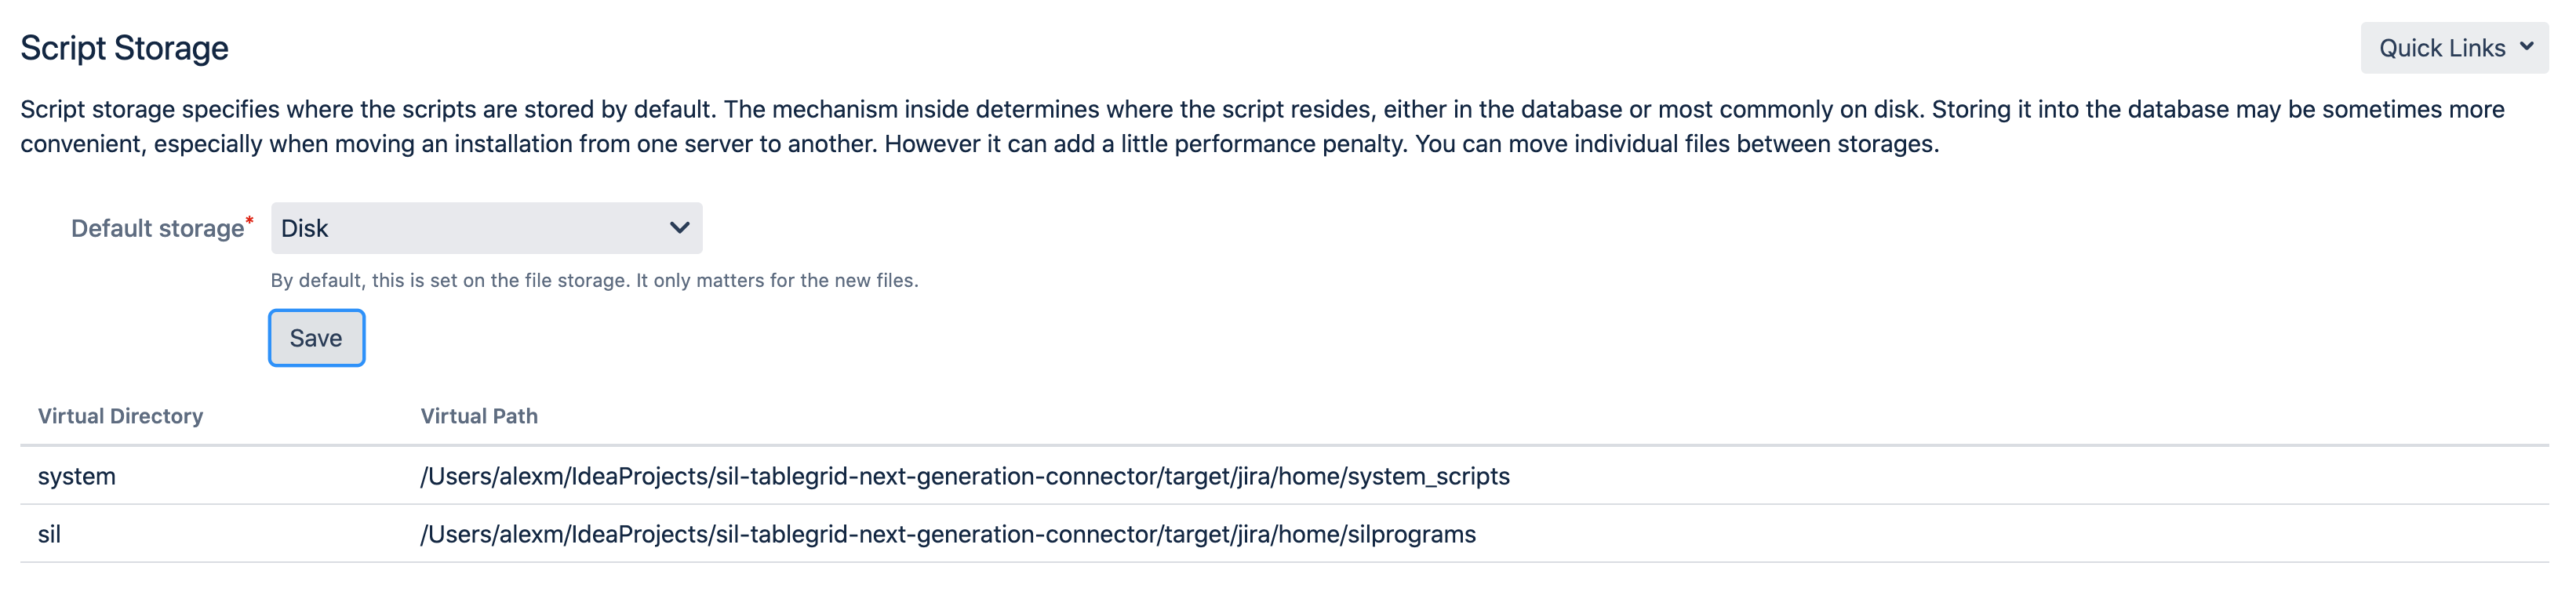 You can choose to have scripts stored in the database (option database). In this case, the scripts will be stored in table AO_1B54DA_TSTEXT.In my opinion, still, it is better to store scripts in the file system. In this case, you can use a version control system, for example, Bitbucket.
Custom fields mapping
In this menu item you can specify mapping of custom field types to SIL value types. You can read the information from the vendor here .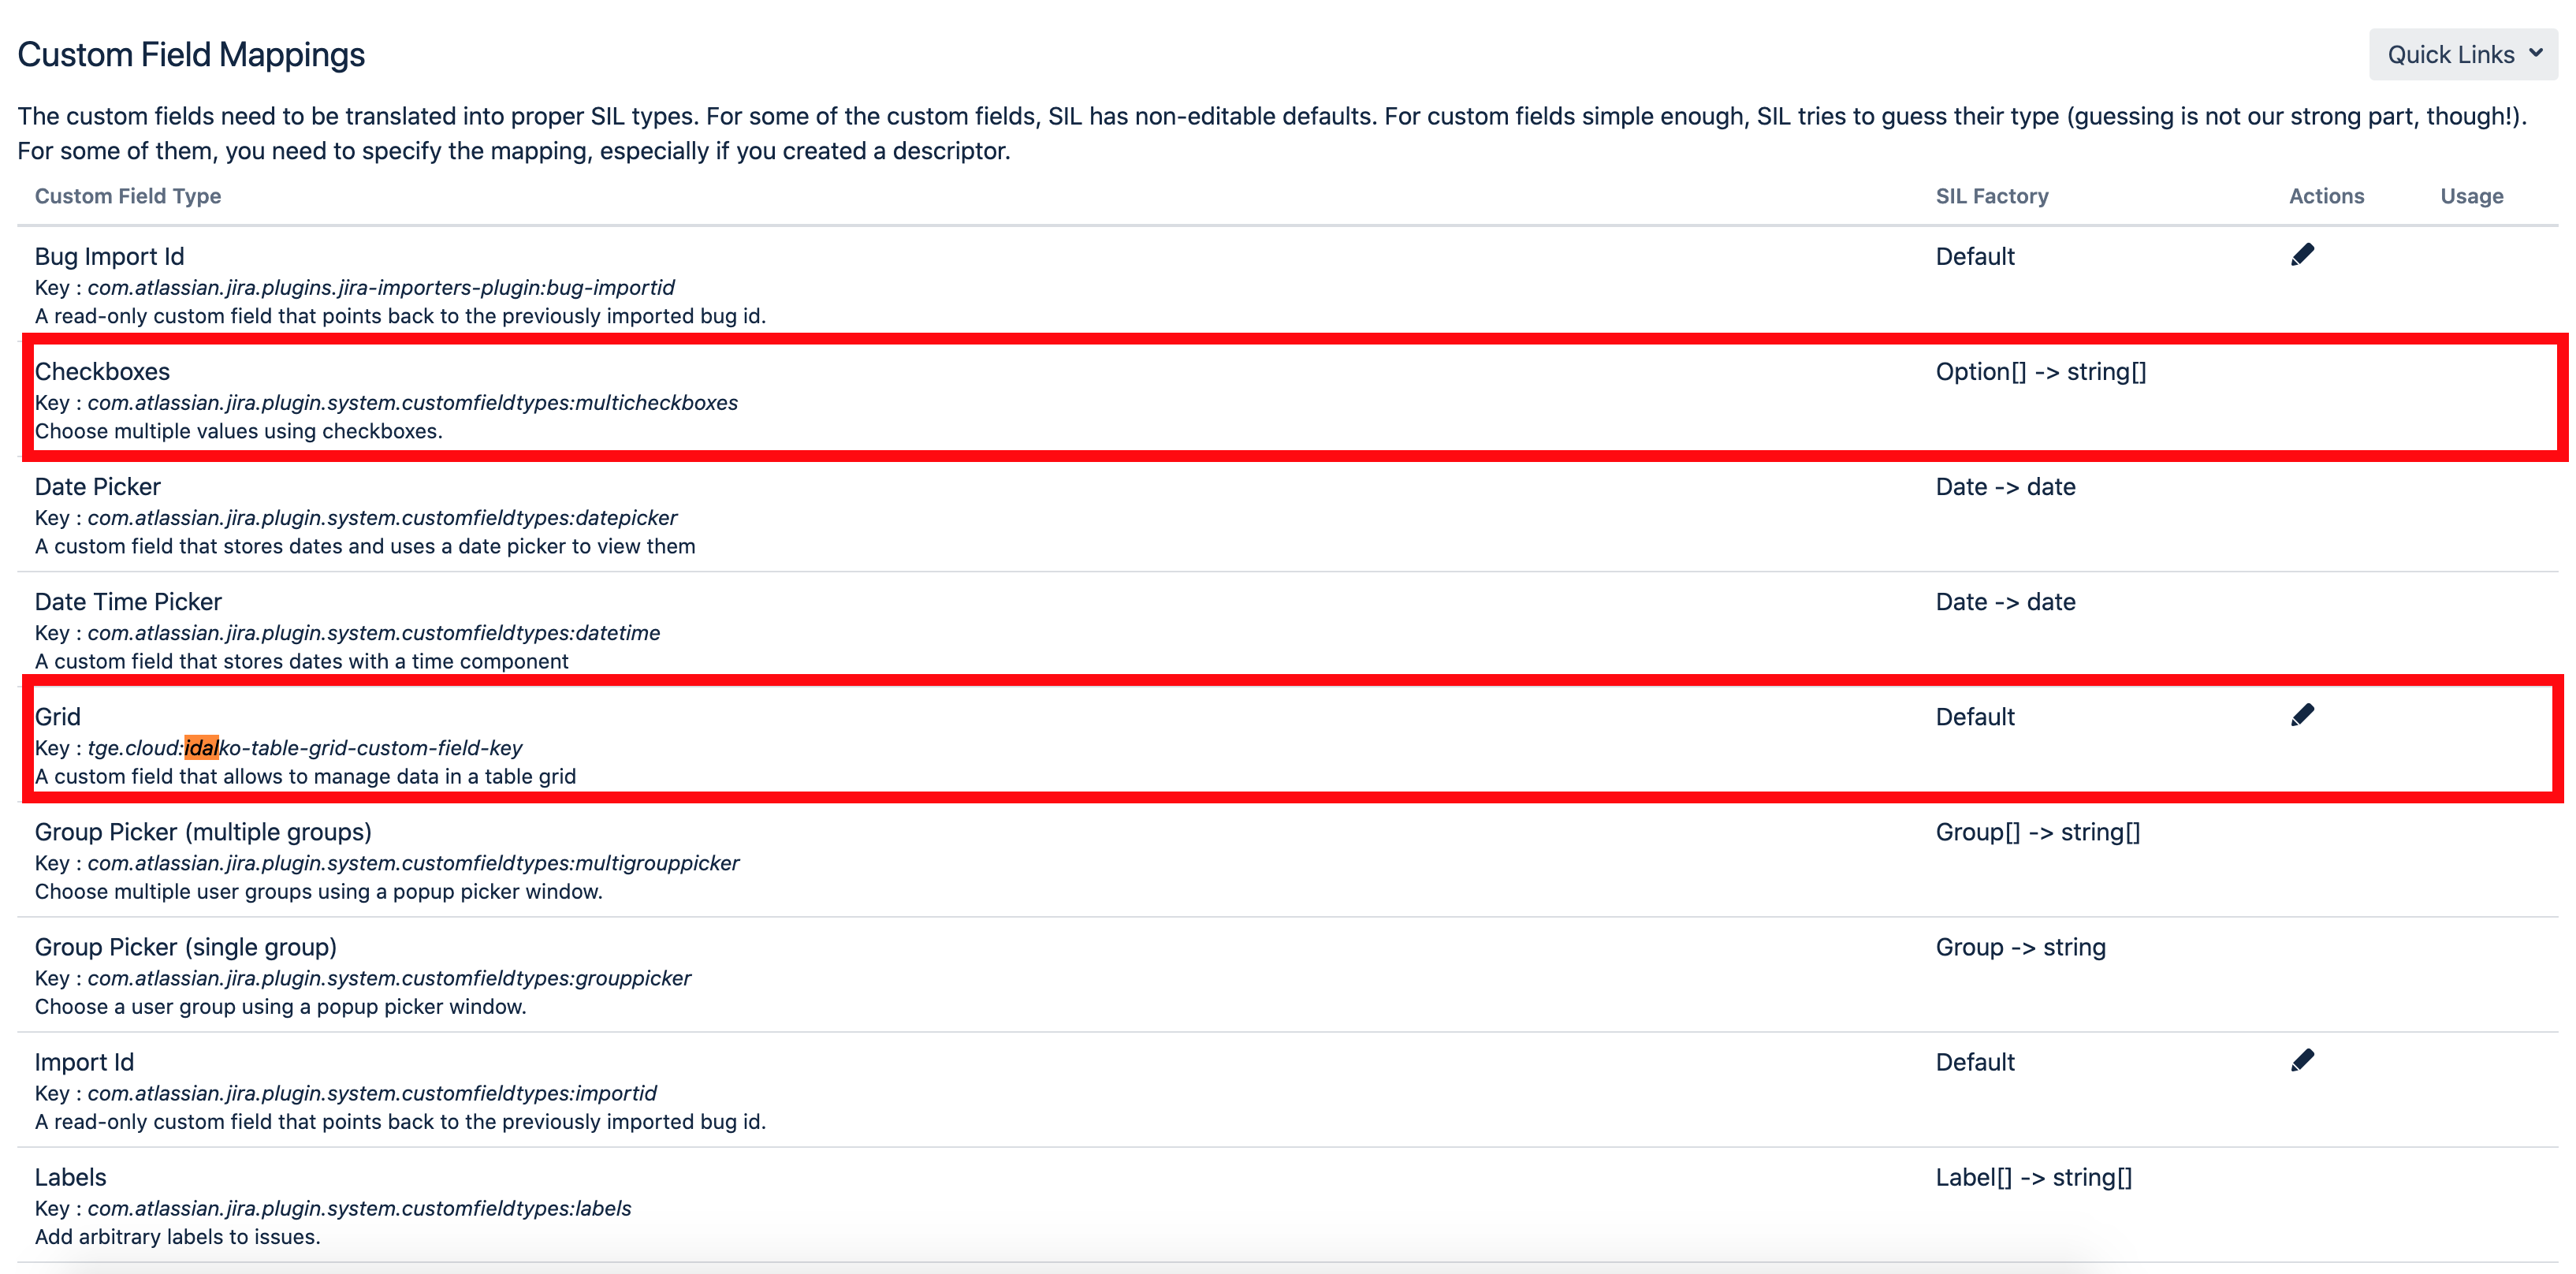 For example, look at the custom Checkboxes field. The value of this field is mapped to type string [], which means that if you want to read a value from a field of type Checkboxes, you must write this code:
string[] value = #{My Checkbox Field};
And to assign a value, here is a code like this:string[] value = {"value1", "value2"};
#{My Checkbox Field} = value;
You cannot change the mapping for this field because it is a standard field. And Cprime already indicated the correct mapping.Now let's look at the type of custom field Grid. We got this type from the Table Grid Next Generation plugin. Cprime does not provide mapping for this field out of the box, so it is assigned default mapping. The default mapping is string. But you can change the default mapping to another: In some cases, the built-in mapping is not enough and in this case you can write an extension to SIL with your mapping. More details on how to do this can be found here .
Intergration configuration
You can create connections to Slack and Stride in this menu item. The vendor has a very detailed instruction on how to do it here .SIL Webhooks Configuration
You can create your own REST API that will call SIL scripts. You can read here .SIL Diagnostic
This menu item provides comprehensive SIL configuration information: Most of this information is necessary for SIL developers, but I would like to draw attention to one important feature on this screen.You can kill SIL scripts that are currently running.Suppose you wrote and ran a script that created an endless loop. Without this option, you would have to wait until the script worked longer than the time in the Time To Live (TTL) parameter and was not killed. But with this option you can not wait for this moment.Just click on the Kill button: