In the last article on the autonomous home carriage 2.0, we managed to work on how to improve the odometer of a budget robot, achieve the construction of an acceptable 2d room map using slam algorithms and an affordable lidar, clarify other issues when building the project. This time, let's see how autonomous navigation works in rviz, what is responsible for, we will implement programs that allow you to leave rviz. Consider also some of the “beauty elements” of rviz that make life easier for ROS robotics.
Let's start with practice.
The task of the robot : to travel independently from point A to point B, or better, immediately to several points B.It is assumed that the scripts (nodes) of the linorobot project around which the project is built will be launched on the robot, and the visualization of what is happening and the control will be carried out from an external PC, virtual machine (hereinafter referred to as "PC").In my case, from the software on the cart, the heart of which is the raspberry pi 3b single-board, it is installed: Ubuntu 16.04, ROS Kinetic, on a PC: Ubuntu 18.04, ROS Melodic.Before you go somewhere, you must set the dimensions of the robot - length and width.To do this, as indicated on the project page , you must enter the appropriate values:roscd linorobot/param/navigation
nano costmap_common_params.yaml
Correct footprint parameters:footprint: [[-x, -y], [-x, y], [x, y], [x, -y]]
where x = length of the robot / 2 and y = width / 2* Ideally, for the robot, you can draw a urdf model, as previously done in the previous project of the robot cart .However, if this is not done, the navigation will not suffer much, but instead of the robot model, the “TF axis” will travel on the map. How to improve the situation with the visual representation of the robot on the map a bit and at the same time not waste time building the urdf model, we’ll talk further.We start an environment
On the robot, execute in two different terminals:roslaunch linorobot bringup.launch
roslaunch linorobot navigate.launch
On the PC, run the rviz visual shell:roscd lino_visualize/rviz
rviz -d navigate.rviz
If everything went well, on the PC you can observe the location of the robot in rviz: TF axes are visible in rviz, as well as the Poligon option, which can be added on the Displays panel. Polygon - these are just the footprint sizes of the robot that were introduced at the beginning, which allows you to see the dimensions of the robot. * TF axes are visible from the axes in the picture: TF-map - map and TF-base-link - the robot itself, the remaining axes are muted in rviz so as not to merge with each other.The data from the lidar slightly does not coincide with the walls on the map, the robot is not localized.If you go from this position, the algorithm will try to adjust, but you can also help it by indicating the starting position directly in rviz using the “2d pose estimate” button:
 Next, in the rviz visualization window on the map, indicate the initial location and direction of the robot with a hefty green arrow- initial pose (you can do this many times):
 After clarifying the position, base_link will shift slightly relative to map: The
 absolute accuracy of the coincidence of the borders from the lidar with the map when manually adjusting the initial position does not needed, the algorithm will then correct everything on its own.
Before you go anyway
Each time, put in rviz the starting position, if on the ground the robot starts from the same place so-so occupation. Therefore, we will use the service (remember that in addition to topics in ROS there are services), when accessed, it will read the "location of the robot on the map", then we will use this data.Create a script on the PC (it does not matter in which place)get_pose.py
import rospy
from std_srvs.srv import Empty, EmptyResponse
from geometry_msgs.msg import PoseWithCovarianceStamped, Pose
robot_pose = Pose()
def service_callback(request):
print ("Robot Pose:")
print (robot_pose)
return EmptyResponse()
def sub_callback(msg):
global robot_pose
robot_pose = msg.pose.pose
rospy.init_node('service_server')
my_service = rospy.Service('/get_pose_service', Empty , service_callback)
sub_pose = rospy.Subscriber('/amcl_pose', PoseWithCovarianceStamped, sub_callback)
rospy.spin()
After starting, the script in the terminal does not display anything and quietly waits for it to be accessed. Since in rviz using the graphical interface we recently set the initial position of the robot, you can refer to our new script and find out this position. Without closing the terminal with the script (like previously launched terminals with nodes), in another terminal we will execute:rosservice call /get_pose_service
After executing the request in the terminal with the script, get_pose.py will display the position of the robot: Save these indicators and add them to the settings of the amcl node on the robot, so that the robot starts from the specified position each time:
nano linorobot/launch/include/amcl.launch
Addparameters<param name="initial_pose_x" value="0.548767569629"/>
<param name="initial_pose_y" value="0.218281839179"/>
<param name="initial_pose_z" value="0.0"/>
<param name="initial_orientation_z" value="0.128591756735"/>
<param name="initial_orientation_w" value="0.991697615254"/>
Now at startup, the robot will start already from a certain position, and it also will not need to be set manually in rviz:
Finally going
Restart the commands for the robot and the PC given at the beginning and look at the robot in rviz.We’ll use the “2D NAV Goal” rviz to send the robot wherever the soul wishes: As you can see, the robot can not only indicate the distance of the trip, but also the direction of movement.In the above example, we drove a little forward, turned around and went back.In rviz, the familiar “green arrows” Amcl particle swarm are also visible, which show where, according to the program, the robot is located. After the trip, their concentration approaches the real location of the robot, the total number decreases. The robot travels fast enough - 0.3 m / s, so the program requires more time to localize the robot.Navigating in rviz using the “2D NAV Goal” to understand how far and in which direction the robot will travel is convenient. But even more convenient is a trip without operator participation in rviz.Therefore, we highlight on the map the points of interest where we will go. To do this, move the robot to the desired points on the map using "2D NAV Goal". At these points it will access the get_pose.py service. Next, the coordinates of all points will be transferred to the travel program.Why not just transfer the robot in your arms to points of interest? The thing is “Amcl particle swarm”, the algorithm that builds them. Even if the robot is at the point of interest, and its position is specified manually, a variant of its location will be "sprayed" over the area around the point of interest itself. Therefore, you still have to go.Let's start from the point codenamed “corridor”:
 We will save the pose when the robot is at the desired point using a call to a previously created service:
rosservice call /get_pose_service
Next - the “entrance”: And the final point - “the kitchen”:
 Now it's time to create a travel program -
MoveTBtoGoalPoints.py
import rospy
import actionlib
from move_base_msgs.msg import MoveBaseAction, MoveBaseGoal
"""
pose x,y,x; orientation: x,y,z,w
"""
GoalPoints = [ [(5.31514576482, 1.36578380326, 0.0), (0.0, 0.0, -0.498454937648, 0.866915610157)],
[(5.77521810772, -1.2464049907, 0.0), (0.0, 0.0, -0.959487358308, 0.281751680114)],
[(2.14926455346, -2.7055208156, 0.0), (0.0, 0.0, -0.99147032254, 0.130332649487)]]
def assign_goal(pose):
goal_pose = MoveBaseGoal()
goal_pose.target_pose.header.frame_id = 'map'
goal_pose.target_pose.pose.position.x = pose[0][0]
goal_pose.target_pose.pose.position.y = pose[0][1]
goal_pose.target_pose.pose.position.z = pose[0][2]
goal_pose.target_pose.pose.orientation.x = pose[1][0]
goal_pose.target_pose.pose.orientation.y = pose[1][1]
goal_pose.target_pose.pose.orientation.z = pose[1][2]
goal_pose.target_pose.pose.orientation.w = pose[1][3]
return goal_pose
if __name__ == '__main__':
rospy.init_node('MoveTBtoGoalPoints')
client = actionlib.SimpleActionClient('move_base', MoveBaseAction)
client.wait_for_server()
for TBpose in GoalPoints:
TBgoal = assign_goal(TBpose)
client.send_goal(TBgoal)
client.wait_for_result()
* In GoalPoints, we will add the previously saved coordinates of the trip points. There is an explanation in the code in which order the parameters go: pose x, y, x; orientation: x, y, z, w - [(5.31514576482, 1.36578380326, 0.0), (0.0, 0.0, -0.498454937648, 0.866915610157)]Run the MoveTBtoGoalPoints.py script in parallel with the previously launched nodes on the robot and PC, see the result: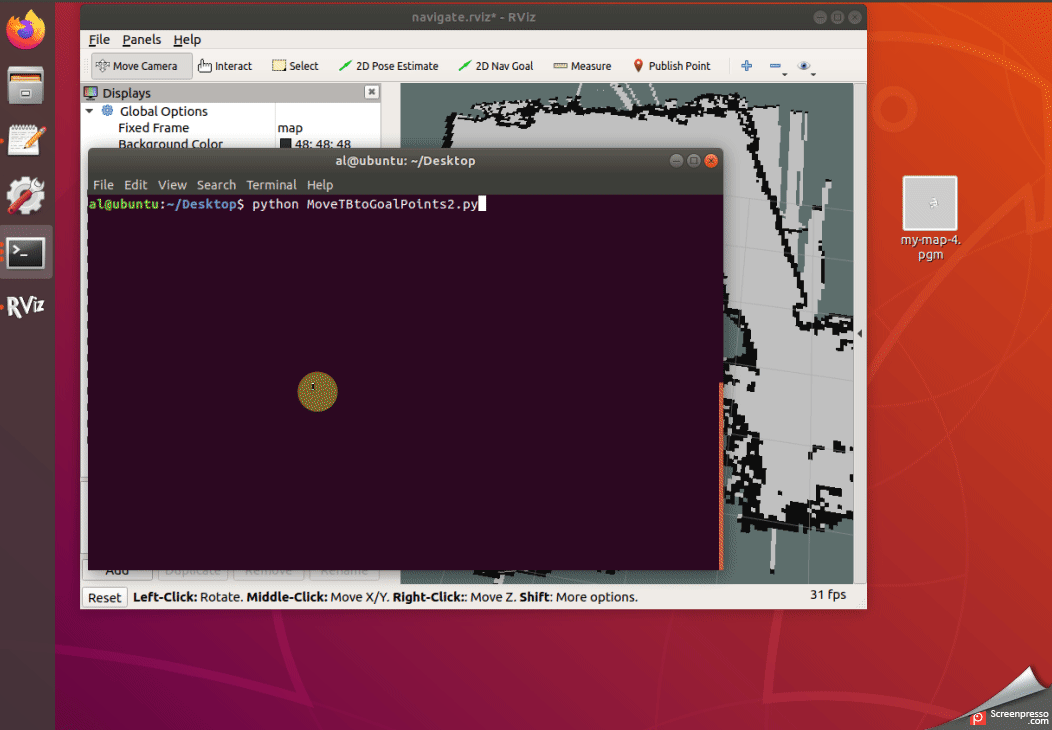 As you can see , the robot successfully drove to the hallway and on the way to the kitchen saw himself in the mirror and got stuck. Well with lidars when meeting with mirrors, unfortunately so.What can be done?It is possible to add intermediate points before and after the mirrors, reduce the speed of the robot, stick an opaque tape on the mirror along the route.But these are the next steps, but for now we will consider the task of traveling from point A to point B with and without the help of rviz completed. Now, in principle, we do not need an external PC, because the trip script takes us to the desired points on the map.But let's not rush to drop the PC along with rviz, since the linorobot project does not work correctly "out of the box", and you need to "work with a file" on the navigation stack.Here is the time to object - let me say, where is the autonomous navigation, the robot drove n steps forward, sideways, backwards, and even drove into the mirror?Well, that’s all, except for some of the details that make ROS stand out.Let's look at these details.Suppose some irresponsible citizen left an inanimate object along the path of the robot. This item is not on the map that was given to the robot for navigation:
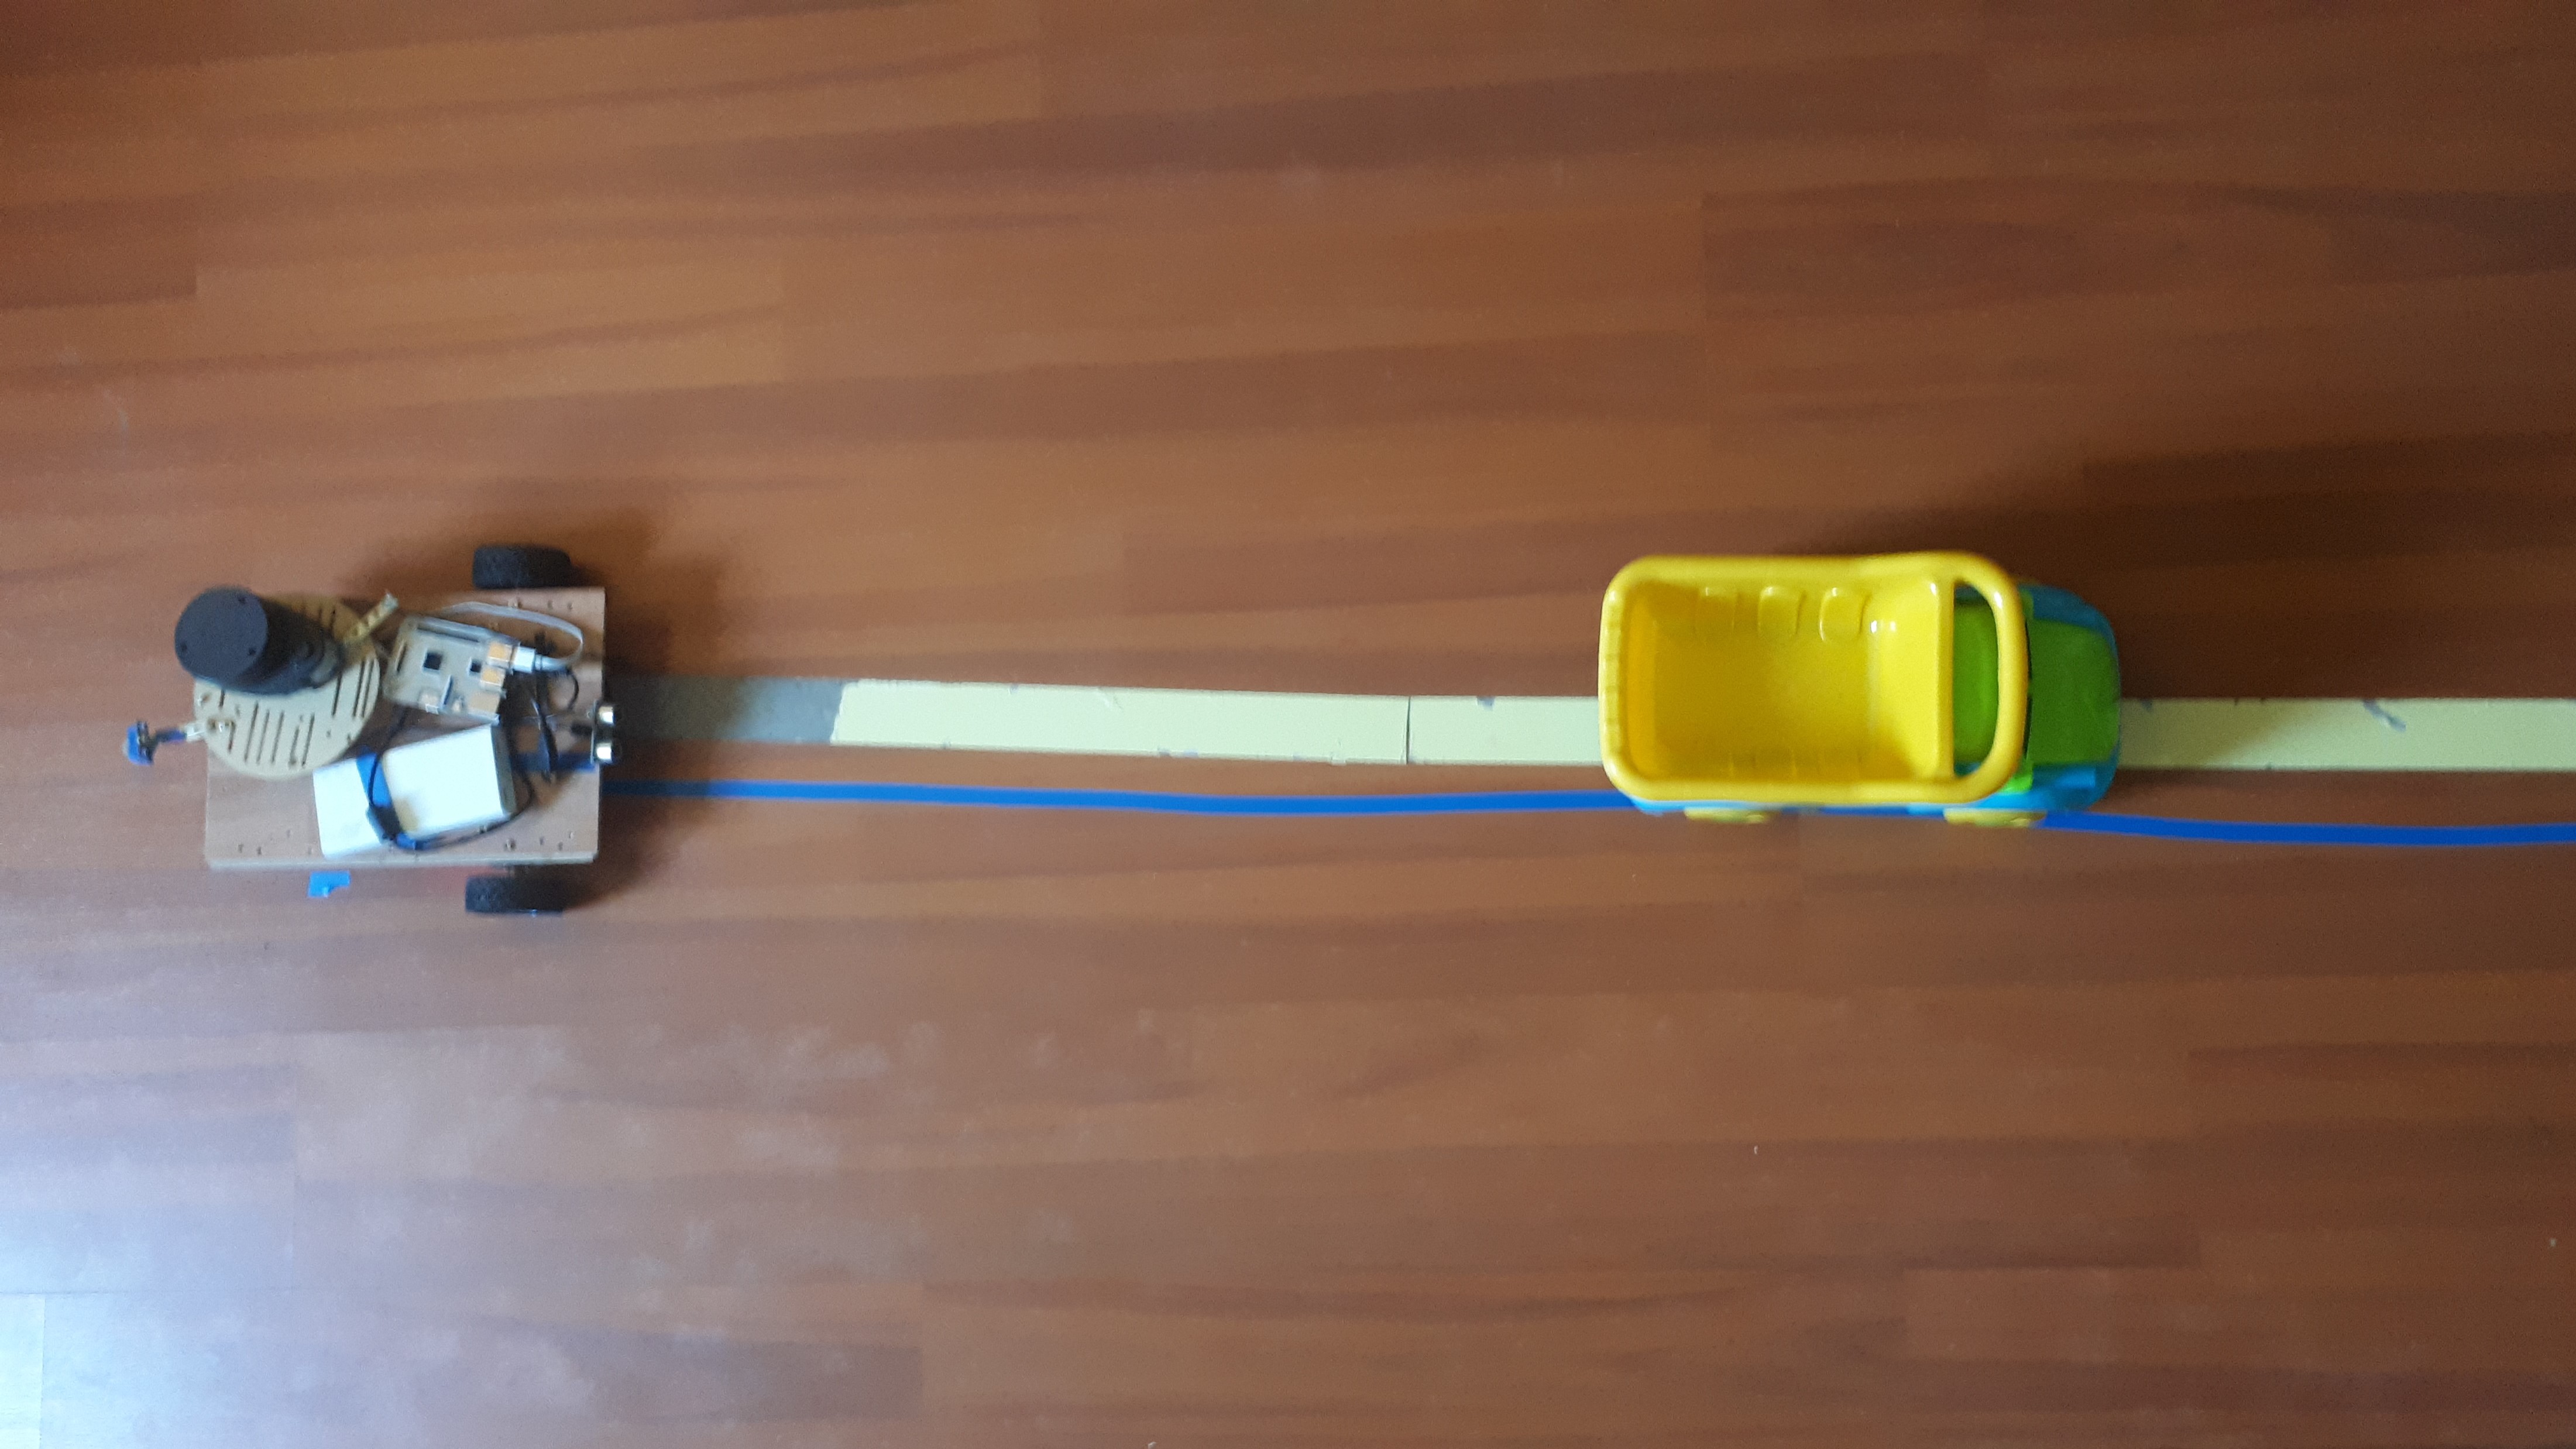 What will happen?Let's see:
 As you can see, the lidar saw an obstacle, the algorithm marked it on the map and ordered a detour.
Finally, add some beauty to rviz
The rviz visual editor has interesting plugins that are not installed by default. Their use can add quite a lot of interesting points when working with rviz.The repository with plugins is here .Install plugins on our PC in our environment:roscd; cd ../src;
catkin_create_pkg my_rviz_markers rospy
cd my_rviz_markers/
cd src
git clone https://github.com/jsk-ros-pkg/jsk_visualization
git clone https://github.com/ClementLeBihan/rviz_layer
cd ..
rosdep install --from-paths -y -r src
cd ~/linorobot_ws/
catkin_make
After installation in rviz, additional plugins should appear.Now, let's add, for example, the icons: In the my_rviz_markers / samples folder, create a script:
pictogram_array_objects_demo.py
import rospy
import math
from jsk_rviz_plugins.msg import Pictogram, PictogramArray
from random import random, choice
rospy.init_node("pictogram_object_demo_node")
p = rospy.Publisher("/pictogram_array", PictogramArray, queue_size=1)
r = rospy.Rate(1)
actions = [Pictogram.JUMP, Pictogram.JUMP_ONCE, Pictogram.ADD,
Pictogram.ROTATE_X, Pictogram.ROTATE_Y, Pictogram.ROTATE_Z]
pictograms = ["home","fa-robot"]
object_frames = ["map","base_link"]
while not rospy.is_shutdown():
arr = PictogramArray()
arr.header.frame_id = "/map"
arr.header.stamp = rospy.Time.now()
for index, character in enumerate(pictograms):
msg = Pictogram()
msg.header.frame_id = object_frames[index]
msg.action = actions[2]
msg.header.stamp = rospy.Time.now()
msg.pose.position.x = 0
msg.pose.position.y = 0
msg.pose.position.z = 0.5
msg.pose.orientation.w = 0.7
msg.pose.orientation.x = 0
msg.pose.orientation.y = -0.7
msg.pose.orientation.z = 0
msg.size = 0.5
msg.color.r = 25 / 255.0
msg.color.g = 255 / 255.0
msg.color.b = 240 / 255.0
msg.color.a = 1.0
msg.character = character
arr.pictograms.append(msg)
p.publish(arr)
r.sleep()
Let's make it executable:sudo chmod +x pictogram_array_objects_demo.py
In the my_rviz_markers / launch folder, create a launch to launch:<launch>
<node pkg="my_rviz_markers" type="pictogram_array_objects_demo.py" name="pictogram_array_objects_demo" </node>
</launch>
It starts as usual (all other nodes at this time should also work):roslaunch my_rviz_markers pictogram_array_objects_demo.launch
Put the marker on the map
Markers can be helpful in understanding where the point is on the map.As in the previous example, create a script in the my_rviz_markers / samples folder:basic_marker.py
import rospy
from visualization_msgs.msg import Marker
from geometry_msgs.msg import Point
class MarkerBasics(object):
def __init__(self):
self.marker_objectlisher = rospy.Publisher('/marker_basic', Marker, queue_size=1)
self.rate = rospy.Rate(1)
self.init_marker(index=0,z_val=0)
def init_marker(self,index=0, z_val=0):
self.marker_object = Marker()
self.marker_object.header.frame_id = "/map"
self.marker_object.header.stamp = rospy.get_rostime()
self.marker_object.ns = "start"
self.marker_object.id = index
self.marker_object.type = Marker.SPHERE
self.marker_object.action = Marker.ADD
my_point = Point()
my_point.z = z_val
self.marker_object.pose.position.x = 5.31514576482
self.marker_object.pose.position.y = 1.36578380326
self.marker_object.pose.orientation.x = 0
self.marker_object.pose.orientation.y = 0
self.marker_object.pose.orientation.z = -0.498454937648
self.marker_object.pose.orientation.w = 0.866915610157
self.marker_object.scale.x = 0.2
self.marker_object.scale.y = 0.2
self.marker_object.scale.z = 0.2
self.marker_object.color.r = 0.0
self.marker_object.color.g = 0.0
self.marker_object.color.b = 1.0
self.marker_object.color.a = 1.0
self.marker_object.lifetime = rospy.Duration(0)
def start(self):
while not rospy.is_shutdown():
self.marker_objectlisher.publish(self.marker_object)
self.rate.sleep()
if __name__ == '__main__':
rospy.init_node('marker_basic_node', anonymous=True)
markerbasics_object = MarkerBasics()
try:
markerbasics_object.start()
except rospy.ROSInterruptException:
pass
In the my_rviz_markers / launch folder, create a launch to launch:basic_marker.launch<launch>
<node pkg="my_rviz_markers" type="basic_marker.py" name="basic_marker" />
</launch>
Run:roslaunch my_rviz_markers basic_marker.launch
Add to rviz:
Add graphics
Which will show the distance and angle between the two frames: In the my_rviz_markers / launch folder, create a launch to launch:
overlay_meny_my.launch overlay_menu_my.launch<launch>
<node pkg="my_rviz_markers" type="haro_overlay_complete_demo.py" name="overlay_menu" />
</launch>
In the my_rviz_markers / samples folder, create the scripts:haro_overlay_complete_demo.py
from jsk_rviz_plugins.msg import OverlayText, OverlayMenu
from std_msgs.msg import ColorRGBA, Float32
import rospy
import math
import random
from geometry_msgs.msg import Twist
class HaroOverlay(object):
def __init__(self):
self.text_pub = rospy.Publisher("/text_sample", OverlayText, queue_size=1)
self.plot_value_pub = rospy.Publisher("/plot_value_sample", Float32, queue_size=1)
self.piechart_value_pub = rospy.Publisher("/piechart_value_sample", Float32, queue_size=1)
self.menu_publisher = rospy.Publisher("/test_menu", OverlayMenu, queue_size=1)
self.plot_value = 0
self.piechart_value = 0
self.max_distance_from_object = 10.0
self.subs = rospy.Subscriber("/haro_base_link_to_person_standing_tf_translation", Twist, self.twist_callback)
self.counter = 0
self.rate = rospy.Rate(100)
self.overlaytext = self.update_overlaytext()
self.menu = self.update_overlay_menu()
def twist_callback(self, msg):
self.plot_value = msg.linear.x
self.piechart_value = msg.angular.z
def update_overlaytext(self, number=1.23, number2=20):
text = OverlayText()
text.width = 200
text.height = 400
text.left = 10
text.top = 10
text.text_size = 12
text.line_width = 2
text.font = "DejaVu Sans Mono"
text.text = """Distance= %s.
Angle=%s.
Counter = <span style="color: green;">%d.</span>
""" % (str(number), str(number2) ,self.counter)
text.fg_color = ColorRGBA(25 / 255.0, 1.0, 240.0 / 255.0, 1.0)
text.bg_color = ColorRGBA(0.0, 0.0, 0.0, 0.2)
return text
def update_overlay_textonly(self, new_text):
self.overlaytext.text = new_text
def update_overlay_menu(self):
menu = OverlayMenu()
menu.title = "HaroSystemMode"
menu.menus = ["Sleep", "Searching", "MovingInCircles","Waiting"]
menu.current_index = self.counter % len(menu.menus)
return menu
def update_overlay_menu_haro_tf(self):
menu = OverlayMenu()
menu.title = "HaroDistanceFromPerson"
menu.menus = ["FarAway", "CloseBy", "Target", "OtherWayRound"]
fraction = 10.0
if self.piechart_value < (math.pi/fraction):
if self.plot_value >= self.max_distance_from_object:
index = 0
elif self.plot_value >= (self.max_distance_from_object/ fraction) and self.plot_value < self.max_distance_from_object:
index = 1
elif self.plot_value < (self.max_distance_from_object/fraction):
index = 2
else:
index = 3
menu.current_index = index
return menu
def start_dummy_demo(self):
while not rospy.is_shutdown():
self.overlaytext = self.update_overlaytext()
self.menu = self.update_overlay_menu()
if self.counter % 100 == 0:
self.menu.action = OverlayMenu.ACTION_CLOSE
self.text_pub.publish(self.overlaytext)
self.value_pub.publish(math.cos(self.counter * math.pi * 2 / 1000))
self.menu_publisher.publish(self.menu)
self.rate.sleep()
self.counter += 1
def start_harodistance_demo(self):
while not rospy.is_shutdown():
self.overlaytext = self.update_overlaytext(number=self.plot_value, number2=self.piechart_value)
self.menu = self.update_overlay_menu_haro_tf()
self.text_pub.publish(self.overlaytext)
self.plot_value_pub.publish(self.plot_value)
self.piechart_value_pub.publish(self.piechart_value)
self.menu_publisher.publish(self.menu)
self.rate.sleep()
self.counter += 1
def dummy_overlay_demo():
rospy.init_node('distance_overlay_demo_node', anonymous=True)
haro_overlay_object = HaroOverlay()
try:
haro_overlay_object.start_harodistance_demo()
except rospy.ROSInterruptException:
pass
if __name__ == '__main__':
dummy_overlay_demo()
The second script istf_haro_to_object_listener.py
import sys
import rospy
import math
import tf
from geometry_msgs.msg import Twist, Vector3
if __name__ == '__main__':
rospy.init_node('tf_listener_haro_to_person')
listener = tf.TransformListener()
if len(sys.argv) < 3:
print("usage: tf_haro_to_object_listener.py parent child")
else:
follower_model_name = sys.argv[1]
model_to_be_followed_name = sys.argv[2]
topic_to_publish_name = "/"+str(follower_model_name)+"_to_"+str(model_to_be_followed_name)+"_tf_translation"
tf_translation = rospy.Publisher(topic_to_publish_name, Twist ,queue_size=1)
rate = rospy.Rate(10.0)
ctrl_c = False
follower_model_frame = "/"+follower_model_name
model_to_be_followed_frame = "/"+model_to_be_followed_name
def shutdownhook():
global ctrl_c
ctrl_c = True
rospy.on_shutdown(shutdownhook)
while not ctrl_c:
try:
(trans,rot) = listener.lookupTransform(follower_model_frame, model_to_be_followed_frame, rospy.Time(0))
translation_object = Vector3()
translation_object.x = trans[0]
translation_object.y = trans[1]
translation_object.z = trans[2]
angular = math.atan2(translation_object.y, translation_object.x)
linear = math.sqrt(translation_object.x ** 2 + translation_object.y ** 2)
cmd = Twist()
cmd.linear.x = linear
cmd.angular.z = angular
tf_translation.publish(cmd)
except (tf.LookupException, tf.ConnectivityException, tf.ExtrapolationException):
continue
rate.sleep()
It starts like this (it is believed that all other main nodes and rviz are already running):roslaunch linorobot overlay_meny_my.launch
python tf_haro_to_object_listener.py base_link map
We will see the angle and distance of the base_link frame relative to the map.To be continued.