In this article, I bring to your attention instructions for installing and configuring TeamCity to automate the assembly and testing of Android projects under Windows.I will also pay attention to the features of setting up the environment for the Android project (which I found in the research process) and various kinds of things that can help make life easier for the novice tester and developer.Objectives:
When updating the project code, the following should occur:- Auto build project
- Run UI Autotests
- Exporting debug and release APK files for subsequent manual testing
- Notify all development team members of the results
Plan:
- Install and configure the Java JDK
- Install and configure Android SDK
- Setting a separate gradle for debug
- Preparing an Android project
- Install TeamCity Server and Build Agent
- Setting up TeamCity Project → Build for the project build and getting the installation APK
- Configure build steps with UI autotests
Main part
1. Installing and Configuring Java JDKContrary to popular belief about installing the latest version of Java, JetBrains on its official website publishes the recommended version of the Java SDK: linkInstalls the recommended version: linkAlso install Environment Variables:JAVA_HOME- path to the folder with SKD Java for using CI.
Example:
C:\Java\jdk1.8.0_181
Better to put in System variables.- Path - path to the folder with Java SKD for use from the command line.
Example:
C:\Java\jdk1.8.0_181\bin
Better to put in User variables.
We check the installation:In the CMD in any directory we enter: java -versionJava should answer that it is: 2. Install and configure the Android SDKWe will not install the Android SDK tools separately. Android has forbidden to create projects from the command line. It will also be more convenient to debug possible errors if we immediately install Android Studio.Install the latest version: linkAlso install Environment Variables:
ANDROID_HOMEExample: C:\Users\1\AppData\Local\Android\SdkANDROID_AVD_HOMEExample: C:\Users\1\.android\avdPath:Example: C:\Users\1\AppData\Local\Android\Sdk\platform-tools\- launch the utilities from the console by us and CI.Check: type in CMD: adb --helpGet information on the current version and available commands: Path:Example:
 C:\Users\1\AppData\Local\Android\Sdk\emulator\- start the emulator from the console by us and CI.Check: we type in CMD emulator -versionWe get information on the current version: 3. Gradle installation Gradleis included in Android Studio, but we will put another one for debug from the console.The version is not important, because it is assumed that the project will be launched through the Gradle wrapper.I suggest installing a version similar to that used in the project, for example Gradle 3.3. Link .We also install Environment Variables:
GRADLE_HOME- there is no need, because CI will use Gradle Android Studio.GRADLE_USER_HOMEExample: c:/gradle-cacheActual for Windows Server, as without it, during the assembly of the project, all the downloaded Gradle libraries will be stored inC:\Windows\System32\config\systemprofile\.gradlefurther CI will not be able to access these files.Path:C:\Gradle\gradle-3.3\bin- the path to the Gradle folder for convenient use from the command line.Check: we type in CMD gradle -vWe receive information on the current version: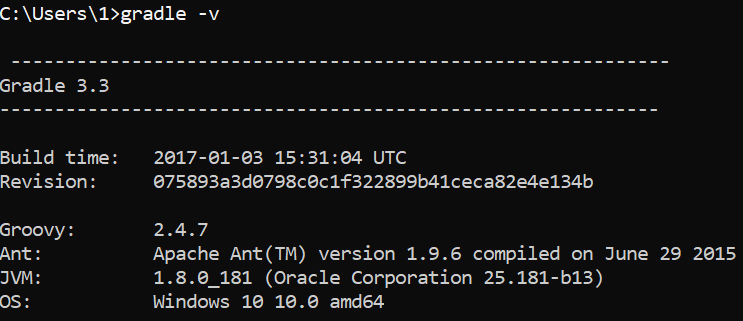 4. Preparation of the Android project4.1. Create a test project in Android Studio.Type Activity - Bottom Navigation Activity. It will come in handy later for creating a UI test.4.2. Disable Gradle Daemon on an ongoing basis so that Gradle Daemon does not spawn in CI:Add in file
 gradle.properties:add org.gradle.daemon=false4.3. We also add to the file .gitignore(to your taste) so that extra files are not left in VCS. 4.4. Create a keystore (or use an existing one) in the project folder. Link ..gradle
.idea
/build/
local.properties4.5. Add links to the keystore to Gradle so that we can build a full-fledged APK.Example:android{
... //
signingConfigs {
release {
storeFile file("keystorefile.jks") //
storePassword "Password" //
keyAlias "android" // keyAlias,
keyPassword "Password" // APK
}
}
... //
buildTypes {
release {
... //
signingConfig signingConfigs.release // APK
}
}
}
4.6. To test the health of the system, we will assemble a new project from the command line. Enter in CMD:cd < >For example: C:\Users\1\Documents\GitHub\Command2Go to the project.Enter: We aregradlew assembleDebugwaiting for the completion of the assembly.If all is well, then we get the result BUILD SUCCESSFUL. We go to the project folder:
 app\build\outputs\apk\debugIt contains a fresh APK file that can be installed on the device and check if everything works.4.7. We will also check whether the SDK tools and AVD manager are launched.4.7.1. Launch Android Studio and create an emulator. You can, of course, create it on the command line, but we have the installed UI shell, it’s a sin not to use it.Tools → AVD Manager: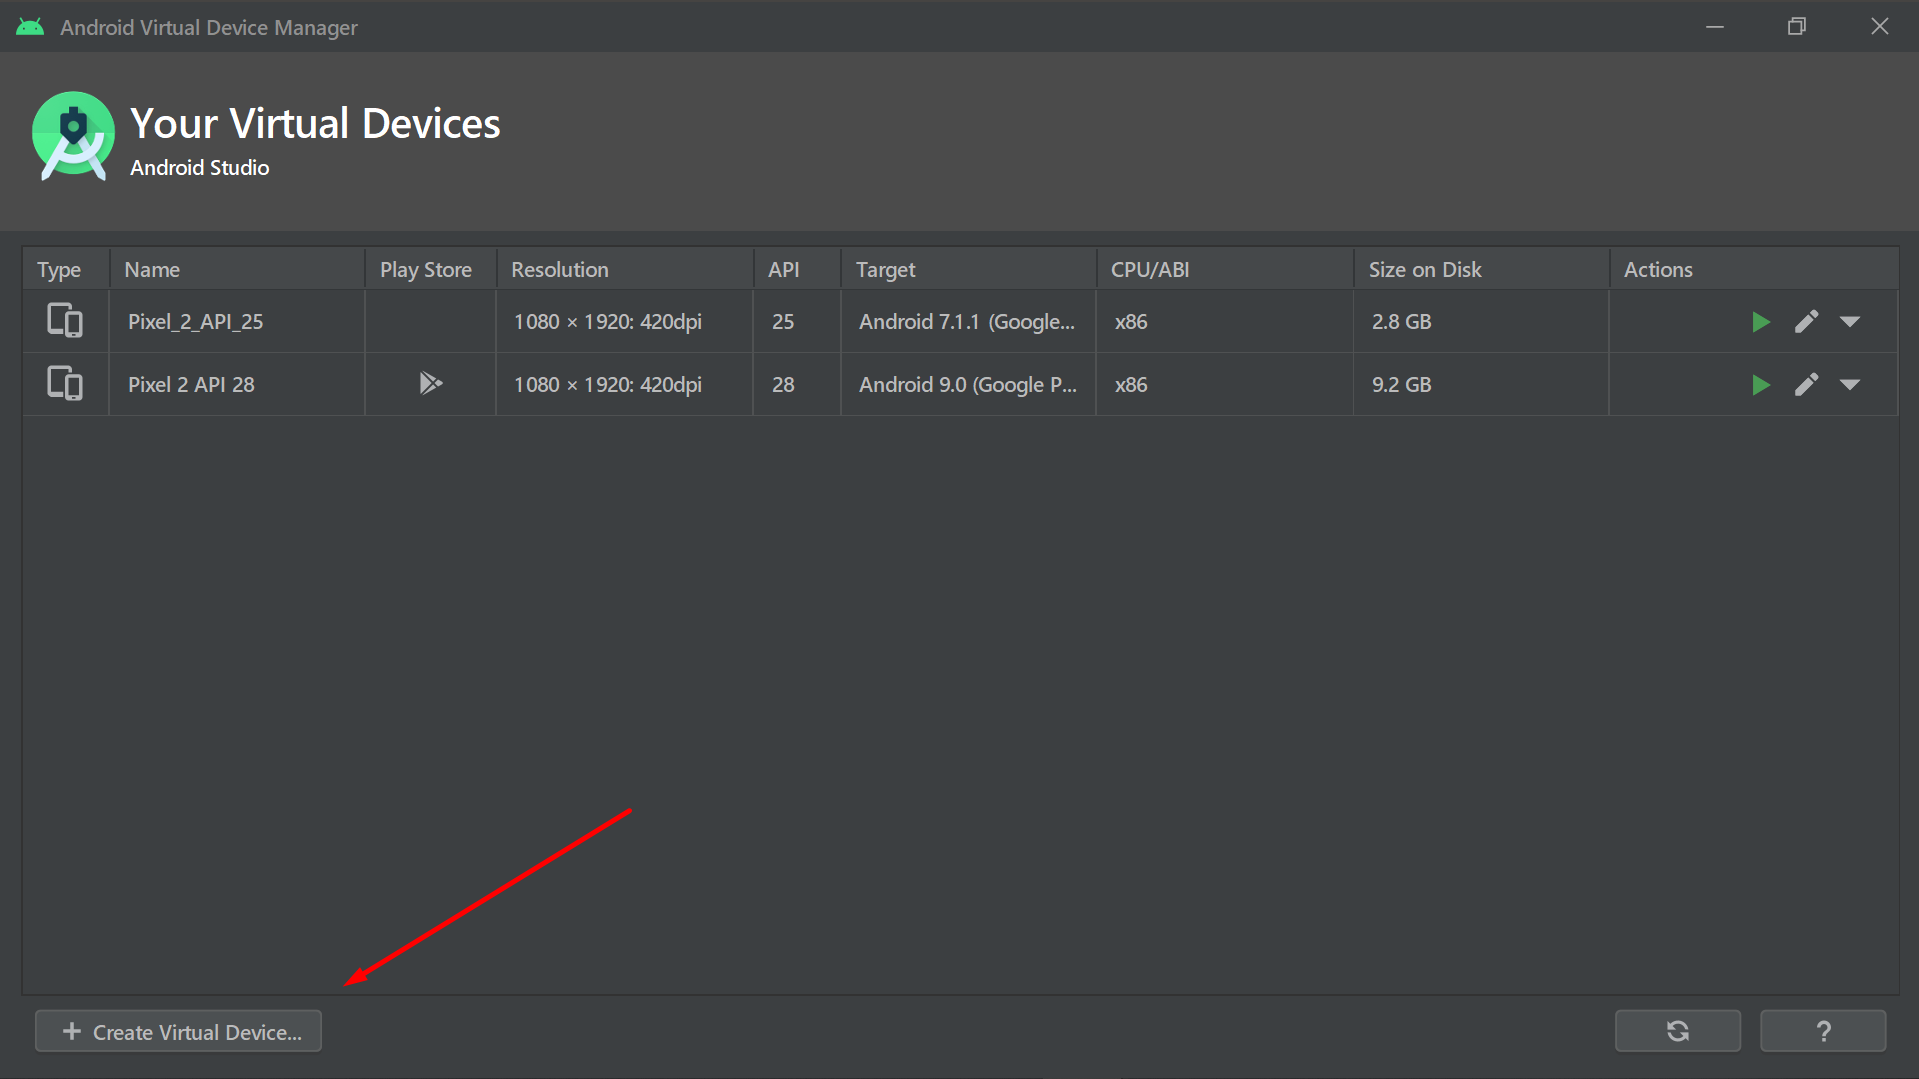 The SDK version of the emulator created must be at least as large as our SDK project.4.7.2. Created an emulator. Let's check its launch from the console. We enter at the command line:
start /min emulator -avd < >Example:start /min emulator -avd Pixel_2_API_25Note that we use a function /minto start the emulator in the background. Otherwise, he would not have allowed to enter new commands in the CMD.The device is running: 4.7.3. We check the installation of the collected APK.We enter in the CMD:
adb install <path_to_apk>Example:adb install C:\Users\1\Documents\GitHub\Command2\app\release\app-release.apkSuccessfully: 4.7.4. We check the launch of the installed APK.We enter in the CMD:
adb shell monkey -p < > -c android.intent.category.LAUNCHER 1Example: Theadb shell monkey -p com.panarik.command -c android.intent.category.LAUNCHER 1application started: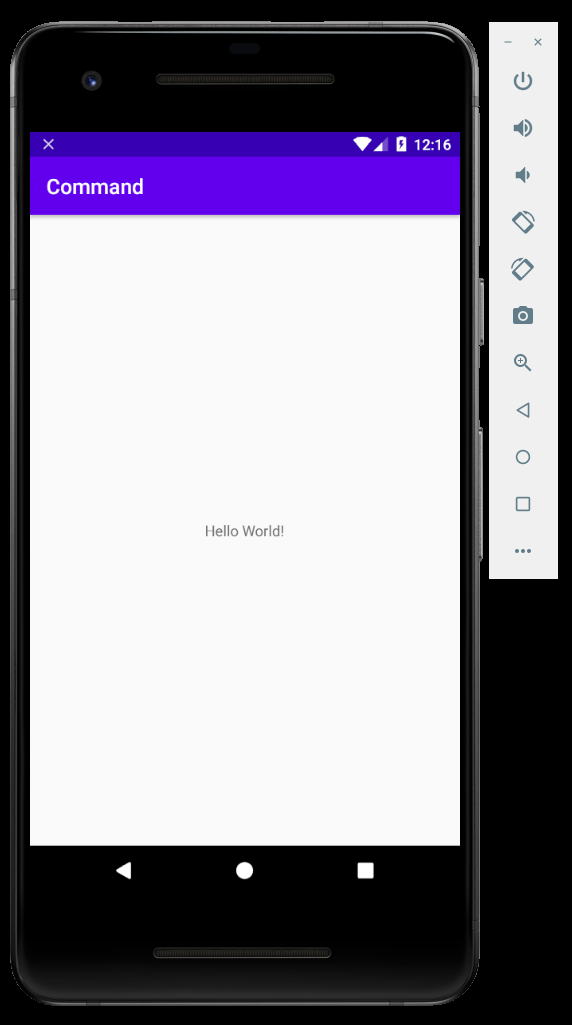 4.7.5. We upload the project to a remote repository, for example, to GitHub. Check if the project will be downloaded:Install Git BASH (if we use Git VCS). Link .We clone the project from a remote repo. Enter in the console Git BASH:
git clone < .git>Example:git clone https://github.com/panarik/Command2.gitWe see the result. The project was copied to a local folder: Everything is ready to install and configure TeamCity. Why are we doing exercises with the command line, and not immediately installing TeamCity. It will be much more convenient to make sure in advance that the project is working, so that later it will be easier to localize possible bugs at the build stage in TeamCity.5. Installing TeamCity Server and Build AgentI will not describe the installation process in detail. He is in the official guide and many other sources. TeamCity server port I propose to set non-standard, so that it is more difficult to calculate port scans.6. Configuring TeamCity Project → BuildIn general settings, you just need to set the path to the APK output:Example:
app\build\outputs\apk\release\app-release.apk 6.1. Setting up TeamCity VCS RootsEverything is standard. In our project, we use Git, so we enter it and a link to the remote repo. Example:
https://github.com/panarik/Command2.git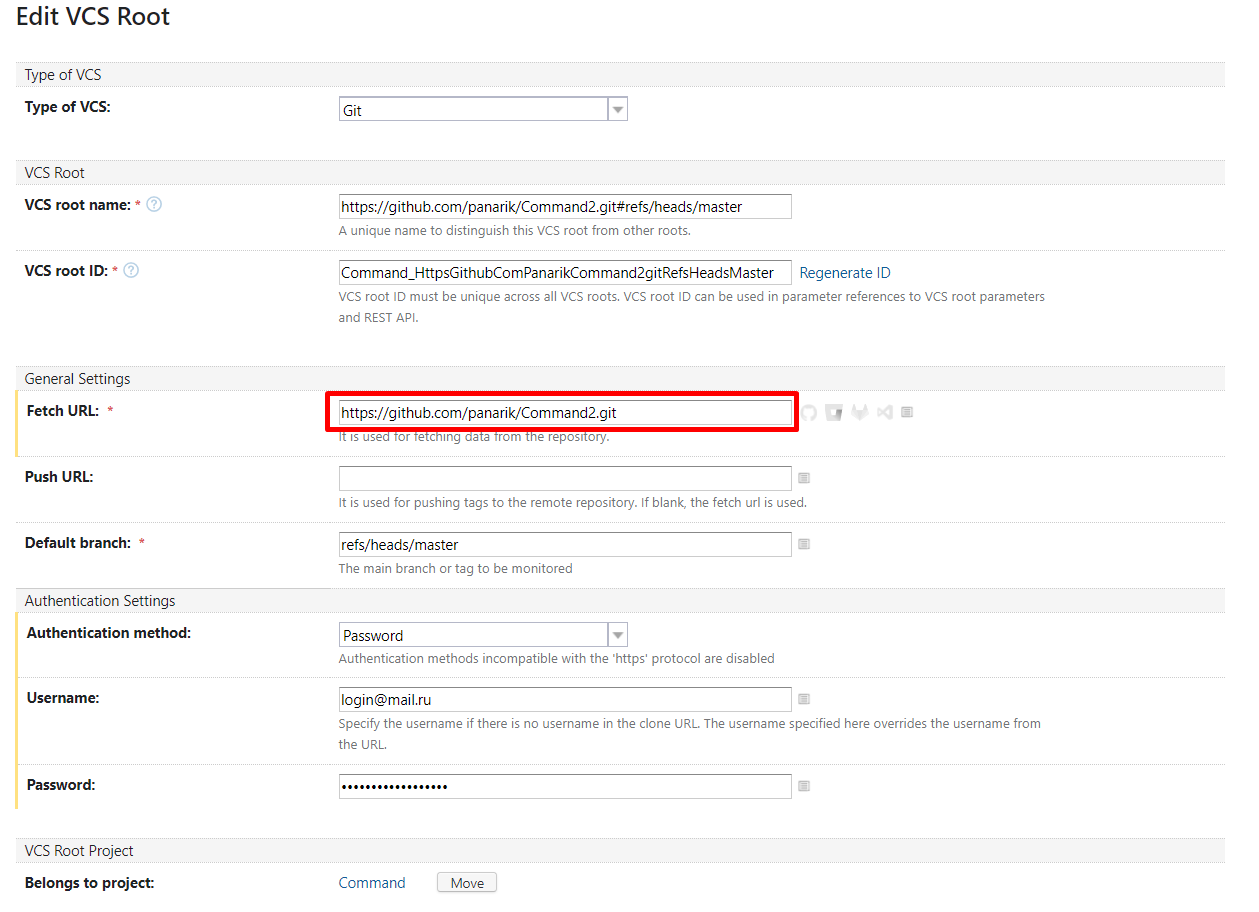 6.2. TeamCity Build ConfigurationAdd a Build Step, which will compile the project and display the APK. In our project we use Gradle.Enter in the field Gradle tasks:
clean build assembleDebug --no-daemon(--no-daemon just in case, and this should work as a subscript to the file that we did in section 4.2)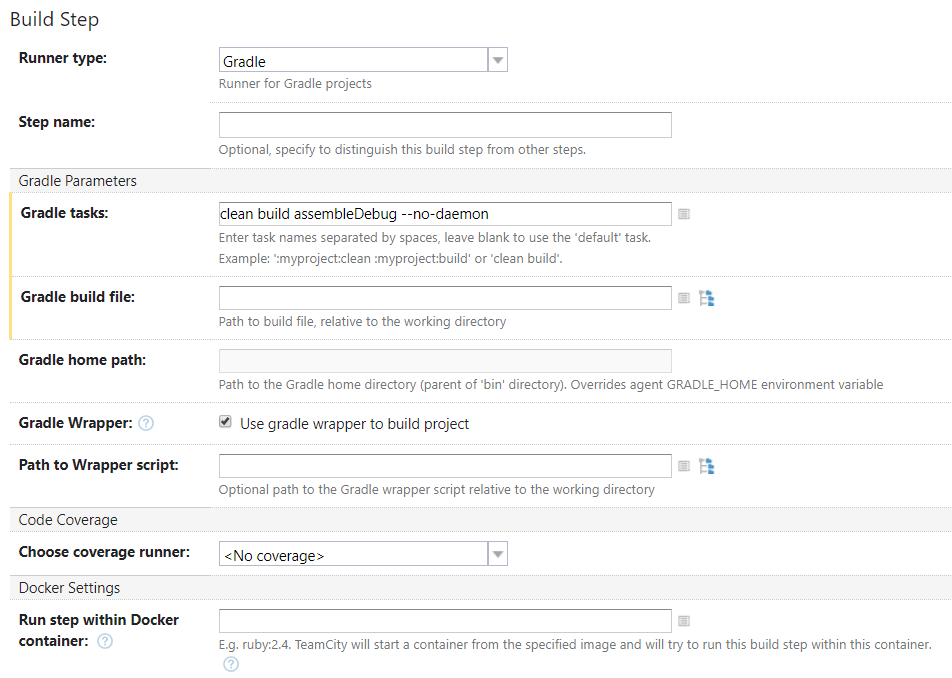 Click Run, we get the APK.7. Configuring build steps with UI autotests Wegot to the most interesting part, namely, the automatic launch of UI tests.Steps will be launched using .BAT files. It’s much more convenient to write code, change it on the fly without having to go into TeamCity UI, etc.7.1. First, create a build step with the emulator running.You can make the URL to the BATnik completely, for convenience, I made the Environment in TeamCity
 BAT_FILESwith the path to the folder with the BATs: we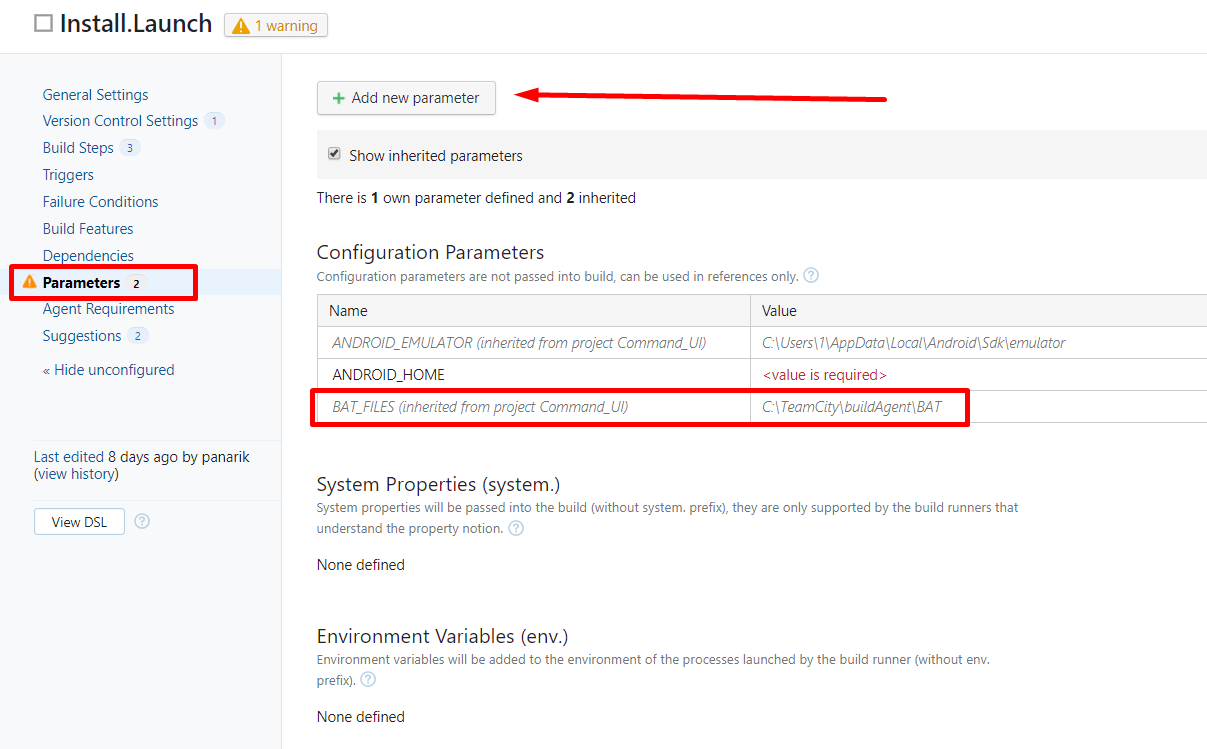 write the emulator start code in the file.Example:
start /min "emulator" /D "C:\Users\1\AppData\Local\Android\Sdk\emulator" emulator.exe -avd Pixel_2_API_25 -no-snapshot-save -no-boot-animList of commands and parameters on an off site: link .7.2. Create a build step with a pause while the emulator loads. You can immediately register the first step in .BAT, but it will be more clear.An example of such a team that has spied on the Internet:adb wait-for-device shell 'while [[ -z $(getprop sys.boot_completed) ]]; do sleep 1; done; input keyevent 82'From the UI it will look like this: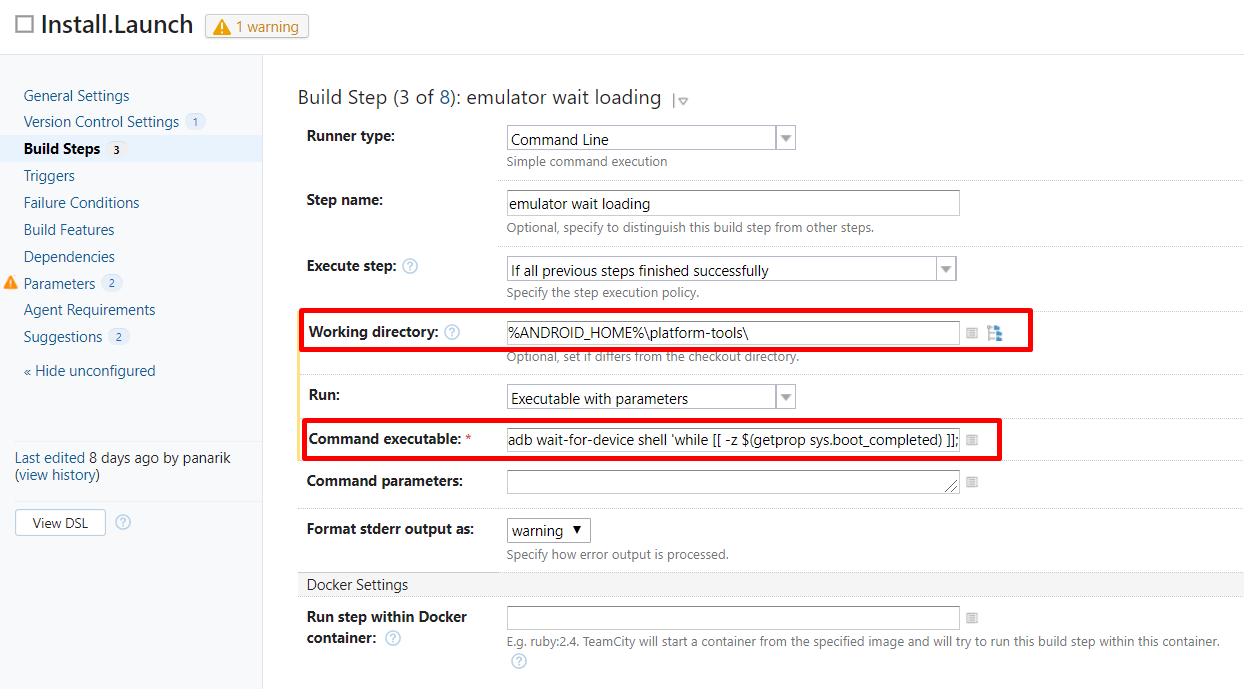 List of all the teams on the off site: link.7.3. Run the test.Also from the command line. Everything is individual here.Example command:
gradlew connectedDebugAndroidTest7.4. We stop the emulator.Example command:adb -s emulator-5554 emu killProcess completed.You can also upload the report in a separate step. By default, it is saved in the project folder.Thank you very much for your attention!If anyone has advice on improving the code for steps, and suggestions for improvement, I will be very grateful.