This is the first article in a short series on the graphical programming language G, which is used by LabVIEW. This language is not very popular yet - according to the TIOBE index for May 2020, LabVIEW is in the fortieth place exactly between Julia and Haskell. The LabVIEW Community Edition makes it possible to significantly expand the audience of users (previously it was possible to use only the trial version, and after 45 days to learn “closely”).
Well, as the great Kernigan and Ritchie said, "the only way to learn a new programming language is to start programming on it." This is what we will do.
In the first part, we will analyze the main elements of the development environment, and draw on the block diagram our first "Hello, World!"

The tutorial article is intended for those who see LabVIEW for the first time. Under the cut fifty pictures about seven megabytes.
Introduction
It is assumed that you have already completed the installation and activation of LabVIEW NXG.
, " ". "" . C# ( , , ). , , LabVIEW "" . — LabVIEW .
, LabVIEW "", " " ("Virtual Instruments") VI. LabVIEW -, . # *.cs , LabVIEW VI ( LabVIEW 2020 *.vi, NXG — *.gvi). . — , , ( , ). , — , — (, ). , VI .
LabVIEW NXG :

, LabVIEW. , , "" LabVIEW, — NXG, NXG LabVIEW, NI , NXG .
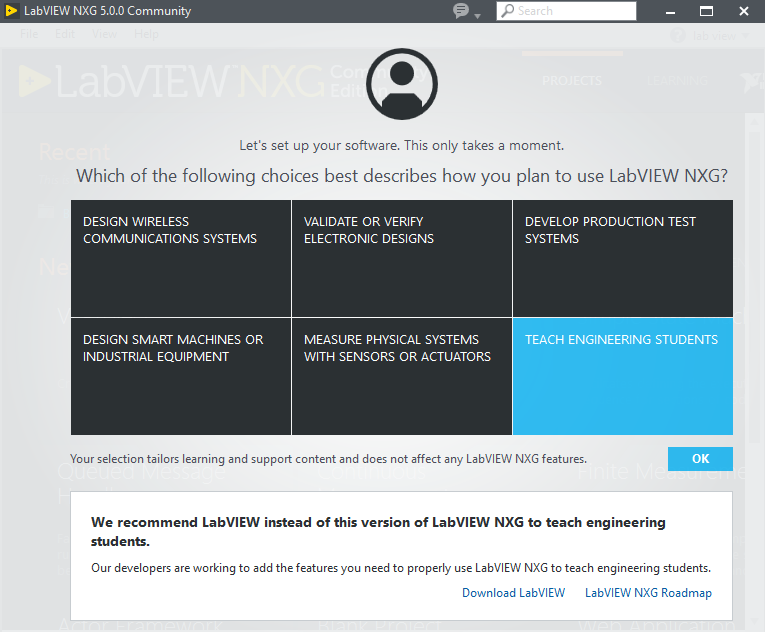
, NXG :

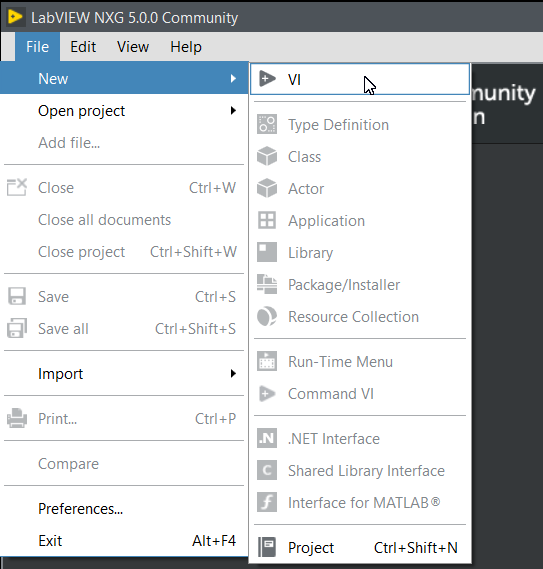
, File->New VI...:
— . ( , , , ).
:
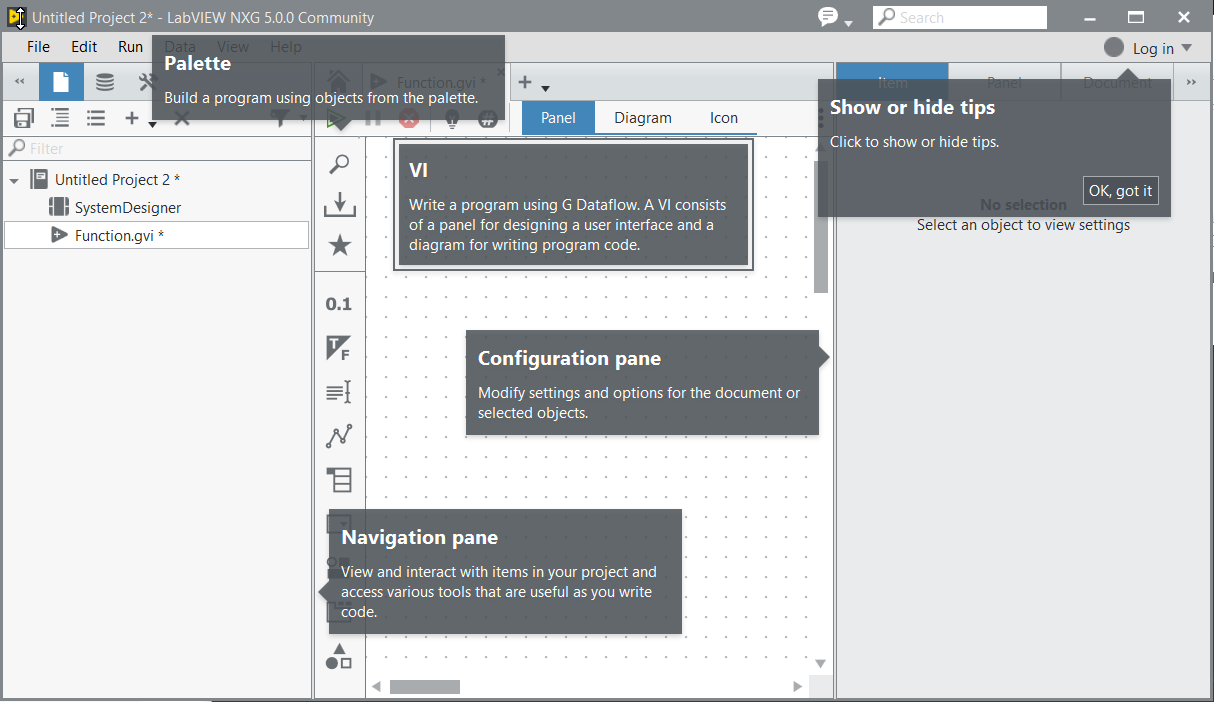
(Navigation Pane), — (VI), (Palette), — , (Configuration Pane), .
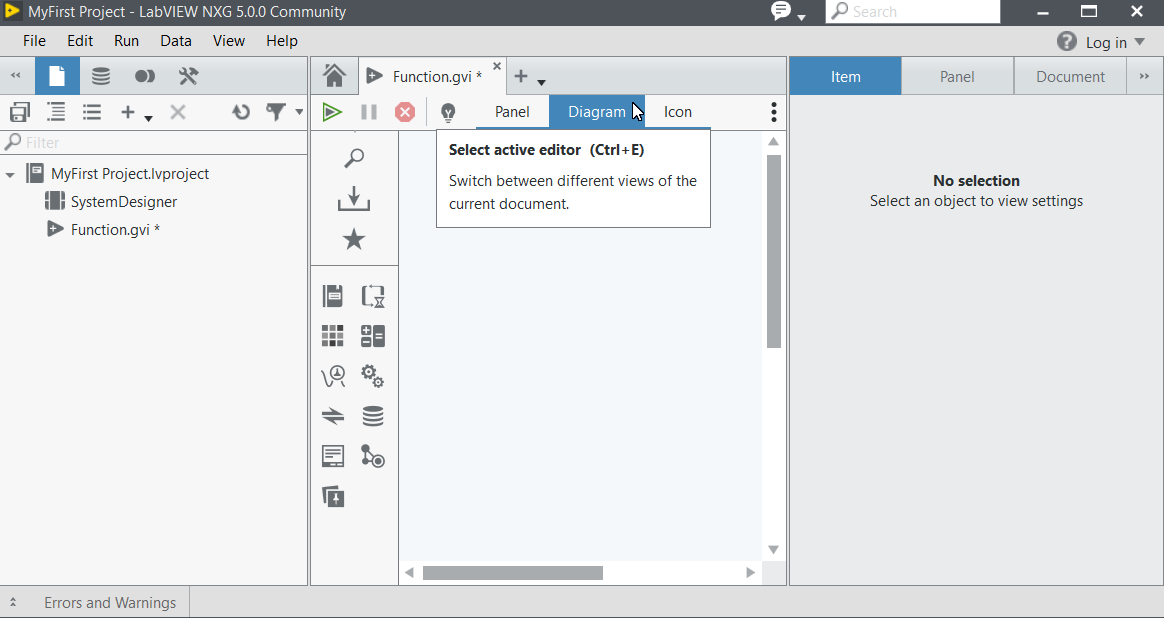
(VI). VI — - (Block Diagram) (Front Panel). — Panel Diagram (Icon — , ).
-
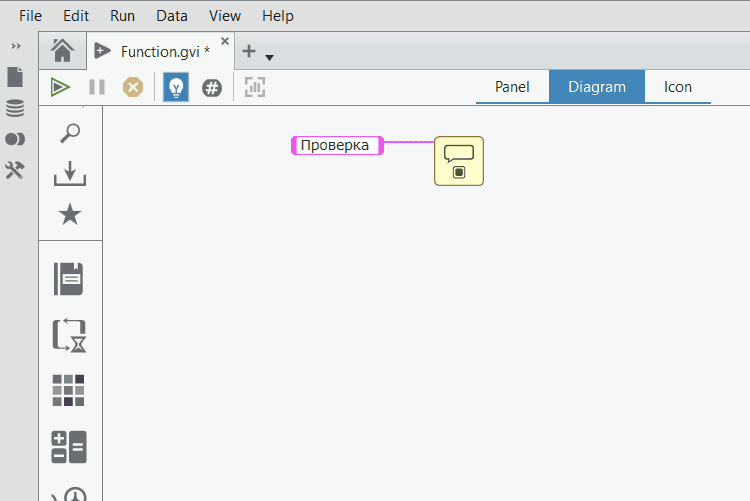
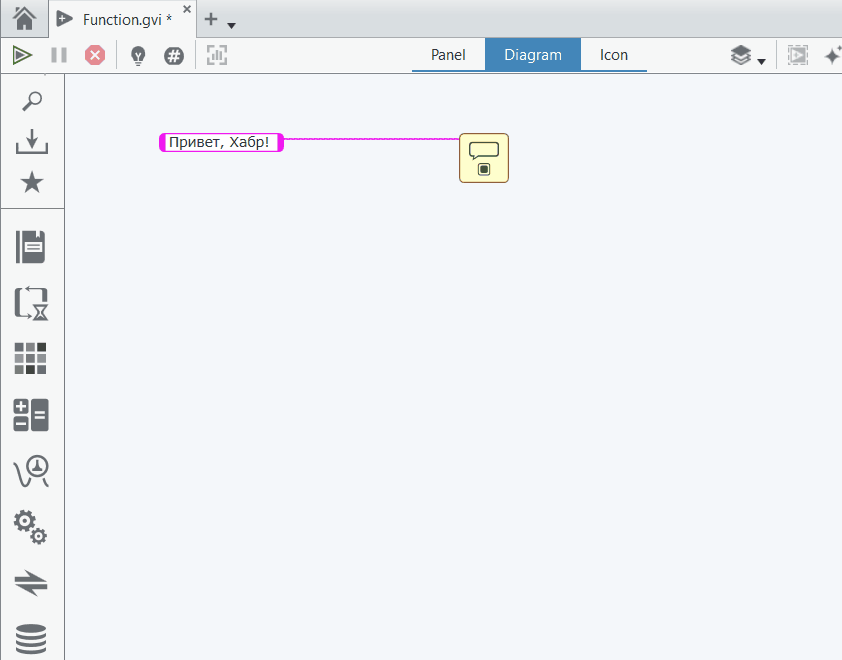
-. LabVIEW — , - ? - . Diagram . :
", !"- , - , - :
Console.WriteLine("Hello World!");
? — , . , . , , # WPF. *.cs , — *.xaml , LabVIEW *.gvi .
, NXG, , C#/WPF — , (, .net , WPF — API).
C# - :
const string message = "Hello, Habr!";
MessageBox.Show(message);
C#, — . , MessageBox — , Show ( ).
LabVIEW. .
DataTypes :

:

, ( , ).
-:

, "User Interface":
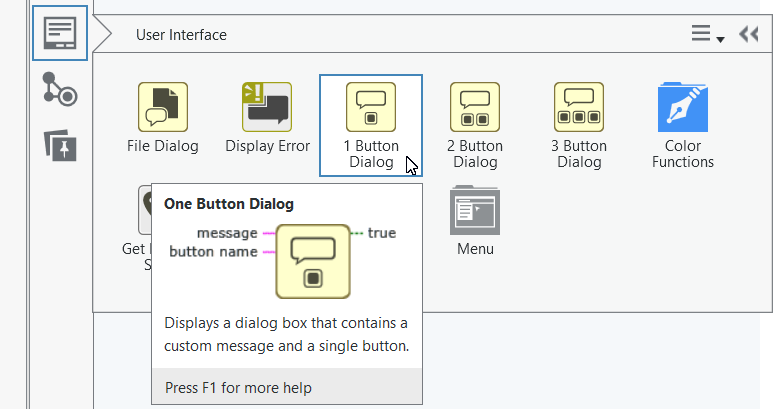
-:
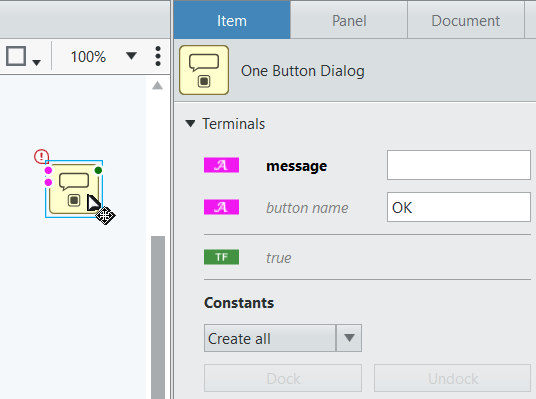
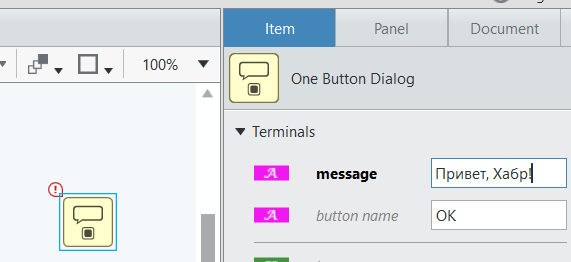
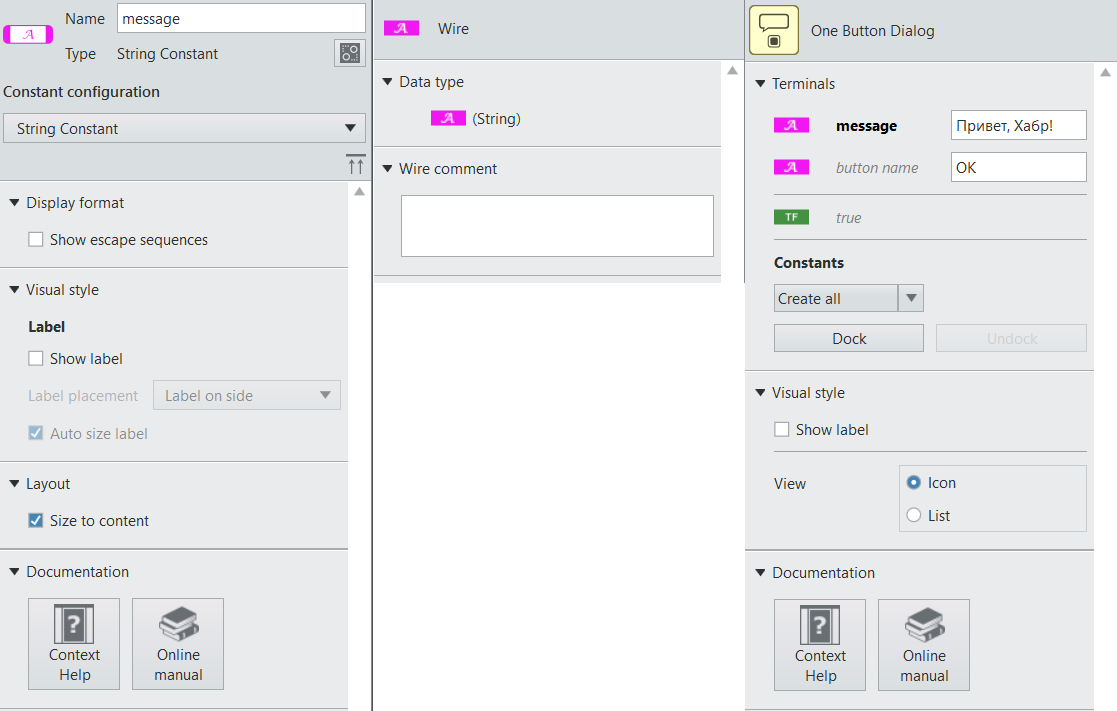
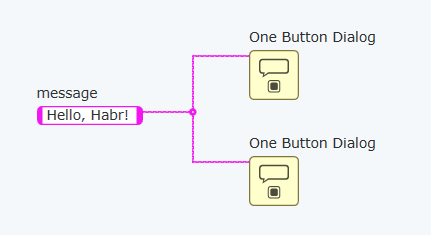
, ( , "magenta") — . , — . , (message) - , — , "OK". — , — . () ( true).
, — , ( , ), ( , ):

- ( "", ):

( — — gif)
— , (Data Flow).
. . ("Wire") .
" ". , — , , .
, .

— . — .
( , , ):

? — — Run Execute this code:
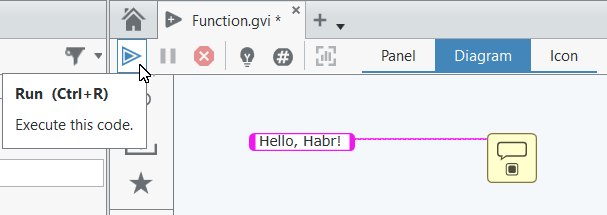
:
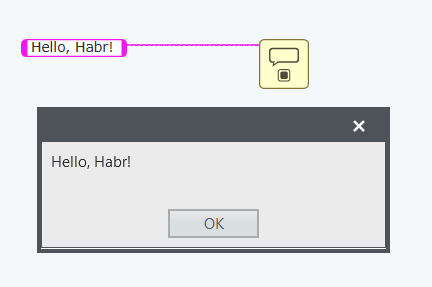
"Ctrl+R" VI. , .
, , . LabVIEW , . , , , , :
" " , Run, "".
, , , :

:

.
.
: LabVIEW , Ctrl+C/Ctrl+V ( , Ctrl+C, , Ctrl+V), — , Ctrl ( ), . Shift , — . ( , — Ctrl):
:
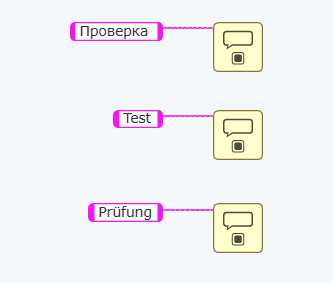
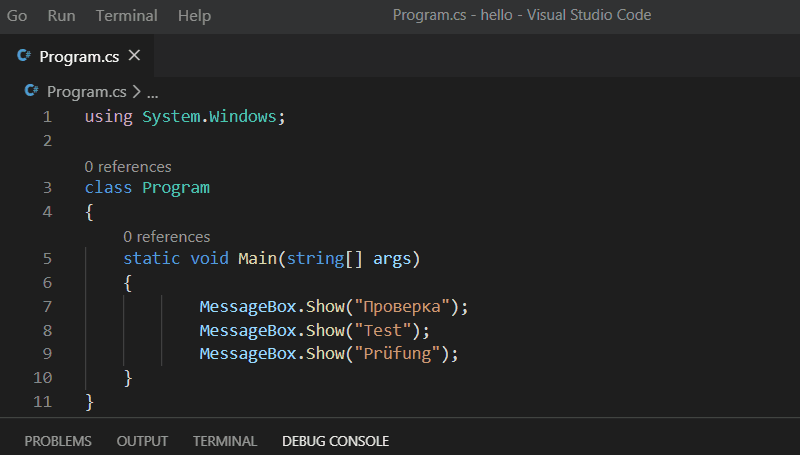
, . . , :
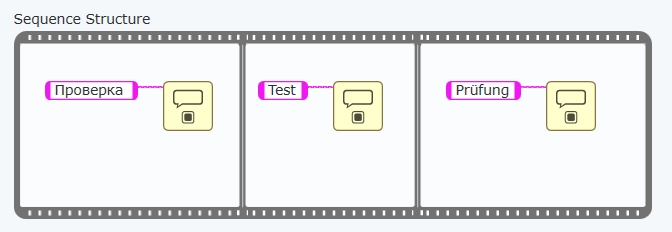
            MessageBox.Show("");
            MessageBox.Show("Test");
            MessageBox.Show("Prüfung");
, ( , ""):
LabVIEW :

, ( ), , .
? , , .
" " ( ). , , , " ?"
: . , , , .
, .
LabVIEW
. , , , , , :
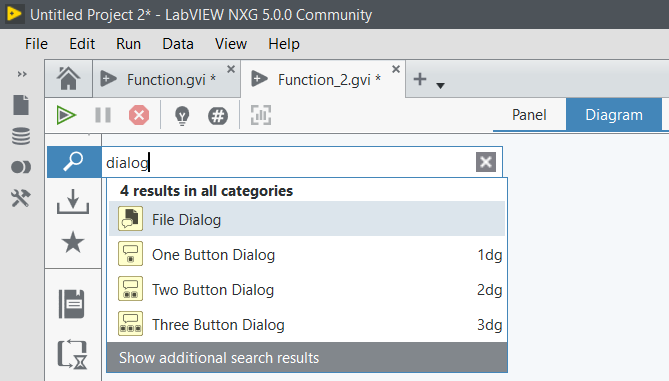
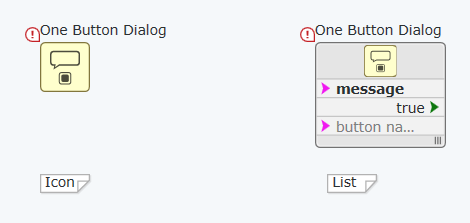
, 1dg, 2dg . — , "One Button Dialog" "Dialog" "1dg" "". , , , Enter.
— Ctrl+Space ( ). "Quick Drop" . , -, , .
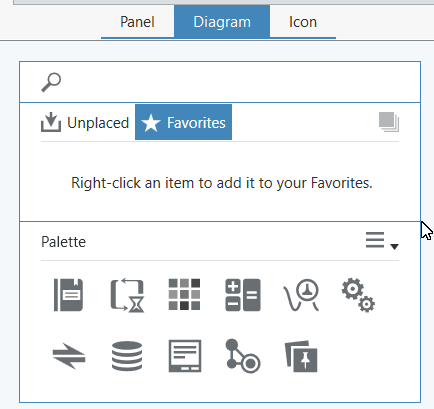
, , — "Show in Palette"

, .
— , . , "Unplaced" ( ). "" LabVIEW ( Quick Drop ).
. "" ( Ctrl+Space, sc — ):
, , , :
"" :

: <Ctrl+>, "1dg", <>, , "Hello, Habr" <Ctrl+R>.
, :

, , , :

, " " — "" , .
, , , . , , — .
, — . LabVIEW , .
— , , :

( ), :
:
Dock to node — "" , . , Terminals->Dock constants, , , :
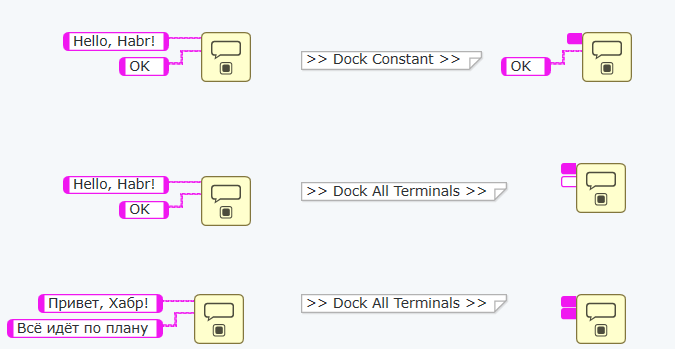
— ( "" — , ), . , ( ).
Show in Palette , .
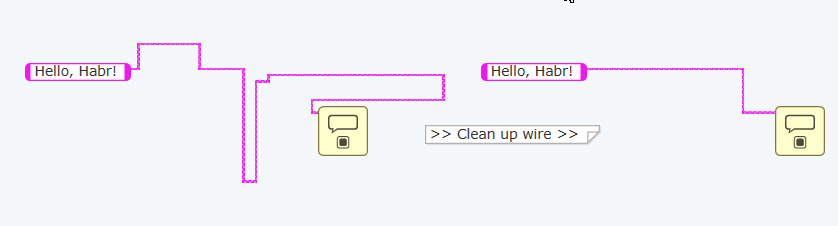
Clean up wire "" "":
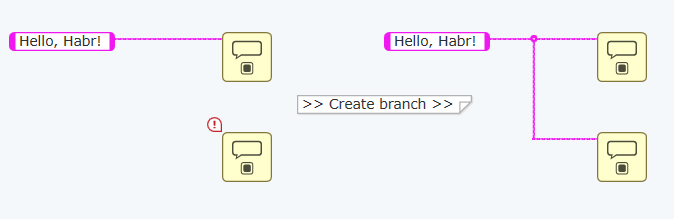
Create branch — . :
Delete Branch — . "Del", :

, — , — , . . — , , — .
Create wire comment — :

Insert Replace. , - , . — :
Properties — . ( — , ):
:
Constant configuration , — , .
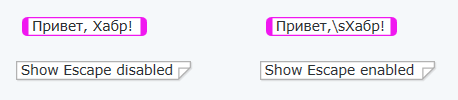
Display Format -> Show escape sequences :
.
Visual style -> Show Label :

, //, — . , — , . , — :
, :
Layout -> Size to content , :

, .
, "" , :
, , , , ( , , :

( Shift), ( ).
, .
— :

Ctrl+H. ( , , ).
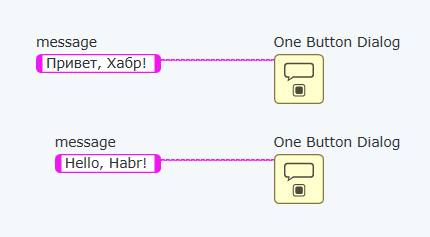
"Hello, Habr!". :
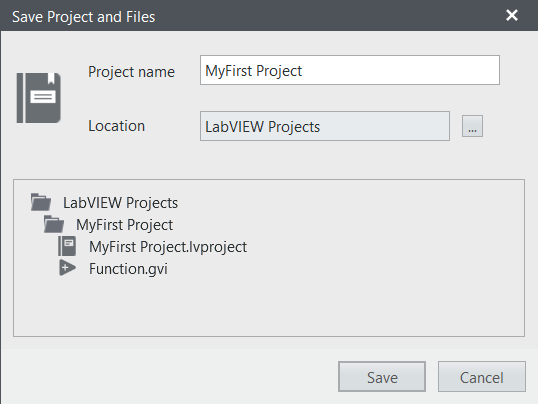
A project was created for us, by default everything is saved in "My Documents" - the folder "LabVIEW Projects" will be created there.
Curious people can look inside the file - there is plain XML where you can see our diagram.
XML slice with chart <BlockDiagram Id="a44ad16c1aa64eb9940a6db1357f6f34">
<OneButtonDialog Bounds="230 236 40 40" Id="abd1e9094fb74fe3ae59249f61acaa0b" />
<Literal Bounds="100 236 100 15" DataType="String" Id="99b8849aac10420386a3c64b659755e8"
Label="e03893aa5f6948b4b8f028ffff4aaa45" xmlns="http://www.ni.com/MocCommon">
<p.Data>, !</p.Data>
<StringBehavior TextDisplayMode="Default" />
</Literal>
<NodeLabel AttachedTo="99b8849aac10420386a3c64b659755e8" Bounds="100 234 30 15"
Id="e03893aa5f6948b4b8f028ffff4aaa45" Visible="False"
xmlns="http://www.ni.com/PlatformFramework">
<p.Text>message</p.Text>
</NodeLabel>
<Wire Id="4e45a6a724704c38b808a29f3417ce9b"
Joints="N(99b8849aac10420386a3c64b659755e8:Out)|(200,237)
N(abd1e9094fb74fe3ae59249f61acaa0b:message)|(230,237)"
xmlns="http://www.ni.com/PlatformFramework" />
</BlockDiagram>
"" LabVIEW , , . , , , , .
That's all for today. We examined the block diagram, made a simple program, learned the keyboard shortcuts Ctrl + R, Ctrl + H, Ctrl + Space and got used to the development environment.
In the next lesson, we touch the front panel and do something a little more useful - Front Panel Basics - Controls and Indicators