Now everyone around is setting up a VPN for remote employees. It pains me to watch how people install monstrous buggy programs, configure some kind of certificates, install TUN / TAP drivers and do many complex operations, while the best solution is already built into the operating system.IKEv2 is a modern VPN protocol developed by Microsoft and Cisco. It is used by default for new VPN connections in Windows, macOS, iOS. It is faster and safer than most VPN protocols and can be easily configured on the client side in two clicks without using third-party programs.I believe that IPsec IKEv2 is great not only for connecting servers, but also for regular VPN end-user connections. In this post, I will try to convince you to use IPsec IKEv2 for regular home users instead of OpenVPN.IKEv2 faster
All things being equal, IKEv2 will always be faster than OpenVPN. This is especially noticeable on low-power systems with slow memory, such as routers or single-board computers.The fact is that IPsec works in the context of the kernel of the operating system, and OpenVPN in the context of the user (userspace), and the processing of each package switches the context between the kernel processes and the user processes. This affects both throughput and latency.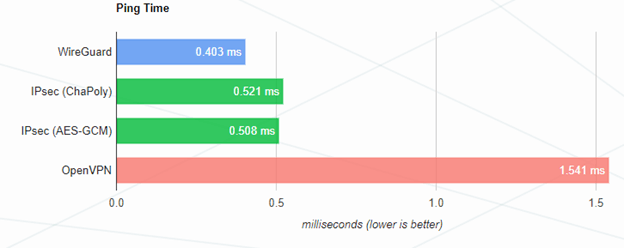 Comparison of delays for different VPN protocols.The screenshot above shows the difference in delay by half between IPsec and OpenVPN. Of course, the difference of 1ms is impossible to notice by eye, but with a load on the system, these values can vary significantly. In addition, the real indicators strongly depend on the characteristics of a particular system, so I will not give absolute figures for comparing the two protocols. Delays are very important when using voice and video over VPN.According to my subjective feelings, IKEv2 on Windows 10 works noticeably more responsive than OpenVPN. After all, the actual use of a desktop computer is very different from synthetic tests of VPN protocols. The load on the processor and memory is not constant, the user can run demanding programs, all this will affect the performance.
IKEv2 easier to configure
All modern operating systems (except Android) support IPsec IKEv2 right out of the box. No need to install any programs , virtual TUN / TAP drivers, etc. All VPN management comes from the system menu.At the same time, the configuration on the client can be simplified to three lines:- Domain - for IPsec, a domain is required, since an SSL certificate is issued for it
- login
- password
You no longer need to transfer files with certificates and keys to the client, force it to import root certificates into the system storage. A username and password are enough, and the connection will be just as secure as in OpenVPN when using certificates, because the connection uses the same x.509 certificate as for websites with HTTPS.Setup on Windows 10
The VPN setup wizard is called up from the WiFi connection menu. A user of any qualification can handle the setup of one window. The created connection is activated from the menu with a list of WiFi networks.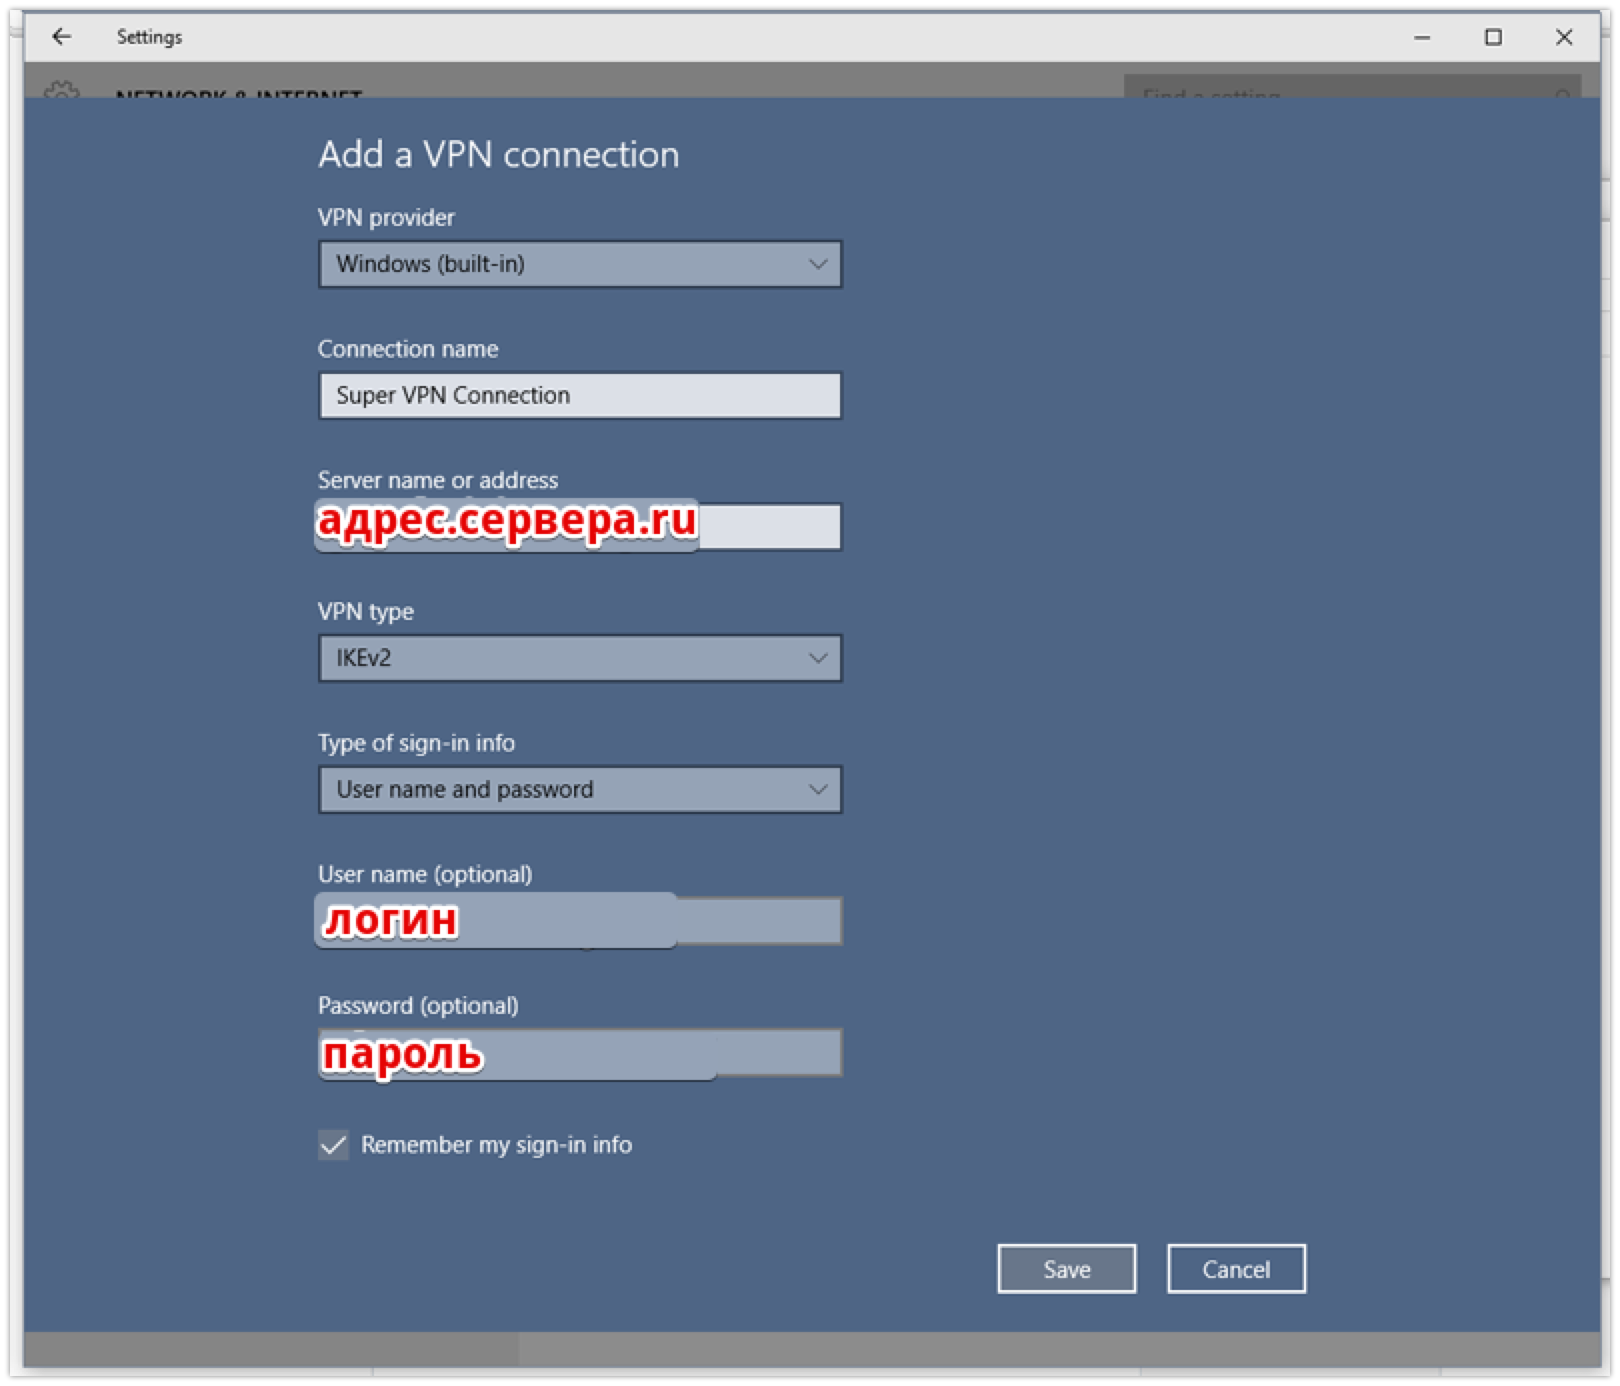 Interface for configuring a new IKEv2 connection in Windows 10
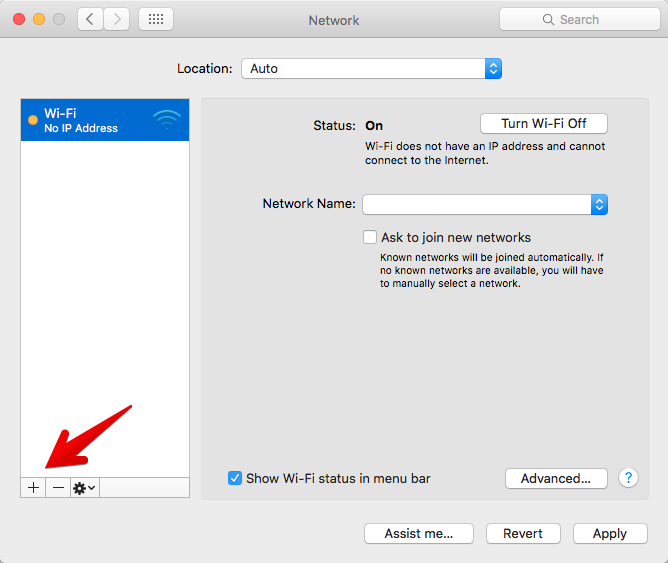
MacOS setupmacOS IKEv2 10.11 (El Capitan). .
. .

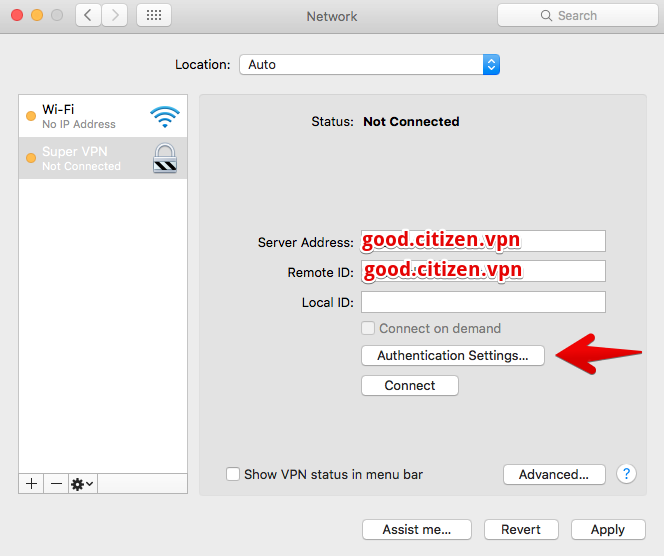
, . «Server Address» IP- , «Remote ID», DNS-, .
 /etc/ipsec.secrets
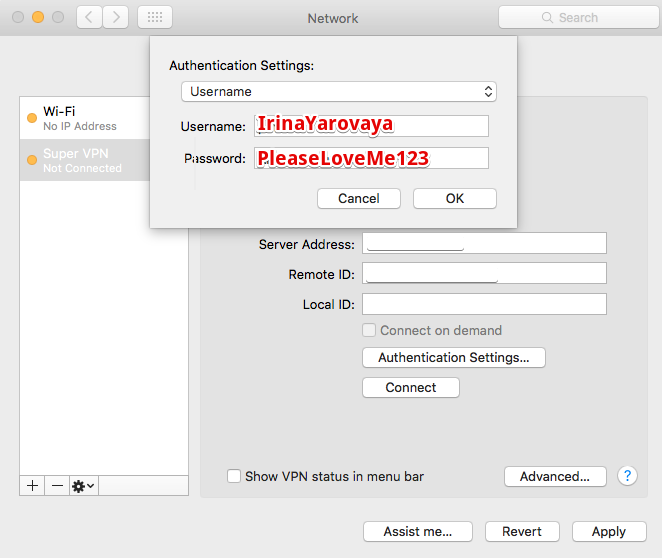
IOS setupiOS , mobileconfig.
macOS:
-> VPN -> VPN
IKEv2 is safe
At the previous step, we found out that a login and password are enough to configure the connection. But how can the client verify that the connection is not being tapped, the data is not being replaced, and the server is really who it claims to be? For this, ordinary SSL certificates are used, which we are used to using for websites and HTTPS.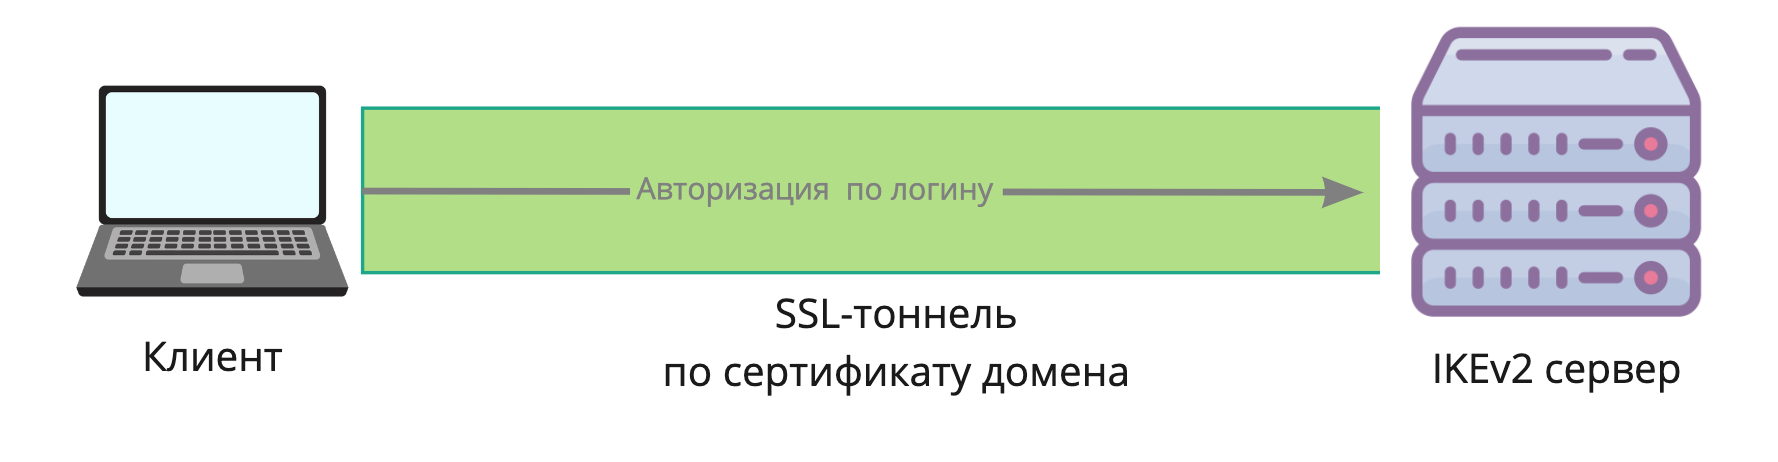 The client installs a secure SSL tunnel with the server, and a login password is already transmitted inside it. By default, on Windows and macOS, the mschapv2 algorithm is used to transmit the password. Thus, with the help of an SSL certificate, the client verifies the authenticity of the server, and the server verifies the authenticity of the client using the login / password.An IKEv2 server can use the same certificate with a web server, for example from the popular Let's Encrypt. This greatly simplifies certificate management.The same model is used in OpenVPN, and if desired, you can use a certificate from Lets Encrypt in it, however, in any case, the administrator will need to transfer the file to the user to configure the VPN.
Configure IKEv2 server
You can deploy your IKEv2 server in a couple of minutes using automated installation scripts or using ready-made containers. Using docker is not recommended, since its network subsystem reduces the performance of IPsec at cheap VPS rates. You can also configure the IKEv2 server manually, there are articles on the Habré with examples of Strongswan server settings .We will use one of the most successful auto- configuration scripts github.com/jawj/IKEv2-setupThis script is good because it uses certificates from Lets Encrypt and automatically generates a valid certificate.Step 1: Server Selection
To start the VPN server, we need VDS. The simplest configuration with a single processor core will do. The script from our example is best tested on Ubuntu 18.04, so when creating the server, select this OS image.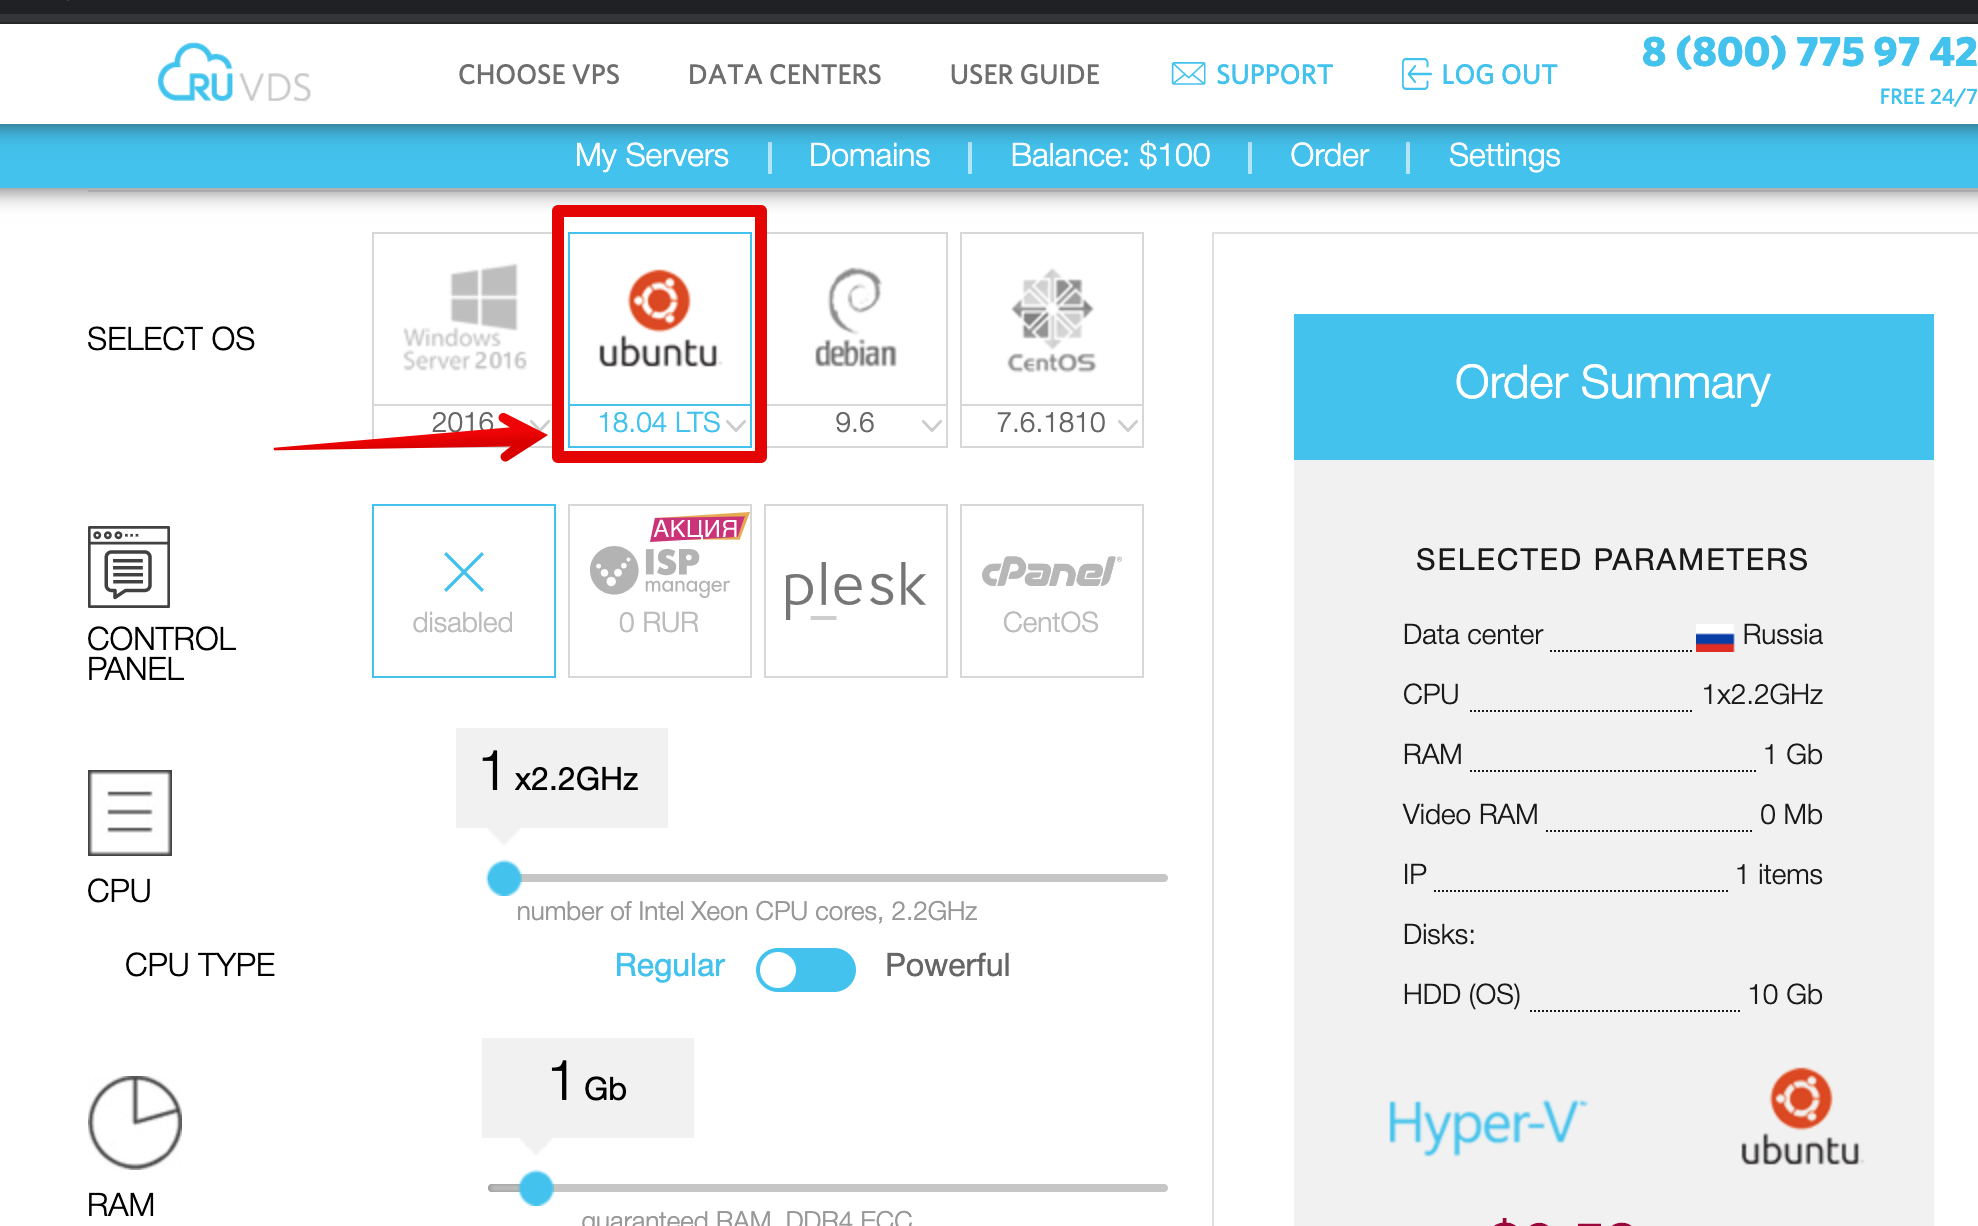 We are waiting for the installation of the server to finish and copy the details for the connection. The root password will be sent to the mail, or it can be set manually through the web-interface. Next, we enter all the commands
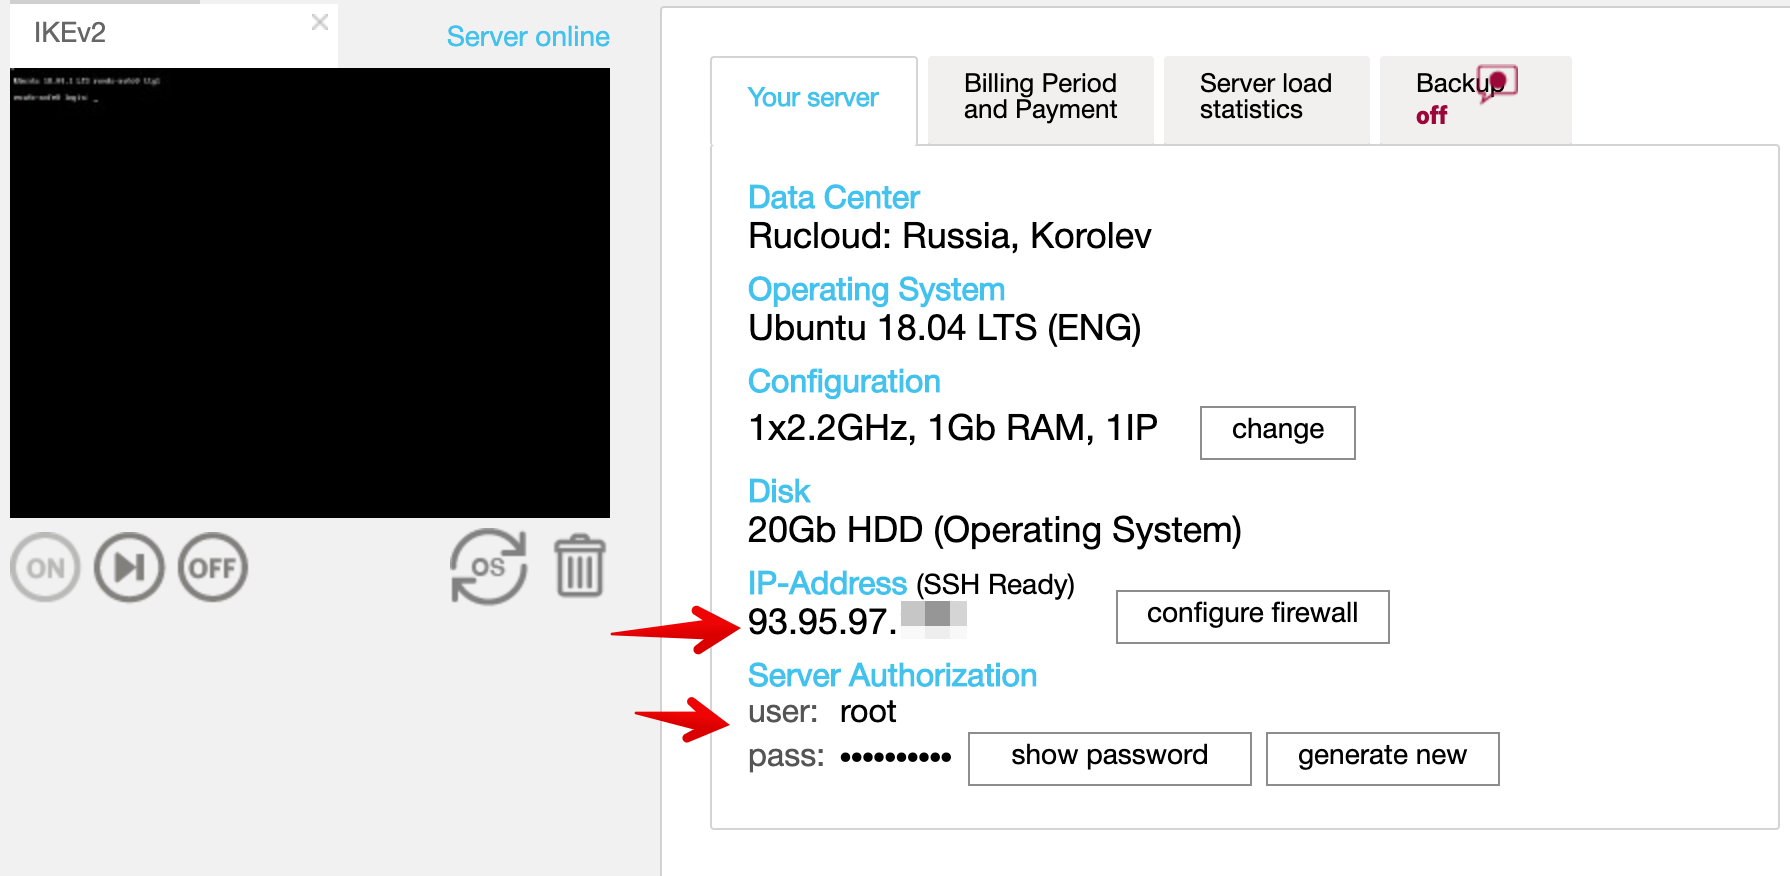
Step 2: Install Strongswan
We are connected by the SSH client and run the installation script:
wget https://raw.githubusercontent.com/jawj/IKEv2-setup/master/setup.sh
chmod u+x setup.sh
./setup.sh
....
Hostname for VPN: 123-45-67-89.sslip.io
VPN username: coolguy
VPN password (no quotes, please):
....
Step 3: Client setup
The entered VPN user details must now be used for configuration on the client. It is important to use exactly the domain name that you entered in Hostname for VPN .Step 4: Add New Users
To add a new user to an already created server, edit the /etc/ipsec.sectes file .
123-45-67-89.sslip.io : RSA "privkey.pem"
coolguy : EAP "C00lPassword"
badguy : EAP "bAdP$$word"
After adding the user, run the ipsec secrets command so that Strongswan re-read the config.Conclusion
We reviewed the user experience of IKEv2. Administration of such a server is not more complicated, and sometimes even easier than OpenVPN. If you only plan to organize remote access for your employees, be sure to look towards IKEv2. Do not force your users to install unnecessary programs if everything you need is already on their computer. It is more convenient, safer and much more advanced.