Quarantine is a wonderful time to learn something. However, as you know, for someone to learn something, someone must teach. If you have a presentation with which you want to speak to a millionth audience, gaining world fame, then this article is for you. Here you will find step-by-step instructions on how to make a video from the presentation.We mark the way of recording “audio comments” in PowerPoint and exporting the presentation in video as trivial and not giving a tenth of the possibilities that are needed for a truly cool video.To begin with, we will decide which frames we need:- Actually slides with a voiceover
- Slide change
- Interrupt quotes from popular movies
- A few frames with the physiognomy of the lecturer and favorite cat (optional)
Create a directory structure
.
├── clipart
├── clips
├── rec
├── slide
└── sound
Assignment of catalogs in the order of listing: movies from which we will pull quotes (clipart), fragments of our future video (clips), videos from the camera (rec), image slides (slide), sound (sound).Making a presentation in pictures
For a real red-eyed Linuxoid, making a presentation in the form of pictures does not present any problems. Let me just remind you that a pdf document can be parsed into images bypdftocairo -png -r 128 ../lecture.pdf
If there is no such command, install the poppler-utils package (instructions for Ubuntu; if you have Arch, then you already know what to do without me).Hereinafter, I believe that the video is being prepared in HD Ready format, i.e., 1280 × 720. A presentation with a horizontal size of 10 inches gives exactly this size when unloading (see the -r 128 option).We are preparing the text
If you want to make really cool material, then your speech must first be written. I also thought that I could say the text without preparation, especially since I have a good lecture experience. But it’s one thing to perform live, and another to record video. Do not be lazy - the time spent on typing will pay off more than once.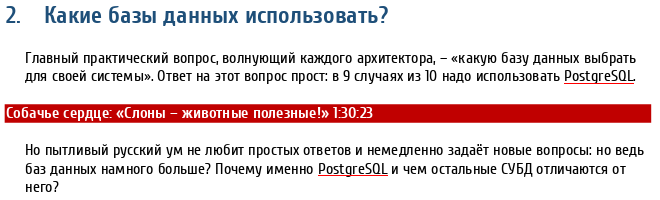 Here is my recording format. The number in the heading is equal to the number of the slide, interruptions are highlighted in red. Any editor is suitable for preparation, but it's better to take a full-fledged word processor - for example, OnlyOffice .
Sounding slides
What can I say - turn on the microphone and write :)Experience shows that the recording quality even from the cheapest external microphone is incomparably better than with the laptop’s built-in microphone. If you want high-quality equipment, then I recommend this article .For recording, I used audio-recorder - a very simple recording application. You can take it, for example, here:sudo add-apt-repository ppa:audio-recorder/ppa
sudo apt-get update
sudo apt-get install audio-recorder
The main thing in this step is the proper file naming. The name must consist of a slide number and a fragment number. Fragments are numbered with odd numbers - 1, 3, 5, etc. So, for a slide, the text of which is shown in the picture, two files will be created: 002-1.mp3 and 002-3.mp3 .If you recorded all the videos at once in a quiet room, then nothing can be done with them. If you recorded in several stages, it is better to equalize the volume level:mp3gain -r *.mp3
For some reason, mp3gain utilities are not in the standard repositories, but you can get it here:sudo add-apt-repository ppa:flexiondotorg/audio
sudo apt-get update
sudo apt-get install mp3gain
After all this, you need to write another file with silence. It is necessary to add a soundtrack to silent clips: if there is a soundtrack in one clip and not in the other, then it is difficult to glue these clips. Silence can be recorded from the microphone, but it is better to create a file in the Audacity editor . The file must be at least a second long (longer), and silence.mp3 should be calledCooking breakdown rollers
Everything here is limited only by your imagination. You can use the Avidemux editor to edit the video . Once it was in standard repositories, but then for some reason it was sawn out. This will not stop us:sudo add-apt-repository ppa:ubuntuhandbook1/avidemux
sudo apt-get update
sudo apt-get install avidemux2.7-qt5
Instructions for working with this editor on the sea, yes, in principle, everything is intuitive there. It is important to observe several conditions.First, the resolution of the movie must match the target resolution of the movie. To do this, in the “video for exit” you need to use two filters: swsResize to change the resolution and “add fields” to make the Soviet “narrow-format” film wide format. All other filters are optional. For example, if someone does not understand what Mr. Sharikov’s statement is in the fragment under discussion, using the “add logo” filter, you can add the PostgreSQL logo on top of “Dog’s Heart”.Secondly, all fragments must use the same frame rate. I use 25 frames per second, because so much gives my camera and old Soviet films. If the movie from which you cut the frame is shot at a different speed, use the “Resample Video” filter.Thirdly, all fragments must be compressed with the same codec and packed in the same containers. Therefore, in Avidemux for the format, select the video - “ Mpeg4 AVC (x264) ”, audio - “ AAC (Faac) ”, the output format - “ MP4 Muxer ”.Fourthly, it is important to correctly name the cut clips. The file name should consist of a slide number and a fragment number. Fragments are numbered with even numbers, starting with 2. So, for the frame under discussion, the clip with the chopping should be called 002-2.mp4After the clips are ready, you need to transfer them to the directory with the fragments. The avidemux settings differ from the default ffmpeg settings by the mysterious parameters tbr, tbn, tbc. They do not affect reproduction, but they do not allow the rollers to be glued. Therefore, we recode:for f in ???-?.mp4;
do
ffmpeg -hide_banner -y -i "${f}" -c copy -r 25 -video_track_timescale 12800 ../clips/$f
done
We remove screensavers
Everything here is also simple: shoot in the background of some kind of clever scheme, put the received videos in the rec directory , and from there transfer to the directory with fragments. Naming rules are the same as for quotation-breaks, the recoding command is as follows:ffmpeg -y -i source_file -r 25 -vcodec libx264 -pix_fmt yuv420p -profile:v high -coder 1 -s 1280x720 -ar 44100 -ac 2 ../clips/xxx-x.mp4
If you plan to start the video with your speech, name this fragment 000-1.mp4We make frames from static pictures
It's time to mount clips from static pictures and sound. This is done with this script:#!/bin/bash
for sound in sound/*.mp3
do
soundfile=${sound##*/}
chunk=${soundfile%%.mp3}
clip=${chunk}.mp4
pic=slide/${chunk%%-?}.png
duration=$(soxi -D ${sound} 2>/dev/null)
echo ${sound} ${pic} ${clip} " - " ${duration}
ffmpeg -hide_banner -y -loop 1 -i ${pic} -i ${sound} -r 25 -vcodec libx264 -tune stillimage -pix_fmt yuv420p -profile:v high -coder 1 -t ${duration} clips/${clip}
done
Please note that first the duration of the sound file is determined by the soxi utility , and then the video of the desired length is mounted. All the recommendations I found are simpler: instead of the -t $ {duration} flag, the -shortest flag is used . In fact, ffmpeg determines the length of the mp3 very approximately, and during installation, the length of the audio track can be very (one to two seconds) different from the length of the video track. It doesn’t matter if the whole video consists of a single frame, but when gluing such a movie with a break at the border, extremely unpleasant effects with stuttering occur.Another way to determine the duration of an mp3 file is to use mp3info . She is also mistaken, and sometimesffmpeg gives more than mp3info , sometimes vice versa, sometimes they both lie - I haven’t noticed any patterns. But soxi is working correctly.To install this useful utility, do this:sudo apt-get install sox libsox-fmt-mp3
Making transitions between slides
Transition - a short video in which one slide turns into another. To make such videos, take slides in pairs and use imagemagick to turn one into the other:#!/bin/bash
BUFFER=$(mktemp -d)
for pic in slide/*.png
do
if [[ ${prevpic} != "" ]]
then
clip=${pic##*/}
clip=${clip/.png/-0.mp4}
./fade.pl ${prevpic} ${BUFFER} 1280 720 5 direct 0
./fade.pl ${pic} ${BUFFER} 1280 720 5 reverse 12
ffmpeg -y -hide_banner -i "${BUFFER}/%03d.png" -i sound/silence.mp3 -r 25 -y -acodec aac -vcodec libx264 -pix_fmt yuv420p -profile:v high -coder 1 -shortest clips/${clip}
rm -f ${BUFFER}/*
fi
prevpic=${pic}
done
rmdir ${BUFFER}
For some reason, I wanted the slide to scatter in dots, and then the next slide was assembled from the dots, and for this I wrote a script called fade.pl Having imagemagick , a real Linuxoid will create any special effect, but if someone likes my idea of scattering, here is the script:
use strict;
use warnings;
use locale;
use utf8;
use open qw(:std :utf8);
use Encode qw(decode);
use I18N::Langinfo qw(langinfo CODESET);
my $codeset = langinfo(CODESET);
@ARGV = map { decode $codeset, $_ } @ARGV;
my ($source, $target, $width, $height, $pixsize, $rev, $file_no) = @ARGV;
my @rects;
$rects[$_] = "0123456789AB" for 0..$width*$height/$pixsize/$pixsize/12 - 1;
for my $i (0..11) {
substr($_,int(rand(12-$i)),1) = "" for (@rects);
my $s = $source;
$s =~ s
open(PICTURE,"| convert - -transparent white PNG:- | convert \"$source\" - -composite \"$target/".substr("00".($file_no+$i),-3).".png\"");
printf PICTURE ("P3\n%d %d\n255\n",$width,$height);
for my $row (1..$height/$pixsize/3) {
for my $j (0..2) {
my $l = "";
for my $col (1..$width/$pixsize/4) {
for my $k (0..3) {
$l .= (index($rects[($row-1)*$width/$pixsize/4+$col-1],sprintf("%1X",$j*4+$k))==-1 xor $rev eq "reverse") ? "0 0 0\n" : "255 255 255\n" for (1..$pixsize);
}
}
print PICTURE ($l) for (1..$pixsize);
}
}
close(PICTURE);
}
Mount the finished roller
Now we have all the fragments. We go to the clips directory and collect the finished movie with two commands:ls -1 ???-?.mp4 | gawk -e '{print "file " $0}' >list.txt
ffmpeg -y -hide_banner -f concat -i list.txt -c copy MOVIE.mp4
Enjoy your viewing to your grateful students!