Prerequisites
Before you begin, make sure your system has approximately the following configuration:- Windows 10 Version 1803 Build 1734 and later
- Ubuntu for WSL 16.0.4 LTS or something like that (your version may vary slightly)
It is important that the version and build of Windows is not lower than what is indicated here. The fact is that, starting with these numbers, fundamental changes have been made to the Windows WSL kernel that allow the use of cgroups (control groups - added to the Linux kernel in 2008). And they are necessary for Docker to manage the resources of your system in containers.
Install Docker-CE 09.17.0
We will install Docker Community Edition 17.09.0 (because at the time of this writing, more recent versions have fallen when installed on WSL).The first thing we will do is get rid of all previous Docker installations (if any). To do this, run the bash terminal and write the following:$ sudo apt-get remove docker docker-engine docker.io containerd runc
Now install the repository for Docker CE. Through apt-get, we can install the necessary version without having to build it from the sources ourselves. Following the recommendations on the official Docker website, we write the following commands:
$ sudo apt-get update
$ sudo apt-get install apt-transport-https ca-certificates curl gnupg2 software-properties-common
$ curl -fsSL https://download.docker.com/linux/ubuntu/gpg | sudo apt-key add -
$ sudo add-apt-repository "deb [arch=amd64] https://download.docker.com/linux/ubuntu $(lsb_release -cs) stable"
$ sudo apt-get update
If you've ever added a new repository using apt, all of this is familiar to you as a whole. If not, I hope you still stayed with me :)Next, install Docker:$ sudo apt-get install docker-ce=17.09.0~ce-0~ubuntu
If you are not using Ubuntu-style WSL, you can see the list of available versions like this:$ apt list -a docker-ce
... or use a similar command from some other library if you abandoned APT.At the end, you need to add your current user to the docker group in order to be able to correctly use the Docker Engine, which should be running on your system with as root.sudo usermod -aG docker $USER
Running Docker on Windows
Now that Docker is installed, we need to use a rather tricky method to start it as a service in WSL every time we boot Windows. This is not as easy as it may seem. We need to act on behalf of the superuser and run the command shell with elevated privileges, which complicates the task a bit.To simplify the process a bit, create a new file in / usr / local / sbin / - a script that contains the appropriate commands for launching the Docker service:$ sudo nano /usr/local/sbin/start_docker.sh
with the following contents:#!/usr/bin/env bash
sudo cgroups-mount
sudo service docker start
The first sudo command is to mount cgroups (it will be executed at reboot), and the second gives the docker service to systemd (this is the Ubuntu subsystem for initializing and managing services).Now let the script run and run it:$ sudo chmod +x /usr/local/sbin/start_docker.sh
$ sudo chmod 755 /usr/local/sbin/start_docker.sh
$ /bin/sh /usr/local/sbin/start_docker.sh
However, the Docker service will not start for two reasons:- The script makes calls as the superuser, so the script itself must be run with superuser privileges in order to work as intended. In theory, doing this is as simple as writing any sudo command, but for this, the user must enter their data after each download, which is very annoying.
- The first command to mount cgroups must be run in bash with elevated privileges. To run it without user input, we have to use the Windows Task Scheduler.
All clear? Then to the point ...Running a script with root privileges without user input
In the Linux family of OSs, the / etc / sudoers file determines who and what can run with superuser privileges. Let's modify it so that your user can call the script without having to constantly enter the root password. (But be very careful with this file! It is very easy to cut yourself out of the system if you don't know what you are doing!)$ sudo nano /etc/sudoers
Add a new line to the end of the file. In this case, you must know your user name exactly (run echo $ USER if you are not sure):<your username here> ALL=(ALL:ALL) NOPASSWD: /bin/sh /usr/local/sbin/start_docker.sh
Now we can start the Docker service as root without user input:$ sudo /bin/sh /usr/local/sbin/start_docker.sh
Hooray, comrades!Proper Docker Startup on Windows Boot
Now, when the system boots, we will be able to launch Docker as an administrator using a separate command that does not require user interaction.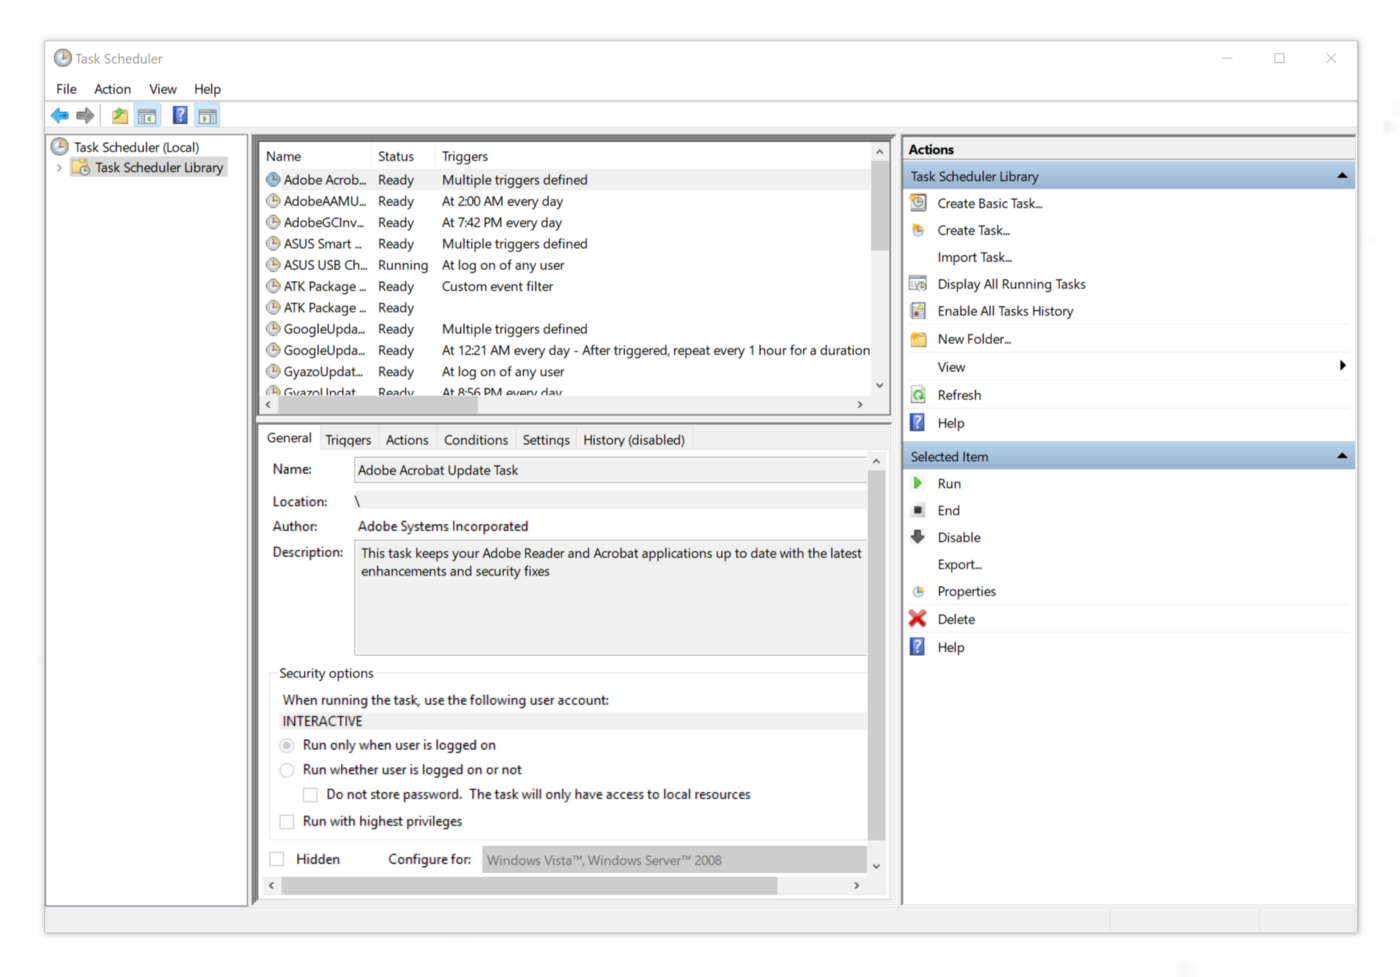 Launch the Windows Task Scheduler and select the Task Scheduler Library in the left pane. Then select Create Task in the right pane.
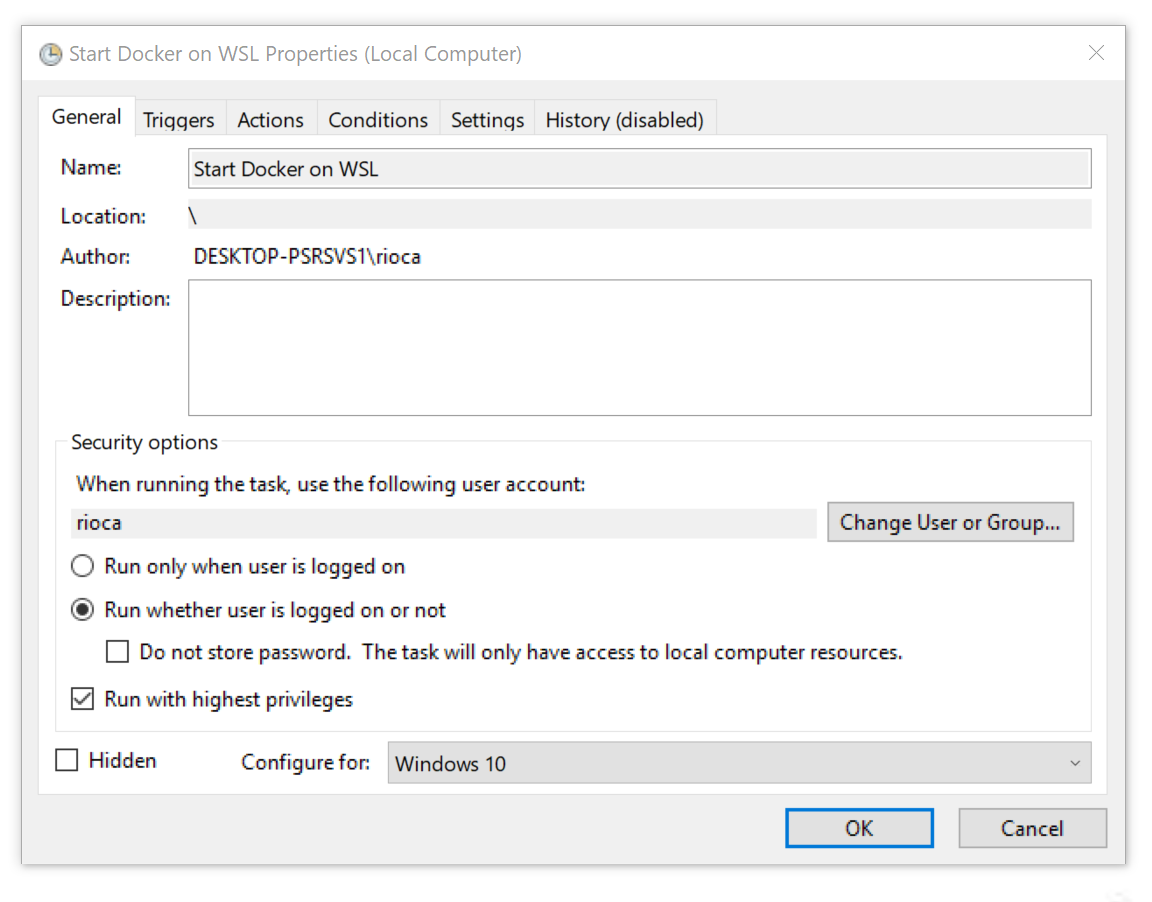 Next, you will be prompted to edit the basic settings of the task. Give your task a clear name and make sure that the rest of the settings match mine. It is important that you select Run with highest privileges .
 In the Triggers tab, add a new trigger that will start the task as soon as the local user logs in.
 Switching to the Actions tab , create a new action that will run bash and immediately execute our script with the -c switch :
-c "sudo /bin/sh /usr/local/sbin/start_docker.sh"
Please note that this must be done with elevated privileges, so check the Run with highest privileges checkbox on the General tab . The rest of the parameters mainly depend on individual preferences, but I will show my settings. If you want, you can copy them. Some power settings may not appear if you are sitting on a stationary car. Personally, I use a laptop.
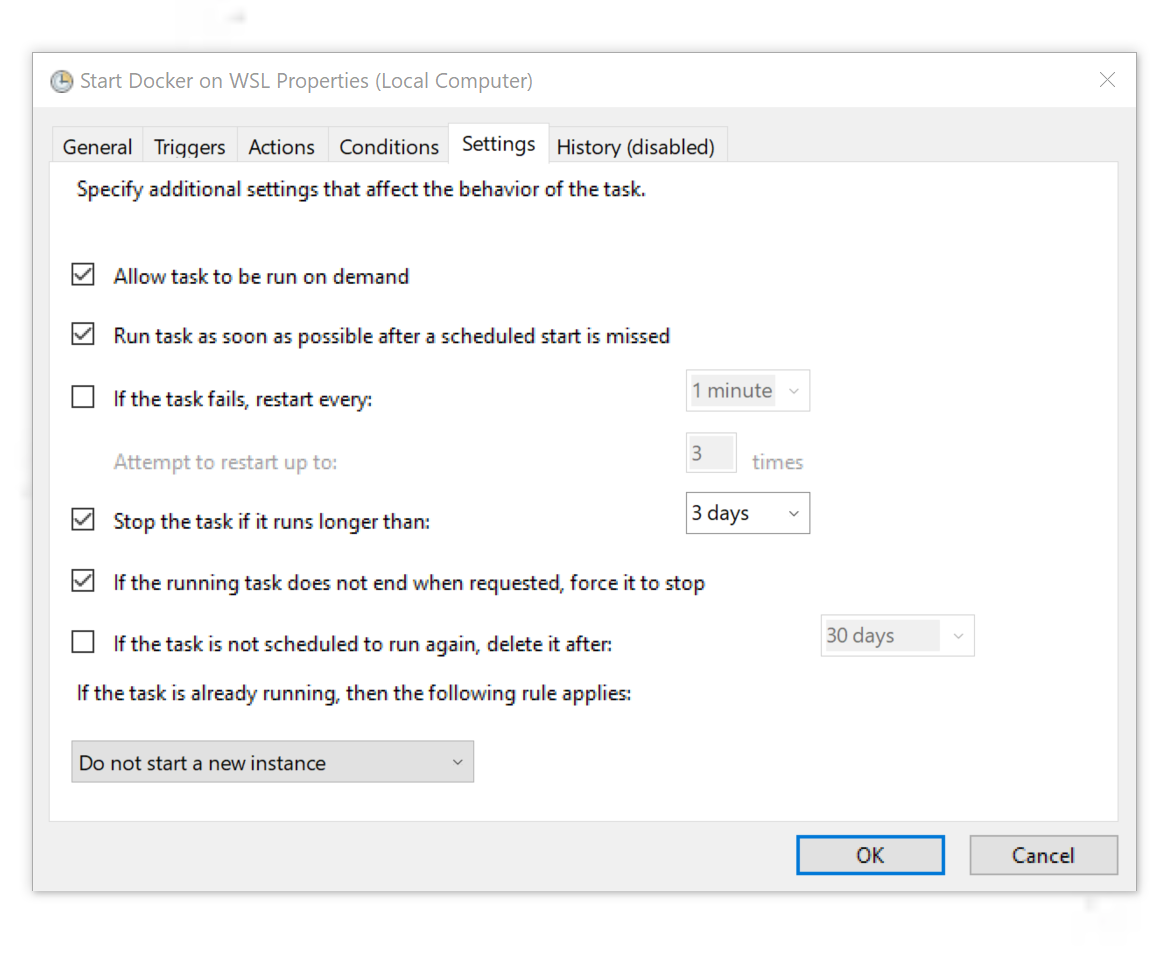 Well, everything goes as we intended. If you didn’t launch Docker in the previous steps using commands with elevated privileges, just right-click on the task that we created in the Task Scheduler and select “Run”! That's all!
Check that everything works
If you want to play it safe, reboot your machine (yes, for this you will have to close your browser tabs for some time) , start bash and enter:$ docker run --rm hello-world
If all goes well, you will see Docker's standard greeting. The service will start automatically and directly in WSL! Congratulations!Round off
You just installed and started Docker in WSL. This means that your containers can now share Ubuntu already running on your system. Thus, there is no need to deploy a new (virtualized) OS, as a regular Docker for Windows does.The performance of Docker in WSL so far [at the time of writing of the original article] leaves much to be desired, but as the platform develops and Windows updates are released, it will only improve.- onomatopellan GitHub: https://github.com/Microsoft/WSL/issues/2291#issuecomment-383698720
- Official Docker Documentation: https://docs.docker.com/install/linux/docker-ce/ubuntu/
- cgroupfs-mount: https://github.com/tianon/cgroupfs-mount
- Bash Command Line Interface: https://docs.microsoft.com/en-us/windows/wsl/reference