 This is the second article in a series about updating CI / CD processes. Up to this point, preparations were being made for setting up new tools, namely: planning, daily rallies, resolving disagreements, in general, all without which it would not be possible to competently build a work process. And now, all issues have been resolved, we are confident that we can continue development, and our code will not sink into the black hole with the beginning of summer. Let me remind you the table of contents of the list of articles, as well as brief results of the previous part.Part 1: what is, why it is not like, planning, a little bash. I would call this part near-technical.Part 2: teamcity.Part 3: octopus deploy.Part 4: behind the scenes. Unpleasant moments, plans for the future, possibly FAQ. Most likely, it can also be called near-technical.We provided the customer with a proof-of-concept of a new update delivery system, identified the shortcomings of the existing system, selected the basis for the new one, made a transition plan and converted our mercurial repository to git. Also, in the previous part, we described the features of the project that will affect the entire subsequent process. As mentioned earlier, the existing solution did not meet modern requirements. Initially, most likely, one build was configured in ccnet. The very first build with which it all started (like a big bang, yeah). Then, apparently, the person who set it all up, pressed ctrl + c, ctrl + v, corrected a couple of lines, and received a new configuration. And for all the subsequent time, this was done a sufficient number of times so that the source code on the build server took up more than 60G. And these are just the source! And there are logs, build artifacts, temporary files, and so on. Only this made me think. Looking at the old system, one could see the following: a build step was performed for each module. In fact, the same core was assembled. And this assembly was stored for each module (along with source) on the server.The build results (90% identical) were pushed into local repositories (git deployment), and also, of course, took their place. It was possible and necessary to leave this.
 General settings
At this stage, it is assumed that there is already a configured teamcity and octopus. At the stage of installation and configuration, we do not stop in detail. For convenience, we write down the url and api-token of the octopus in env teamcity, which, by the way, for the root project looks like this: env.apiUserName and env.apiUserPassword are api accesses to the teamcity user (will be needed later), env.buildPath and env .sourcePath - default paths to build files and source files, respectively, env.octoApiKey and env.octoUrl - token and octopus url. They still env.teamcityUrl added. Well, env.tt.exe- path to the text transform utility. This utility generates all configurations.Of the third-party plugins, only Octopus Deploy integration is installed. In order not to overload the already huge amount of text, only those steps in which there is something worth attention will be examined in detail. It is assumed that everything else is understandable based on the data presented and the knowledge of the reader. In any case, if you have any questions, I will be happy to answer them.
Project breakdown, versioning, names
The result was such a project scheme (as a picture, because there is a problem with displaying a multilevel list): We will version the packages as follows: major.minor.patch, where major is so far 1, minor is the build counter from the Build configuration, patch is the build counter for the configuration Deploy (not needed for Build configuration, therefore always 0).Note: the old version is described here. We are redesigning it so that it is based on the git tag.
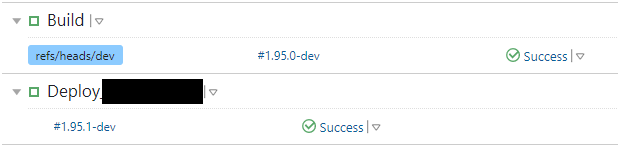 For example, here 1 is major, 95 is minor, and 1 is patch.In the new process for modules there will be one build which will then be deployed to each module. That is, the source code is stored in a single copy for each environment, the build result is also, since it is common for all modules. Unique configurations and libraries are packaged in an individual package at the deployment stage. This will effectively use disk space and reduce the delivery time of each package.At the preparation stage, there was a separate short meeting on the convention of naming configuration files. It used to be (it was just), but not always the same. In addition, the configuration name did not always contain enough information. As a result, all configuration names were as follows:ConfigurationType.Environment.ModName.configwhere ConfigurationType can be AppSettings, Web, etc. Environment - development, test, staging, production. ModName is the unique name of the module.
Modules
All Modules projects work on the same principle. Every environment has a Build configuration that:- Performs nuget restore (NuGet installer, nuget restore)
- Generates configs (Command Line, text transform)
- Buildit solution (Visual studio sln)
- Picks up files from env.buildPath in zip and pushes it into octopus (Octopus deploy: push packages)
- Release creation (no deploy) (Octopus deploy create release)
- Resets the patch version (powershell)
There are also deploy configurations that work based on the template and do the following:- Picks up the configs that were generated at the build stage (step 2) (Octopus deploy push packages)
- Deploy core release (which was created in step 6 of the build) (Octopus deploy: deploy release)
- Deployment individual release (which was created in step 1 of the current configuration) (Octopus deploy: deploy release)
- Displays a list of all domains for this module in the log (step for the convenience of the tester and developer). (Powershell).
For each deploy configuration, the build configuration is added to the dependency. This makes it possible to automatically launch the build when it is deployed if it is not relevant, as well as the ability to reset the patch version.Deploy_all configuration. In fact, this is a build chain which describes that you first need to run build if it is not relevant, and then simultaneously install all the modes.It looks something like this: Let's look at some of the steps in a bit more detail.
Build.General settings
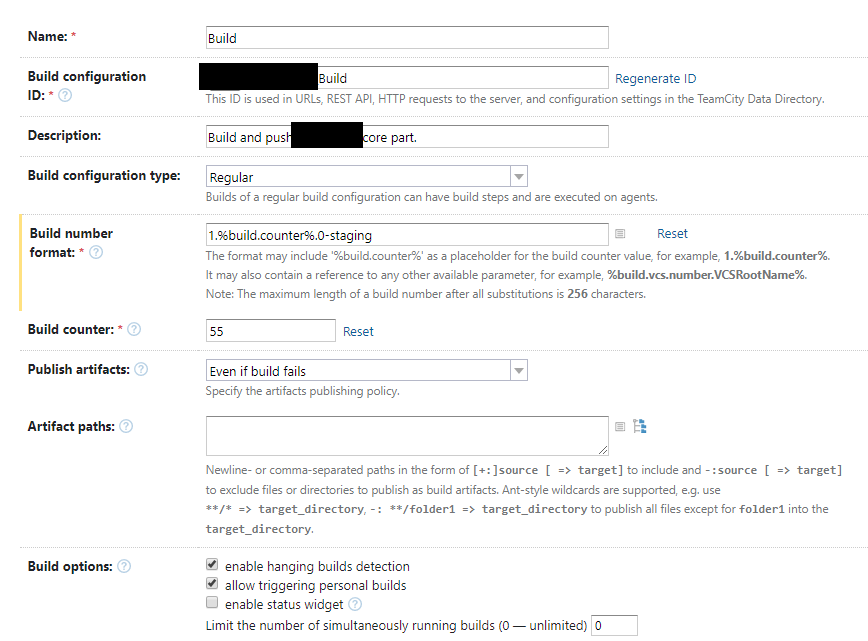 From unusual only build number format. Will be explained later.
Build.env
 Of
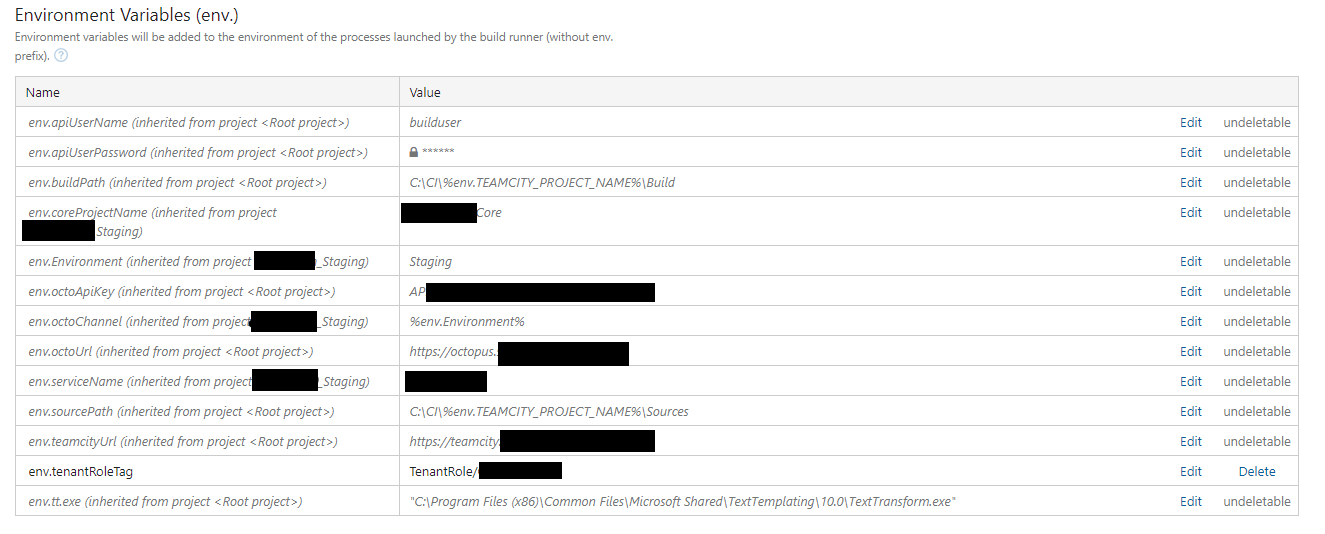
interest here are: env.coreProjectName - set for the entire project. Needed to identify the project in octopus.env.Environment - set for the Modules subproject. It is necessary to select the correct configs depending on the environment.env.octoChannel - the channel in the octopus into which the packet falls. Same as env.Environment .env.serviceName is the name of the solution. Basically, the variable is added for ease of visualization.env.tenantRoleTag - tenant tag in the octopus. More details in the octopus section.
Of
interest here are: env.coreProjectName - set for the entire project. Needed to identify the project in octopus.env.Environment - set for the Modules subproject. It is necessary to select the correct configs depending on the environment.env.octoChannel - the channel in the octopus into which the packet falls. Same as env.Environment .env.serviceName is the name of the solution. Basically, the variable is added for ease of visualization.env.tenantRoleTag - tenant tag in the octopus. More details in the octopus section.Build.4
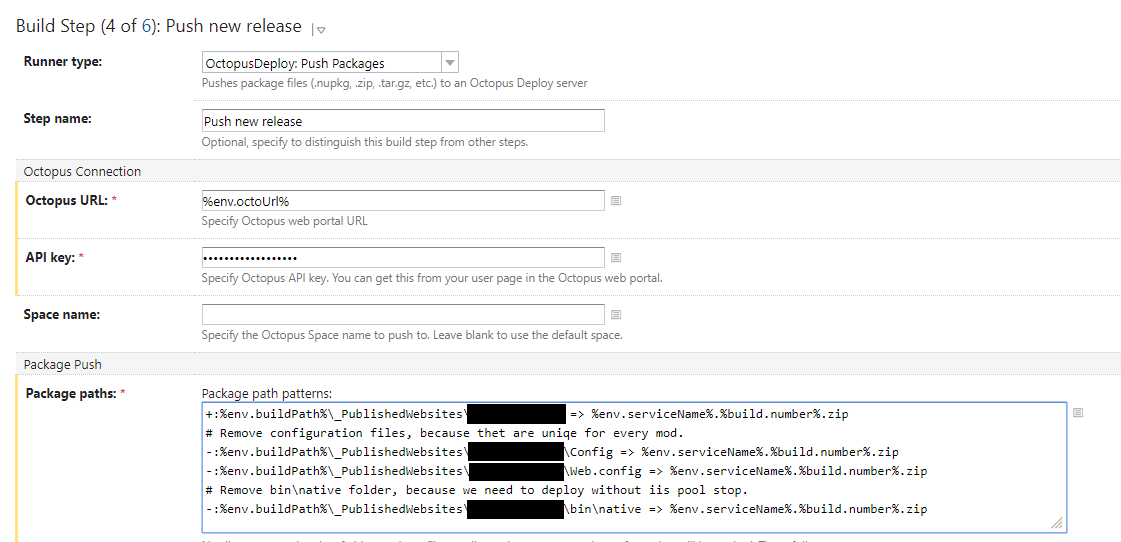 Add to the archive with the name % env.serviceName%.% Build.number% .zip files from the directory with the result of the build, excluding all configurations, and dll from the bin / native folder. The last ones were manually added to the web server once and nobody will touch them again. If necessary, they will also be updated manually (for this it is planned to write a separate script, but we will be honest). This is due to the fact that these libraries are “held” by the IIS pool, and for a successful deployment it must be stopped and then launched, which takes some time. By excluding these libraries from the deployment, we can skip the step of stopping the pool, which will reduce the time of the deployment, and, accordingly, downtime.
Build.5
 I think everything is clear here, except for why the Environment field is empty. In what env the package gets, the octopus makes a decision based on the pre-release tag (configured in the channels). This tag is contained in % build.number% (the same -staging on the screen in Build.General). So in this case it turned out to be more convenient. It is also worth paying attention to the “Show deployment process” checkbox . If it is not installed, timsity considers the build successful as soon as the octopus has begun (but not finished!) The work. That is, if the checkbox is not installed and something went wrong at the deployment stage - without looking at the octopus interface we won’t know about it.
Build.6
Nothing unusual, just a powershell script and information from the teamcity documentation.$pair = "%env.apiUserName%:%env.apiUserPassword%"
$encodedCreds = [System.Convert]::ToBase64String([System.Text.Encoding]::ASCII.GetBytes($pair))
$basicAuthValue = "Basic $encodedCreds"
$depUri="%env.teamcityUrl%/app/rest/buildTypes?locator=snapshotDependency:(from:(build:(id:%teamcity.build.id%)),includeInitial:false)"
$result = (Invoke-RestMethod -Headers @{'Origin'='http://localhost:8090'; "Authorization"="$basicAuthValue"} -Uri $depUri)
foreach ($i in $result.buildTypes.buildType.Count) { $buildId += $result.buildTypes.buildType.id }
$buildId = $buildId | Where-Object { $_ -ne 'Module_DeployAll' }
for ($i=0; $i -lt $buildId.Count; $i++) {
$buildCounterUri = "%env.teamcityUrl%/httpAuth/app/rest/buildTypes/"+$buildId[$i]+"/settings/buildNumberCounter"
Invoke-RestMethod -Method Put -Headers @{'accept'='text/plain'; 'Origin'='http://localhost:8090'; "Authorization"="$basicAuthValue"} -Uri $buildCounterUri -ContentType "text/plain" -Body 1
}
Here we need an api user in teamcity (env is created for him). We log in, take all the configurations that are dependent on the Build configuration, and reset their build counter to 1. That is, in fact, for each patch version, this is an indicator of how many times the same build was deployed for a particular module. If there is not 1, it means something went wrong with the process of deploying or working the module on the current version, and requires attention.Deploy.General
 Version format: 1.% dep.Module_Build.build.counter%.% Build.counter% -staging , where% dep.Module_Build.build.counter% is the teamcity system variable whose value corresponds to the build counter of the corresponding Build configuration (should be added to dependencies). In fact, here 1 is the major version, % dep.Module_Build.build.counter% is minor, and % build.counter% is patch. staging is a pre-release tag.
Deploy.Env
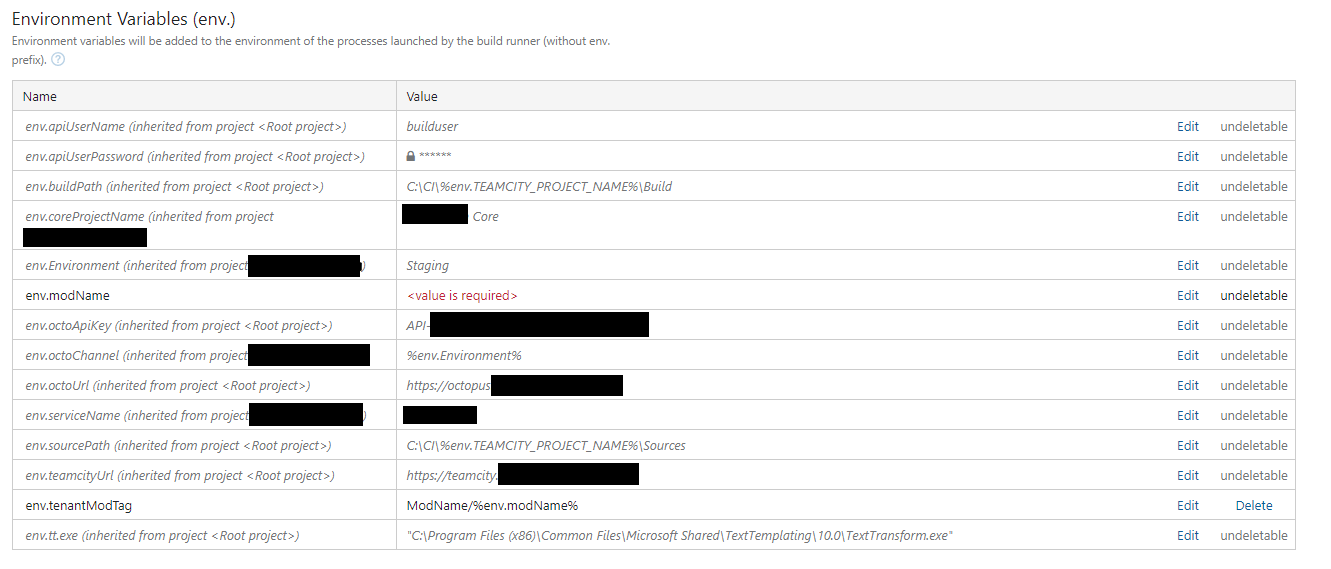 When adding a new module, only the configuration for its deployment is added and the value of the env.modName variable is indicated . All other variables are inherited from the parent projects. The env.tenantModTag variable for an octopus is formed from env.modName .
Deploy.2
 Deploy core package. Release number latest - use the latest available release for this environment.Tenant tag - client / organization tag. More details in the octopus section.Additional cli parameters. Here we indicate the channel in which our package will fall, as well as additional parameters. This will also be discussed separately in the octopus section.
Deploy.3
Like Deploy.2, only an individual module package is deployed.Deploy.4
This step will also be described in detail below, because it receives data from octopus.The configurations for the Company website and Special module are built on the same principle, and the main points in them are the same, so I do not see the point of describing them in the same detail. They are one, they do not need to be deployed many times, and in fact there is nuget restore, text transform, msbuild, octopus push, octopus create release + deploy.Learn more about unique configurations. For some mods, there may not be any environments (for example, staging), they must be deployed to other servers, or you must manually set the client ID (take the base config and change some fields in it using powershell). That is, they work on the same principle as the main modules. Their uniqueness lies in the fact that steps are added / changed for them, or the deployment server is changed and they do not fit into the template, so it takes a little longer to create them. Fortunately, there are few of them.Teamcity: Summary
The implementation of teamcity allowed a more optimal approach to the application assembly process. Now it takes much less time: instead of building the same code each time, we build it once. We also make better use of disk space, network traffic, and computing time. Previously, the number of packages for deployment (repositories with artifacts) was equal to the number of modules. Each package weighed approximately 100M in compressed form. Now we have the number of packages one more than the number of modules, with one package weighing about the same 100M, and the rest about 500K. Plus a more user-friendly interface, convenient logs, and most importantly - reducing the time to maintain the build system and adding configurations. Now adding a new module takes from 15 minutes to half an hour.Separately, it should be said about the templates, since it is the standardization that allows us to save time on the creation of new configurations and their further maintenance. All configurations for interacting with octopus (deploy) are built on the basis of a single template. Firstly, it allows to unify, and therefore simplify the process. Secondly, as already mentioned, it saves time on adding new configurations: we’ve connected a template, changed one variable, and that's it. And most importantly, templates simplify maintenance. All changes made to the template are inherited by configurations based on it. So, if we need to add some step to all the configurations at once, we don’t need to click them all, just add this step to the template.Naturally, the teamcity setup process went hand in hand with the octopus setup. It is simply impossible to describe in parallel in the text, since there is a great chance of confusion. Therefore, the description has been shared, and in this part only the steps for providing CI are described. The octopus setup process will be described in the following.