This article will be useful for those who have just started to get acquainted with microservice architecture and with the Apache Kafka service. The material does not claim to be a detailed tutorial, but will help you quickly get started with this technology. I will talk about how to install and configure Kafka on Windows 10. We will also create a project using Intellij IDEA and Spring Boot.What for?
Difficulties in understanding certain tools are often associated with the fact that the developer has never encountered situations in which these tools may be needed. With Kafka, this is exactly the same. We describe the situation in which this technology will be useful. If you have a monolithic application architecture, then of course you do not need any Kafka. Everything changes with the transition to microservices. In fact, each microservice is a separate program that performs one or another function, and which can be launched independently of other microservices. Microservices can be compared with employees in the office, who sit at separate desks and independently solve their problem. The work of such a distributed team is unthinkable without central coordination.Employees should be able to exchange messages and results of their work with each other. Apache Kafka for microservices is designed to solve this problem.Apache Kafka is a message broker. With it, microservices can interact with each other, sending and receiving important information. The question arises, why not use the regular POST - reqest for these purposes, in the body of which you can transfer the necessary data and get the answer in the same way? This approach has a number of obvious disadvantages. For example, a producer (a service sending a message) can send data only in the form of a response in response to a request from a consumer (a service that receives data). Suppose a consumer sends a POST request and the producer answers it. At this time, for some reason, the consumer cannot accept the answer. What will happen to the data? They will be lost. The consumer will again have to send a request and hope that the data that he wanted to receive has not changed during this time,and the producer is still ready to accept the request.Apache Kafka solves this and many other problems that arise when exchanging messages between microservices. It will not be amiss to recall that uninterrupted and convenient data exchange is one of the key problems that must be solved to ensure the stable operation of the microservice architecture.Install and configure ZooKeeper and Apache Kafka on Windows 10
The first thing you need to know to get started is that Apache Kafka runs on top of the ZooKeeper service. ZooKeeper is a distributed configuration and synchronization service, and that’s all we need to know about it in this context. We must download, configure and run it before we get started with Kafka. Before you start working with ZooKeeper, make sure that you have JRE installed and configured.You can download the latest version of ZooKeeper from the official website .We extract the files from the downloaded ZooKeeper archive to a folder on the disk.In the zookeeper folder with the version number, we find the conf folder and in it the file “zoo_sample.cfg”. Copy it and change the name of the copy to “zoo.cfg”. Open the copy file and find the line dataDir = / tmp / zookeeper in it. In this line we write the full path to our zookeeper-x.x.x folder. It looks like this for me: dataDir = C: \\ ZooKeeper \\ zookeeper-3.6.0
 Now we add the system environment variable: ZOOKEEPER_HOME = C: \ ZooKeeper \ zookeeper-3.4.9 and at the end of the system variable Path add the entry:;% ZOOKEEPER_HOME % \ bin;Run the command line and write the command:
zkserver
If everything is done correctly, you will see something like the following.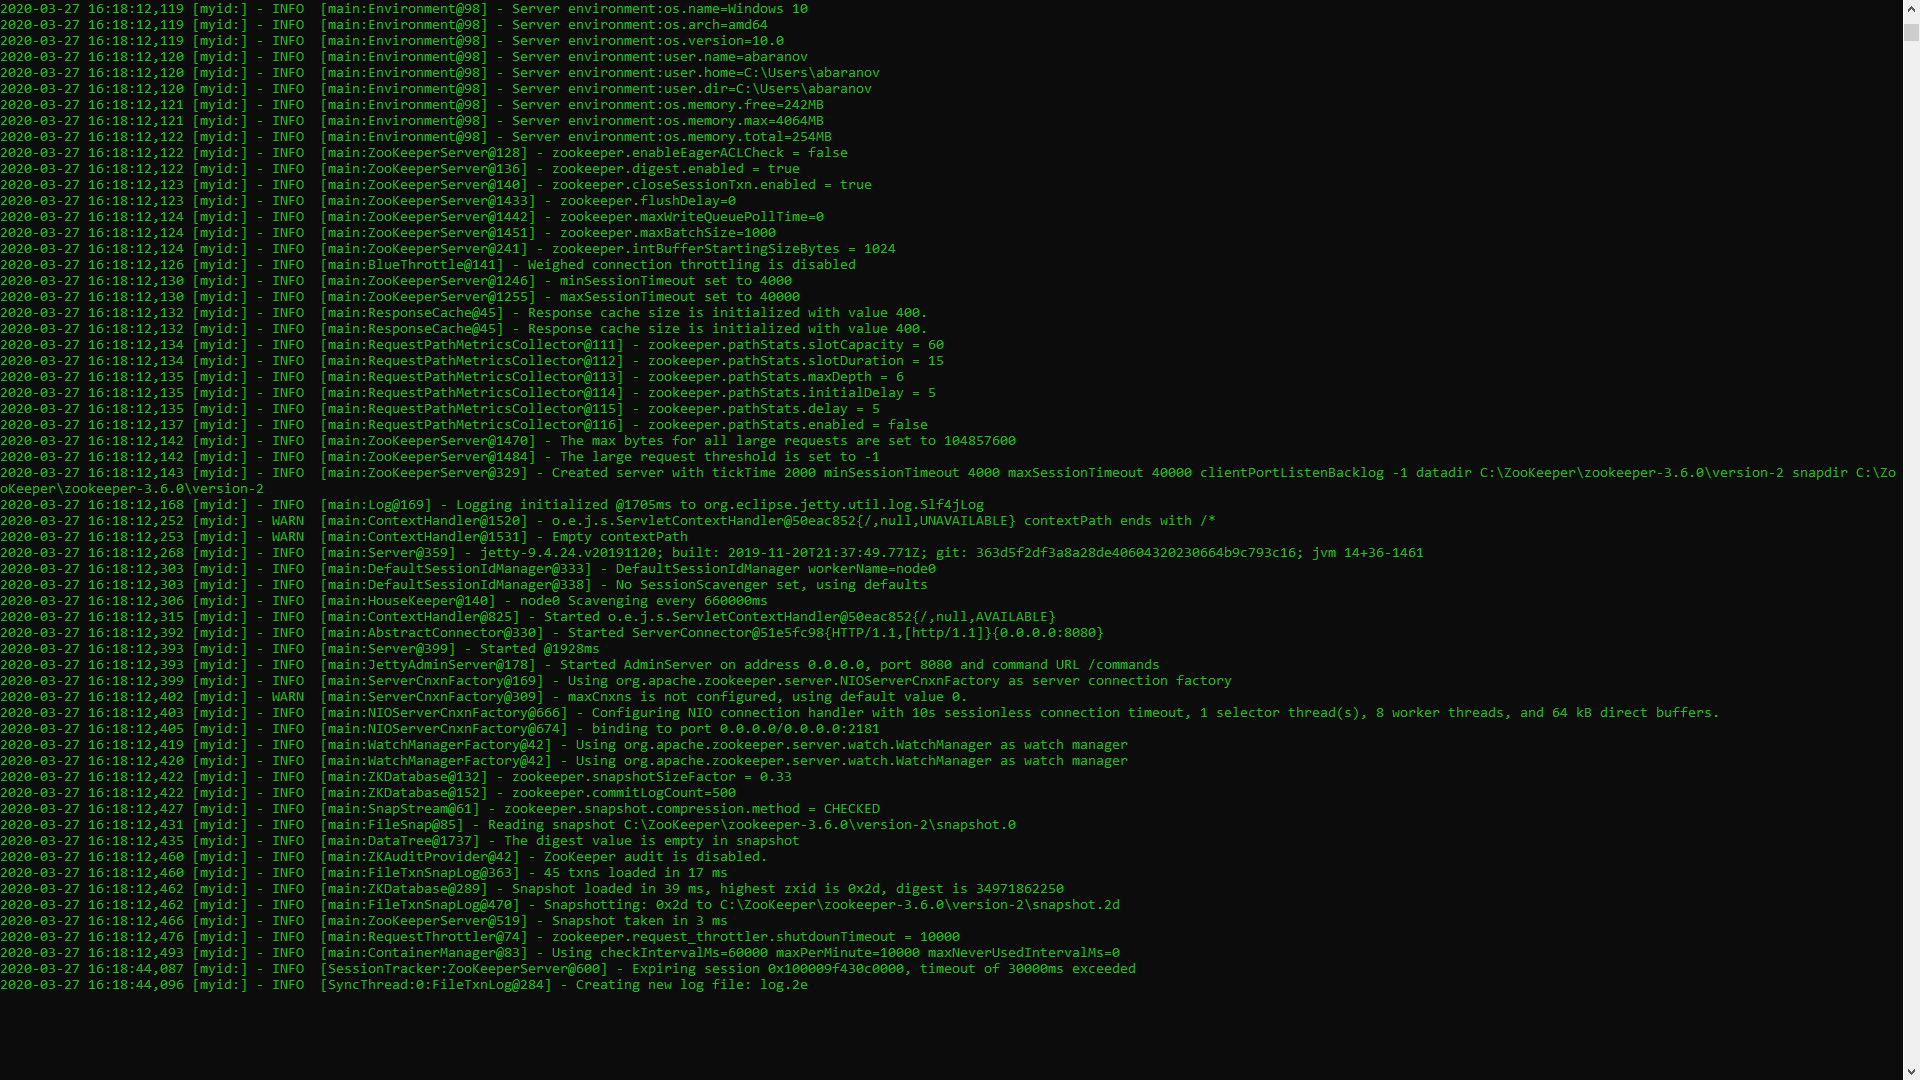 This means that ZooKeeper started normally. We proceed directly to the installation and configuration of the Apache Kafka server. Download the latest version from the official site and extract the contents of the archive: kafka.apache.org/downloadsIn the folder with Kafka we find the config folder, in it we find the server.properties file and open it.
 We find the line log.dirs = / tmp / kafka-logs and indicate in it the path where Kafka will save the logs: log.dirs = c: / kafka / kafka-logs.
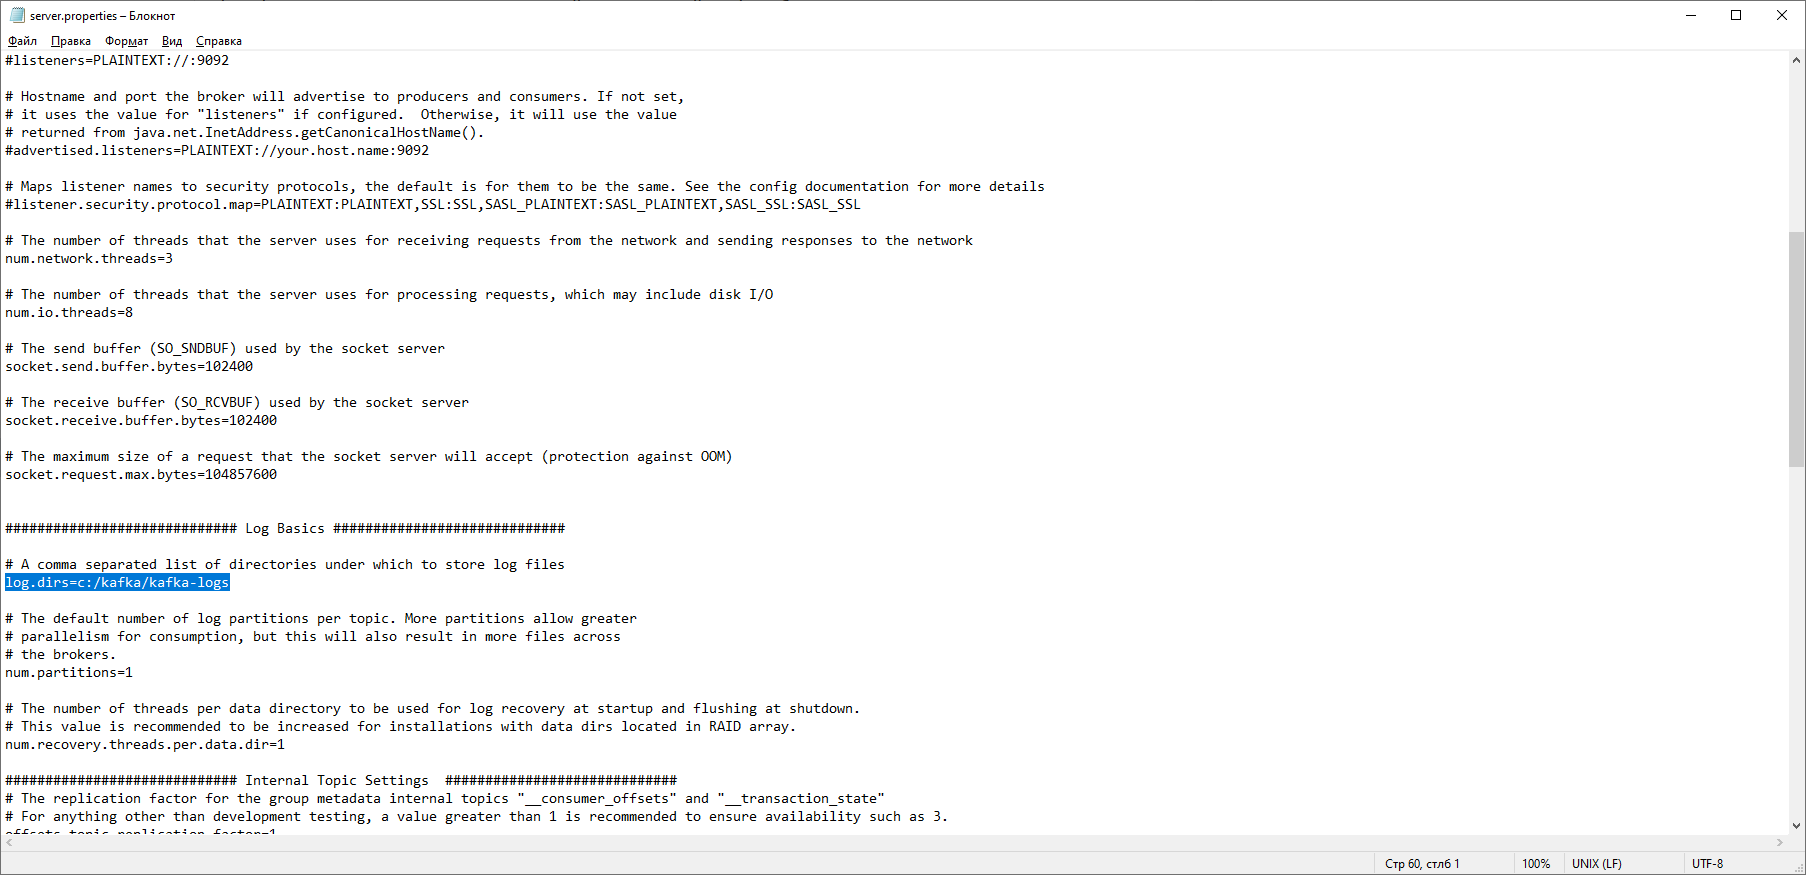 In the same folder, edit the zookeeper.properties file. We change the line dataDir = / tmp / zookeeper to dataDir = c: / kafka / zookeeper-data, without forgetting to indicate the path to your Kafka folder after the disk name. If you did everything right, you can run ZooKeeper and Kafka.
 For some, it may be an unpleasant surprise that there is no GUI to control Kafka. Perhaps this is because the service is designed for harsh nerds working exclusively with the console. One way or another, to run Kafka we need a command line.First you need to start ZooKeeper. In the folder with the kafka we find the bin / windows folder, in it we find the file to start the zookeeper-server-start.bat service, click on it. Nothing happens? It should be so. Open the console in this folder and write:
 start zookeeper-server-start.bat
Doesn't work again? This is the norm. This is because zookeeper-server-start.bat requires the parameters specified in the zookeeper.properties file, which, as we recall, lies in the config folder for its work. We write to the console:start zookeeper-server-start.bat c:\kafka\config\zookeeper.properties
Now everything should start normally. Once again, open the console in this folder (do not close ZooKeeper!) And run kafka:
start kafka-server-start.bat c:\kafka\config\server.properties
In order not to write commands every time on the command line, you can use the old proven method and create a batch file with the following contents:start C:\kafka\bin\windows\zookeeper-server-start.bat C:\kafka\config\zookeeper.properties
timeout 10
start C:\kafka\bin\windows\kafka-server-start.bat C:\kafka\config\server.properties
The timeout 10 line is needed to set a pause between starting zookeeper and kafka. If you did everything right, when you click on the batch file, two consoles should open with zookeeper and kafka running. Now we can create a message producer and a consumer with the necessary parameters directly from the command line. But, in practice, it may be needed unless for testing the service. We will be much more interested in how to work with kafka from IDEA.Work with kafka from IDEA
We will write the simplest application possible, which will simultaneously be the producer and consumer of the message, and then add useful features to it. Create a new spring project. This is most conveniently done using a spring initializer. Add the dependencies org.springframework.kafka and spring-boot-starter-web
 As a result, the pom.xml file should look like this:
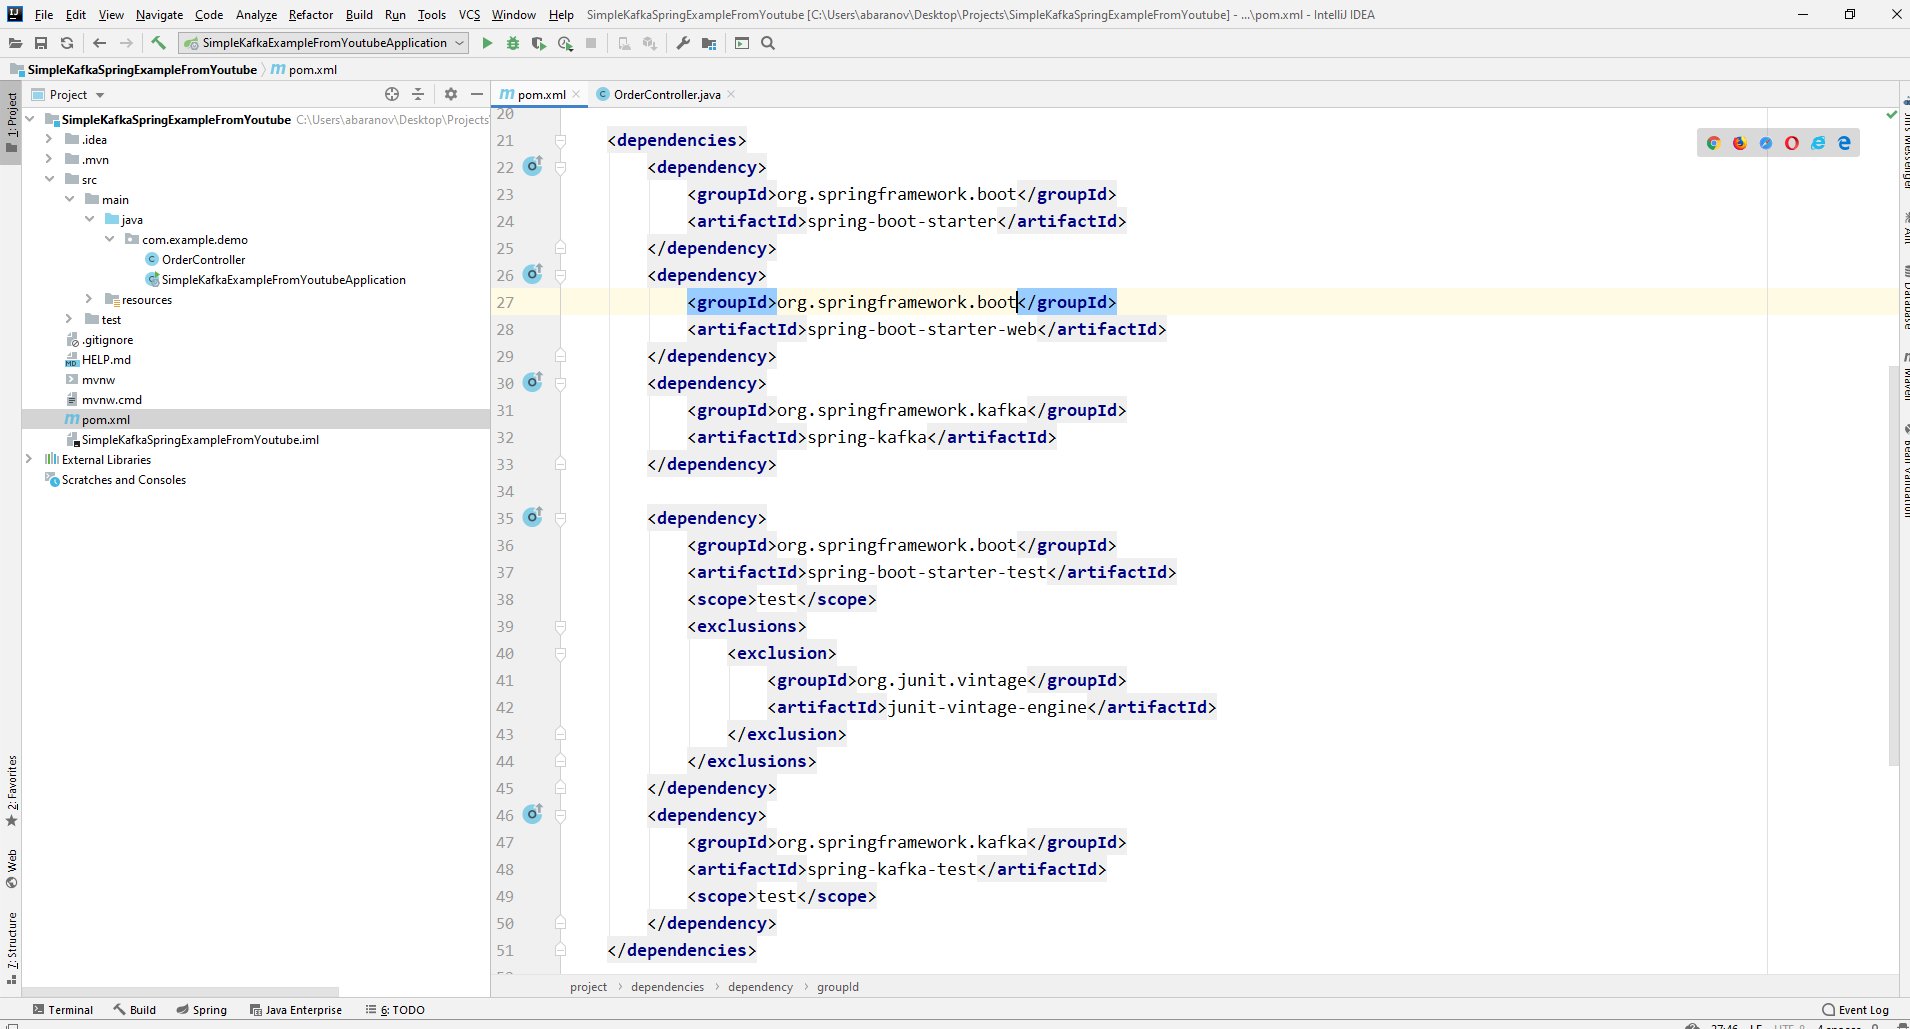 In order to send messages, we need the KafkaTemplate <K, V> object. As we see the object is typed. The first parameter is the type of key, the second is the message itself. For now, we will indicate both parameters as String. We will create the object in the class-controller. Declare KafkaTemplate and ask Spring to initialize it by annotatingAutowired.
@Autowired
private KafkaTemplate<String, String> kafkaTemplate;
In principle, our producer is ready. All that remains to be done is to call the send () method on it. There are several overloaded versions of this method. We use in our project an option with 3 parameters - send (String topic, K key, V data). Since KafkaTemplate is typed by String, the key and data in the send method will be a string. The first parameter indicates the topic, that is, the topic to which messages will be sent, and which consumers can subscribe to in order to receive them. If the topic specified in the send method does not exist, it will be created automatically. The full class text looks like this.@RestController
@RequestMapping("msg")
public class MsgController {
@Autowired
private KafkaTemplate<String, String> kafkaTemplate;
@PostMapping
public void sendOrder(String msgId, String msg){
kafkaTemplate.send("msg", msgId, msg);
}
}
The controller maps to localhost : 8080 / msg, the key and the message itself are transmitted in the request body.The message sender is ready, now create a listener. Spring also allows you to do this without much effort. It is enough to create a method and mark it with the @KafkaListener annotation, in the parameters of which you can specify only the topic to be listened to. In our case, it looks like this.@KafkaListener(topics="msg")
The method itself, marked with annotation, can specify one accepted parameter, which has the type of message transmitted by the producer.The class in which the consumer will be created must be marked with @EnableKafka annotation.@EnableKafka
@SpringBootApplication
public class SimpleKafkaExampleApplication {
@KafkaListener(topics="msg")
public void msgListener(String msg){
System.out.println(msg);
}
public static void main(String[] args) {
SpringApplication.run(SimpleKafkaExampleApplication.class, args);
}
}
Also, in the application.property settings file, you must specify the concierge parameter groupe-id. If this is not done, the application will not start. The parameter is of type String and can be anything.spring.kafka.consumer.group-id=app.1
Our simplest kafka project is ready. We have a sender and a recipient of messages. It remains only to run. First, launch ZooKeeper and Kafka using the batch file that we wrote earlier, then launch our application. It is most convenient to send a request using Postman. In the body of the request, do not forget to specify the parameters msgId and msg. If we see such a picture in IDEA, then everything works: the producer sent a message, the consumer received it and displayed it on the console.
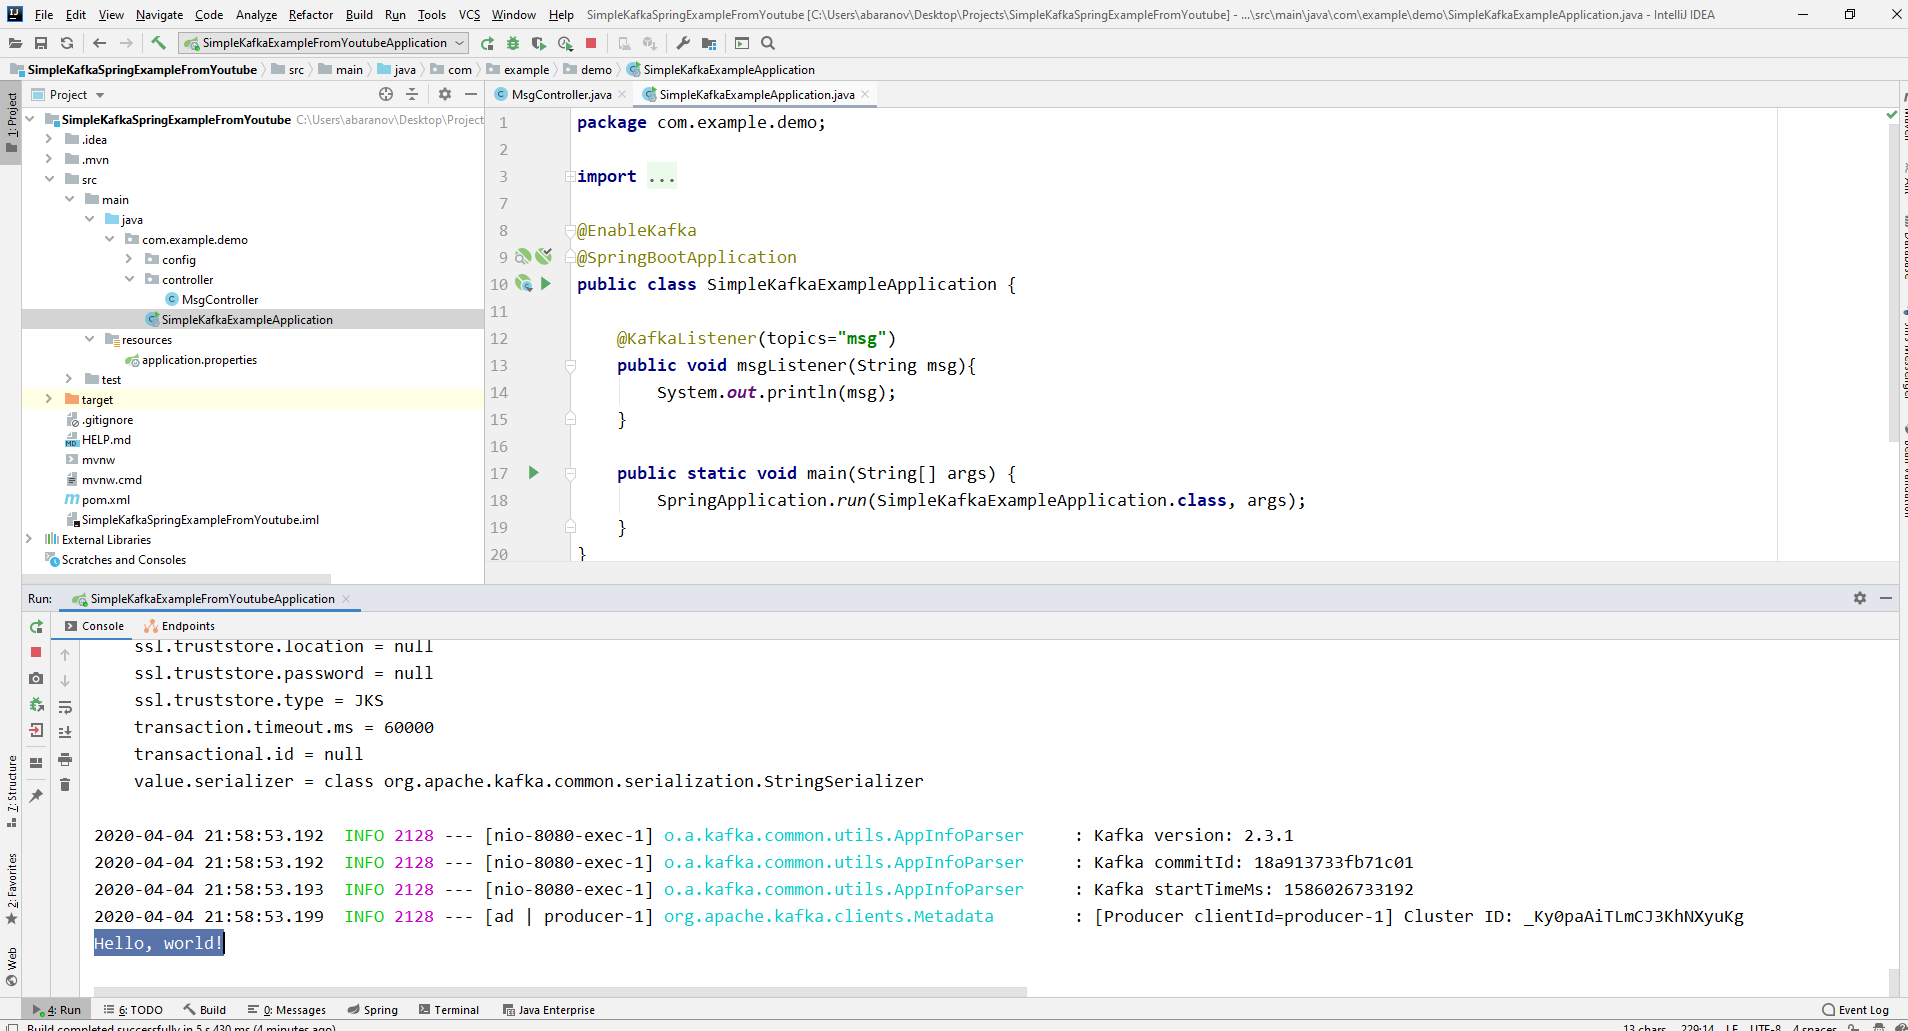
We complicate the project
Real projects using Kafka are certainly more complicated than the one we created. Now that we’ve figured out the basic functions of the service, consider what additional features it provides. To begin with, we will improve the producer.If you opened the send () method, you might notice that all of its variants have a return value of ListenableFuture <SendResult <K, V >>. Now we will not consider in detail the capabilities of this interface. Here it will be enough to say that it is needed to view the result of sending a message.@PostMapping
public void sendMsg(String msgId, String msg){
ListenableFuture<SendResult<String, String>> future = kafkaTemplate.send("msg", msgId, msg);
future.addCallback(System.out::println, System.err::println);
kafkaTemplate.flush();
}
The addCallback () method accepts two parameters - SuccessCallback and FailureCallback. Both of them are functional interfaces. From the name you can understand that the method of the first will be called as a result of successful sending of the message, the second - as a result of an error. Now, if we run the project, we will see something like the following on the console:SendResult [producerRecord=ProducerRecord(topic=msg, partition=null, headers=RecordHeaders(headers = [], isReadOnly = true), key=1, value=Hello, world!, timestamp=null), recordMetadata=msg-0@6]
Let's look carefully at our producer again. Interestingly, what happens if the key is not String, but, say, Long, but as the transmitted message, and even worse - some kind of complicated DTO? First, let's try to change the key to a numeric value ... If we specify Long as the key in the producer, the application will start normally, but when you try to send a message, a ClassCastException will be thrown and it will be reported that the Long class cannot be cast to the String class.
 If we try to manually create the KafkaTemplate object, we will see that the ProducerFactory <K, V> interface object, for example, DefaultKafkaProducerFactory <>, is passed to the constructor as a parameter. In order to create a DefaultKafkaProducerFactory, we need to pass a Map containing its producer settings to its constructor. All the code for the configuration and creation of the producer will be placed in a separate class. To do this, create the config package and in it the KafkaProducerConfig class.
@Configuration
public class KafkaProducerConfig {

    private String kafkaServer="localhost:9092";

    @Bean
    public Map<String, Object> producerConfigs() {
        Map<String, Object> props = new HashMap<>();
        props.put(ProducerConfig.BOOTSTRAP_SERVERS_CONFIG,
                kafkaServer);
        props.put(ProducerConfig.KEY_SERIALIZER_CLASS_CONFIG,
                LongSerializer.class);
        props.put(ProducerConfig.VALUE_SERIALIZER_CLASS_CONFIG,
                StringSerializer.class);
        return props;
    }

    @Bean
    public ProducerFactory<Long, String> producerFactory() {
        return new DefaultKafkaProducerFactory<>(producerConfigs());
    }

    @Bean
    public KafkaTemplate<Long, String> kafkaTemplate() {
        return new KafkaTemplate<>(producerFactory());
    }
}
In the producerConfigs () method, create a map with the configurations and specify LongSerializer.class as the serializer for the key. We start, send a request from Postman and see that now everything works as it should: the producer sends a message, and the consumer receives it.Now let's change the type of the transmitted value. What if we do not have a standard class from the Java library, but some kind of custom DTO. Let's say this.@Data
public class UserDto {
private Long age;
private String name;
private Address address;
}
@Data
@AllArgsConstructor
public class Address {
private String country;
private String city;
private String street;
private Long homeNumber;
private Long flatNumber;
}
To send DTO as a message, you need to make some changes to the producer configuration. Specify JsonSerializer.class as the serializer of the message value and do not forget to change the String type to UserDto everywhere.@Configuration
public class KafkaProducerConfig {
private String kafkaServer="localhost:9092";
@Bean
public Map<String, Object> producerConfigs() {
Map<String, Object> props = new HashMap<>();
props.put(ProducerConfig.BOOTSTRAP_SERVERS_CONFIG,
kafkaServer);
props.put(ProducerConfig.KEY_SERIALIZER_CLASS_CONFIG,
LongSerializer.class);
props.put(ProducerConfig.VALUE_SERIALIZER_CLASS_CONFIG,
JsonSerializer.class);
return props;
}
@Bean
public ProducerFactory<Long, UserDto> producerFactory() {
return new DefaultKafkaProducerFactory<>(producerConfigs());
}
@Bean
public KafkaTemplate<Long, UserDto> kafkaTemplate() {
return new KafkaTemplate<>(producerFactory());
}
}
Send a message. The following line will be displayed in the console: Now we are going to complicate the consumer. Prior to this, our method public void msgListener (String msg), marked with the annotation @KafkaListener (topics = "msg") took String as a parameter and displayed it on the console. What if we want to get other parameters of the transmitted message, for example, a key or a partition? In this case, the type of the transmitted value must be changed.
@KafkaListener(topics="msg")
public void orderListener(ConsumerRecord<Long, UserDto> record){
    System.out.println(record.partition());
    System.out.println(record.key());
    System.out.println(record.value());
}
From the ConsumerRecord object we can get all the parameters we are interested in.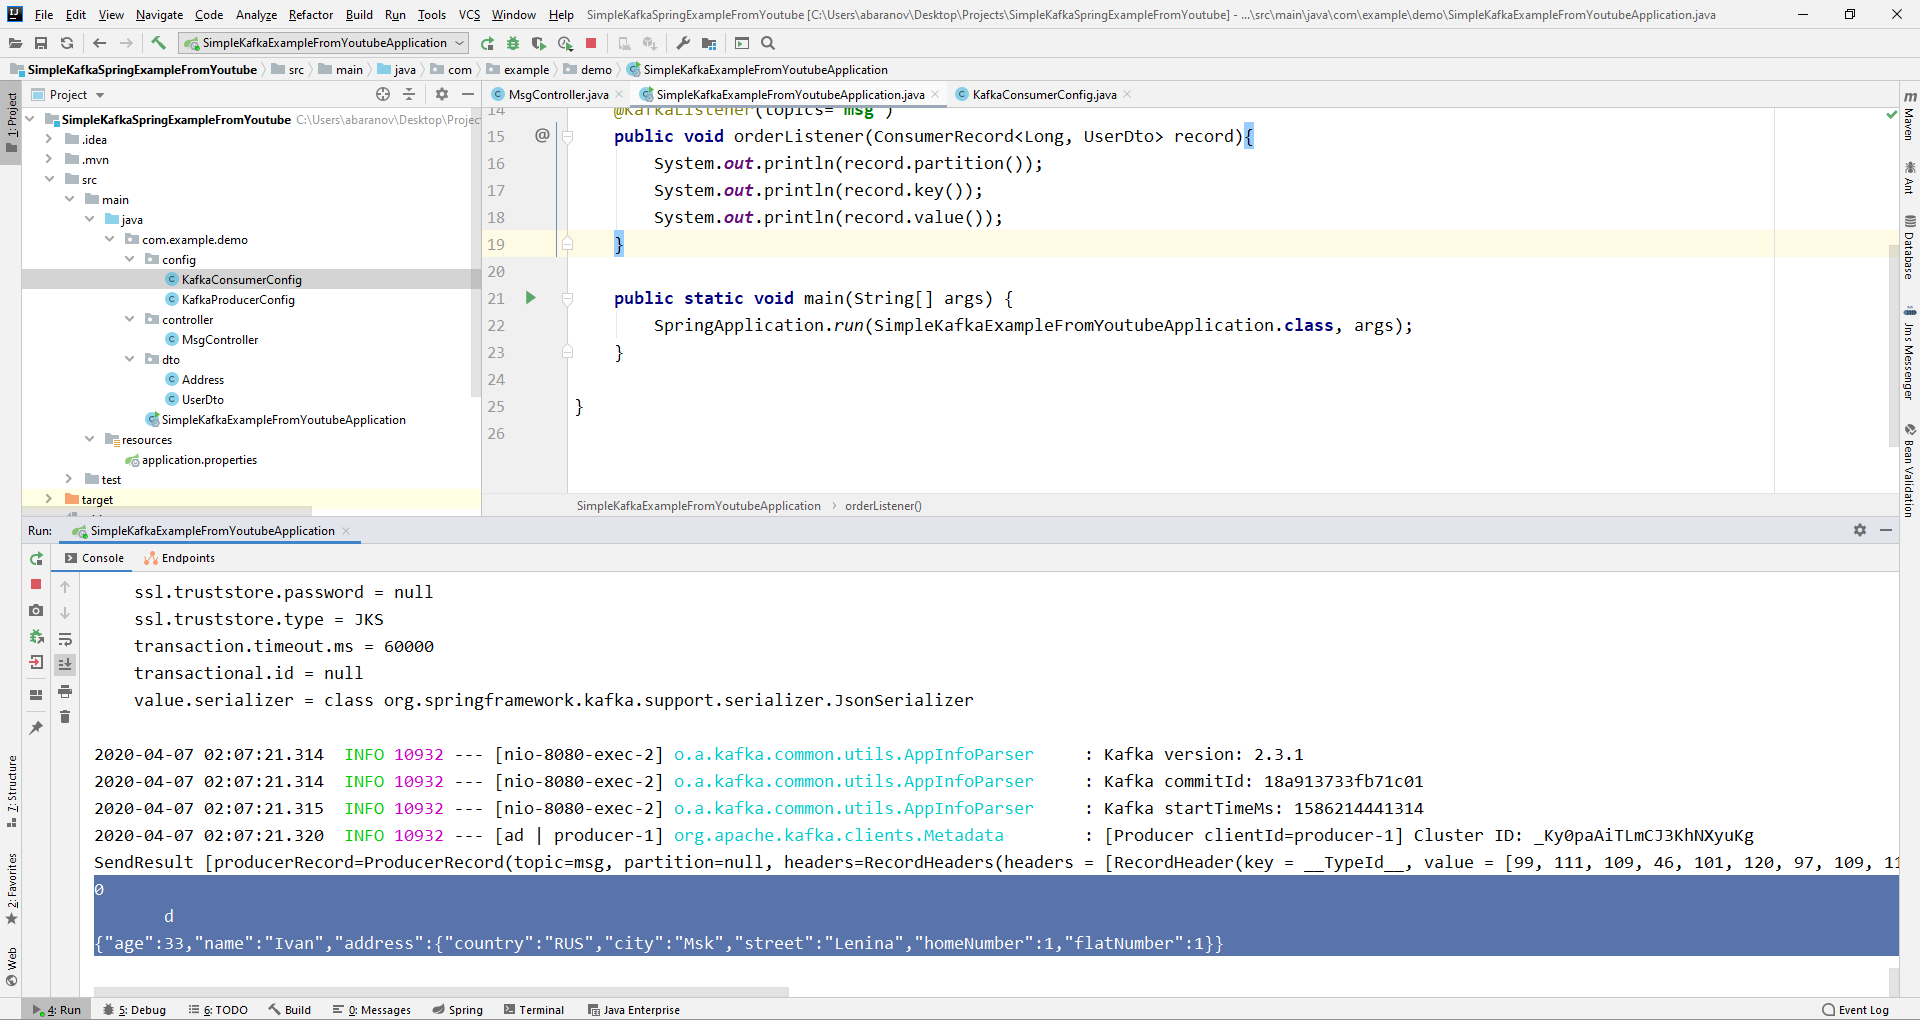 We see that instead of the key on the console, some kind of krakozyabry are displayed. This is because the StringDeserializer is used by default to deserialize the key, and if we want the key in the integer format to display correctly, we must change it to LongDeserializer. To configure the consumer in the config package, create the KafkaConsumerConfig class.
@Configuration
public class KafkaConsumerConfig {

    @Value("${spring.kafka.bootstrap-servers}")
    private String kafkaServer;

    @Value("${spring.kafka.consumer.group-id}")
    private String kafkaGroupId;

    @Bean
    public Map<String, Object> consumerConfigs() {
        Map<String, Object> props = new HashMap<>();
        props.put(ConsumerConfig.BOOTSTRAP_SERVERS_CONFIG, kafkaServer);
        props.put(ConsumerConfig.KEY_DESERIALIZER_CLASS_CONFIG, LongDeserializer.class);
        props.put(ConsumerConfig.VALUE_DESERIALIZER_CLASS_CONFIG, StringDeserializer.class);
        props.put(ConsumerConfig.GROUP_ID_CONFIG, kafkaGroupId);
        return props;
    }

    @Bean
    public KafkaListenerContainerFactory<?> kafkaListenerContainerFactory() {
        ConcurrentKafkaListenerContainerFactory<Long, UserDto> factory =
                new ConcurrentKafkaListenerContainerFactory<>();
        factory.setConsumerFactory(consumerFactory());
        return factory;
    }

    @Bean
    public ConsumerFactory<Long, UserDto> consumerFactory() {
        return new DefaultKafkaConsumerFactory<>(consumerConfigs());
    }
}
The KafkaConsumerConfig class is very similar to the KafkaProducerConfig we created earlier. There is also a Map that contains the necessary configurations, for example, such as a deserializer for the key and value. The created map is used to create the ConsumerFactory <>, which, in turn, is needed to create the KafkaListenerContainerFactory <?>. An important detail: the method returning KafkaListenerContainerFactory <?> Should be called kafkaListenerContainerFactory (), otherwise Spring will not be able to find the desired bean and the project will not compile. We start. We see that now the key is displayed as it should, which means that everything works. Of course, the capabilities of Apache Kafka go far beyond those described in this article, however, I hope that after reading it you will get an idea about this service and, most importantly, you can start working with it.Wash your hands more often, wear masks, do not go outside without need, and be healthy.