 There is no way to keep up with the development of modern home automation systems from eminent brands, but the price and a certain functionality makes you apply your skills to home-made home appliances. I was no exception, the technique and work with software are now more accessible, ESC, Arduino, STM and other endless multitude of the proposed platforms provide opportunities for solving almost any technical problem. Not so long ago, I moved to a new apartment on the outskirts of the city, a hall overlooking a vacant lot and an abandoned construction site on which pheasants walked in winter, everything changes quickly and is being built, a house has grown outside the window, a window through the window.
 The lack of desire to become the subject of someone else's attention spurred to cut automatic curtains. So, what I wanted from the curtains, the first, raising and lowering according to the set time, control, including via the Internet, although the latter was necessary for the implementation of voice control. As a result, the Internet has a lot of interesting things, but since I am weak in programming, I couldn’t understand many solutions, and not all of them met the requirements. The decision to do it on my own came gradually, here I gradually stepped on all the rakes but still came to the results. Roller blinds were bought, the old rotary CCTV camera taken from the object was dismantled, from it I extracted two Nooname-Chinese stepper motors whose characteristics I could not find on the Internet.
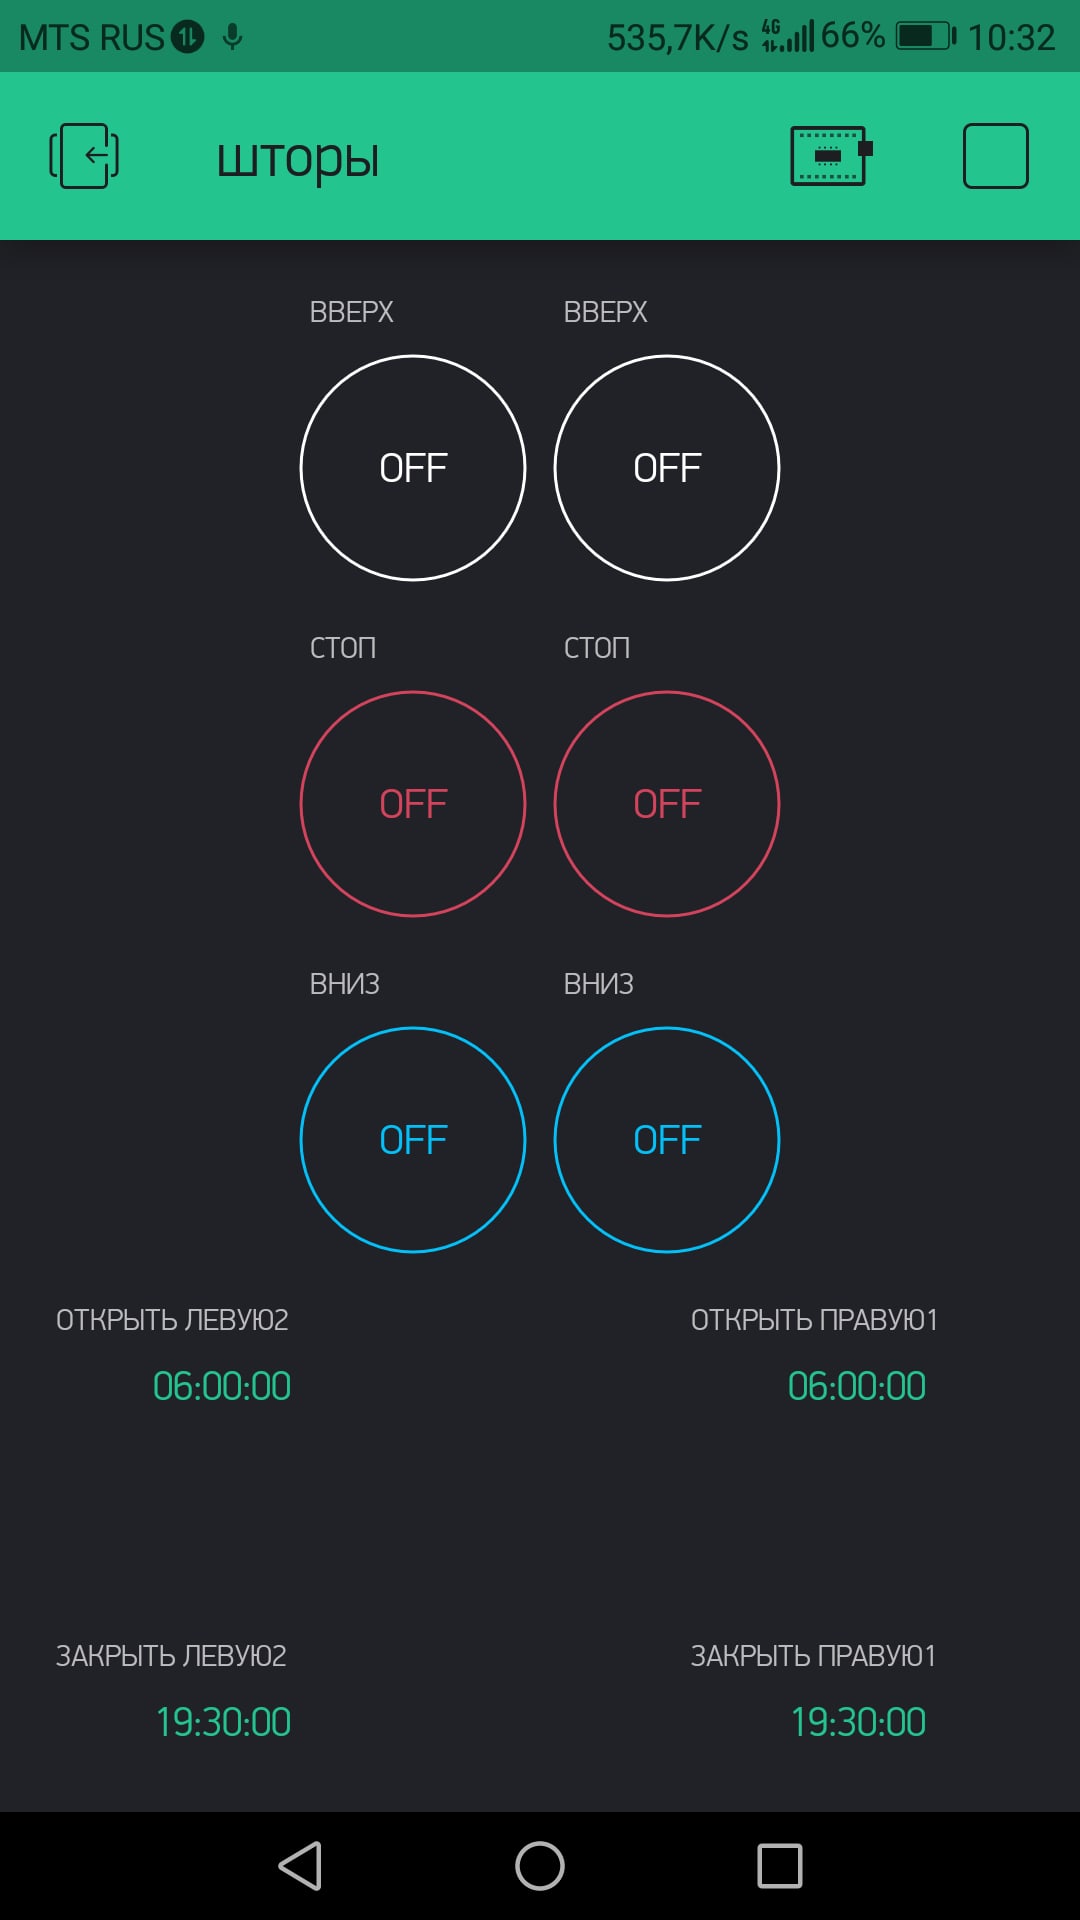
 Having dealt with the engines, I used nodemcu to control them, which sends signals to control the power unit to the ln298n driver, a simple sketch works on the Blynk platform, the initial position of the curtain is counted from the signal from the reed switch, a certain number of steps are taken to the lower position. The time of raising and lowering differs in a couple of seconds and is one and a half minutes, rather slowly, but without sound! The board has a built-in wifi module, and the blink platform allowed synchronization with time, depending on the time zone, as a result, one widget made it possible to simplify the circuit as much as possible. Voice control is performed on Dusya's assistant, while I use the phone as a platform, there are periodic false alarms, not critical, in the future it will be possible to replace the platform (if I figure it out) and replace the microphone, there are ideas.
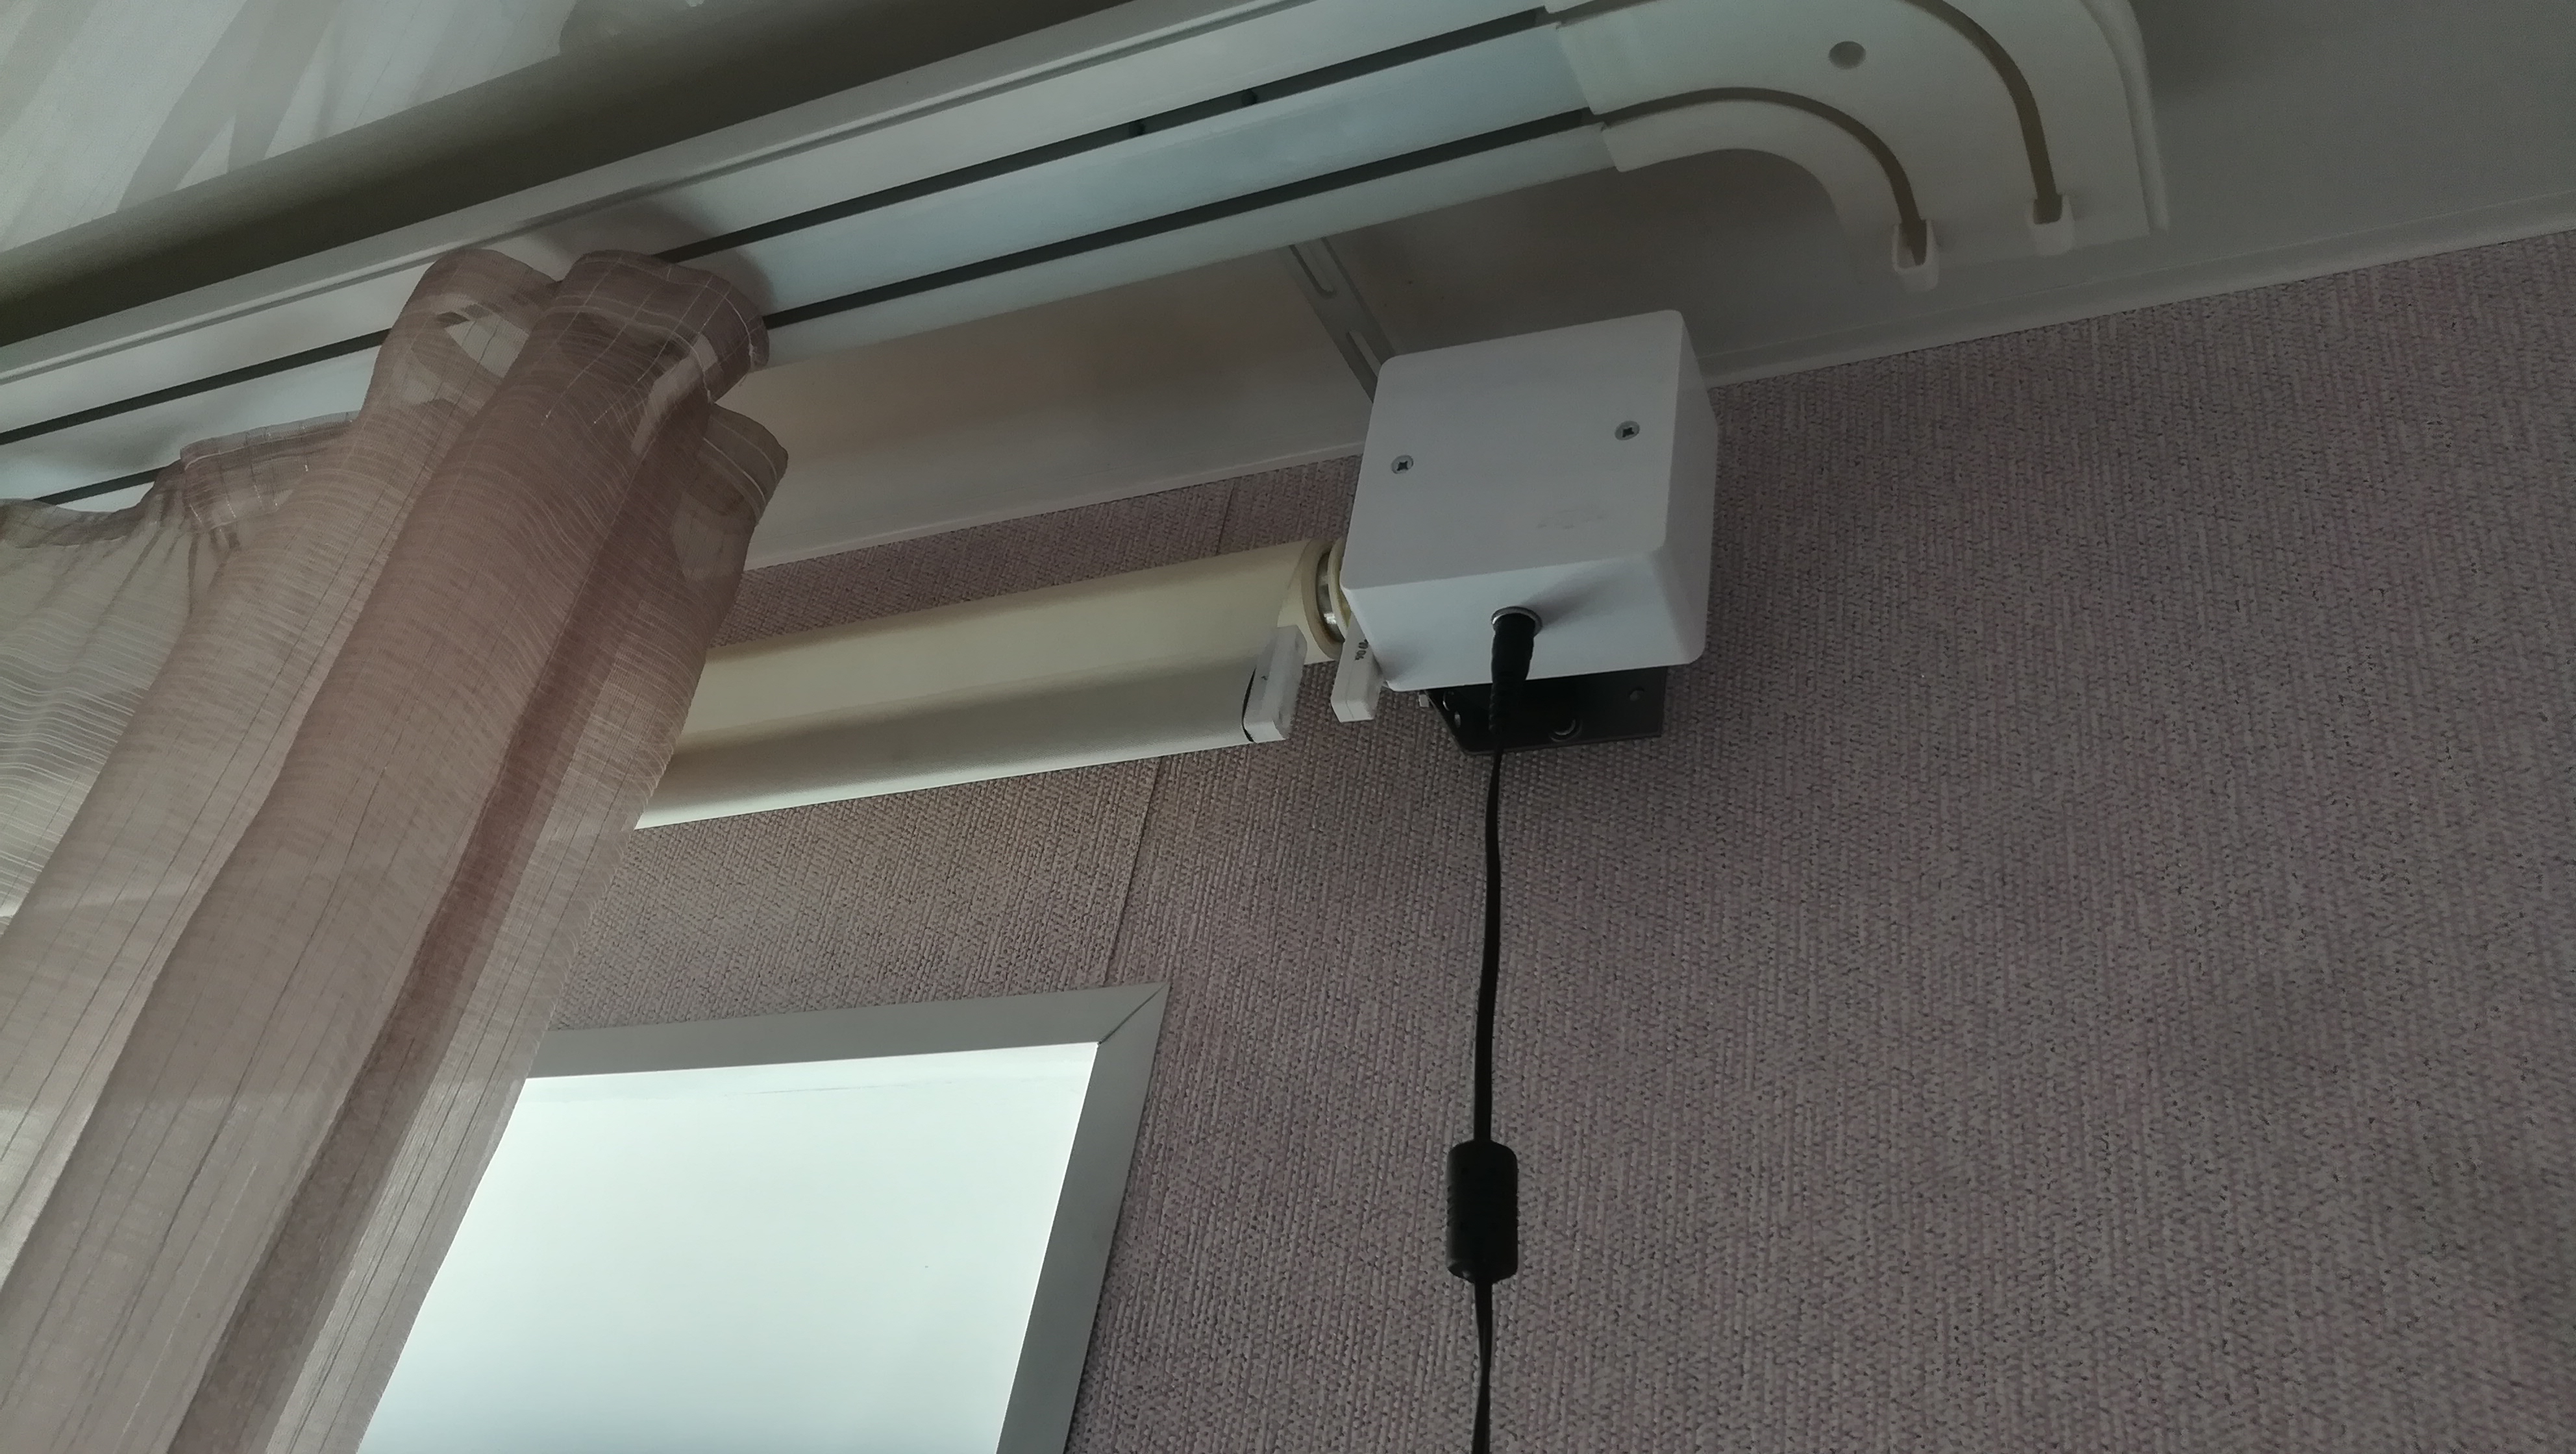
 A couple of months of operation have passed, everything works, doesn’t skip steps, I don’t pay attention to the curtains anymore, you can’t say about my cat, they cause him a steady interest. What are the disadvantages, curtains do not work in the absence of the Internet (payment for an affordable implementation), there is no feedback, until I realized it, it is not clear in what position the curtains are open or closed. Although it is not fatal if the curtains are open or closed and re-command nothing will happen. In any case, the implementation is justified on the basis of the prevailing market price. Well, as they say, all good!Below is the code for esp:
#define BLYNK_PRINT Serial
#include <ESP8266WiFi.h>
#include <BlynkSimpleEsp8266.h>
#include <ESP8266mDNS.h>
#include <WiFiUdp.h>
#include <ArduinoOTA.h> //OTA OTA-
#include <AccelStepper.h>
#define motor1 D1
#define motor2 D2
#define motor3 D3
#define motor4 D4
AccelStepper Stepper1(4, D1, D2, D3, D4);
static int buttonPin = D5;
unsigned long runTime2;
int current = 20800;
static bool newZeroPoint = true;
char auth[] = "";
char ssid[] = "";
char pass[] = "";
void setup() {
Serial.begin(9600);
Blynk.begin(auth, ssid, pass);
pinMode(buttonPin, INPUT);
pinMode(motor1, OUTPUT);
pinMode(motor2, OUTPUT);
pinMode(motor3, OUTPUT);
pinMode(motor4, OUTPUT);
ArduinoOTA.setHostname("ESP8266-00002");
ArduinoOTA.begin();
Stepper1.setMaxSpeed(200);
Stepper1.setAcceleration(180);
}
void ZeroPoint(){
if (newZeroPoint)
if (digitalRead(buttonPin))
{
Stepper1.setCurrentPosition(0);
newZeroPoint = false;
} else
{
if (Stepper1.distanceToGo() == 0) {Stepper1.moveTo(Stepper1.currentPosition() + 1000);}
Stepper1.run();
}
}
BLYNK_WRITE(V0)
{
int button = param.asInt();
if (button == 1){ Stepper1.move(-Stepper1.currentPosition());}
}
BLYNK_WRITE(V1)
{
int button = param.asInt();
if (button == 1){
Stepper1.moveTo(-current);
Stepper1.run();
}
}
BLYNK_WRITE(V2)
{
int button = param.asInt();
if (button == 1){
Stepper1.stop();}
}
void Out()
{
if (Stepper1.run())
runTime2 = millis();
if (millis() - runTime2 > 5000)
{runTime2 = millis();
digitalWrite (5, LOW);
digitalWrite (4, LOW);
digitalWrite (0, LOW);
digitalWrite (2, LOW);
}
}
void loop()
{
Blynk.run();
Stepper1.run();
ZeroPoint();
Out();
ArduinoOTA.handle();
}