A lot of topics have already been written with Core Data, but most of these articles are in English, as well as using a lot of “smart” words that can confuse beginners.In this article, I will try to talk about this framework from Apple in an understandable language, so that even the "smallest" programmers can get out information for themselves, and get that minimum amount of knowledge that will help them in their projects either.Small offtopic
Core Data is a very powerful tool that allows you to save data in your application and use it later. In this article, I will NOT talk about working with multiple context with subsequent synchronization, how to solve migration problems and various advance features.The target audience of this article is people who generally had no experience with Core Data.Well ... Let's get started!
To start, you need to create the .xcdatamodeld file itself, after you open it, at the bottom of the screen you will see the “Add entity” button. By clicking on it, your object model will be created: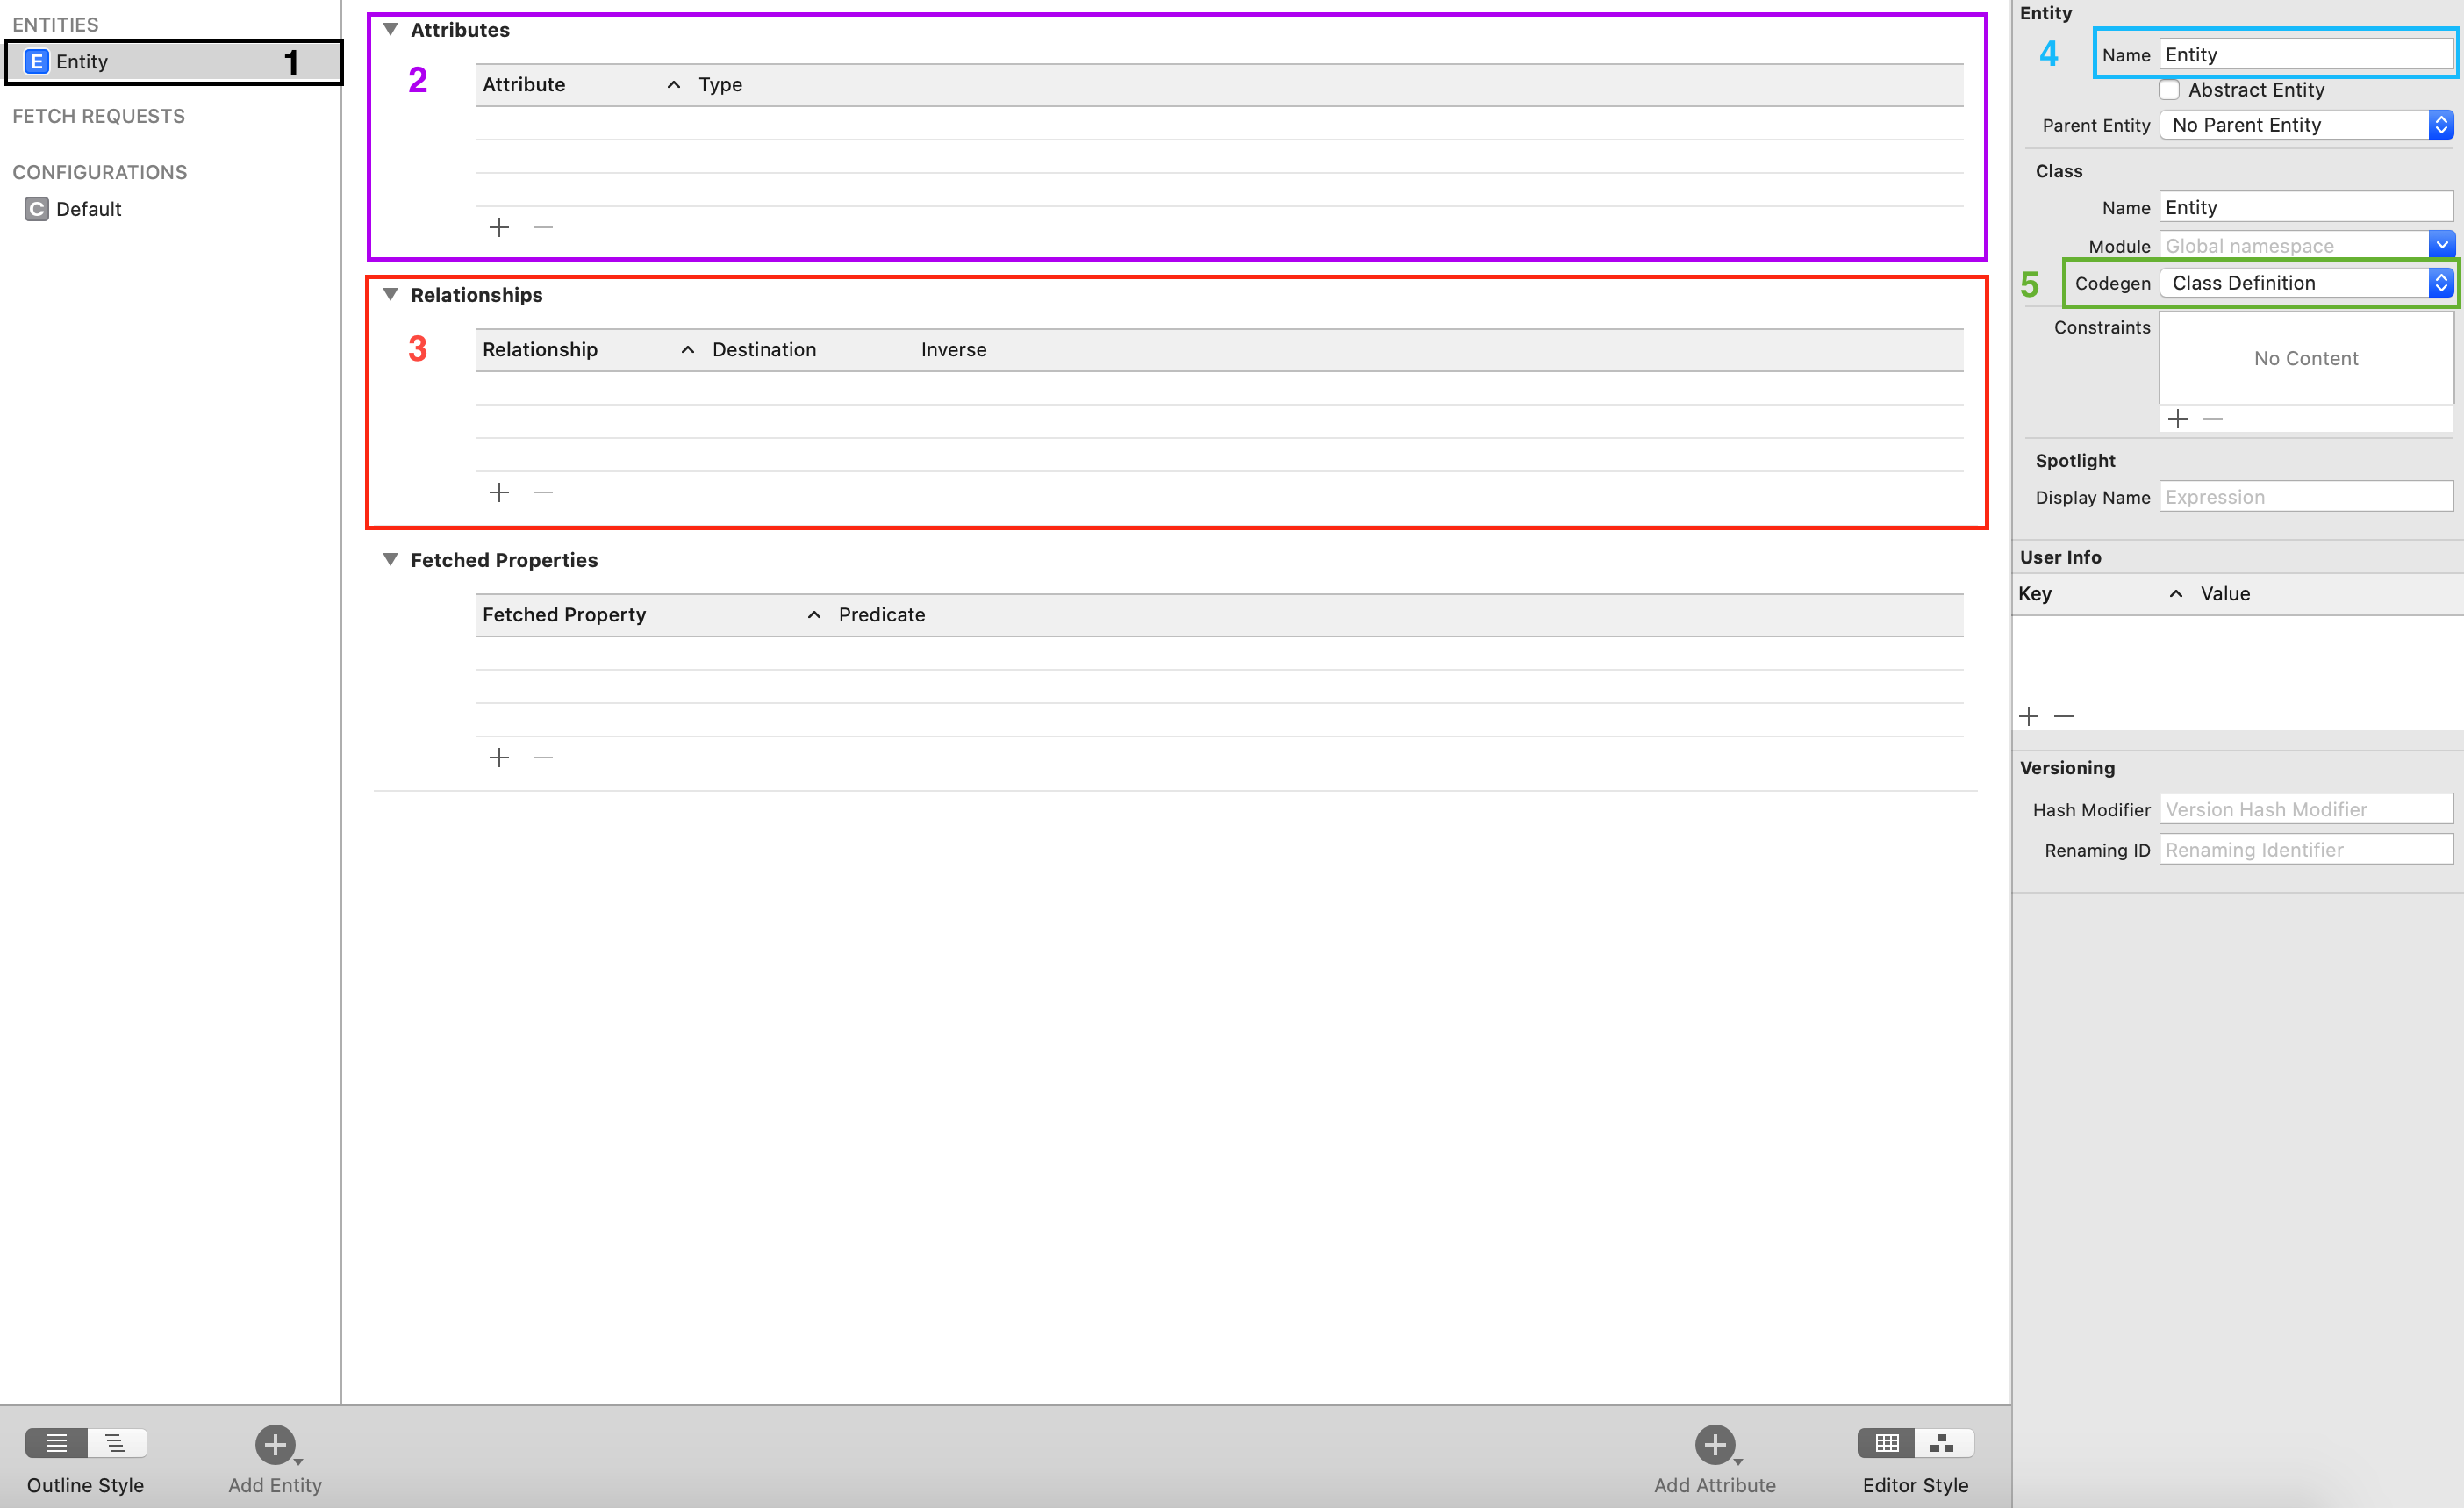 And now, in more detail:
- Your Entity. You can think of Entity as your data structure, which has inheritance from a certain class - NSManagedObject, and will also have certain fields for writing data, more on that later.
- Attributes. Entity . + . :
- Integer 16/32/64 — . , . Int, .
: Integer16(15) - Decimal/Double/Float — . , .
- String — .
- Boolean — .
- Date — Date.
NOTE: Core Data 00:00:00 UTC 1 1970 .
- Binary Data — Data
NOTE: Allow External Storage. Core Data , 100 , Core Data . .
- UUID — UUID.
- URI — URL
- Transformable — , NSCoding.
- Relationship. Entity. Relationships :
- One-to-One
- One-to-Many
- Many-to-Many
Relationships.
3 Entities, Andrey, Home, Car.
- — One-to-One Relationship.
- 1, 2 — One-to-Many Relationship.
- Many-to-Many Relationship . .
- Entity
- Codegen field. In short, this field indicates who will govern the creation of NSManagedObject classes. For ease of operation, select Manual / None , then Core Data will be able to create the necessary classes for your Entity itself. About it below.
To create our Entity class, use:Editor> Create NSManagedObject Subclass.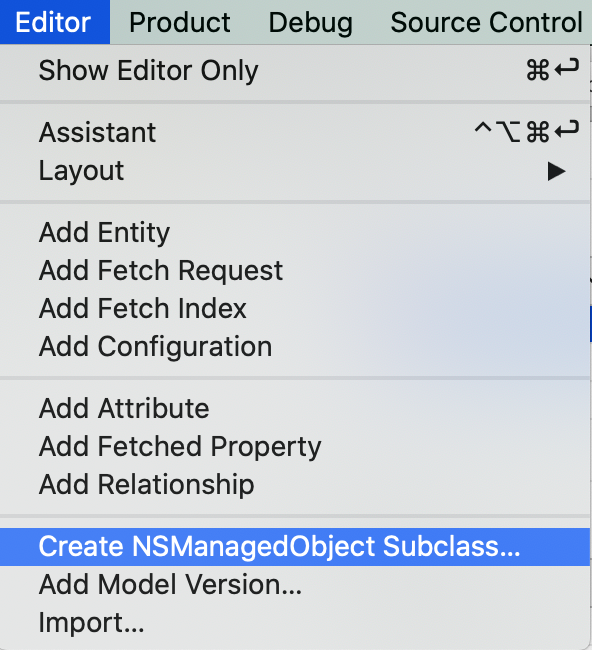 If you want to set default values for your attributes, use the method:
public override func awakeFromInsert() {
        super.awakeFromInsert()
        date = Date()
}
Work with NSManagedObjectContext and PersistentStoreCoordinator
Core Data Stack Hierarchy: In simple terms, all of your Entitys are shown as Managed Objects in the diagram above. All our Managed Objects are stored in NSManagedObjectContext. Context It refers to the NSPersistentStoreCoordinator which stores your saved data as a Row Cache after accessing SQL, but this is not the case now.To create an instance of your ManagedObject (Entity), you must refer to your NSPersistentContainer which is a wrapper for your NSPersistentStoreCoordinator.
var persistentContainer: NSPersistentContainer = {
      let container = NSPersistentContainer(name: "SavingLearn")
      container.loadPersistentStores(completionHandler: { (storeDescription, error) in
          if let error = error as NSError? {
              fatalError("Unresolved error \(error), \(error.userInfo)")
          }
      })
      return container
  }()
Next, we need to access the NSManagedObjectContext through our PersistentContainer:var context: NSManagedObjectContext = {
return persistentContainer.viewContext
}()
Now we can create an instance of our ManageObject from our context and assign it a value:var person = Person(context: context)
person.age = 32
Saving Object
To save, we use a simple function:func saveContext () {
if context.hasChanges {
do {
try context.save()
} catch {
context.rollback()
let nserror = error as NSError
fatalError("Unresolved error \(nserror), \(nserror.userInfo)")
}
}
}
In the method above, we check our context for changes and if they are present, we make a save. In case of an error, the method is executed:context.rollback()
rollback()
The method returns our context to its original state and cancels all changes that were made on it.
Delete objectcontext.delete(object)
Allows us to easily remove an object from Core Data.NOTE: For the changes to take effect, it is necessary to save the context, otherwise all changes will not be saved.context.save()
Retrieving All Objects
In order to get an array of our objects from Core Data, we must perform NSFetchRequest. I will not go deep into the full power of FetchRequest since this article is designed for beginners.let fetchRequest: NSFetchRequest<Person> = Person.fetchRequest()
let objects = try context.fetch(fetchRequest)
Under the hood, NSFetchRequest does a great job:- NSFetchRequest Goes to Persistent Store Coordinator
- Persistent Store Coordinator sends request to Persistent Store
- Persistent Store SQL
- SQL . ID Row Value. Row Value Persistent Store Row Cache ID.
- Persistent Store Managed Objects ID Persistent Store Coordinator. fault () . Managed Object Context ID, Core Data SQL.
- Persistent Store Coordinator context Managed Object
- Core Data .
includePendingChanges = false
- NSManagedObject
NOTE: While the NSFetchRequest Managed Object Context is running and the Persistent Store Coordinator is running in a synchronous queue, all processes are blocked while another process is running.
Conclusion
In this article, I described the minimum information needed to work with Core Data in my opinion.Now you can create your own data models, save, delete and retrieve them.If you are interested in a more “advance” topic about working with Core Data and interesting tips, then write in the comments and I will figure out what can be done about it. Happy coding!