Hello everyone!In this article I want to tell how to create my function in SIL.Introduction
SIL stands for Simple Issue Language, was created by cPrime developers to automate manual actions in Atlassian Jira and Confluence.The main advantage of SIL is that SIL contains functions that do not require knowledge of the Atlassian Jira or Atlassian Confluence APIs to use them. This significantly reduces the threshold for entering SIL and makes SIL program code smaller in volume than similar Java or Groovy code.For example, you want to select tickets from Jira upon request, so that you can perform some actions on them. To do this, in Java or Groovy, you would have to write a dozen lines of code. On SIL, this is one line:selectIssues(" JQL ");
Moreover, in Java or Groovy you would have to ensure compatibility of the code on Jira 7 and Jira 8. In SIL you do not need to think about compatibility. SelectIssues will work on all versions of Jira that SIL supports.You can find more about SIL here .But what if I need to do something like this, why are there no functions in SIL? For example, I need to get data from the Table Grid Next Generation plugin or generate a PDF file using the PDF exporter for Jira plugin.In this case, you have two options:- SIL Groovy Connector - this plugin allows you to write code using the Jira Java API in Java or Groovy and call this code from a SIL script.
- Write your Jira plugin that will add your functions to SIL, and then use your functions in SIL scripts
In this article, we will focus on how to write your Jira plugin to extend the functions of SIL. In order to repeat the steps in this article, you will need the Atlassian SDK and git.Set the maven archetype
A plugin that will extend SIL must contain logic that will add your functions to SIL. In order not to add this logic to the plugin each time, but to concentrate only on writing functions, I made the maven archetype that will create everything you need in the new plugin.First, clone the archetype from the repository:git clone https://alex1mmm@bitbucket.org/alex1mmm/sil-extension-archetype.git --branch v1 --single-branch
The sil-extenstion-archetype folder will be created. Let's go into it:cd sil-extension-archetype
Now install the archetype in your local maven repository:atlas-mvn install
Create a plugin
Go to the folder above and create a new plugincd ..
atlas-mvn archetype:generate -DarchetypeCatalog=local
You will be asked standard questions when creating a project through maven. I give my answers to the questions. You can change them.Choose archetype:
1: local -> com.cprime.jira.sil.extension:sil-extension-archetype (This is the com.cprime.jira.sil.extension:sil-extension plugin for Atlassian JIRA.)
Choose a number or apply filter (format: [groupId:]artifactId, case sensitive contains): :
Define value for property 'groupId': ru.matveev.alexey.sil.extension
Define value for property 'artifactId': sil-extension
Define value for property 'version' 1.0-SNAPSHOT: :
Define value for property 'package' ru.matveev.alexey.sil.extension: :
Confirm properties configuration:
groupId: ru.matveev.alexey.sil.extension
artifactId: sil-extension
version: 1.0-SNAPSHOT
package: ru.matveev.alexey.sil.extension
Y: : Y
After that, the plugin will be created.Testing plugin
Go to the created folder (in my case it is sil-extension) and run Jira:cd sil-extension
atlas-run</code>
Jira
<code>http://localhost:2990/jira/plugins/servlet/silmanager?autoSelectTree=sil.scripts
You will see the SIL Manager screen. Select the New File option: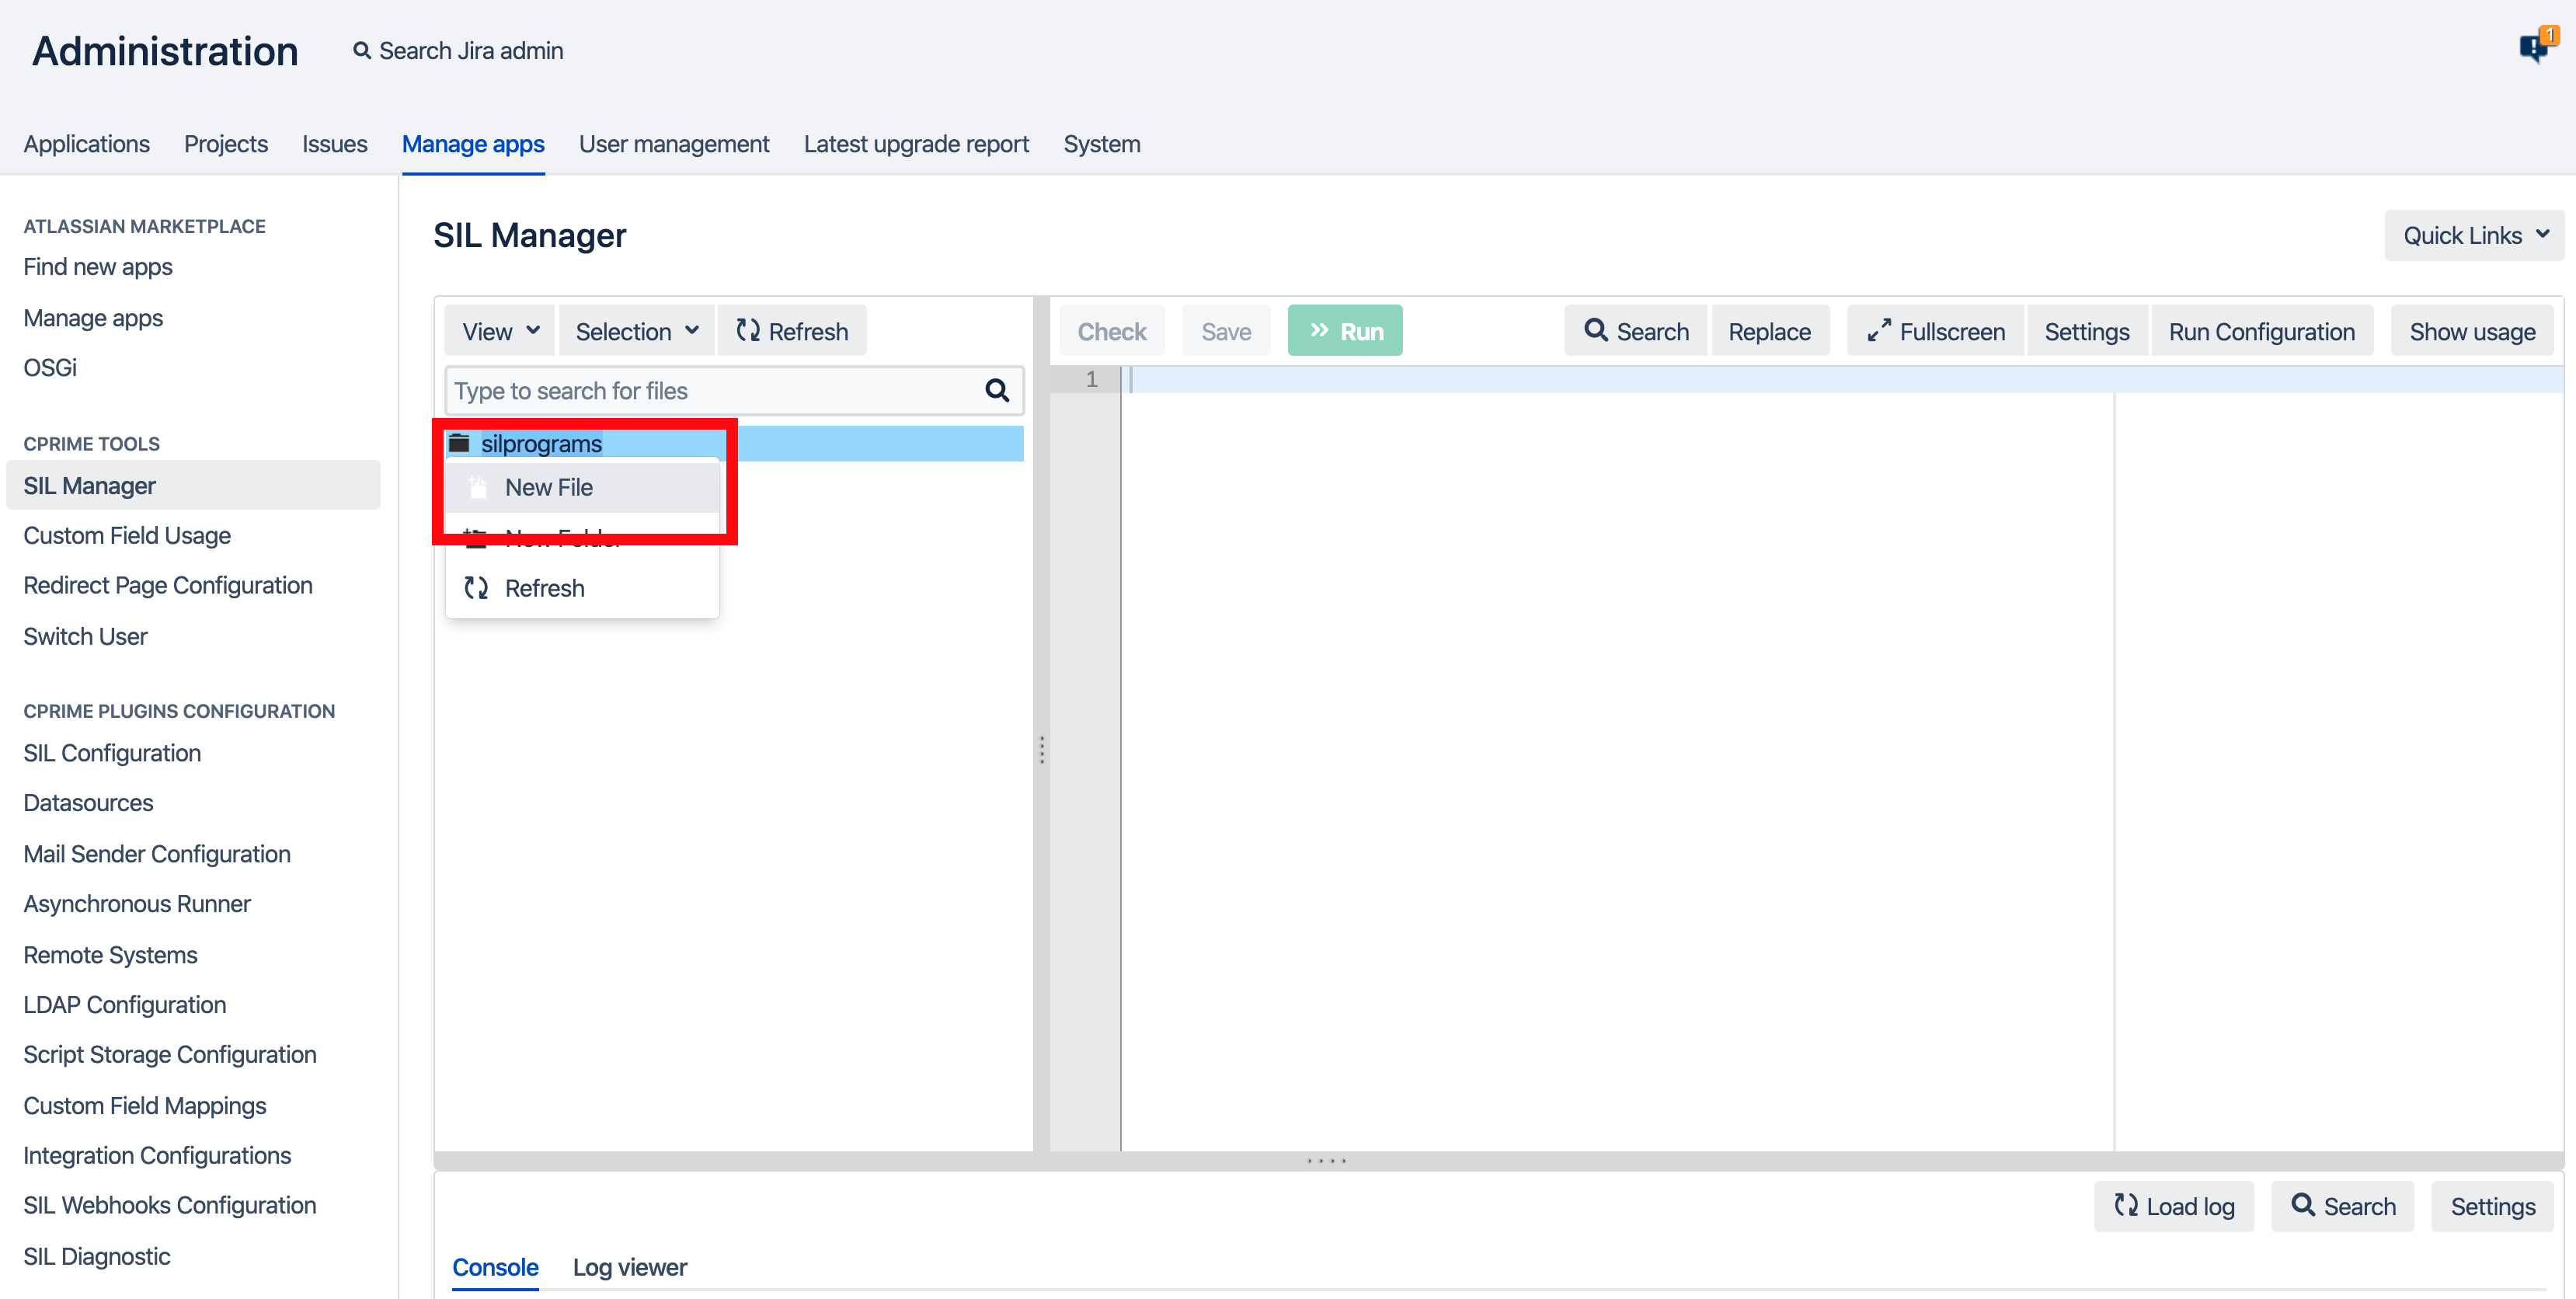 Create a test.sil file with the following contents:
runnerLog(SayHello("Alexey"));
string[] res = SayHello2("Alexey", "Matveev");
runnerLog(res[0]);
runnerLog(res[1]);
res = SayHello3("Alexey", "Matveev");
runnerLog(res["param1"]);
runnerLog(res["param2"]);
The screen in Jira will look something like this: Our plugin added three functions: SayHello, SayHello2, SayHello3. Test.sil checks that functions have been added to SIL.Run test.sil by clicking on the Run button. In the Console tab, you should see the following text:
Hello Alexey
Hello Alexey
Hello Matveev
Hello Alexey
Hello Matveev
Done.
If you saw such text, then our functions have been successfully added to SIL.Now let's talk about what needs to be changed in the plugin in order to create our own function.Create a Java class for our function
Each function that you want to add to SIL must have its own class. This class must be a descendant of the AbstractSILRoutine class.In order to understand what needs to be added to a new class, let's look at the available examples.SayHello.java
public class SayHello extends AbstractSILRoutine<MutableString> {
  private static final SILType[][] types = {{ TypeInst.STRING }};

  public SayHello(ClassLoader classLoader, String name) {
    super(classLoader, name, types);
  }

  @Override
  public SILType<MutableString> getReturnType() { return TypeInst.STRING; }

  @Override
  protected SILValue<MutableString> runRoutine(SILContext silContext,                                   List<SILValue<?>> list) {
    SILValue param = list.get(0);
    return SILValueFactory.string( "Hello " + param.toStringValue());
 }
  @Override
  public String getParams() { return "(name)"; }
First line:private static final SILType[][] types = {{ TypeInst.STRING }};
This line defines the types and number of parameters that will be passed to your function. The function in SIL looks like this:mymethod(myparameter);
Accordingly, {{TypeInst.STRING}} means that we will have one parameter and its type will be String. If you want to pass two parameters of type String, then you need to change the string like this:private static final SILType[][] types = {{ TypeInst.STRING, TypeInst.STRING }};
In SIL, you can call your function like this:mymethod(myparameter1, myparameter2);
If your function can accept either one or two parameters. That term will look like this:private static final SILType[][] types = {{ TypeInst.STRING},
{TypeInst.STRING, TypeInst.STRING }};
Next comes:public class SayHello extends AbstractSILRoutine<MutableString>
We inherit our class from AbstractSILRoutine, which means that our class will return a parameter of type String.Further:public SayHello(ClassLoader classLoader, String name) {
super(classLoader, name, types);
}
This is the constructor. You probably will not have to change anything in it.Further:@Override
public SILType<MutableString> getReturnType() { return TypeInst.STRING; }
Here we determine the type of the returned parameter. In our case, it is String.Further:@Override
protected SILValue<MutableString> runRoutine(SILContext silContext, List<SILValue<?>> list) {
SILValue param = list.get(0);
return SILValueFactory.string( "Hello " + param.toStringValue());
}
This is the main entry point for your function. When you execute a function in SIL, you will get here. All logic is here.This function takes two parameters:silContext - allows you to get the Jira and SIL variables.For example, your SIL script works as a post function and you want to receive a ticket under which the script is executed:Issue issue = (Issue) silContext.getAllMetaInformation().get("issue");
list - allows you to get the values of parameters passed to the SIL function.SILValue param = list.get(0);
Line:SILValueFactory.string( "Hello " + param.toStringValue());
returns the value. You must return values that SIL understands, so use SILValueFactory to generate values.Further:@Override
public String getParams() { return "(name)"; }
This defines the type of function in SIL Manager. When you start typing in the SIL manager, you are presented with a hint of available functions. In our case, you will see:yourmethod(name)
Add our class to the SIL engine
You have created your class. Now you need to make SIL aware of your function. This is done in the ESLauncher.java file. This file contains these lines:RoutineRegistry.register(new SayHello( classLoader,"SayHello"));
This line says that we are adding the SayHello class to SIL under the name SayHello. The class name and function may not match.Next, add the following line:RoutineRegistry.unregister("SayHello");
Change SayHello to the name of your function. This line will unload your function from SIL if you remove your plugin from Jira.More about SIL
In the SayHello2 class, we return a List.SILValue param1 = list.get(0);
SILValue param2 = list.get(1);
List<String> res = new ArrayList<>();
res.add("Hello " + param1.toStringValue());
res.add("Hello " + param2.toStringValue());
return SILValueFactory.stringArray(res);
In order for this to work, you also need to change the return value to TypeInst.STRING_ARR and inherit from AbstractSILRoutine with KeyableArraySILObject.In SIL, you call SayHello2 like this:string[] res = SayHello2("Alexey", "Matveev");
runnerLog(res[0]);
runnerLog(res[1]);
In SayHello3 we return Map:SILValue param1 = list.get(0);
SILValue param2 = list.get(1);
Map<String, String> res = new HashMap<>();
res.put("param1","Hello " + param1.toStringValue());
res.put("param2","Hello " + param2.toStringValue());
return SILValueFactory.stringArray(res);
In SIL, you can call SayHello3 like this:res = SayHello3("Alexey", "Matveev");
runnerLog(res["param1"]);
runnerLog(res["param2"]);
In this case, we get the elements of the array not by index, but by keys.If you look at the code in Java, then in both cases we work with KeyableArraySILObject. The fact is that in SIL List and Map are implemented by the KeyableArraySILObject class. Those. any array in SIL can be accessed either by index or by key.We pass an array as a parameter
We can return an array from the SIL function. Now let's see how to pass an array as a parameter.The code will look like this:@Override
protected SILValue<MutableString> runRoutine(SILContext silContext, List<SILValue<?>> list) {
GenericArraySILObject rowsToUpdate = (GenericArraySILObject) list.get(0).getObject();
Map<String, int[]> keys = rowsToUpdate.getKeysMapping()
......
}
First, we get the object of the GenericArraySILObject class from the parameter, and then we get the Map from it.In SIL, you can pass an array like this:string[] arr;
arr["key1"] = "value1";
arr["key2"] = "value2";
yourmethod(arr);
That concludes this article. I hope you have gained enough knowledge to write your function in SIL.