 Hi, my name is Andrey Schukin, I help large companies migrate services and systems to the CROC Cloud. Together with colleagues from Southbridge, which runs Kubernetes courses at the Slerm training center, we recently conducted a webinar for our customers.I decided to take materials from an excellent lecture by Pavel Selivanov and write a post for those who are just starting to work with cloud provisioning tools and don’t know where to start. Therefore, I will talk about the stack of technologies that are used in our training and production of CROC Cloud. Let's talk about modern approaches to infrastructure management, about a bunch of Packer, Terraform and Ansible components, as well as about the Kubeadm tool with which we will install.Under the cut will be a lot of text and configs. There is a lot of material, so I added post navigation. We also prepared a small repository where we put everything we needed for our training deployment.Do not give chickens names.Baked cakes are more healthy than fried ones.We start the oven. PackerTerraform - infrastructure as codeLaunch TerraformCluster structure KubernetesKubeadmRepository with all files
Do not give names to chickens
 There are many different concepts of infrastructure management. One of them is called Pets vs. Cattle, that is, "pets against livestock." This concept describes two opposing approaches to infrastructure.Imagine we have a favorite dog. We take care of her, take him to the veterinarian, comb out the fur, and in general it is unique to us among many other dogs.In another case, we have a chicken coop. We also take care of chickens, feed, heat and try to create the most comfortable conditions. Nevertheless, chickens are a rather faceless resource for us, which fulfills its function of laying eggs, and at best we designate them as "that powdered black that always pecks cement." If the chicken stops laying eggs or breaks its paw, then most likely it will simply provide us with a delicious broth for lunch. In fact, we do not care about the fate of an individual chicken, but about the chicken coop as a whole as a production line.In IT, a similar approach began to be applied as soon as tools appeared that lowered the entry threshold for engineers and made it possible to deploy and maintain complex clusters in a fully automatic mode.Previously, we had a small number of servers that were monitored, tuned manually and looked after in every possible way. In monitoring, logs from the Cthulhu, Aylith, and Dagon servers flashed. Traditions.Then virtualization firmly entered our lives, and the names from the works of Lovecraft and Star Trek gave way to the more utilitarian “vlg-vlt-vault01.company.ru”. There are a lot of servers, but we still raised the services more or less manually, eliminating the problems on each machine if necessary.Now the approach to maintaining the infrastructure completely coincides with programming. We add another level of abstraction and stop bothering about individual nodes. Each one has a faceless index instead of a name, and in case of a problem the virtual machine simply kills and rises from the working snapshot. There are tools that allow you to implement this approach. In our case, the first tool is the CROC Cloud, the second is Terraform.
Baked cakes are healthier than fried
 In infrastructure management there is a contrast between the two approaches Fried vs. Baked, that is, “fried against baked”.The Fried approach implies that you have a vanilla OS image, for example, CentOS 7. Then, after deploying the OS, we use the configuration management system in order to bring the system to the target state. For example, using Ansible, Chef, Puppet or SaltStack.Everything works fine, especially when there are not very many servers. When there is a need for a massive deployment, we are faced with performance issues. Hundreds of servers synchronously begin to devour network resources, CPU, RAM and IOPS in the process of rolling many new packages. Moreover, this process can be delayed for a rather long time. In short, the circuit is absolutely operational, but not so interesting from the point of view of minimizing downtime during accidents.The Baked approach implies that you have ready-made “baked” OS images on which you have already installed all the necessary packages, configured the configuration and everything else. At the output, we have an abstract snapshot template, sharpened for the performance of some function. Deploying infrastructure from such baked images takes significantly less time and reduces downtime to a minimum. A very similar ideology is used in multi-layer Docker images, in which no one pokes his hands unnecessarily. Nailed the container - picked up a new one.
We start the oven. Packer
 In our infrastructure, we use several Hashicorp products, some of which turned out to be extremely successful. Let's start our magic with preparing and baking an image using the Packer tool.Packer uses a JSON Template, that is, template files that contain a description of what needs to be obtained as a “baked” virtual machine (VM). After creating the template, the file is transferred to Packer, and the necessary permissions for creating the server in the cloud are configured.Packer allows you to raise VMs locally in KVM, VirtualBox, Vagrant, AWS, GCP, Alibaba Cloud, OpenStack, etc. It is convenient to work with Packer in the CROC Cloud, since it implements AWS interfaces, that is, all the tools that are written for AWS, work with the CROC Cloud.After setting the necessary templates, Packer raises VM CROC in the Cloud, waits for it to start, and then the “provider” enters the work - provisioner: a utility that must complete image preparation. In our case, this is Ansible, although Packer can work with other options.When the VM is ready, Packer creates its image and places it in the CROC Cloud so that other VMs can be launched from the same image.
Base.json structure
At the beginning of the file there is a section in which variables are declared:Spoiler"variables" : {
"source_ami_name": "{{env SOURCE_AMI_NAME}}",
"ami_name": "{{env AMI_NAME}}",
"instance_type": "{{env INSTANCE_TYPE}}",
"kubernetes_version": "{{env KUBERNETES_VERSION}}",
"docker_version": "{{env DOCKER_VERSION}}",
"subnet_id": "",
"availability_zone": "",
},
The main set of these variables will be set from the settings.json file. And those variables that change frequently are more convenient to set from the console when starting Packer and building a new image.The following is the Builders section:Spoiler"builders" : [
{
"type": "amazon-ebs",
"region": "croc",
"skip_region_validation": true,
"custom_endpoint_ec2": "https://api.cloud.croc.ru",
"source_ami": "",
"source_ami_filter": {
"filters": {
"name": "{{user `source_ami_name`}}"
"state": "available",
"virtualization-type": "kvm-virtio"
},
...
Target clouds and the VM startup method are described here. Please note that in this case the amazon-ebs type is declared, but for Packer to work with the CROC Cloud, the corresponding address in custom_endpoint_ec2 is set. Our infrastructure has an API that is almost completely compatible with Amazon Web Services, so if you have ready-made developments for this platform, then for the most part you will only need to specify a custom API entry point - api.cloud.croc.ru in our example.It is worth noting the source_ami_filter section separately. Here the initial image of the VM is set, in which the necessary changes will be made. However, Packer requires an AMI for this image, i.e. its random identifier. Since this identifier is rarely known in advance and changes with each update, the source AMI is set not as a specific value, but as a variable source_ami_filter. In this case, the determining parameter of the filter is the name of the image. This name is set in the variables through the settings.json file.Next, the VM settings are defined: the type of instance, processor, memory size, allocated space, etc. are specified:Spoiler"instance_type": "{{user `instance_type`}}",
"launch_block_device_mappings": [
{
"device_name": "disk1",
"volume_type": "io1",
"volume_size": "8",
"iops": "1000",
"delete_on_termination": "true"
}
],
Following in base.json are the parameters for connecting to this VM:Spoiler"availability_zone": "{{user `availability_zone`}}",
"subnet_id": "{{user `subnet_id`}}",
"associate_public_ip_address": true,
"ssh_username": "ec2-user",
"ami_name": "{{user `ami_name`}}"
It is important to note the subnet_id parameter here. It must be set manually, because without specifying the VM subnet in the CROC Cloud it is impossible to create.Another parameter that requires prior preparation is associate_public_ip_address. You need to select a white IP address, because after creating the VM Packer will begin to apply the necessary settings through Ansible. In this case, Ansible connects to the VM via SSH, which requires a white IP address or VPN.The last section is the Provisioners:Spoiler"provisioners": [
{
"type": "ansible",
"playbook_file": "playbook.yml",
"extra_arguments": [
"--extra-vars",
"kubernetes_version={{user `kubernetes_version`}}",
"--extra-vars",
"docker_version={{user `docker_version`}}"
]
}
]
These are the providers, that is, the utilities with which Packer configures the server. In this case, ansible type provider is used. The following is the playbook_file parameter, which defines the Ansible roles and the hosts on which the specified roles will be applied. Additional options extra_arguments are presented below, which, when starting Ansible, transmit versions of Kubernetes and Docker.CROC Cloud Preparation
 In addition to our configuration files, we need to do a few things from the side of the cloud control panel so that all the magic works. We need to select a white IP and create a working subnet, which we will use when deploying.
- Click Highlight Address. Packer will find the desired white IP address on its own.
- Click Create Subnet and specify a subnet and mask.
- Copy the subnet ID.
- Insert this value into the subnet_id parameter of the Packer startup command.
 Then run Packer. He finds the original VM image, deploys it in the CROC Cloud, and performs the Ansible role on it. The new VM can be seen in the CROC Cloud in the "Instances" section.
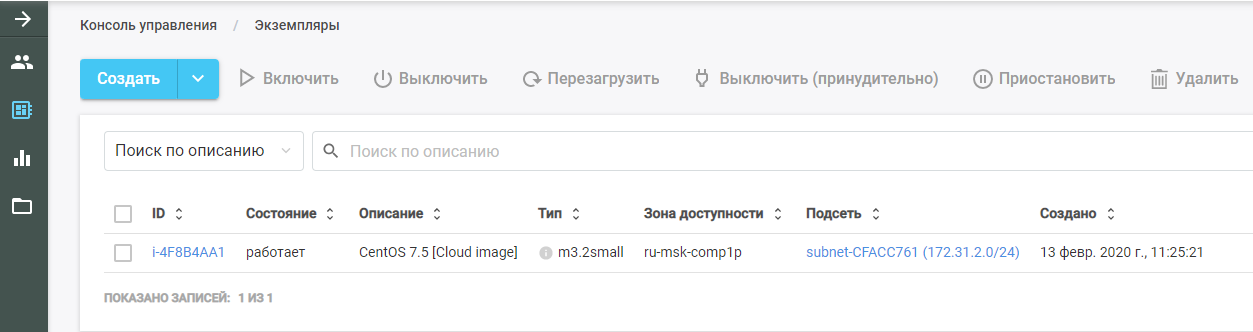
 After finishing work, Packer removes the VM from the cloud and leaves a ready-made image in its place, which can be found in the "Templates" section. The entire Kubernetes infrastructure will be created from this image.
Ansible
As mentioned earlier, the playbook parameter is passed in the parameters of the Ansible provider. The playbook.yml file itself looks like this:- hosts: all
become: true
roles:
| - base
The file transfers to Ansible that on all hosts it is necessary to fulfill the role of base. If there are other roles, you can add them to the same file as a list.The base role allows you to get a ready-made cluster with a single command. The main.yml file shows what exactly this role does:- Adds a Docker repository to the system template.
- Adds the Kubernetes repository to the system template.
- Installs the necessary packages.
- Creates a directory for configuring the Docker daemon.
- Configures the machine according to the daemon.json.j2 configuration file.
- Loads the br_netfilter kernel.
- Includes the necessary options for br_netfilter.
- Includes Docker and Kubelet components.
- Runs Docker in VM.
- Runs a command that downloads the Docker images necessary for Kubernetes to work.
In this case, the installed packages are set in the main.yml file from the vars directory. In our case, we install the docker-ce package, as well as the three packages necessary for Kubernetes to work: kubelet, kubeadm and kubectl.Terraform - infrastructure as code
 Terraform is a very functional tool from HashiCorp for cloud orchestration. It has its own specific HCL language, which is often used in other products of the company, for example, in HashiCorp Vault and Consul.The basic principle is similar to all configuration management systems. You simply indicate the target state in the desired format, and the system calculates the algorithm of how to achieve this. Another thing is that, unlike the same Ansible, which works as a black box on complex playbooks, Terraform can issue a plan of future actions in a form convenient for analysis. This is important when planning complex infrastructure changes. After planning the necessary actions, run the terraform apply command and Terraform will deploy the infrastructure described in the files.Like Packer, this tool supports AWS, GCP, Alibaba Cloud, Azure, OpenStack, VMware, etc.
We describe the project
The Terraform directory has a set of files with the extension .tf. These files describe the components of the infrastructure with which we will work. Break the project into functional modules. Such a structure makes it easier to control versioning and assemble each project from ready-made convenient blocks. For our option, the following structure is suitable:- main.tf
- network.tf
- security_groups.tf
- master.tf
- master.tpl
Main.tf file structure
Let's start with the main.tf file, in which access to the cloud is configured. In particular, several parameters are announced that configure Terraform to work with the CROC Cloud:provider "aws" {
endpoints {
ec2 = "https://api.cloud.croc.ru"
}
In addition, the file describes that Terraform must independently create a private key and upload its public part to all servers. The private key itself is issued at the end of Terraform:resource "tls_private_key" "ssh" {
algorithm = "RSA"
}
resource "aws_key_pair" "kube" {
key_name = "terraform"
public_key = "${tls_private_key.ssh.public_key_openssh}"
}
output "ssh" {
value = "${tls_private_key.ssh.private_key_pem}"
}
The structure of the network.tf file
This file describes the network components needed to start the VM:Spoilerdata "aws_availability_zones" "az" {
state = "available"
}
resource "aws_vpc" "kube" {
cidr_block = "${var.vpc_cidr}"
}
resource "aws_eip" "master" {
count = "1"
vpc = true
}
resource "aws_subnet" "private" {
vpc_id = "${aws_vpc.kube.id}"
count = "${length(data.aws_availability_zones.az.names)}"
cidr_block = "${var.private_subnet_cidr_list[count.index]}"
availability_zone = "${data.aws_availability_zones.az.names[count.index]}"
}
Terraform uses two types of components:- resource - what needs to be created;
- data - what you need to get.
In this case, the data parameter indicates that Terraform should receive the availability zones of the specified cloud, which are in the available state.The first parameter resource describes the creation of a virtual private cloud, and the next parameter describes the creation of Elastic IP Address. For the Kubernetes cluster, we order this IP address through Terraform.Further, in each of the accessibility zones, and at the moment CROC has two cloud services, its own subnet is created. A resource of type aws_subnet is declared, and the ID of the aws_vpc generated is passed as part of this parameter. But, since the ID of this resource is still unknown, we specify the aws_vpc.kube.id parameter, which refers to the created resource and substitutes the value from the ID field.Since the number of created subnets is determined by the number of cloud availability zones and this number can change over time, this parameter is set through the length variable (data.aws_availability_zones.az.names), i.e. the length of the list of access zones received through the data parameter.The last two parameters are cidr_block (the allocated subnet) and the availability zone in which this subnet is created. The last parameter is also set via a variable that takes a value from the data list according to the index of the loop declared by [count.index] .Security_groups.tf file structure
Security groups are a kind of firewall for clouds, which can be created not inside the VM itself, but by the cloud. In this case, the firewall describes two rules.The first rule creates a security group called kube. This security group is needed to allow all outgoing traffic from Kubernetes nodes, allowing the nodes to freely access the Internet. Inbound traffic to Kubernetes nodes from the subnets of the nodes themselves is also allowed. Thus, Kubernetes nodes can work among themselves without restrictions.The second rule creates the ssh security group. It allows SSH connection from any IP address to port 22 of the Kubernetes cluster VM:Spoilerresource "aws_security_group" "kube" {
vpc_id = "${aws_vpc.kube.id}"
name = "kubernetes"
# Allow all outbound
egress {
from_port = 0
to_port = 0
protocol = "-1"
cidr_blocks = ["0.0.0.0/0"]
}
# Allow all internal
ingress {
from_port = 0
to_port = 0
protocol = "-1"
cidr_blocks = ["${var.vpc_cidr}"]
}
}
resource "aws_security_group" "ssh" {
vpc_id = "${aws_vpc.kube.id}"
name = "ssh"
# Allow all inbound
ingress {
from_port = 22
to_port = 22
protocol = "tcp"
cidr_blocks = ["0.0.0.0/0"]
}
}
Master node. Master.tf file structure
The master.tf file describes the creation of several templates and instances. In particular, a Kubernetes master instance is being created.The ami variable sets the AMI of the source image for the VM. The following describes the type of VM and the subnet in which it is created. When defining a subnet, a cycle is again used to create VMs in each availability zone.Next, the used security groups and the key that was specified in the main.tf file are declared. The user_data field contains the execution of a set of cloud-init scripts, the results of which will be implemented in the VM:Spoilerresource "aws_instance" "master" {
count = "1"
ami = "${var.kubernetes_ami}"
instance_type = "c3.large"
disable_api_termination = false
instance_initiated_shutdown_behavior = "terminate"
source_dest_check = false
subnet_id = "${aws_subnet.private.*.id[count.index % length(data.aws_availability_zones.az.names)]}"
associate_public_ip_address = true
vpc_security_group_ids = [
"${aws_security_group.ssh.id}",
"${aws_security_group.kube.id}",
]
key_name = "${aws_key_pair.kube.key_name}"
user_data = "${data.template_cloudinit_config.master.rendered}"
monitoring = "true"
}
Master node. Cloud init
Cloud-init is a tool that Canonical is developing. It allows you to automatically execute in a cloud infrastructure a certain set of commands after starting a VM. Terraform has mechanisms for integrating with it using templates .Since it is impossible to “bake” everything necessary in the VM, after starting, depending on its type, it must either join the Kubernetes cluster or initialize the Kubernetes cluster. In the cloud-init file template called master.tpl, several actions are performed.1. Configuration files for Kubeadm are recorded:#cloud-config
write_files:
- path: etc/kubernetes/kubeadm.conf
owner: root:root
content:
...
2. A set of commands is executed:- the IP address of the wizard is written to the generated configuration file;
- the master in the Kubernetes cluster is initialized with the kubeadm init command;
- in the Kubernetes cluster, the Calico overlay network is installed with the kubectl apply command.
runcmd:
         - sed -i "s/CONTROL_PLANE_IP/$(curl http://169.254.169.254/latest/meta-data-local-ipv4)/g" /etc/kubernetes/kubeadm.conf
         - kubeadm init --config /etc/kubernetes/kubeadm.conf
         - mkdir -p $HOME/.kube
         - sudo cp -i /etc/kubernetes/admin.conf $HOME/.kube/config
         - sudo chown $(id -u):$(id -g) $HOME/.kube/config
         - kubectl apply -f https://docs.projectcalico.org/v3.8/manifests/calico.yaml
After executing the commands when starting the VM, a working Kubernetes cluster is obtained from one master node. The remaining nodes will join this master node.Ordinary nodes. node.tf
The node.tf file is similar to the master.tf file. Resources are also created here, which in this case are called node. The only difference is that the master node is created in a single instance, and the number of working nodes created is set via the nodes_count variable:resource "aws_instance" "node" {
count = "${var.nodes_count}"
ami = "${var.kubernetes_ami}"
instance_type = "c3.large"
The cloud-init file for working nodes executes only one command - kubeadm join. This command attaches the finished machine to the Kubernetes cluster using the authorization token that we send.Launch Terraform
When launched, Terraform uses several modules:- AWS module
- template module;
- TLS module responsible for key generation.
These modules must be installed on the local machine:terraform init terraform/
Together with this command, the directory in which all the necessary files are located is indicated. When initializing, Terraform downloads all the specified modules, after which you need to execute the terraform plan command:terraform plan -var-file terraform/vars/dev.tfvars terraform/
Please note that in addition to the directory with the Terraform files, the var-file is indicated, which contains the values of the variables used in the Terraform files. The vars directory can contain multiple .tfvars files, which allows you to manage different types of infrastructures with one set of Terraform files.The dev.tfvars file itself contains the following important variables:- Kubernetes_version (installable version of Kubernetes);
- Kubernetes_ami (AMI image that Packer created).
After setting the necessary values of the variables, run the terraform plan command, after which Terraform will present a list of actions necessary to achieve the state described in the Terraform files.After checking this list, apply the proposed changes:terraform apply -auto-approve -var-file terraform/vars/dev.tfvars terraform/From the terraform plan command, it is distinguished by the presence of a key - auto-approve, which eliminates the need to confirm the changes made. You can omit this key, but then each action will need to be confirmed manually.Kubernetes Cluster Structure
 The Kubernetes cluster consists of a master node that performs management functions and working nodes that run applications installed in the cluster.Four components are installed on the master node that ensure the operation of this system:
- ETCD, i.e. Kubernetes Database
- API Server, through which we store information in Kubernetes and get information from it;
- Controller Manager
- Scheduler
Two additional components are installed on the working nodes:- Kube-proxy (responsible for generating network rules in the Kubernetes cluster);
- Kubelet (responsible for sending the command to the Docker daemon to run applications in the Kubernetes cluster).
Between the nodes, the Calico network plug-in works.Cluster Workflow Diagram
, Kubernetes replicaset.
- API-, ETCD. .
- API- .
- Controller-manager API- , «», .
- Scheduler . ETCD API-.
- Kubelet API- Docker .
- Docker .
- Kubelet API- , .
, Kubernetes , . , , YAML-. , , API-. .
Kubeadm
 The last element worth mentioning is Kubeadm. Deploying a new Kubernetes cluster is always a painstaking process. At each stage, there are risks of errors due to the human factor, and many tasks are simply very routine and long. For example, pouring certificates for TLS encryption between nodes and keeping them up to date. This is where utilities for basic template automation come to the rescue. The trick of Kubeadm is that it is officially certified to work with Kubernetes.It allows you to:
- Install, configure, and run all major cluster components
- manage certificates, including rotate them and write out new ones;
- manage cluster component versions (upgrade and downgrade).
At the same time, Kubeadm is not a complete Kubernetes cluster management system, but is a kind of building block that allows you to configure Kubernetes on the node on which Kubeadm utility is running. This means that an orchestration system is needed that will run all the necessary VMs, configure them and run Kubeadm on all nodes. It is for these purposes that Terraform is used.Repository with all files
Here we put all the files and configs in one place, so that it would be more convenient for you. If you don’t have a private cloud at hand, but you want to go through all these steps yourself and test the deployment in practice, write to us at cloud@croc.ru.We will give you a demo version for tests and advise on all issues.And soon there will be a new Slurm , where you can create your own cluster. CROC promo code has a 10% discount.For those who already work with Kubernetes, there is an advanced course . The discount is the same.Colleagues, Habraparser breaks the markup of the code. Please take the source from GitHub from the link above.