In this article I want to tell how to make a very simple bluetooth weather station (where without it :)) and write a mobile application on Flutter for it.
In the beginning, consider the sensor
To repeat, you will need an Arduino nano 33 BLE sense board .The board is built on nrf52840. We install it through the board manager in arduino.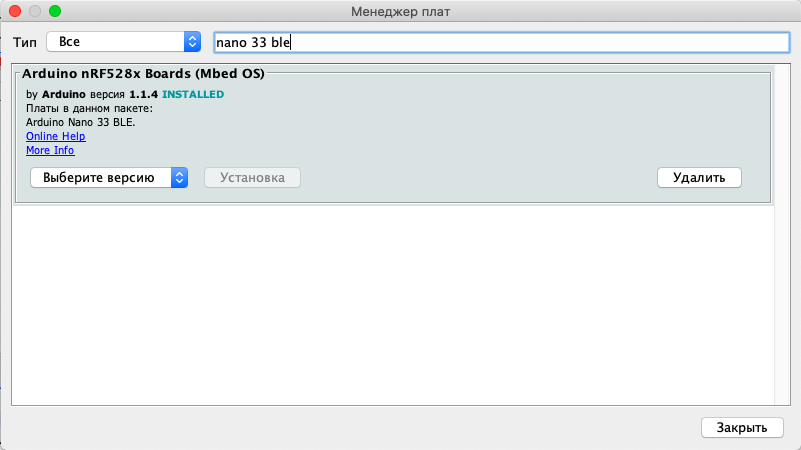 Immediately install the necessary libraries:These libraries are necessary for sensors that are already soldered on the board itself.
A bit of theory, and then consider the practical implementation
The main idea was not to make a plug-in device, but to implement broadcast messages with all the necessary information included in them.The usual bluetooth tag mode was used, but with the ManufacturerData modification. This package can be transmitted in every advertise package.The total size of an advertise package is 31 bytes. This includes all the necessary information: device name, system data, user data. In its pure form, the user in ManufacturerData is about 20 bytes. This is enough to transmit weather station data.The advantages of this method of data transmission in lower power consumption, no need to keep a constant connection with the device, broadcast. Such a message can catch an unlimited number of receivers in the radius of reception.ManufacturerData is installed before the start of advertising.And now the practical part
In the arduino code, we indicate the type of work of the BLE part and set the starting ManufacturerData.Also, for convenience, I specify the name of the device, it is easier to find in the application.BLE.setLocalName("nrf52840.ru");
BLE.setConnectable(false);
byte data[8] = { 0x01, 0x02, 0x03, 0x04, 0x05, 0x06, 0x07, 0x08};
BLE.setManufacturerData(data, 8);
BLE.advertise();
The initial data is given as a set of bytes to fill the array.Now in the main code we make a stop advertising, stop the radio, measure the necessary data and fill out ManufacturerData with real data, then start broadcasting back. This operation is performed every 2 seconds.BLE.stopAdvertise();
---------------------
---------------------
byte data[8] = { 0x00, 0x01, t1, t2, h1, h2, p1, p2};
BLE.setManufacturerData(data, 8);
BLE.advertise();
delay(2000);
This completes the work with the sensor. The sensor will broadcast every 100ms and every 2sec will update the data to the current ones. The result was a very simple weather code and implementation sensor.Now consider the mobile application
I’ll make a reservation right away: I’m not a mobile application developer.For work, I used VSCode with the Flutter plugin. This environment seems simpler than Android Studio, as I thought. To work with BLE, the Flutter_blue library was used , which greatly simplified the connection of the device.The logic of the application is also quite simple. Our sensor broadcasts in normal Beacon mode, so you only need to perform a couple of actions:- Scan broadcast - find the device with the given name,
- Parse it ManufacturerData to display data on the screen.
Let's see how this is done.After starting the application, a timer is regularly launched, which scans the Bluetooth devices every 10 seconds for 2 seconds. It makes no sense to scan more often and longer, the battery consumption will increase, and the sensor broadcasts generally every 100ms.DeviceScanner() {
_subscribeToScanEvents();
_timer = new Timer.periodic(const Duration(seconds: 10), startScan);
}
void startScan(Timer timer) {
FlutterBlue.instance.startScan(timeout: Duration(seconds: 2));
}
Next, we begin to analyze the scan results, check if there is a device with a given name in the scan list, and if so, we parse its package and display the result to the user.
  void _subscribeToScanEvents() {
    FlutterBlue.instance.scanResults.listen((scanResults) {
      for (ScanResult scanResult in scanResults) {
        if (scanResult.device.name.toString() == "nrf52840.ru") {
          final int rssi = scanResult.rssi;
          final String name = scanResult.device.name;
          final String mac = scanResult.device.id.toString();
          final double temp = scanResult.advertisementData.manufacturerData[256]
                  [0] +
              scanResult.advertisementData.manufacturerData[256][1] * 0.01;
          final double humm = scanResult.advertisementData.manufacturerData[256]
                  [2] +
              scanResult.advertisementData.manufacturerData[256][3] * 0.01;
          final double press =
              scanResult.advertisementData.manufacturerData[256][4] +
                  scanResult.advertisementData.manufacturerData[256][5] * 0.01;
          final SensorData sensorData = new SensorData(
              name: name,
              rssi: rssi,
              mac: mac,
              temperature: temp,
              humidity: humm,
              pressure: press);
          _streamController.add(sensorData);
          print(
              'Manufacturer data ${scanResult.advertisementData.manufacturerData}');
          FlutterBlue.instance.stopScan();
        }

        print(
            '${scanResult.device.name} found! mac: ${scanResult.device.id} rssi: ${scanResult.rssi}');
      }
    });
  }
A little nuance. The Bluetooth library for Flutter may seem strange, it receives the data in the form of an int array, and in arduino we form a package from bytes, so I formed a package in the sensor to simplify its analysis. The temperature of 25.85 degrees is divided into two values 25 and 85, which are sent as separate byte values, and are collected in the same way.The end result is such an application.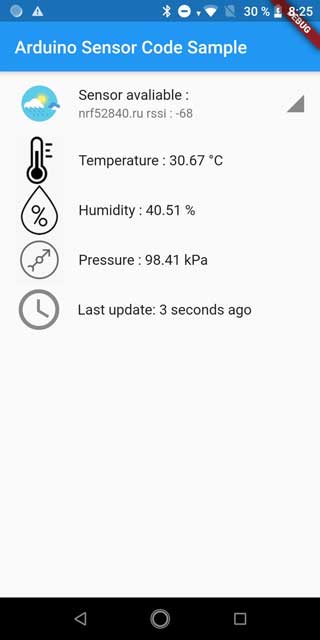 Project source code can be downloaded from Github .