In the Universal Render Pipeline, by creating your own RendererFeature, you can easily expand the rendering capabilities. Adding new passes to the rendering pipeline allows you to create various effects. In this article, using ScriptableRendererFeature and ScriptableRenderPass, we will create the Outline effect of the object and consider some features of its implementation.Intro or a few words about Render Pipeline
Scriptable Render Pipeline allows you to control the rendering of graphics through scripts in C # and control the processing order of objects, lights, shadows, and more. Universal Render Pipeline is a ready-made Scriptable Render Pipeline developed by Unity and designed to replace the old built-in RP.The capabilities of Universal RP can be expanded by creating and adding your own drawing passes (ScriptableRendererFeature and ScriptableRenderPass). This will be the current article. It will be useful to those who are going to switch to Universal RP and, perhaps, help to better understand the work of existing ScriptableRenderPass'ov in Universal RP.This article was written in Unity 2019.3 and Universal RP 7.1.8.Action plan
We will understand how ScriptableRendererFeature and ScriptableRenderPass work on the example of creating the stroke effect of opaque objects.To do this, create a ScriptableRendererFeature that performs the following actions:- drawing specified objects
- blurring drawn objects
- obtaining contours of objects from images obtained in previous passes
Source frame -And the sequence of results that we must achieve:In the course of work, we will create a shader, in the global properties of which the results of the first and second passes will be saved. The last pass will display the result of the shader itself on the screen.Global propertiesThese are properties declared in the shader, but not defined in the Properties block. In this example, there is no fundamental difference in how we define the textures - through global or ordinary properties.
The main reason for using global properties is that there is no need to transfer material to each pass. And also debugging becomes a little more convenient.
Create OutlineFeature
ScriptableRendererFeature is used to add custom rendering passages (ScriptableRenderPass) to Universal RP. Create an OutlineFeature class that inherits from ScriptableRenderFeature and implement its methods.using UnityEngine;
using UnityEngine.Rendering.Universal;
public class OutlineFeature : ScriptableRendererFeature
{
public override void Create()
{ }
public override void AddRenderPasses(ScriptableRenderer renderer, ref RenderingData renderingData)
{ }
}
The Create () method is used to create and configure passes. And the AddRenderPasses () method for injecting the created passes into the rendering queue.arguments AddRenderPasses ()ScriptableRenderer — Universal RP. Universal RP Forward Rendering.
RenderingData — , , .
Now let's start creating the rendering passes, and we will return to the current class after implementing each of them.Render objects pass
The task of this passage is to draw objects from a specific layer with the replacement of the material in the global texture property of the shader. This will be a simplified version of the RenderObjectsPass passage available in Universal RP, with the only difference in the target (RenderTarget) where the rendering will be performed.Create a class MyRenderObjectsPass inherited from ScriptableRenderPass. We implement the Execute () method, which will contain all the logic of the passage, as well as redefine the Configure () method.using UnityEngine.Rendering;
using UnityEngine.Rendering.Universal;
public class MyRenderObjectsPass : ScriptableRenderPass
{
{
public override void Configure(CommandBuffer cmd, RenderTextureDescriptor cameraTextureDescriptor)
{ }
public override void Execute(ScriptableRenderContext context, ref RenderingData renderingData)
{ }
}
}
The Configure () method is used to specify the purpose of rendering and creating temporary textures. By default, the target is the target of the current camera, and after completing the pass, it will be indicated by default again. This method is called before the base logic runs.Rendering target replacement
Declare a RenderTargetHandle for a new rendering target. Using it, create a temporary texture and indicate it as the target. RenderTargetHandle contains the identifier of the temporary RenderTexture used. It also allows you to get a RenderTargetIdentifier, which is used to identify a rendering target that can be set, for example, as a RenderTexture, Texture object, temporary RenderTexture or built-in (used by the camera when rendering a frame).A RenderTargetHandle object will be created in the OutlineFeature and passed to our pass when it is created.private RenderTargetHandle _destination;
public MyRenderObjectsPass(RenderTargetHandle destination)
{
_destination = destination;
}
public override void Configure(CommandBuffer cmd, RenderTextureDescriptor cameraTextureDescriptor)
{
cmd.GetTemporaryRT(_destination.id, cameraTextureDescriptor);
}
The GetTemporaryRT () method creates a temporary RenderTexture with the given parameters and sets it as a global shader property with the specified name (the name will be set in the feature).Remove RenderTextureReleaseTemporaryRT() RenderTexture. Execute() FrameCleanup.
, RenderTexture, , .
To create a temporary RenderTexture we use the descriptor of the current camera containing information about the size, format and other parameters of the camera’s target.public override void Configure(CommandBuffer cmd, RenderTextureDescriptor cameraTextureDescriptor)
{
cmd.GetTemporaryRT(_destination.id, cameraTextureDescriptor);
ConfigureTarget(_destination.Identifier());
ConfigureClear(ClearFlag.All, Color.clear);
}
The purpose of the target and its cleaning should only occur in Configure () using the ConfigureTarget () and ClearTarget () methods.Render
We will not consider rendering in detail, because this can lead us far and long away from the main topic. For rendering, we will use the ScriptableRenderContext.DrawRenderers () method. Create settings for rendering only opaque objects only from the specified layers. The layer mask will be passed to the constructor....
private List<ShaderTagId> _shaderTagIdList = new List<ShaderTagId>() { new ShaderTagId("UniversalForward") };
private FilteringSettings _filteringSettings;
private RenderStateBlock _renderStateBlock;
...
public MyRenderObjectsPass(RenderTargetHandle destination, int layerMask)
{
_destination = destination;
_filteringSettings = new FilteringSettings(RenderQueueRange.opaque, layerMask);
_renderStateBlock = new RenderStateBlock(RenderStateMask.Nothing);
}
public override void Execute(ScriptableRenderContext context, ref RenderingData renderingData)
{
SortingCriteria sortingCriteria = renderingData.cameraData.defaultOpaqueSortFlags;
DrawingSettings drawingSettings = CreateDrawingSettings(_shaderTagIdList, ref renderingData, sortingCriteria);
context.DrawRenderers(renderingData.cullResults, ref drawingSettings, ref _filteringSettings, ref _renderStateBlock);
}
Very briefly about the parametersCullingResults — ( RenderingData)
FilteringSettings — .
DrawingSettings — .
RenderStateBlock — , (, ..)
About the finished RenderObjectsPass in UniversalRP, . . RenderObjectsPass, Universal RP, . RenderFeature - :)
Material Replacement
We redefine the materials used for rendering, since we only need the contours of the objects.private Material _overrideMaterial;
public MyRenderObjectsPass(RenderTargetHandle destination, int layerMask,, Material overrideMaterial)
{
...
_overrideMaterial = overrideMaterial;
...
}
public override void Execute(ScriptableRenderContext context, ref RenderingData renderingData)
{
...
DrawingSettings drawingSettings = CreateDrawingSettings(_shaderTagIdList, ref renderingData, sortingCriteria);
drawingSettings.overrideMaterial = _overrideMaterial;
...
}
Shader for rendering
Create a material shader in ShaderGraph that will be used when drawing objects in the current pass.Add a passage to OutlineFeature
Back to OutlieFeature. First, create a class for the settings of our passage.public class OutlineFeature : ScriptableRendererFeature
{
[Serializable]
public class RenderSettings
{
public Material OverrideMaterial = null;
public LayerMask LayerMask = 0;
}
...
}
Declare the fields for the MyRenderPass settings and the name of the global texture property used as the rendering target by our pass.[SerializeField] private string _renderTextureName;
[SerializeField] private RenderSettings _renderSettings;
Create an identifier for the texture property and an instance of MyRenderPass.private RenderTargetHandle _renderTexture;
private MyRenderObjectsPass _renderPass;
public override void Create()
{
_renderTexture.Init(_renderTextureName);
_renderPass = new MyRenderObjectsPass(_renderTexture, _renderSettings.LayerMask, _renderSettings.OverrideMaterial);
}
In the AddRendererPass method, we add our pass to the execution queue.public override void AddRenderPasses(ScriptableRenderer renderer, ref RenderingData renderingData)
{
renderer.EnqueuePass(_renderPass);
}
The result of the pass for the source scene should be as follows:DebuggingFrame Debug (Windows-Analysis-FrameDebugger).
Blur pass
The purpose of this passage is to blur the image obtained in the previous step and set it to the global shader property.To do this, we will copy the original texture several times to a temporary one, using the blur shader on it. In this case, the original image can be reduced in size (create a reduced copy), which will speed up the calculations and will not affect the quality of the result.Let's create the BlurPass class inherited from ScriptableRenderPass.using UnityEngine.Rendering;
using UnityEngine.Rendering.Universal;
public class BlurPass : ScriptableRenderPass
{
public override void Execute(ScriptableRenderContext context, ref RenderingData renderingData)
{ }
}
Let's get the variables for the source, target and temporary textures (and their ID).private int _tmpBlurRTId1 = Shader.PropertyToID("_TempBlurTexture1");
private int _tmpBlurRTId2 = Shader.PropertyToID("_TempBlurTexture2");
private RenderTargetIdentifier _tmpBlurRT1;
private RenderTargetIdentifier _tmpBlurRT2;
private RenderTargetIdentifier _source;
private RenderTargetHandle _destination;
All IDs for RenderTexture are set through Shader.PropertyID (). This does not mean that somewhere such shader properties must necessarily exist.Add fields for the remaining parameters, which we immediately initialize in the constructor.private int _passesCount;
private int _downSample;
private Material _blurMaterial;
public BlurPass(Material blurMaterial, int downSample, int passesCount)
{
_blurMaterial = blurMaterial;
_downSample = downSample;
_passesCount = passesCount;
}
_blurMaterial - material with a blur shader._downSample - coefficient to reduce the texture size_passesCount - the number of blur passes to be applied.To create temporary textures, create a descriptor with all the necessary information about it - size, format and more. The height and size will be scaled relative to the camera descriptor.public override void Configure(CommandBuffer cmd, RenderTextureDescriptor cameraTextureDescriptor)
{
var width = Mathf.Max(1, cameraTextureDescriptor.width >> _downSample);
var height = Mathf.Max(1, cameraTextureDescriptor.height >> _downSample);
var blurTextureDesc = new RenderTextureDescriptor(width, height, RenderTextureFormat.ARGB32, 0, 0);
We will also create the identifiers and the temporary RenderTexture themselves. _tmpBlurRT1 = new RenderTargetIdentifier(_tmpBlurRTId1);
_tmpBlurRT2 = new RenderTargetIdentifier(_tmpBlurRTId2);
cmd.GetTemporaryRT(_tmpBlurRTId1, blurTextureDesc, FilterMode.Bilinear);
cmd.GetTemporaryRT(_tmpBlurRTId2, blurTextureDesc, FilterMode.Bilinear);
We change the rendering target again, so create another temporary texture and specify it as the target. cmd.GetTemporaryRT(_destination.id, blurTextureDesc, FilterMode.Bilinear);
ConfigureTarget(_destination.Identifier());
}
Blur
Some rendering tasks can be performed using special ScriptableRenderContext methods that configure and add commands to it. To execute other commands, you will need to use the CommandBuffer, which can be obtained from the pool.After adding commands and sending them to the context, the buffer will need to be returned back to the pool.public override void Execute(ScriptableRenderContext context, ref RenderingData renderingData)
{
var cmd = CommandBufferPool.Get("BlurPass");
...
context.ExecuteCommandBuffer(cmd);
CommandBufferPool.Release(cmd);
}
The final implementation of the Execute () method will be as follows.public override void Execute(ScriptableRenderContext context, ref RenderingData renderingData)
{
var cmd = CommandBufferPool.Get("BlurPass");
if (_passesCount > 0)
{
cmd.Blit(_source, _tmpBlurRT1, _blurMaterial, 0);
for (int i = 0; i < _passesCount - 1; i++)
{
cmd.Blit(_tmpBlurRT1, _tmpBlurRT2, _blurMaterial, 0);
var t = _tmpBlurRT1;
_tmpBlurRT1 = _tmpBlurRT2;
_tmpBlurRT2 = t;
}
cmd.Blit(_tmpBlurRT1, _destination.Identifier());
}
else
cmd.Blit(_source, _destination.Identifier());
context.ExecuteCommandBuffer(cmd);
CommandBufferPool.Release(cmd);
}
Shader
To blur, create a simple shader that will calculate the color of the pixel taking into account its nearest neighbors (the average color value of five pixels).Blur shaderShader "Custom/Blur"
{
Properties
{
_MainTex ("Texture", 2D) = "white" {}
}
SubShader
{
HLSLINCLUDE
#include "Packages/com.unity.render-pipelines.universal/ShaderLibrary/Core.hlsl"
struct Attributes
{
float4 positionOS : POSITION;
float2 uv : TEXCOORD0;
};
struct Varyings
{
float4 positionCS : SV_POSITION;
float2 uv : TEXCOORD0;
};
TEXTURE2D_X(_MainTex);
SAMPLER(sampler_MainTex);
float4 _MainTex_TexelSize;
Varyings Vert(Attributes input)
{
Varyings output;
output.positionCS = TransformObjectToHClip(input.positionOS.xyz);
output.uv = input.uv;
return output;
}
half4 Frag(Varyings input) : SV_Target
{
float2 offset = _MainTex_TexelSize.xy;
float2 uv = UnityStereoTransformScreenSpaceTex(input.uv);
half4 color = SAMPLE_TEXTURE2D_X(_MainTex, sampler_MainTex, input.uv);
color += SAMPLE_TEXTURE2D_X(_MainTex, sampler_MainTex, input.uv + float2(-1, 1) * offset);
color += SAMPLE_TEXTURE2D_X(_MainTex, sampler_MainTex, input.uv + float2( 1, 1) * offset);
color += SAMPLE_TEXTURE2D_X(_MainTex, sampler_MainTex, input.uv + float2( 1,-1) * offset);
color += SAMPLE_TEXTURE2D_X(_MainTex, sampler_MainTex, input.uv + float2(-1,-1) * offset);
return color/5.0;
}
ENDHLSL
Pass
{
HLSLPROGRAM
#pragma vertex Vert
#pragma fragment Frag
ENDHLSL
}
}
}
Why not ShaderGraph?ShaderGraph , 13 :)
Add a passage to OutlineFeature
The procedure will be similar to adding our first pass. First, create the settings. [Serializable]
public class BlurSettings
{
public Material BlurMaterial;
public int DownSample = 1;
public int PassesCount = 1;
}
Then the fields.[SerializeField] private string _bluredTextureName;
[SerializeField] private BlurSettings _blurSettings;
private RenderTargetHandle _bluredTexture;
private BlurPass _blurPass;
...
public override void Create()
{
_bluredTexture.Init(_bluredTextureName);
_blurPass = new BlurPass(_blurSettings.BlurMaterial, _blurSettings.DownSample, _blurSettings.PassesCount);
}
And add to the queue for execution.public override void AddRenderPasses(ScriptableRenderer renderer, ref RenderingData renderingData)
{
renderer.EnqueuePass(_renderPass);
renderer.EnqueuePass(_blurPass);
}
Pass result:Outline pass
The final image with the stroke of the objects will be obtained using the shader. And the result of his work will be displayed on top of the current image on the screen.Below is the entire pass code at once, as all logic is in two lines.public class OutlinePass : ScriptableRenderPass
{
private string _profilerTag = "Outline";
private Material _material;
public OutlinePass(Material material)
{
_material = material;
}
public override void Execute(ScriptableRenderContext context, ref RenderingData renderingData)
{
var cmd = CommandBufferPool.Get(_profilerTag);
using (new ProfilingSample(cmd, _profilerTag))
{
var mesh = RenderingUtils.fullscreenMesh;
cmd.DrawMesh(mesh, Matrix4x4.identity, _material, 0, 0);
}
context.ExecuteCommandBuffer(cmd);
CommandBufferPool.Release(cmd);
}
}
RenderingUtils.fullscreenMesh returns a 1 by 1 mesh.Shader
Create a shader to get the outline. It should contain two global texture properties. _OutlineRenderTexture and _OutlineBluredTexture for the image of the specified objects and its blurry version.shader codeShader "Custom/Outline"
{
Properties
{
_Color ("Glow Color", Color ) = ( 1, 1, 1, 1)
_Intensity ("Intensity", Float) = 2
[Enum(UnityEngine.Rendering.BlendMode)] _SrcBlend ("Src Blend", Float) = 1
[Enum(UnityEngine.Rendering.BlendMode)] _DstBlend ("Dst Blend", Float) = 0
}
SubShader
{
HLSLINCLUDE
#include "Packages/com.unity.render-pipelines.universal/ShaderLibrary/Core.hlsl"
struct Attributes
{
float4 positionOS : POSITION;
float2 uv : TEXCOORD0;
};
struct Varyings
{
half4 positionCS : SV_POSITION;
half2 uv : TEXCOORD0;
};
TEXTURE2D_X(_OutlineRenderTexture);
SAMPLER(sampler_OutlineRenderTexture);
TEXTURE2D_X(_OutlineBluredTexture);
SAMPLER(sampler_OutlineBluredTexture);
half4 _Color;
half _Intensity;
Varyings Vertex(Attributes input)
{
Varyings output;
output.positionCS = float4(input.positionOS.xy, 0.0, 1.0);
output.uv = input.uv;
if (_ProjectionParams.x < 0.0)
output.uv.y = 1.0 - output.uv.y;
return output;
}
half4 Fragment(Varyings input) : SV_Target
{
float2 uv = UnityStereoTransformScreenSpaceTex(input.uv);
half4 prepassColor = SAMPLE_TEXTURE2D_X(_OutlineRenderTexture, sampler_OutlineRenderTexture, uv);
half4 bluredColor = SAMPLE_TEXTURE2D_X(_OutlineBluredTexture, sampler_OutlineBluredTexture,uv);
half4 difColor = max( 0, bluredColor - prepassColor);
half4 color = difColor* _Color * _Intensity;
color.a = 1;
return color;
}
ENDHLSL
Pass
{
Blend [_SrcBlend] [_DstBlend]
ZTest Always // ,
ZWrite Off //
Cull Off //
HLSLPROGRAM
#pragma vertex Vertex
#pragma fragment Fragment
ENDHLSL
}
}
}
, . Unity . , _ProjectionParams..
The result of the shader for two previously obtained images: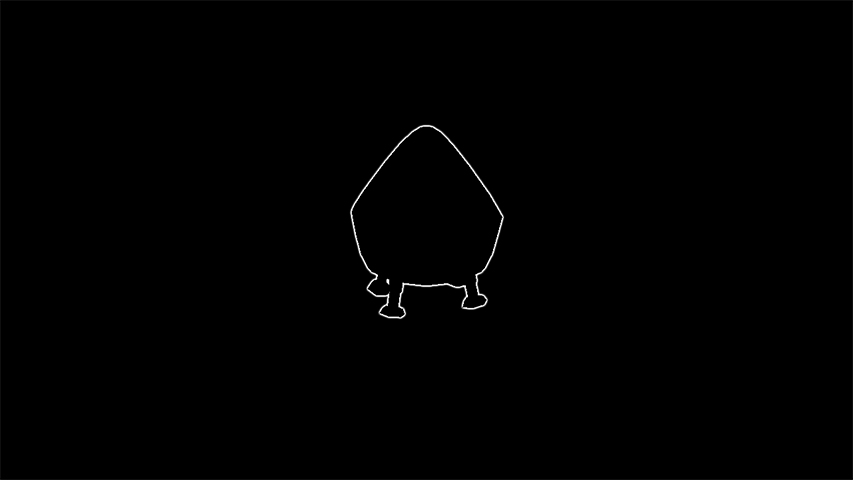
Add a passage to OutlineFeature
All actions are similar to previous passes.[SerializeField] private Material _outlineMaterial;
private OutlinePass _outlinePass;
public override void Create()
{
...
_outlinePass = new OutlinePass(_outlineMaterial);
....
}
public override void AddRenderPasses(ScriptableRenderer renderer, ref RenderingData renderingData)
{
renderer.EnqueuePass(_renderPass);
renderer.EnqueuePass(_blurPass);
renderer.EnqueuePass(_outlinePass);
}
RenderPassEvent
It remains to indicate when the created passes will be called. To do this, each of them needs to specify the renderPassEvent parameter.Event listUniversal RP, .
BeforeRendering
BeforeRenderingShadows
AfterRenderingShadows
BeforeRenderingPrepasses
AfterRenderingPrePasses
BeforeRenderingOpaques
AfterRenderingOpaques
BeforeRenderingSkybox
AfterRenderingSkybox
BeforeRenderingTransparents
AfterRenderingTransparents
BeforeRenderingPostProcessing
AfterRenderingPostProcessing
AfterRendering
Create the appropriate field in OutlineFeature.[SerializeField] private RenderPassEvent _renderPassEvent;
And we will indicate it to all created passages.public override void Create()
{
...
_renderPass.renderPassEvent = _renderPassEvent;
_blurPass.renderPassEvent = _renderPassEvent;
_outlinePass.renderPassEvent = _renderPassEvent;
}
Customization
Add an Outline layer and set it for the objects we want to circle.We will create and configure all the necessary assets: UniversalRendererPipelineAsset and ForwardRendererData.Result
The result for our original frame will be as follows!
Completion
Now the outline of the object will always be visible, even through other objects. In order for our effect to take into account the depth of the scene, several changes must be made.RenderObjectsPass
When specifying the purpose of our render, we should also indicate the current depth buffer. Create the appropriate field and method.public class MyRenderObjectsPass : ScriptableRenderPass
{
...
private RenderTargetIdentifier _depth;
public void SetDepthTexture(RenderTargetIdentifier depth)
{ _depth = depth; }
...
}
In the Configure () method, specify the depth in setting the render target.public override void Configure(CommandBuffer cmd, RenderTextureDescriptor cameraTextureDescriptor)
{
cmd.GetTemporaryRT(_destination.id, cameraTextureDescriptor);
ConfigureTarget(_destination.Identifier(), _depth);
ConfigureClear(ClearFlag.Color, Color.clear);
}
Outlinefeature
In OutlineFeature, we will pass MyRenderObjectsPass the current scene depth.public class OutlineFeature : ScriptableRendererFeature
{
...
public override void AddRenderPasses(ScriptableRenderer renderer, ref RenderingData renderingData)
{
var depthTexture = renderer.cameraDepth;
_renderPass.SetDepthTexture(depthTexture);
renderer.EnqueuePass(_renderPass);
renderer.EnqueuePass(_blurPass);
renderer.EnqueuePass(_outlinePass);
}
...
}
UniversalRenderPipelineAsset
In the used UniversalRenderPipelineAsset, check the box next to DepthTexture.Result
Result excluding depth:Result based on depth:
Total
ScriptableRendererFeature is quite a convenient tool for adding your passages to the RP.In it, you can easily replace RenderObjectsPass's and use them in other ScriptableRendererFeature. You don’t need to go deep into the implementation of Universal RP and change its code to add something.PS
In order to make the general algorithm of working with ScriptableRendererFeature and ScriptableRenderPass more clear, and so that the article does not grow too much, I intentionally tried to create pass code simple, even to the detriment of their universality and optimality.References
The source code is a link to gitlab. Themodels and the scene are taken from the Lander Missions: planet depths game.The following stroke implementation was taken as the basis of the example - youtube linkUnity's own RenderFeature implementation examples - link to github .A series of lessons on creating your own ScriptableRenderPipeline. After reading the general logic of the RP and shaders, the link to the tutorials becomes clear .