 Today we open the source code for testsuite, a framework for testing HTTP services, which was developed and used by Yandex.Taxi. Sources are published on GitHub under the MIT license.With testsuite, it’s convenient to test HTTP services. It provides ready-made mechanisms to:The Yandex.Taxi backend consists of hundreds of microservices, new ones are constantly appearing. We develop all highly loaded services in C ++ using our own userver framework, we already talked about it on Habré . We make less demanding services and prototypes in Python.To make sure that the service solves its problem well, providing the API to other services and the final application, we want to test it as a whole, mainly on the principle of a black box.There are no ready-made tools for this - you would have to write code to set up a test environment, which would be:
- raise and fill the database;
- intercept and spoof HTTP requests;
- run a test service in this environment.
Solving this problem using the frameworks for unit tests is too difficult and wrong, because their task is different: unit testing of smaller structural units - components, classes, functions.Testsuite is based on pytest , the standard Python test framework. It doesn’t matter what language the microservice we are testing is written in. Now testsuite runs on GNU / Linux, macOS operating systems.Although testsuite is convenient for integration scenarios, that is, the interaction of several services (and if the service is written in Python, then for low-level ones), we will not consider these cases. Further, we will focus only on testing a single service.Operating principle
The ultimate goal is to make sure that the service answers HTTP calls correctly, so we test through HTTP calls.Starting / stopping a service is a routine operation. Therefore, we check:- that after starting the service responds via HTTP;
- how the service behaves if external services are temporarily unavailable.

Testsuite:- Starts the database (PostgreSQL, MongoDB ...).
- Before each test, it fills the database with test data.
- Starts the tested microservice in a separate process.
- Launches its own web server (mockserver), which imitates (dries) the external environment for the service.
- Performs tests.
Tests can check:- Whether the service handles HTTP requests correctly.
- How the service works directly in the database.
- The presence / absence / sequence of calls to external services.
- The internal state of the service using the information that it passes to Testpoint.
mockserver
We test the behavior of a single microservice. Calls to the HTTP API of external services should be bridged. For this part of the work in the testsuite meet its own plug-ins mockserverand mockserver_https. Mockserver is an HTTP server with request handlers that are customizable for each test and memory about which requests are processed and what data is transferred.Database
Testsuite allows the test to directly access the database for reading and writing. Using the data, you can formulate a precondition for the test and check the result. Out of the box supported PostgreSQL, MongoDB, Redis.How to start using
To write testsuite tests, a developer must know Python and the standard pytest framework .Let's demonstrate using testsuite step by step using a simple chat example. Here are the source codes for the application and tests.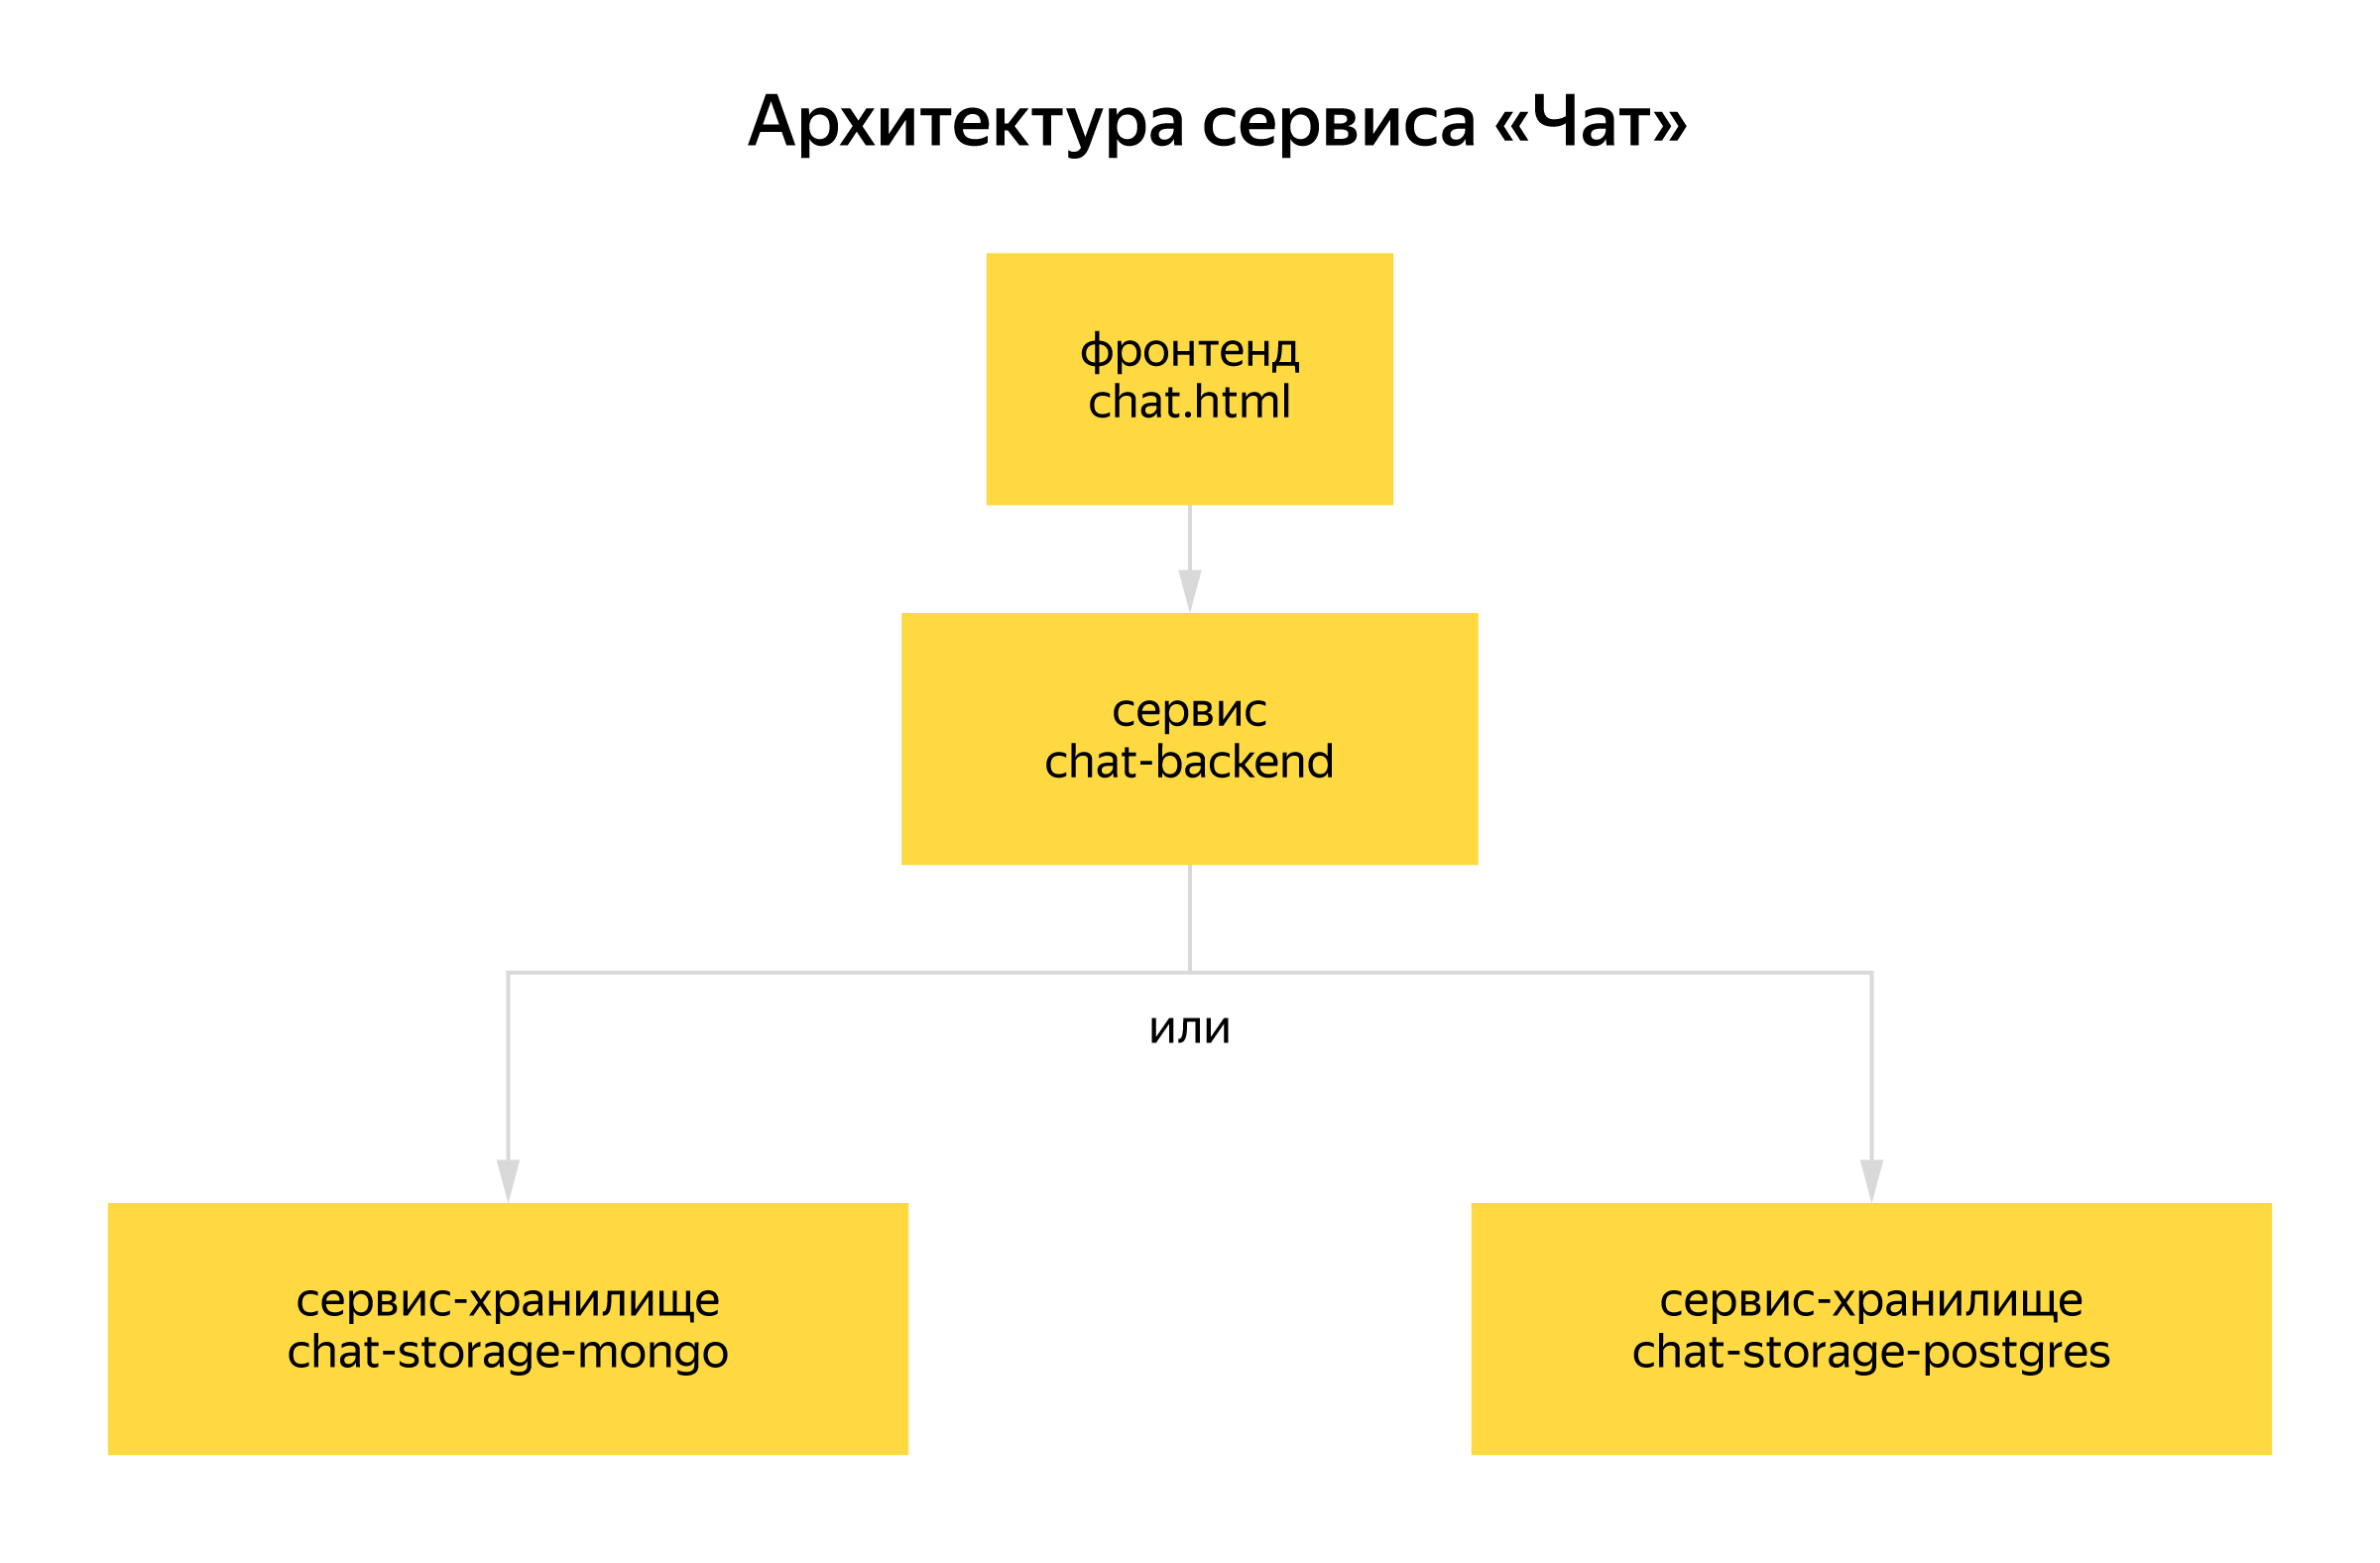 The frontend chat.html interacts with the chat-backend service .To demonstrate how services interact, chat-backend delegates message storage to the repository service. Storage is implemented in two ways, chat-storage-mongo and chat-storage-postgres .
chat backend
The chat-backend service is the entry point for requests from the front-end. Able to send and return a list of messages.Service
We show an example request handler POST /messages/retrieve:Source code@routes.post('/messages/retrieve')
async def handle_list(request):
async with aiohttp.ClientSession() as session:
response = await session.post(
storage_service_url + 'messages/retrieve',
timeout=HTTP_TIMEOUT,
)
response.raise_for_status()
response_body = await response.json()
messages = list(reversed(response_body['messages']))
result = {'messages': messages}
return web.json_response(result)
Tests
Prepare the testsuite infrastructure for the launch of the service. We indicate with what settings we want to start the service.Source
@pytest.fixture(scope='session')
async def service_daemon(
register_daemon_scope, service_spawner, mockserver_info,
):
python_path = os.getenv('PYTHON3', 'python3')
service_path = pathlib.Path(__file__).parent.parent
async with register_daemon_scope(
name='chat-backend',
spawn=service_spawner(
[
python_path,
str(service_path.joinpath('server.py')),
'--storage-service-url',
mockserver_info.base_url + 'storage/',
],
check_url=SERVICE_BASEURL + 'ping',
),
) as scope:
yield scope
We set the client fixture, through it the test sends an HTTP request to the service.Source@pytest.fixture
async def server_client(
service_daemon,
service_client_options,
ensure_daemon_started,
mockserver,
):
await ensure_daemon_started(service_daemon)
yield service_client.Client(SERVICE_BASEURL, **service_client_options)
Now the infrastructure knows how to start chat-backendand how to send a request to it. This is enough to start writing tests.Please note that in tests chat-backendwe do not use storage services, neither chat-storage-mongo, nor chat-storage-postgres. To chat-backendhandle calls normally, we wet the storage API with mockserver.Let's write a test for the method POST messages/send. We verify that:- the request is processed normally;
- when processing the request,
chat-backendcalls the storage method POST messages/send.
Sourceasync def test_messages_send(server_client, mockserver):
@mockserver.handler('/storage/messages/send')
async def handle_send(request):
assert request.json == {
'username': 'Bob',
'text': 'Hello, my name is Bob!',
}
return mockserver.make_response(status=204)
response = await server_client.post(
'messages/send',
json={'username': 'Bob', 'text': 'Hello, my name is Bob!'},
)
assert response.status == 204
assert handle_send.times_called == 1
Let's write a test for the method POST messages/retrieve. We verify that:- the request is processed normally;
- when processing the request,
chat-backendcalls the storage method POST /messages/retrieve; chat-backend “Flips” the list of messages received from the repository so that the latest messages are at the end of the list.
Sourceasync def test_messages_retrieve(server_client, mockserver):
messages = [
{
'username': 'Bob',
'created': '2020-01-01T12:01:00.000',
'text': 'Hi, my name is Bob!',
},
{
'username': 'Alice',
'created': {'$date': '2020-01-01T12:02:00.000'},
'text': 'Hi Bob!',
},
]
@mockserver.json_handler('/storage/messages/retrieve')
async def handle_retrieve(request):
return {'messages': messages}
response = await server_client.post('messages/retrieve')
assert response.status == 200
body = response.json()
assert body == {'messages': list(reversed(messages))}
assert handle_retrieve.times_called == 1
chat-storage-postgres
The service chat-storage-postgresis responsible for reading and writing chat messages to the PostgreSQL database.Service
This is how we read the list of messages from PostgreSQL in the method POST /messages/retrieve:Source Code@routes.post('/messages/retrieve')
async def get(request):
async with app['pool'].acquire() as connection:
records = await connection.fetch(
'SELECT created, username, "text" FROM messages '
'ORDER BY created DESC LIMIT 20',
)
messages = [
{
'created': record[0].isoformat(),
'username': record[1],
'text': record[2],
}
for record in records
]
return web.json_response({'messages': messages})
Tests
The service we are testing uses the PostgreSQL database. For everything to work, all you need to do is tell testsuite in which directory to look for table schemas.Source@pytest.fixture(scope='session')
def pgsql_local(pgsql_local_create):
tests_dir = pathlib.Path(__file__).parent
sqldata_path = tests_dir.joinpath('../schemas/postgresql')
databases = discover.find_databases('chat_storage_postgres', sqldata_path)
return pgsql_local_create(list(databases.values()))
The rest of the conftest.py infrastructure setup is no different from the service described above chat-backend.Let's move on to the tests.Let's write a test for the method POST messages/send. Check that it saves the message to the database.Sourceasync def test_messages_send(server_client, pgsql):
response = await server_client.post(
'/messages/send', json={'username': 'foo', 'text': 'bar'},
)
assert response.status_code == 200
data = response.json()
assert 'id' in data
cursor = pgsql['chat_messages'].cursor()
cursor.execute(
'SELECT username, text FROM messages WHERE id = %s', (data['id'],),
)
record = cursor.fetchone()
assert record == ('foo', 'bar')
Let's write a test for the method POST messages/retrieve. Check that it returns messages from the database.First, create a script that adds the records we need to the table. Testsuite will automatically execute the script before the test.Source
INSERT INTO messages(id, created, username, text) VALUES (DEFAULT, '2020-01-01 00:00:00.0+03', 'foo', 'hello, world!');
INSERT INTO messages(id, created, username, text) VALUES (DEFAULT, '2020-01-01 00:00:01.0+03', 'bar', 'happy ny');
Source
async def test_messages_retrieve(server_client, pgsql):
response = await server_client.post('/messages/retrieve', json={})
assert response.json() == {
'messages': [
{
'created': '2019-12-31T21:00:01+00:00',
'text': 'happy ny',
'username': 'bar',
},
{
'created': '2019-12-31T21:00:00+00:00',
'text': 'hello, world!',
'username': 'foo',
},
],
}
Launch
Running examples is easiest in a docker container. To do this, you need docker and docker-compose installed on the machine.All examples are launched from the Start chat directory.docs/examples
docs/examples$ make run-chat-mongo
docs/examples$ make run-chat-postgres
After launch, the URL will be displayed in the console, where you can open chat in the browser:chat-postgres_1 | ======== Running on http://0.0.0.0:8081 ========
chat-postgres_1 | (Press CTRL+C to quit)
Run tests
docs/examples$ make docker-runtests
docs/examples$ make docker-runtests-mockserver-example
docs/examples$ make docker-runtests-mongo-example
docs/examples$ make docker-runtests-postgres-example
Documentation
Detailed testsuite documentation is available here .Instructions for setting up and running examples.If you have questions github.com/yandex/yandex-taxi-testsuite/issues - leave a comment.