Create snippets for a specific language;
Create snippets for all languages, but for a specific project;
Create global snippets for all languages and for all projects.
Let's create global ones, here you need to enter the name of the list of snippets.

I type my, click and the my.code-snippets file opens. There is any commented information, as well as an example. I will uncomment him. Here is the snippet for JavaScript.
. scope — . , . — , , . body . console.log description, .

: , . , css .
— “ ”, . , mm. body «margin: 0px, 0px, 0px 0px;», mm . Ctrl+S .

style.css mm Tab. , , .
, . js, log Tab.
, , $1 $2. $1. Tab, $2. .
, , , .
. Ctrl+Shift+X .
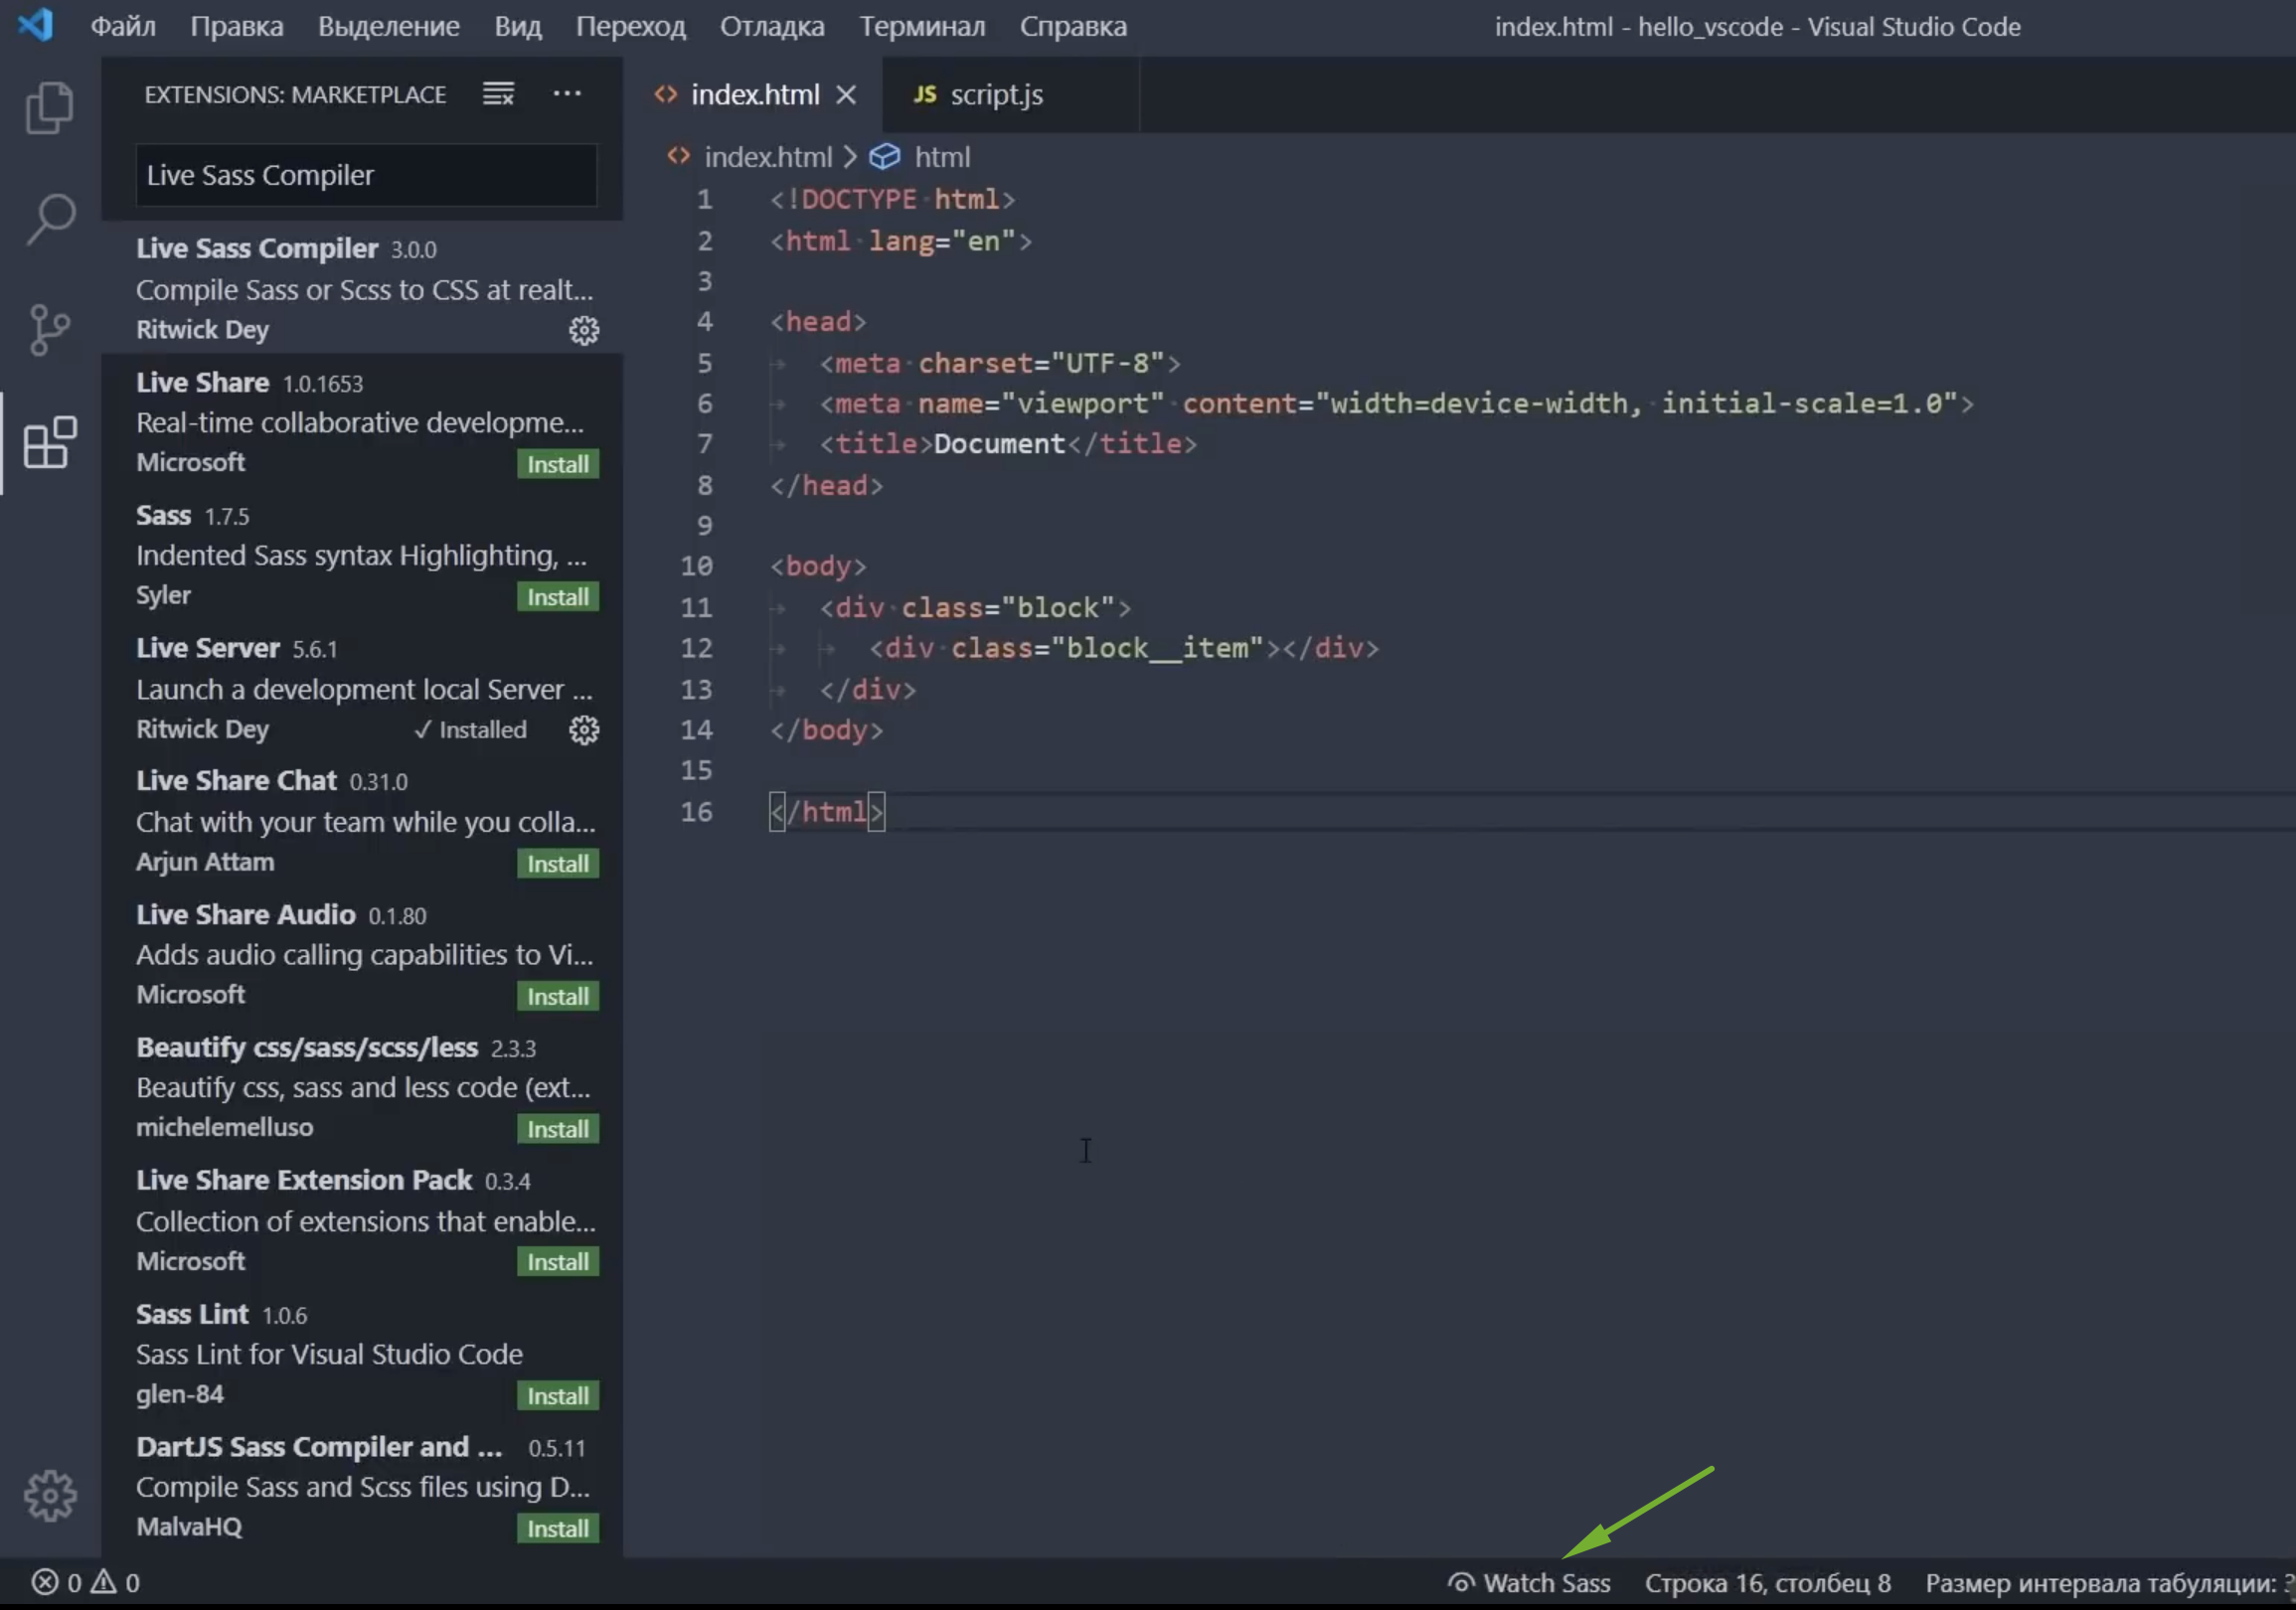
Live Sass Compiler
, SASS/SCSS. Install. , , , . , .
Watch Sass. .
scss , . style.scss.
:
body{
	font-size: 20 px;
	div{
		font-size: 10 px;
	}
}
, Watch Sass scss\sass . style.css style.css.map.

. , , , scss, css.
. Shift+Ctrl+P, Settings (JSON). , .

"liveSassCompile.settings.generateMap": false,
"liveSassCompile.settings.formats": [
	{
		"format": "expanded",
		"autoprefix": "last 5 versions",
		"extensionName": ".css",
		"savePath": "css"
	}
],
-, -. . «format» — , scss — , , ..
— css . . — css. css, .
, . , - - , css , style.css. , .

, style.scss. , scss - . , — import «header.scss»

, . …

? header.scss header.css. , style.css, header, , . header, . , header.scss, , .

, . , , header.css, . :)
Live Server
Live Css Compiler Live Server — , . Live Css Compiler, Live Server .
, , Live Css Compiler. Go Live. , , index.html Go Live .
html , “Hello”, , GoLive .

, . . link, link.css, . , .

, , , . , .
SCSS IntelliSense
SaSS. SCSS IntelliSense, scss, .
SCSS Formatter
. sss . .
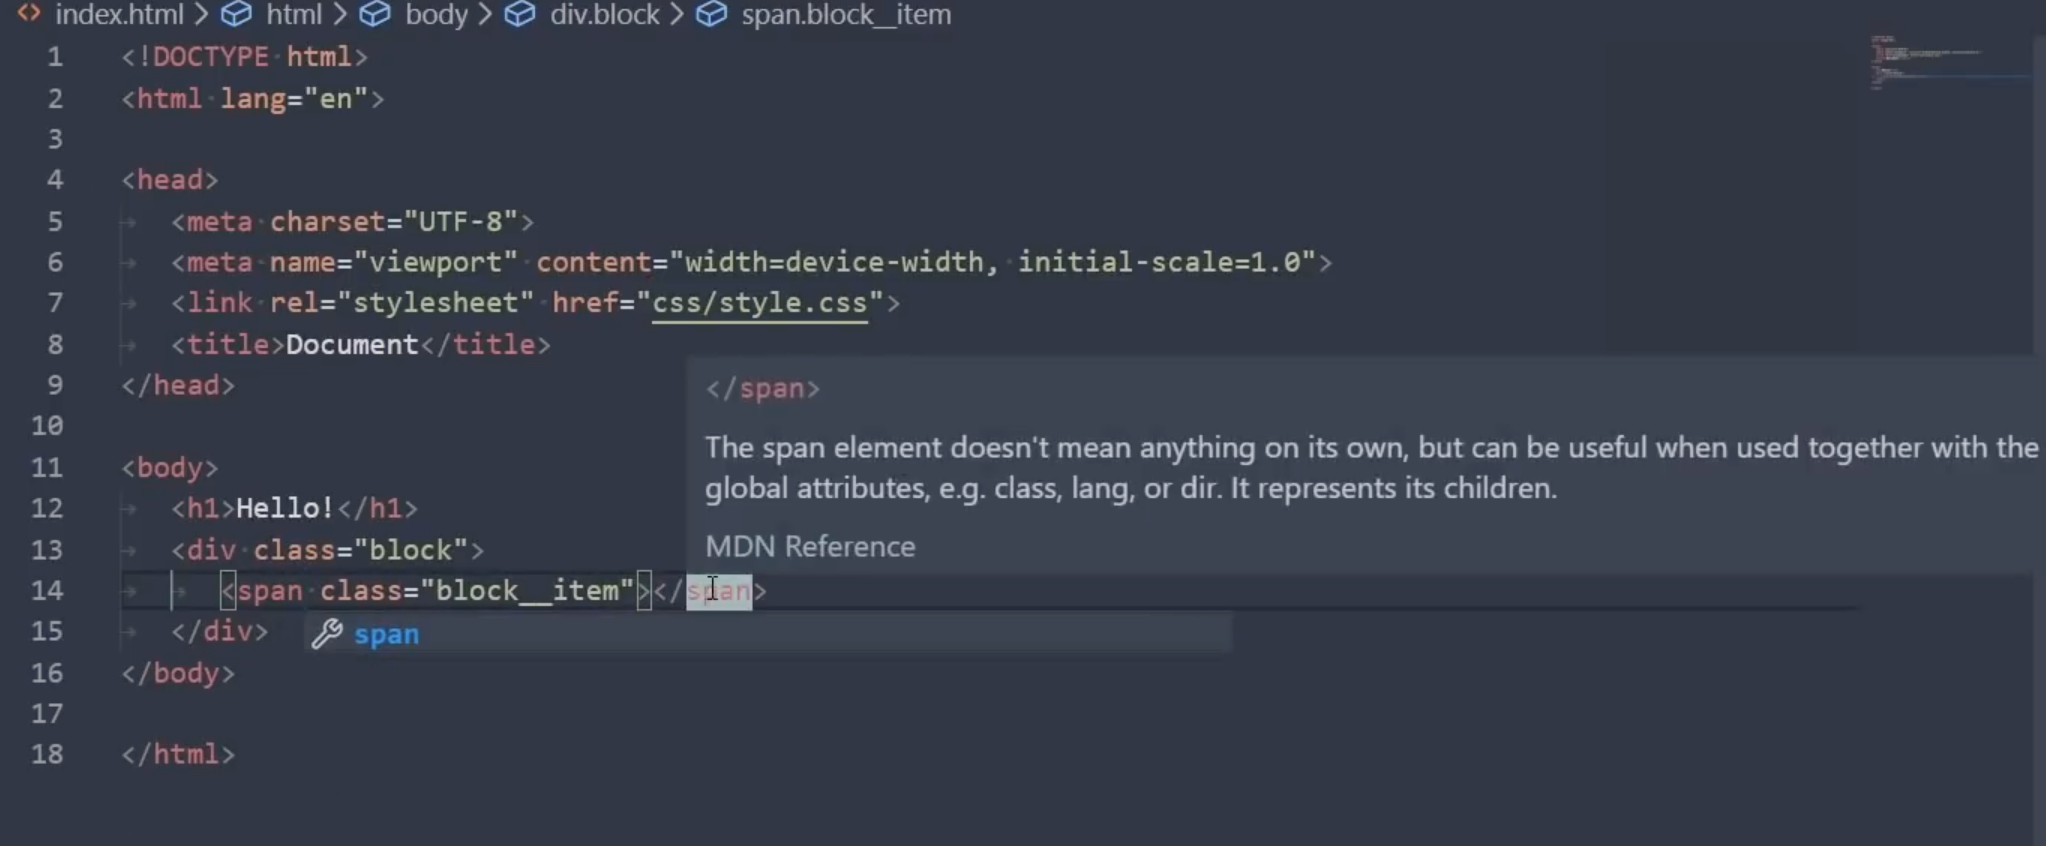
Auto Complete Tag
Auto Rename Tag Auto Close Tab. , VS Code , Auto Close Tab — html, . Auto Rename Tag — , . , span , .
Bracket Pair Colorizer
, — , , . . , , . , , , .
Indent Rainbow
, , , , SaSS pug, .
Better Comments
. , , .. , , - , .
- —! — , ToDO — , —? — .

, , .
, .
Color, - .
BEM Helper
BEM. bem, , . , , - css scss bem- html .

. Alt+B+E, , , .
?
.
. , > BEM Helper.
, Insert Element. , , .

, . , , - .
eCSStractor
, html css\scss\sass. , . > , eCSStractor, . eCSStractor Run (With BEM Nesting).
, , Ctrl+Alt+1, Enter, .

: html , , Ctrl+Alt+1, , .

. , .
, , BEM? Ctrl+Alt+2 .
, , . , — BEM BEM.
CSS Navigation
, . -, .
, red. html, . r , .
. , F12 . , , .
, , - , . F12 , , , html-.
Alt + F12

Image Preview
. , . html-, , , . , , , .

Debugger for Chrome
, - . F5 Chrome, , .

Vscode Google Translate Google Translate
. , translate text.

, , , Shift+Alt+T.
html , hello, Shift+Alt+T . , .
, > , , , , .

, (Preffered). , Shift+Alt+T . .
Project Manager
, , .. . Project Manager.

, , . . , , Project Manager .
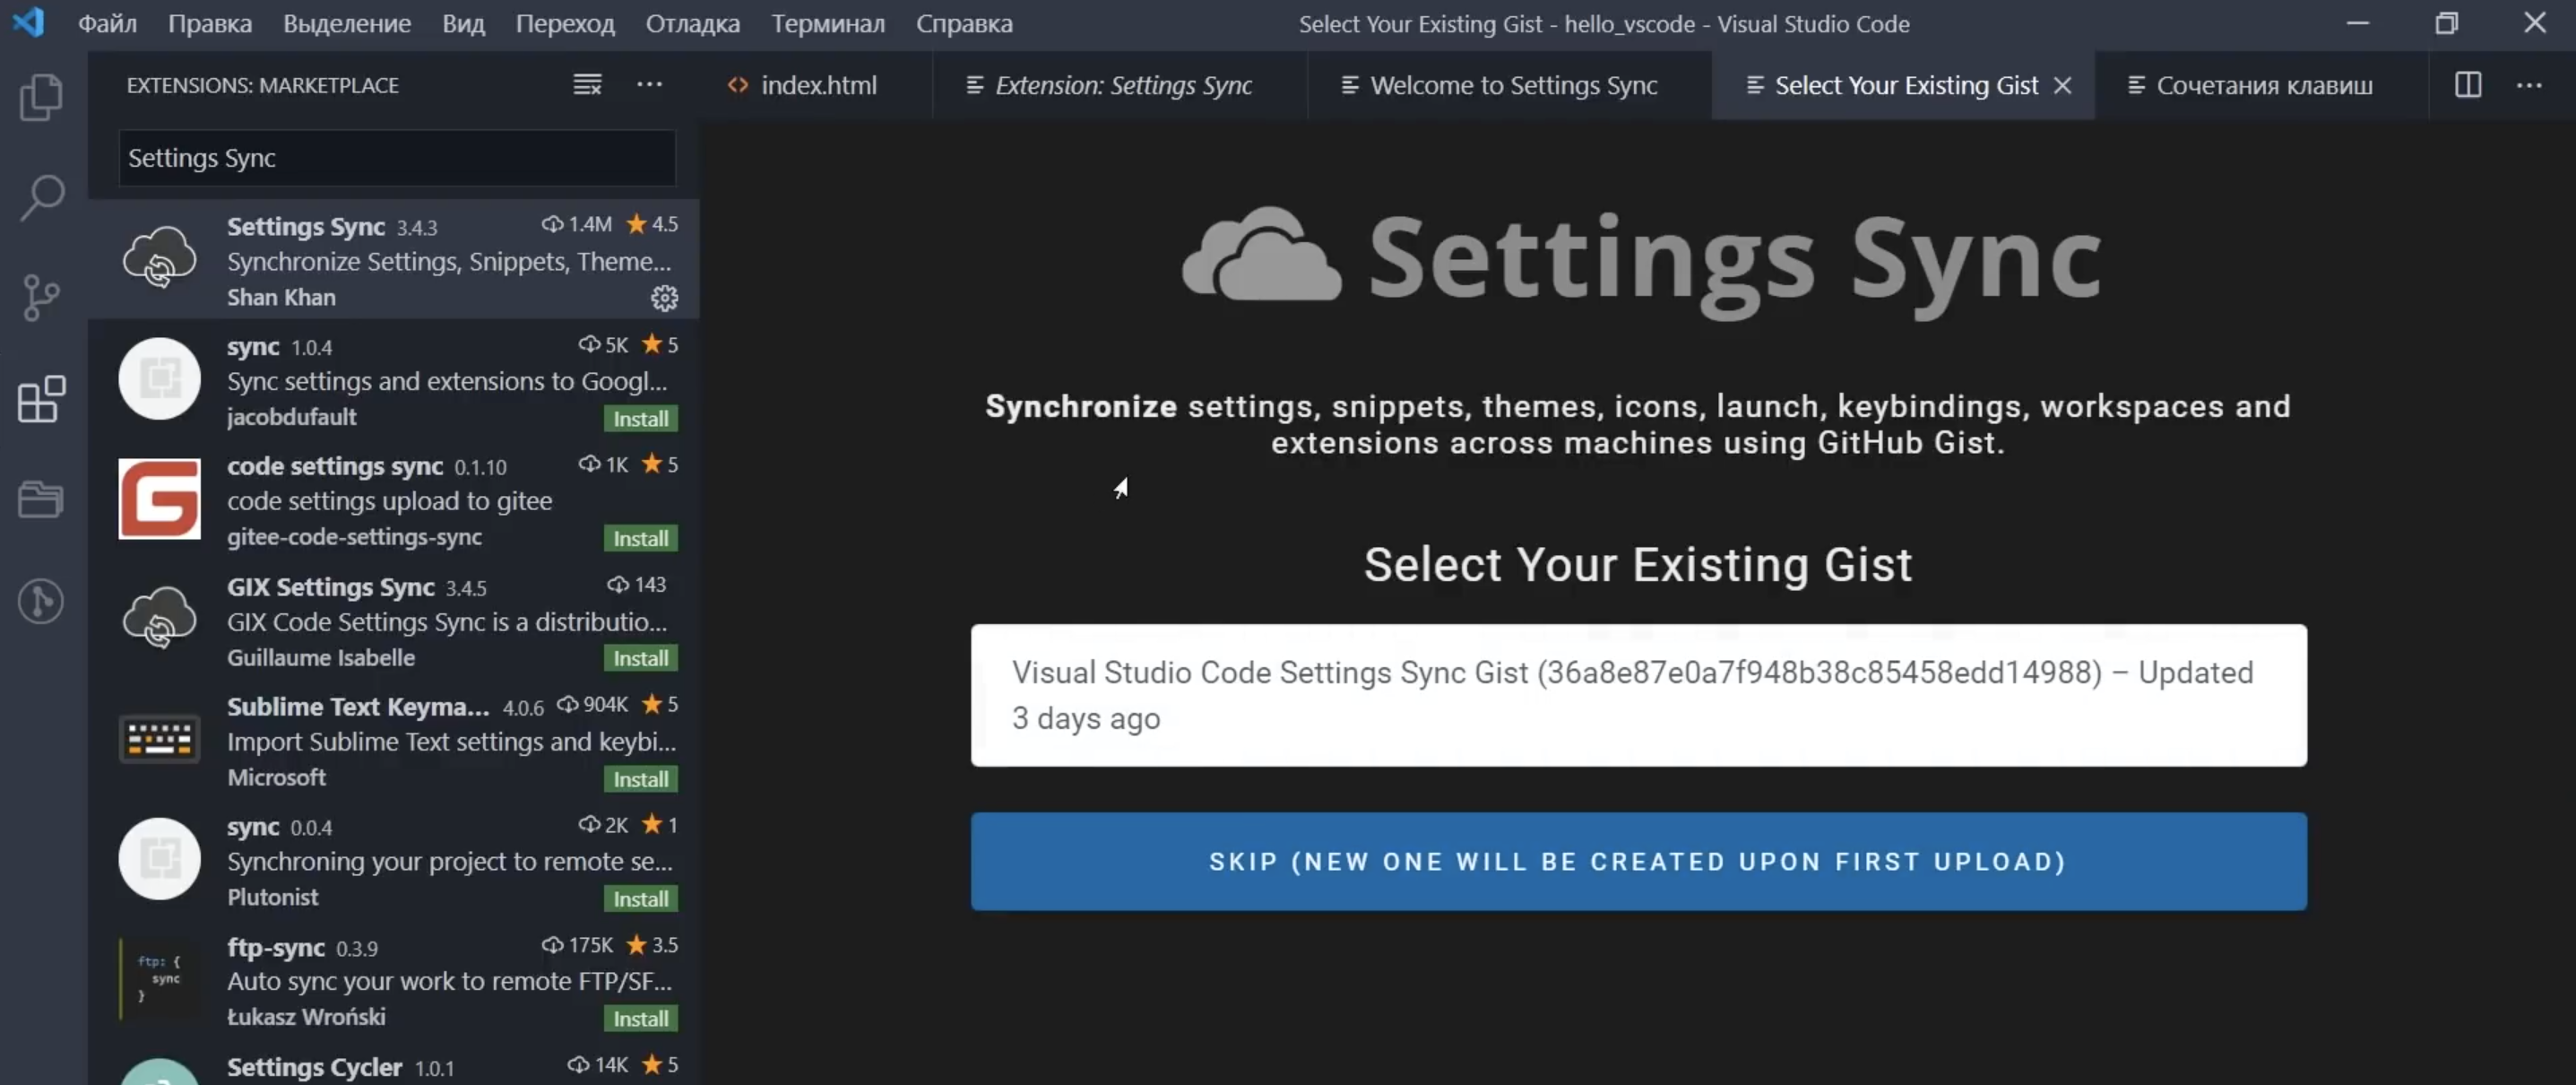
Settings Sync
, , Windows, Settings Sync.
, GitHub .
, GitHub, , .

, , . , .
, . Shift+Alt+U.
. , , , , .
.
, Settings Sync. , GitHub. .

. , , — Shift+Alt+D.
, , - . , , , . , — . , , , .
. , .
( ) :
Auto Complete Tag (Auto Close Tag, Auto Rename Tag), Bracket Pair Colorizer, indent-rainbow, Better Comments, Guides, BEM Helper, CSS Navigation, eCSStractor for VSCode, Image preview, Live Sass Compiler, Live Server, Project Manager, SCSS BEM Support, SCSS Formatter, SCSS IntelliSense, Vscode Google Translate, SVG, SVG Font Previewer, jQuery Code Snippets, JavaScript Snippet Pack, jsflowchart, no jQuery Snippets, ESLint, Code Runner, Multiple clipboards for VSCode, WordPress Snippets, Live Pug Compiler, pug, Avocode, Google Fonts, GitLens — Git supercharged,
Settings Sync
GITHub
? .
! Git.
, +, , .

. +, .

, , -, Enter. GitHub. , , . :

git remote add origin https://github.com/FreelancerLifeStyle/hello_vscode.git
git push -u origin master
, . , . , , , . , Enter.

, . Git. - , 1, 1 , , . > .
GitHub, , GitHub.

GitLens, .

, , — , — .
, , — , !
VS Code " "