It so happened that I decided to simplify the issue of watching movies online, the standard smart TV option did not suit me, and the constantly sticking out HDMI cable for connecting to a laptop was annoying. The solution to my problem I saw in the purchase of the Raspberry Pi 4, which can be carefully hidden behind the TV.I ordered a ready-made kit in Ali and while I was waiting I read how and what to do. There were two solutions suitable for me:- Turn a raspberry into a mini-computer and watch streaming video from a browser, as I usually do with a laptop
- Install the Kodi player and use raspberries as a kind of set-top box.
During the implementation, I decided to combine both options: configure the Kodi player to autorun and, if necessary, exit it into the Raspbian system. And it was in such a solution that the main problem hid, but everything in order.I will set out in steps, as I did.Step One: Choosing the Right Version of a Single Board ComputerIn my case, I took the top version of what the seller had: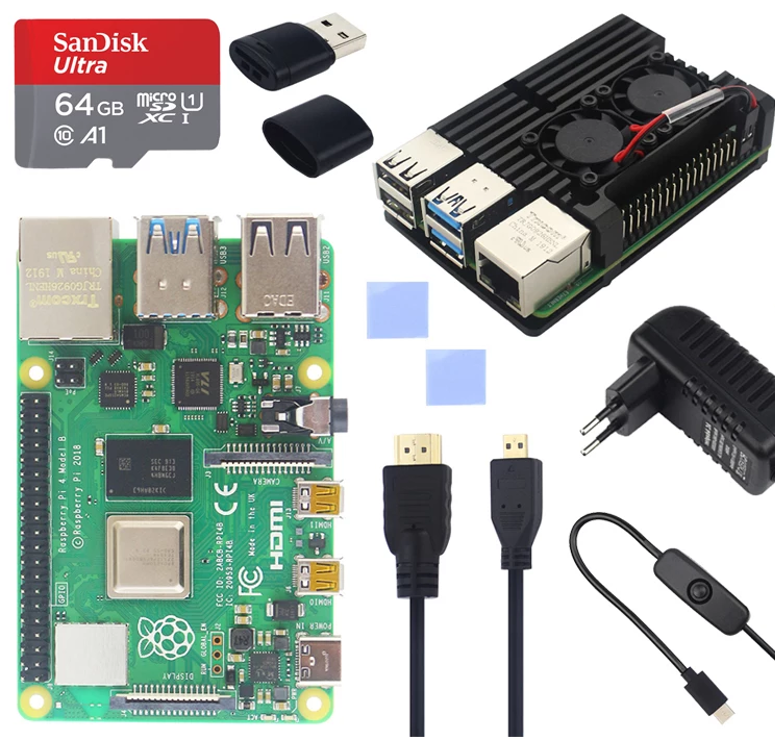
- Raspberry Pi 4:
Broadcom BCM2711, Quad core Cortex-A72 (ARM v8) 64-bit SoC @ 1.5GHz
4GB LPDDR4-3200 SDRAM
2.4 GHz and 5.0 GHz IEEE 802.11ac wireless, Bluetooth 5.0, BLE Gigabit Ethernet
2 USB 3.0 ports; 2 USB 2.0 ports
2 × micro-HDMI ( 4k 60fps)
4-pole stereo audio and composite video
H.265 ( 4kp60), H264 ( 1080p60, 1080p30)
OpenGL ES 3.0
USB-C ( 3A, 5V DC) - -
- 5
- SD 64, 10 USB
- HDMI/microHDMI 1,5
If desired, you can take a simpler and cheaper kit, but I decided what is called to take "in reserve".Step two: Install the operating system.The first launch of Raspderry is described in detail and even shown in pictures on the official website.I took a slightly different path and used the balenaEtcher utility to unzip the Raspbian system image to an SD card. Who decides to take this path can be downloaded here . The utility itself is primitive in management: we insert a USB flash drive for the firmware, run balenaEtcher, specify the path to the system image and click Flash! You can download the Raspbian image from the official site.I used the version of “Raspbian Buster with desktop and recommended software” - an almost complete solution, which is called “out of the box”. Inside there is a desktop environment and preinstalled software. In this version, the default environment is PIXEL (Pi Improved Xwindows Environment, Lightweight), which is essentially a refinement of the LXDE environment.At the first start, Raspbian will ask you some configuration questions (choosing a country, language and time zone / setting a password / Wi-Fi connection / receiving the latest updates) and will offer to reboot. We will not dwell on them, because they are intuitive and described in the pictures at the link above on the official website.Step Three: Setup.You may have to adjust the resolution of the monitor, you can do it this way: Start / Settings / Screen Configuration. The Screen Layout Editor window will open where you need to go to Configure / Screens / HDMI / Resolution / select the desired resolution from the list and click on the green checkmark.We will need to configure the ability to switch the layout language. It is done like this:
- Right-click on the Taskbar and select "Add / Remove Panel Elements".
- The Panel Settings window will open, click "Add."
- In the list that opens, find “Keyboard Layout Handler”, select and click “Add”.
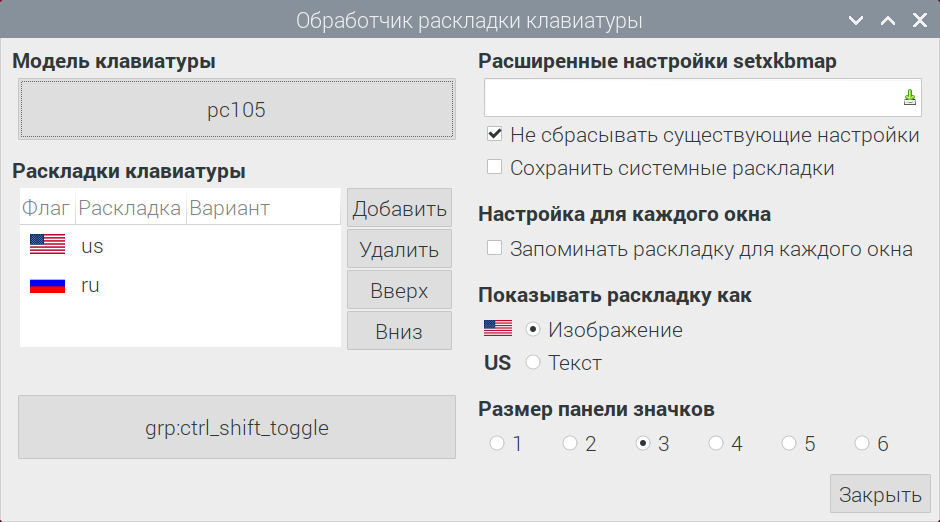
- We will return to the previous menu, in which the "Keyboard Layout Handler" item should now appear, select and click "Parameters".
- Uncheck “Save system settings”
- In the "Keyboard Layouts" window that has become active, click "Add" and select the necessary layout.
- A little lower will be written "grp: shift_caps_toggle" - this is a combination of hot keys for changing layouts. You can click here and change this key combination to the usual convenient by selecting from the list below.
- Check the box "Do not reset existing settings."
- Click the cross to close the Keyboard Handler window, because the Close button does not work here and close the Panel Settings window.
 Of the additional software that I had to install was the Onboard virtual keyboard, as Using my physical keyboard is not my plan.
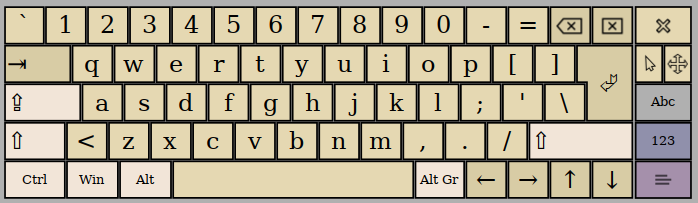 There are two ways to do this:
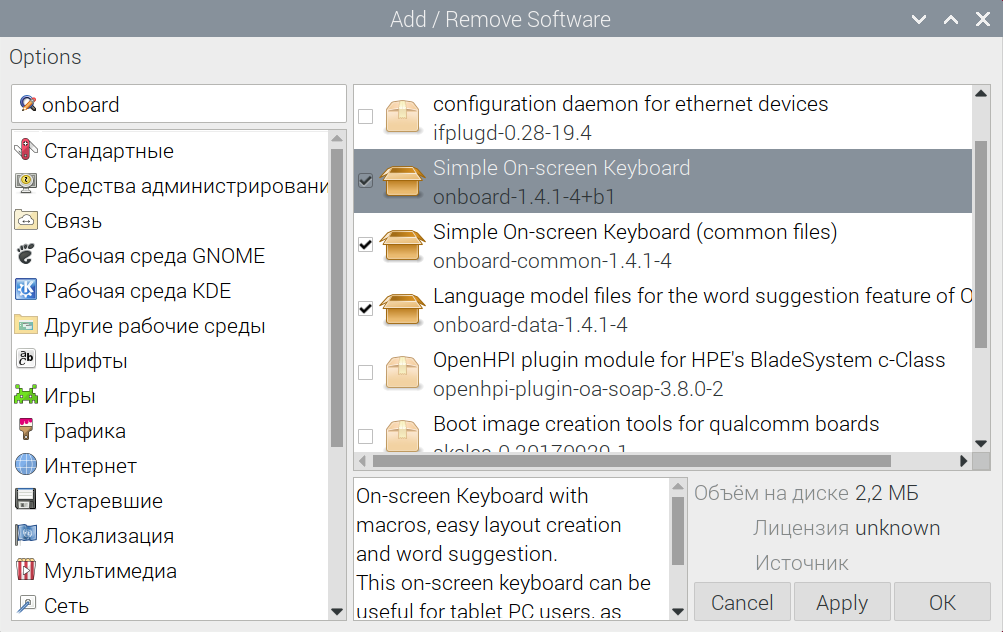 You need to look for the keyboard in Start / Accessibility / Onboard.This completes the setup process.Step Four: Install the Kodi Player.Before installing the player itself, it’s worthwhile to carry out some manipulations on setting the memory allocation between the GPU and the CPU, expanding the used memory space and connecting 4k 60fps mode, this can be done in at least three ways, but in my opinion this is the simplest:
- Launch the terminal and enter:
sudo raspi-config
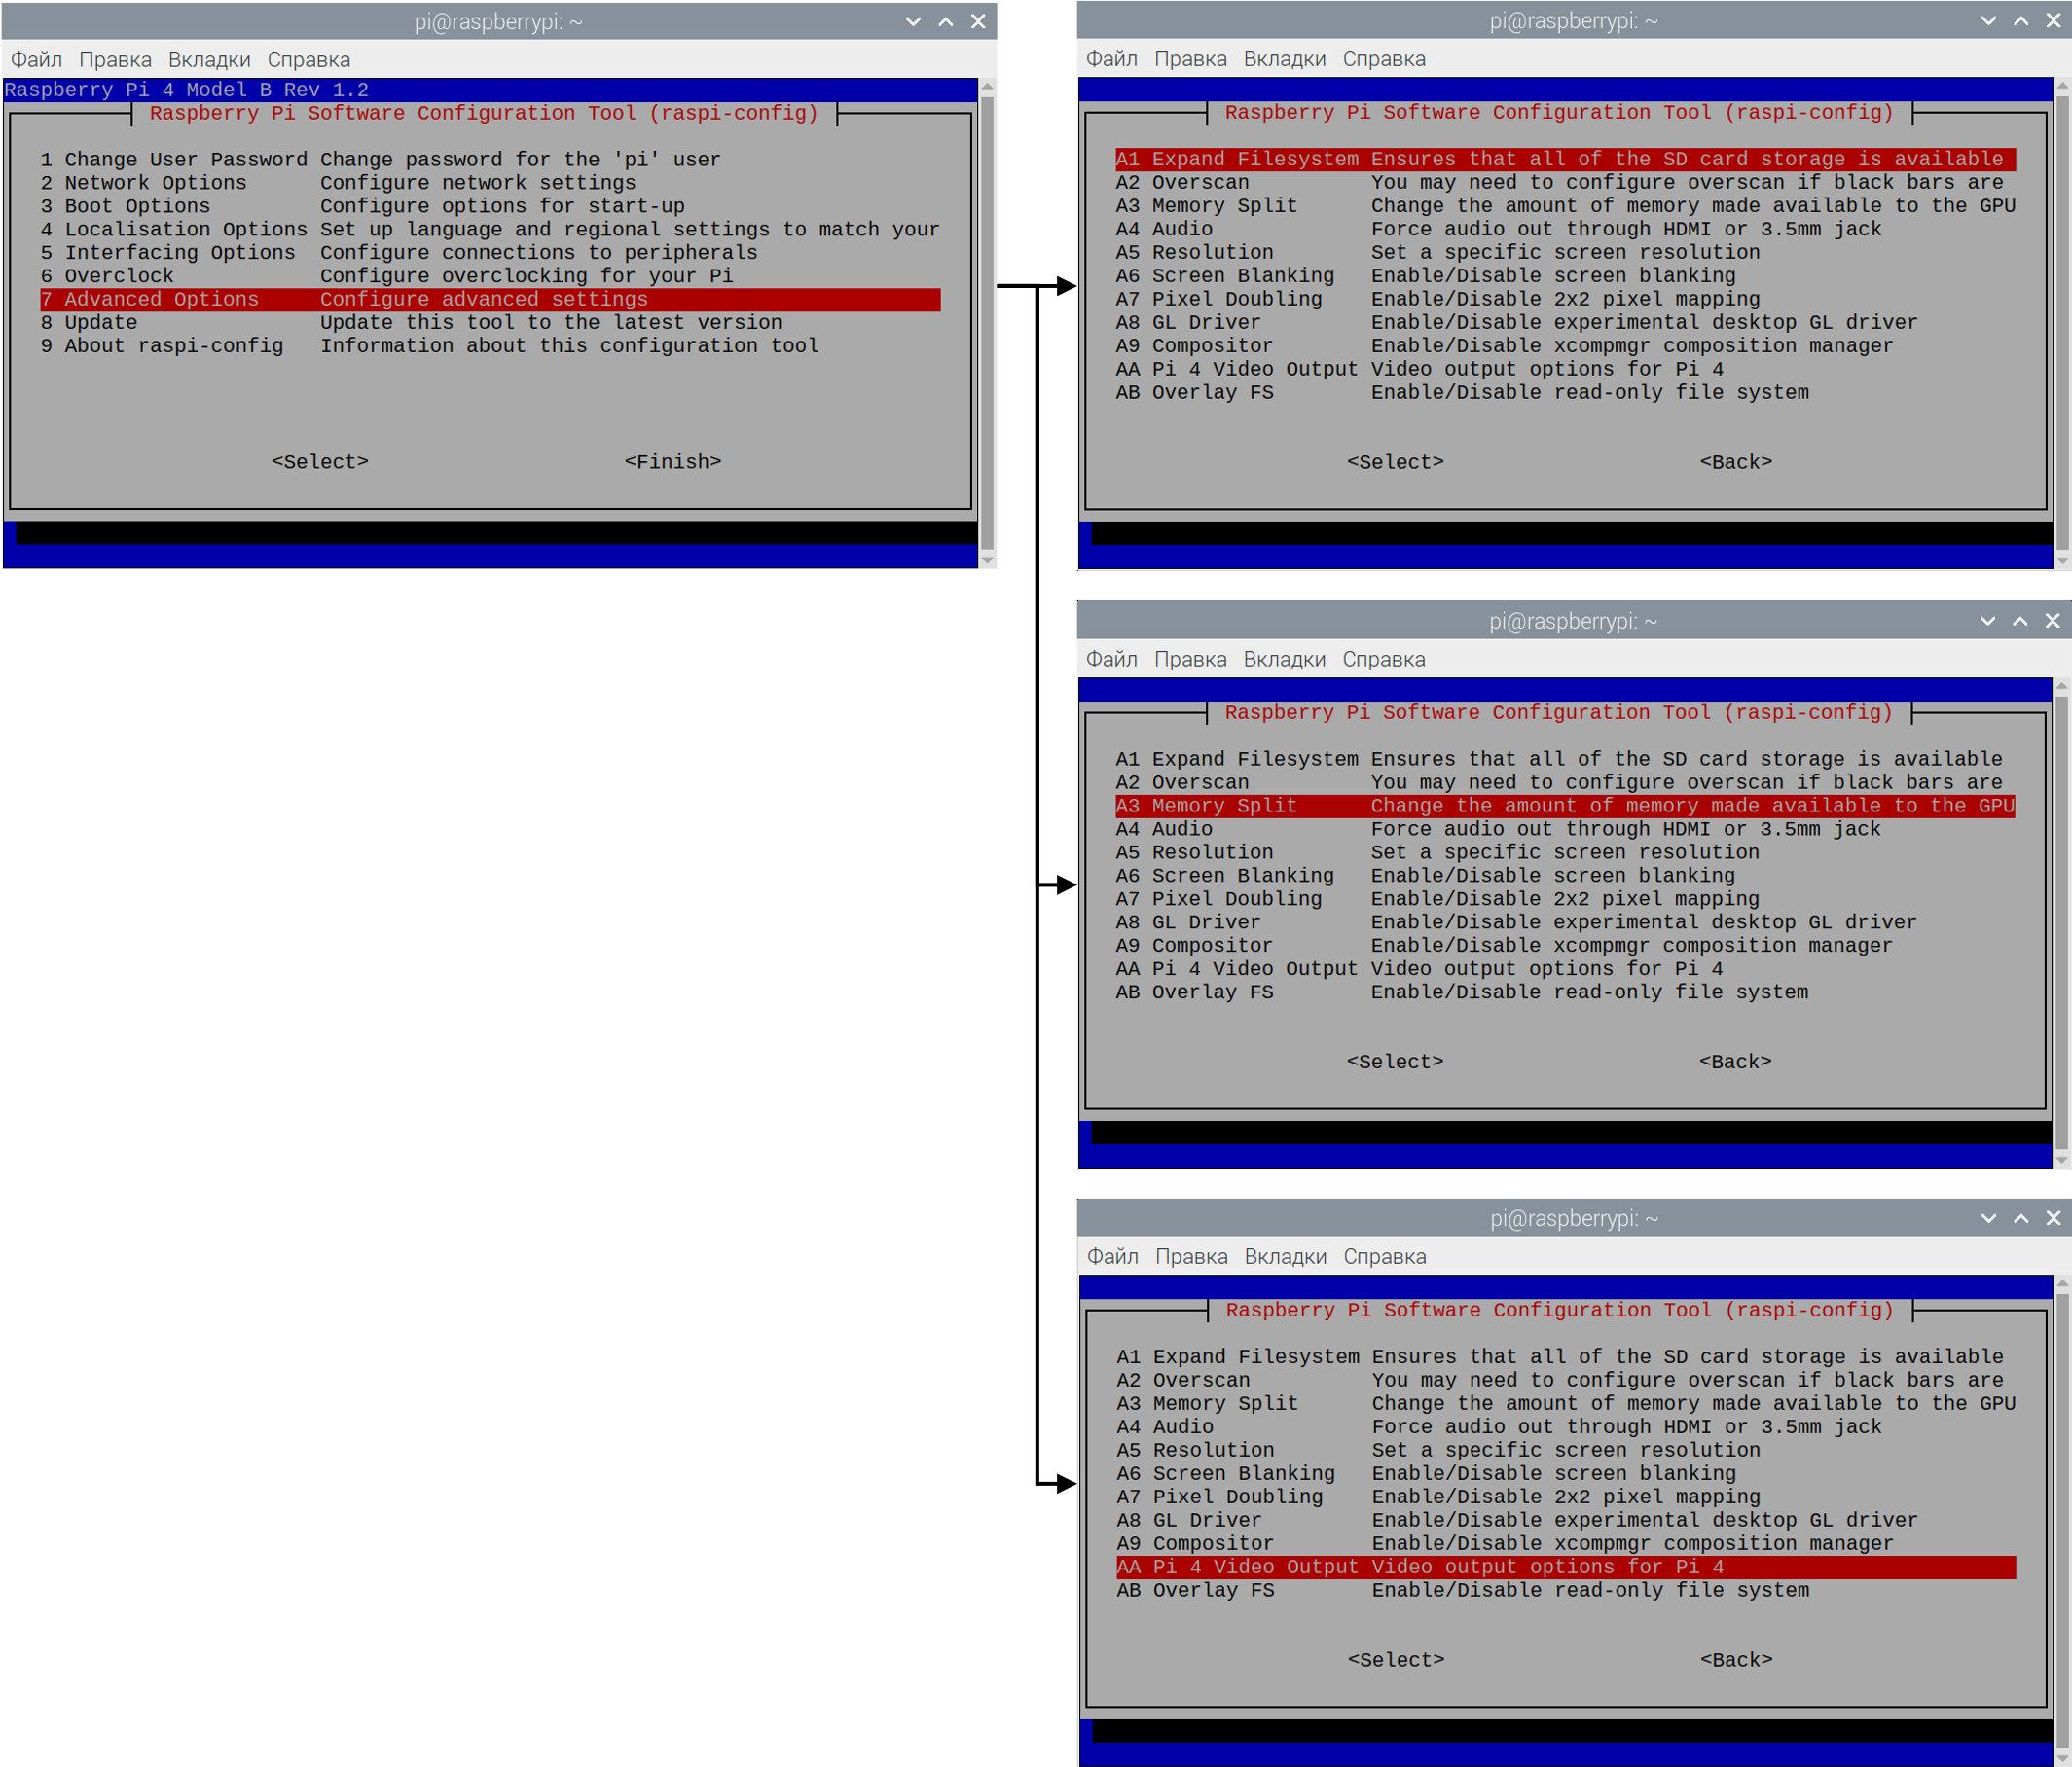
- The configuration settings window (Raspberry Pi Software Configuration Tool (raspi-config)) opens. It requires several items to be included:
7 Advanced options / A1 Expand filesystem - expand the use of file space on the entire flash card
7 Advanced options / A3 Memory split enter a value from 160 to 640 (default 64) is the amount of memory allocated in GPU for the GPU, the minimum 160 should be enough.If a black screen appears or there will be slowdowns when playing video, you need to allocate more memory for the GPU.
7 Advanced options / AA Pi 4 Video Output - Allows 4k 60fps
 Next, raspberries will ask for a reboot, which is worth performing. After that, open the Terminal again and get the system updates using the commands (necessary if you installed the system some time ago):
sudo apt-get update
sudo apt-get dist-upgrade
Next, install the Kodi player with the command:sudo apt-get install kodi
After this command, the system will ask if we want to continue, to which of course we answer “y” and wait for the installation to finish. Then we reboot the system.After all these manipulations, you can start the Kodi player (Start / Audio and video / Kodi).Step Five: Configure Kodi Autorun.Now when you turn on raspberries, we will start the PIXEL environment and then you can start Kodi as a regular application. But I need Kodi to start when the system starts and, if necessary, you can get into the PIXEL environment. To do this, you need to configure the application to start automatically when raspberries start. Again we return to the Terminal and write:sudo nano ~/.config/lxsession/LXDE-pi/autostart
An empty autorun configuration file will open, enter the line into it:@kodi
Close with saving Ctrl + x / y / Enter. Here the Terminal may begin to swear that there is no such directory. Then you will have to create this directory first and there are three options:- Try to configure something on the desktop, for example, change the wallpaper (Desktop / RMB / Desktop Settings / Picture). Then the folder will be created automatically.
- In the terminal, enter mkdir ~ / .config / lxsession / LXDE-pi
- Open the File Manager, press Ctrl + H to show hidden files and folders, then go to .config / lxsession / and then create the LXDE-pi folder
We restart raspberries and now instead of PIXEL we see the Kodi interface. Now, if we try to get out of Kodi, then we should get into the PIXEL environment and here lies the main problem, which took me a while. Instead of PIXEL we will see a black screen of the Openbox environment, and this is not at all what we expected to receive. The solution to this problem is simple - let's go back one step when we made changes to the autorun file. One line is @kodinot enough, you still need to start the PIXEL environment. Therefore, in this file you need to write the following:@lxpanel --profile LXDE-pi
@pcmanfm --desktop --profile LXDE-pi
@kodi
Now everything should work as planned at the very beginning. It remains only to configure Kodi itself, but here everyone configures it for themselves, and on the Internet there are many articles on how to do this.Step Six: Quick Tips on Configuring Kodi.I will only tell you about the settings that are most likely to be needed.Change language: Settings / Interface / Regional / LanguageAdjust resolution: Settings / System / Screen / ResolutionAdd keyboard layout: Settings / System / Enter / Keyboard layoutsInstalling add-ons from the repository:- Add add-on repository: Add-ons / Add-ons Browser / Install from a ZIP file. You can download the repository, for example here .
- Installing from the repository: Add-ons / Add-ons Browser / Install from the repository
A convenient feature is the control of Kodi from the phone, for this:- Go to Settings / Services / Management and turn on two points:
Allow remote control via HTTP
Allow application management on other systems - We immediately record the data for connecting to Kodi (the application on the phone will need them): port, username and password.
- Download the application you like from the application store. The most common is the official Kore app, but I liked Sibu more.
- In the application settings, specify the previously recorded port, username and password.
- Enjoy the convenient "remote control".
If you want to watch IP TV, you may need to use the PVR IPTV Simple Client. By default, it is not in the Kodi repository, but it can be accessed from Add / Remove Software by requesting “Simple IPTV PVR for Kodi”.