Hello, colleagues in this guide will tell you how to control smart home sensors using the Google Assistant and the mqtt protocol, using the ESP8266 board and LED as an example. We will also create our own Assistant app with blackjack and php scripts. I ask everyone for cat.To do this, we need the ESP8266 controller, or other controllers with an Internet connection, as well as a server with a valid ssl certificate (instead of a valid ssl, you can use a reverse proxy which already has one) and an MQTT server (broker).For integration with google assistant we will use the Google Actions service and Dialogflow. So, let's begin.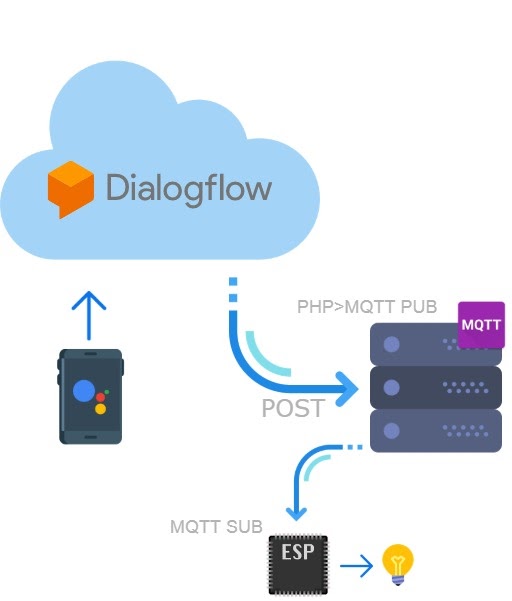
Creating and setting up a project
Google action console
First you need to log in to the service and create a project, select a language and region.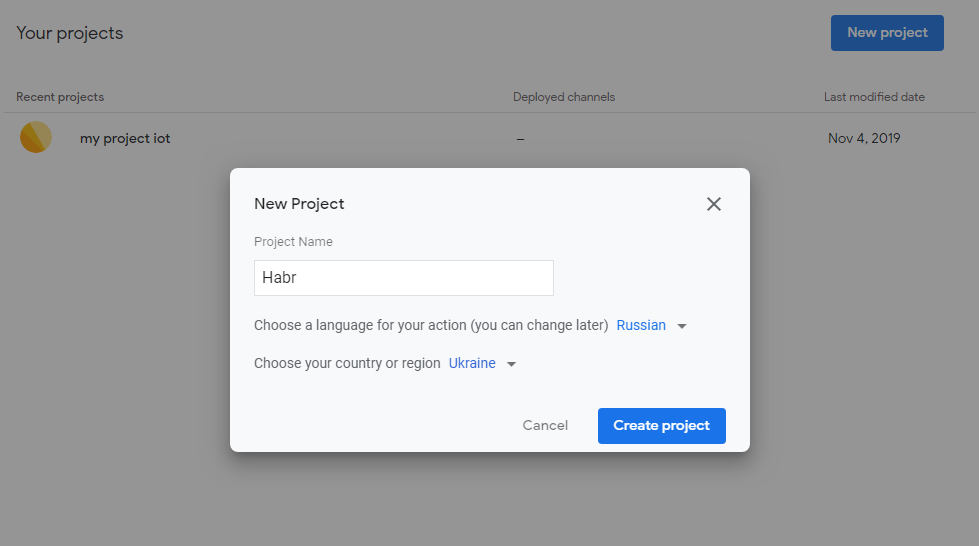 After you need to choose the scope. I chose Kids & Family. From someone else’s experience I’ll say that the logically asking category Smart Home only works correctly with devices from Google, for projects with its own sensors it’s better to choose a different category for correct operation.
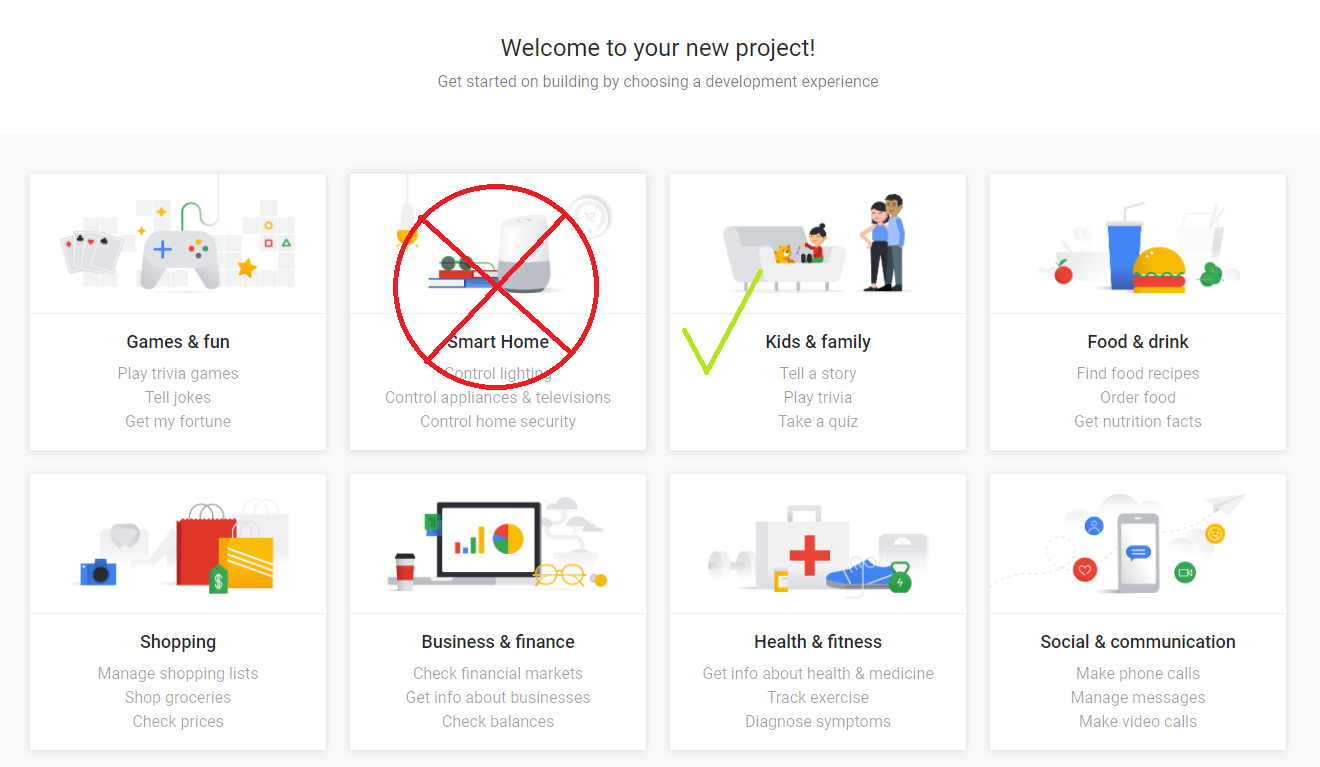 We read and accept the agreement. In the Quick setup category, go to Decide how your Action is invoked. We come up with what our bot will be called and select a voice from the available ones, save it.
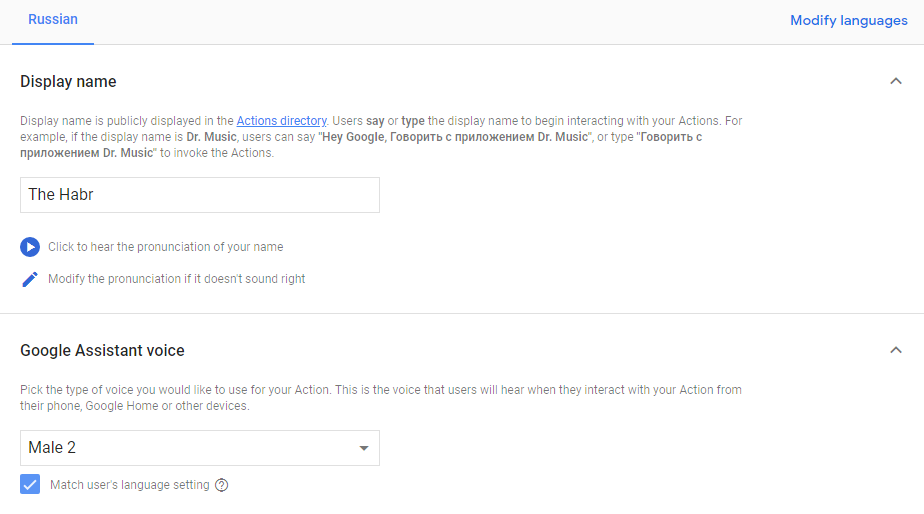 Go to the Actions tab, add a Custom Intent action
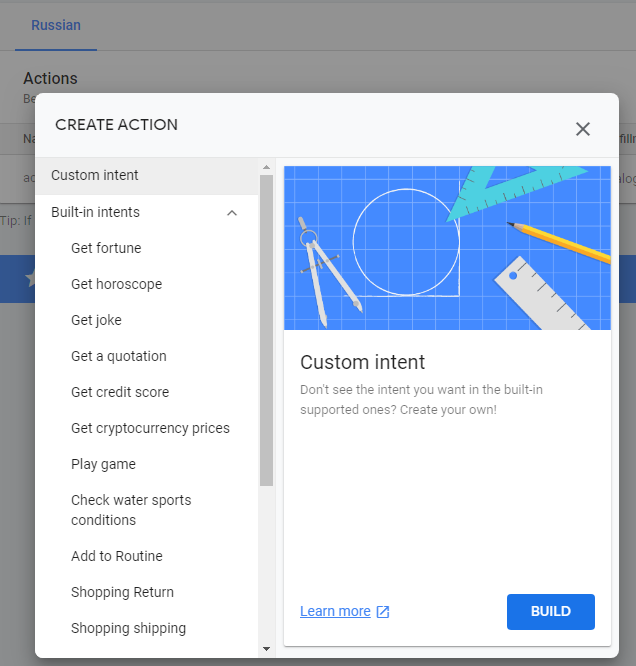
Dialogflow
After clicking the Build button, we are redirected to the Dialogflow resource, we also log in and proceed to the creation of the project:- Choose the default language and time zone.
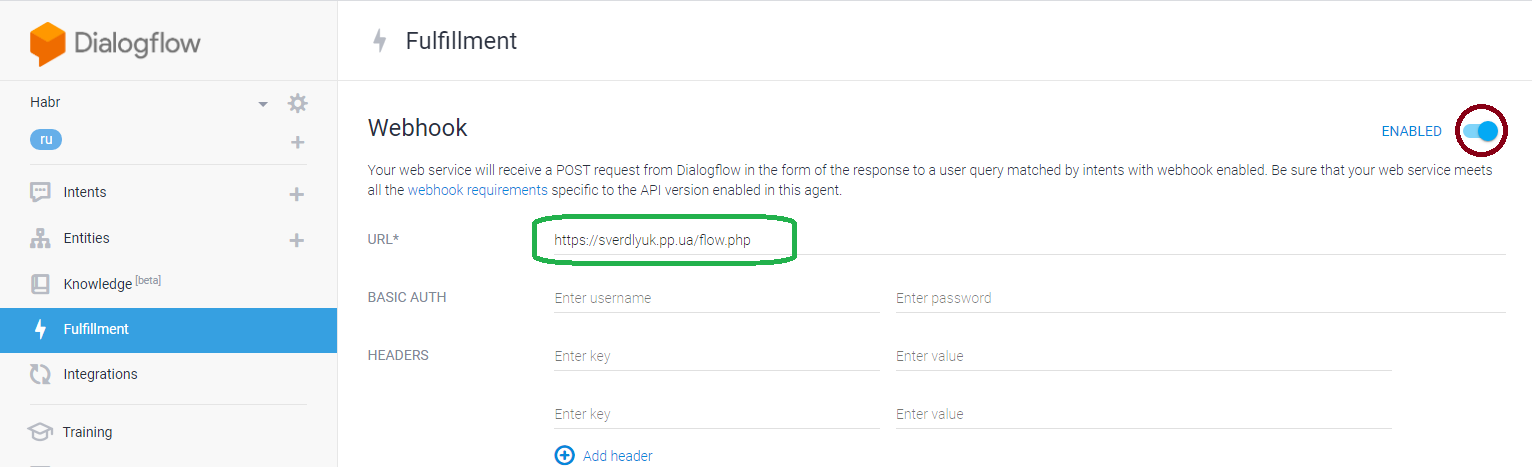
- Fulfillment Webhook. ( , ) Dialogflow POST .
- 3. .
intets . . + Intents. .
 The page itself can be divided into three categories:Training phrases are words that the assistant responds to with the team. They can be different for one team. For example, shine the words, cut the light, turn on the lamp, etc.
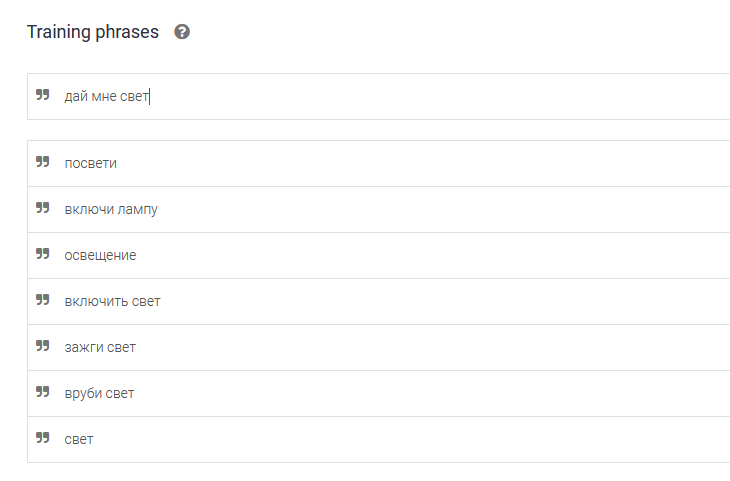 Action - the action itself, or the word that the sensor will understand, it is one and concrete.Responses are the answers of the assistant after the command is executed. Here is just a field for creativity.
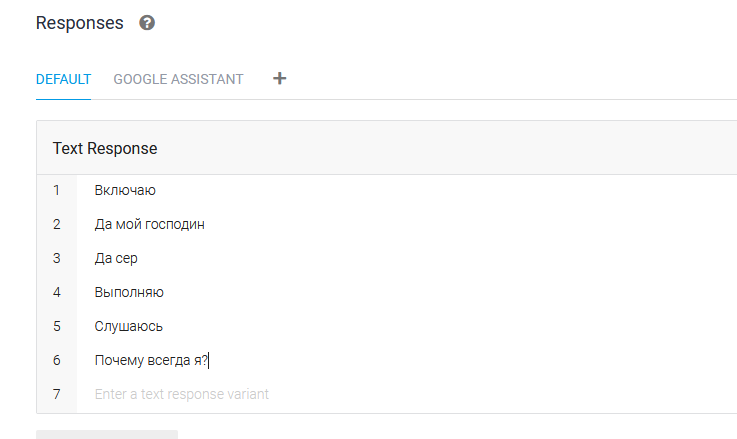
Hosting setup
As a server, I purchased the cheapest ($ 5) droplet and installed Debian 10.2 on it. Which hosting you choose does not matter.Configure reverse proxy and DNS
You can skip this part if you have a hosting with a valid certificate.The Cloudflare service itself offers a lot of lower level names, so if you are experiencing problems with step 4, you may need to indicate your ip instead of the default one in the content column next to www ***, https // www *** (*** is your domain) .To interact with Dialogflow, you need an SSL certificate. I did not install it on the server, instead I used the DNS proxy Cloudflare (free - basic). To do this, when configuring Cloudflare, I added my previously purchased domain name and added the IP address of my server to it (Content column). Also added two A records (in the picture it is Value) in the settings of the name provider. It is worth noting that adding a record is not a matter of seconds and can take up to several business days.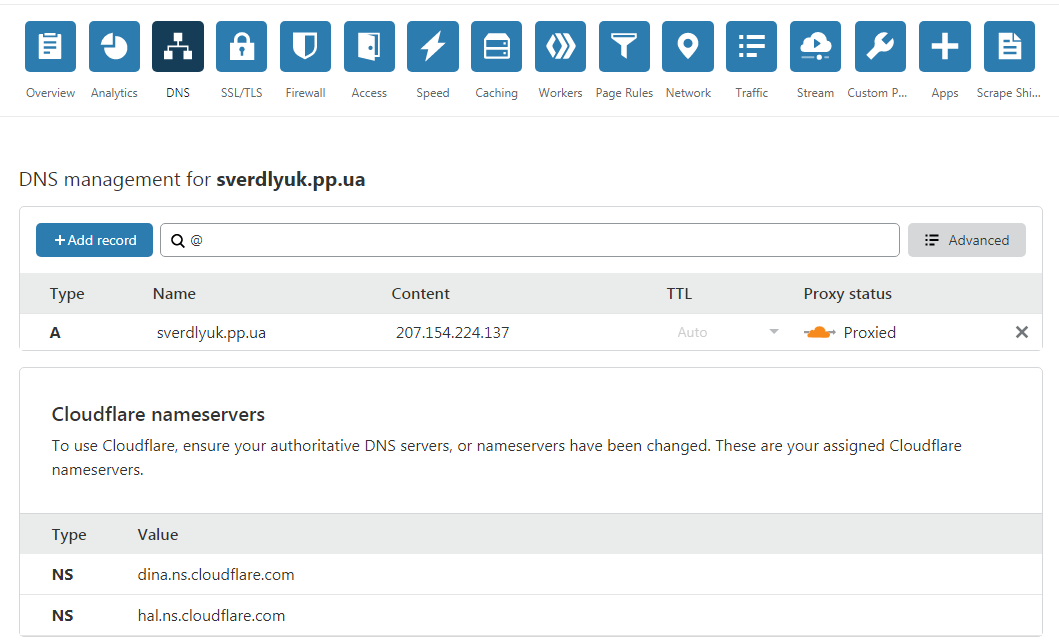
Software installation
1. First thing after starting the server for the first time, do not forget to update the package databaseapt update
, and then update the installed packagesapt upgrade
2. After we install LAMPApacheapt install apache2
Php / mysqlapt-get install php libapache2-mod-php php-mcrypt php-mysql
Add the server address in apache2.conf. This can be done with the nano /etc/apache2/apache2.conf command, indicating at the end of the file ServerName *** at the end of your file, where instead of asterisks you need to substitute the server ip. Check the syntax and restart the Apach service Learn more here .After successfully completing the steps described above when entering your domain name in the browser bar, you will receive the Apache2 welcome page.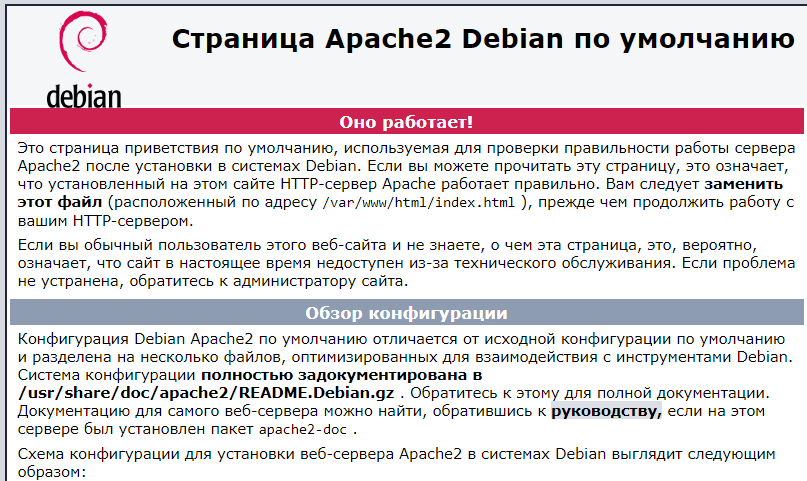 If this does not happen, check whether the commands were executed correctly, and whether the page works with an unsecured http connection. If it works, the server is probably listening on port 80, not port 443. Or some service is already running on it. More details here .4. Installing the Mosquitto Library for PHPIoT devices can use different protocols for interoperability. One such MQTT that works on a publisher-subscriber basis. In this case, subscribers can receive information from many publishers. But since the protocol understands only certain types of messages, it needs a converter (broker). Here we set it up.5. If you do not have PECL installed, install it
apt install pecl
After we become a brokerpecl install Mosquitto-alpha
Then add extension = mosquitto.so to your php.ini. And don't forget the clientapt install mosquitto mosquitto-clients
More details here .Setting up php script, subscription to topic
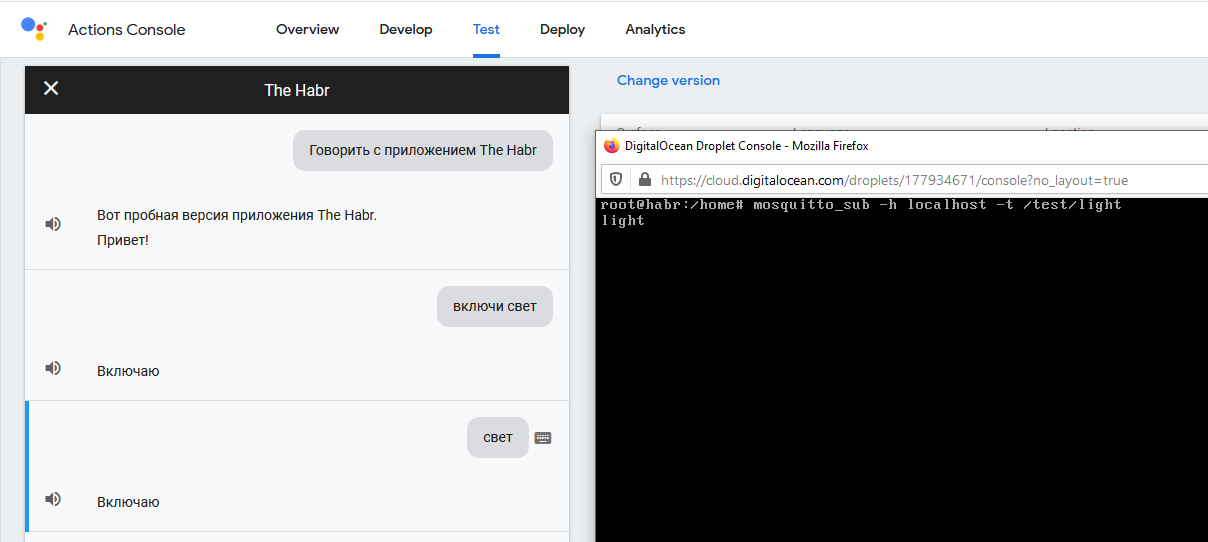
Actually the script itself. Its purpose is to accept a post request from Dialogflow, isolate the action from it and send it as a message to the broker in the subject, whose name is indicated at the end of the script. What do you call a script does not matter. By the way, this is the script that we indicated in the Fulfillment tab. Place the script at / var / www / htmlTopics are created by subscribers. To create a topic, use the command:mosquitto_sub -h localhost - t /test/light
Instead of localhost, you can specify any other address, or domain, where you want to create a publisher (pub).Instead of / test / light, you can specify any topic. In our case, the main thing is that it be indicated in the script.Messages are created by publishers. To create a message, you can use the command.mosquitto_pub -h localhost - t /test/light -m “light”
But we will not need it, because our publisher (pub) will be our application. The scheme is this, when our application receives a command, it sends a request to our script. The script is for the broker, and the broker is for the subscriber (esp8266).We will check the sending of messages through the Test Action Console tab.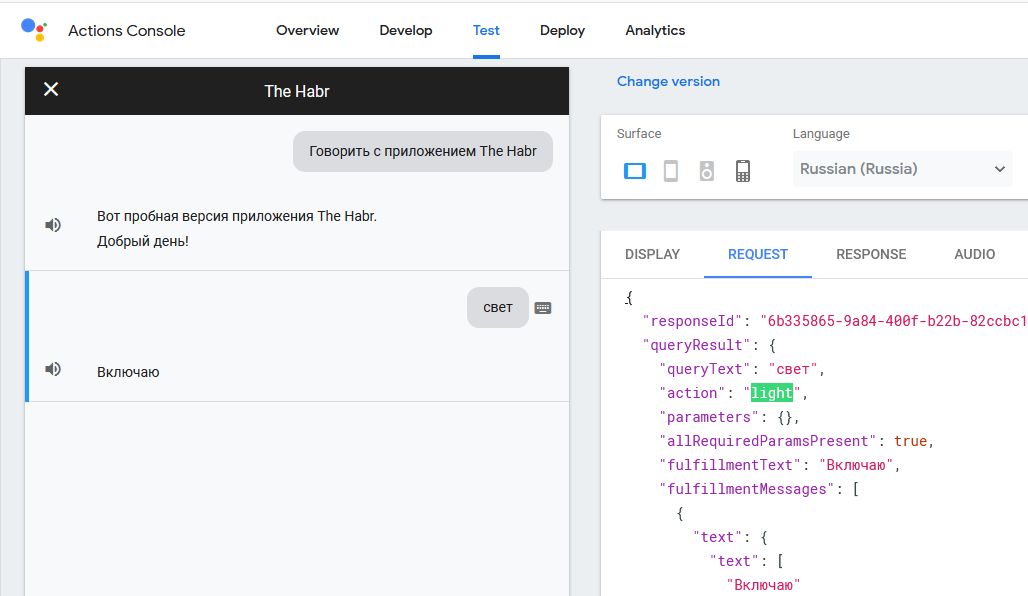
Php script<?php
if(strcasecmp($_SERVER['REQUEST_METHOD'], 'POST') != 0){
throw new Exception('Request method must be POST!');
}
$contentType = isset($_SERVER["CONTENT_TYPE"]) ? trim($_SERVER["CONTENT_TYPE"]) : '';
if(strcasecmp($contentType, 'application/json') != 0){
throw new Exception('Content type must be: application/json');
}
$content = trim(file_get_contents("php://input"));
$decoded = json_decode($content);
var_dump($decoded);
echo $decoded->queryResult->action;
define('BROKER', 'localhost');
define('PORT', 1883);
define('CLIENT_ID', getmypid());
$client = new Mosquitto\Client(CLIENT_ID);
$client->connect(BROKER, PORT, 60);
$message = $decoded->queryResult->action;
$client->publish('/test/light', $message, 0, false);
$client->loop();
?>
Firmware ESP8266
For the firmware we will use the Arduino IDE. If someone will install the IDE for the first time, do not forget about the ch340 driver. By default, there is no such payment in arduino. In File >> Settings you need to specify the address of the additional boards: arduino.esp8266.com/stable/package_esp8266com_index.json. In Tools >> board >> board manager you need to install the esp8266 package.In the sketch after const char * ssid, you should indicate the name of your wi-fi network. After const char * password, her password. After const char * mqtt_server specify the ip address of your server.Sketch Arduino IDE#include <ESP8266WiFi.h>
#include <PubSubClient.h>
// Update these with values suitable for your network.
const char* ssid = "***";
const char* password = "********";
const char* mqtt_server = "**.**.*.*";
WiFiClient espClient;
PubSubClient client(espClient);
long lastMsg = 0;
char msg[50];
int value = 0;
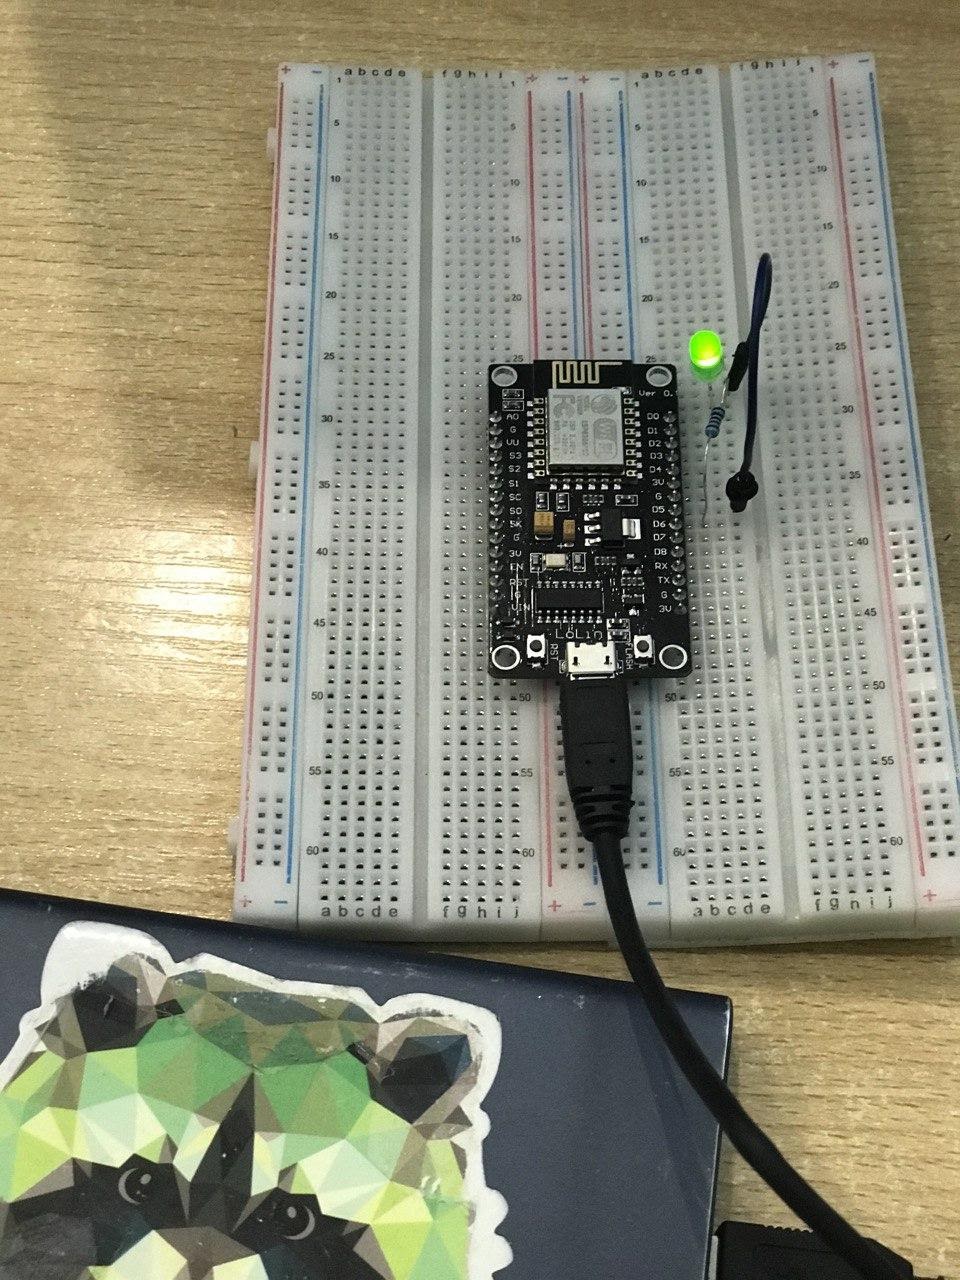
int led = D5;
void setup_wifi() {
delay(10);
// We start by connecting to a WiFi network
Serial.println();
Serial.print("Connecting to ");
Serial.println(ssid);
WiFi.begin(ssid, password);
while (WiFi.status() != WL_CONNECTED) {
delay(500);
Serial.print(".");
}
randomSeed(micros());
Serial.println("");
Serial.println("WiFi connected");
Serial.println("IP address: ");
Serial.println(WiFi.localIP());
}
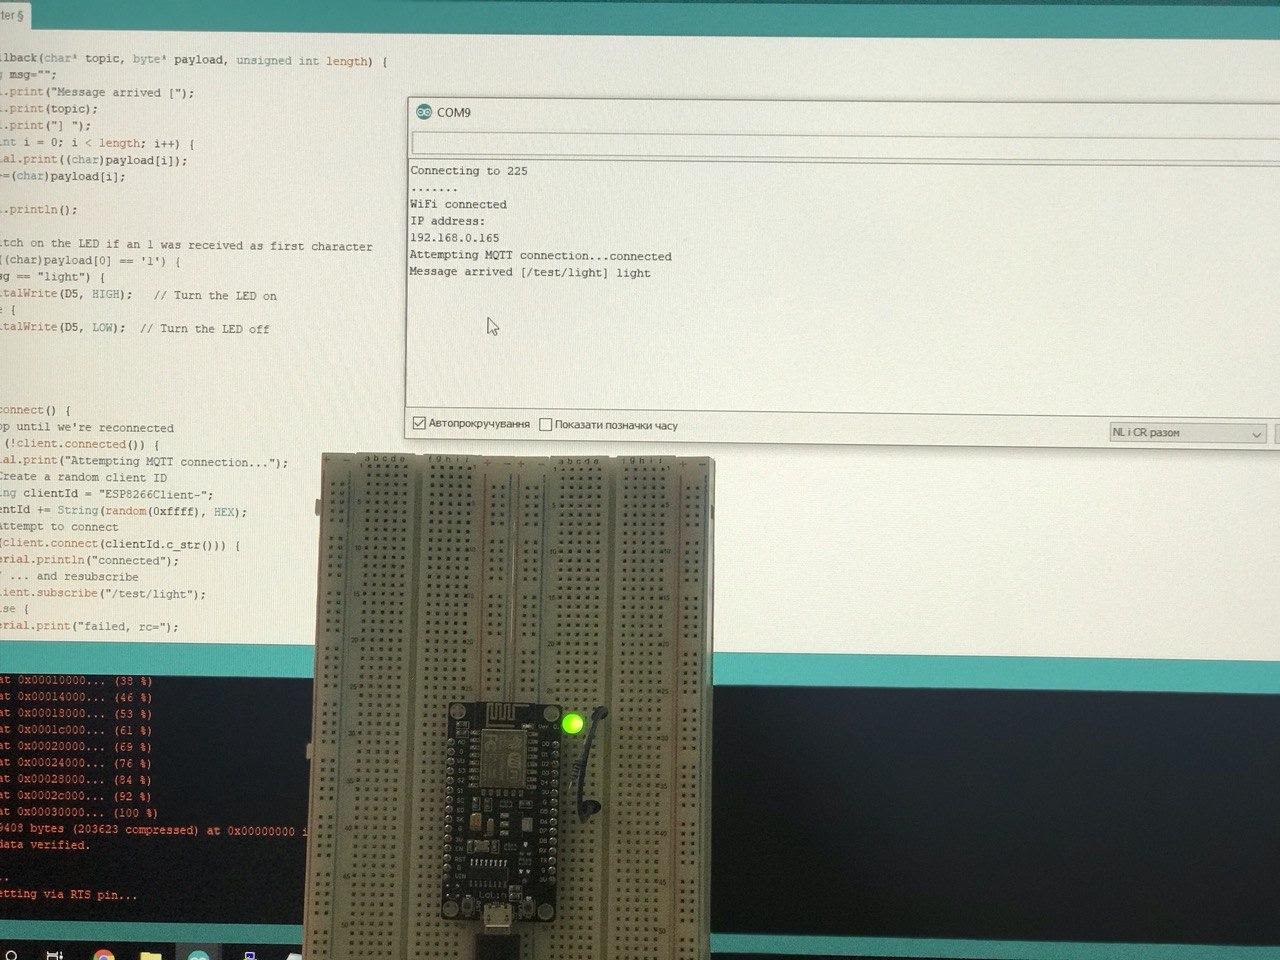
void callback(char* topic, byte* payload, unsigned int length) {
String msg="";
Serial.print("Message arrived [");
Serial.print(topic);
Serial.print("] ");
for (int i = 0; i < length; i++) {
Serial.print((char)payload[i]);
msg+=(char)payload[i];
}
Serial.println();
// Switch on the LED if an 1 was received as first character
// if ((char)payload[0] == '1') {
if (msg == "light") {
digitalWrite(led, HIGH); // Turn the LED on
} else {
digitalWrite(led, LOW); // Turn the LED off
}
}
void reconnect() {
// Loop until we're reconnected
while (!client.connected()) {
Serial.print("Attempting MQTT connection...");
// Create a random client ID
String clientId = "ESP8266Client-";
clientId += String(random(0xffff), HEX);
// Attempt to connect
if (client.connect(clientId.c_str())) {
Serial.println("connected");
// ... and resubscribe
client.subscribe("/test/light");
} else {
Serial.print("failed, rc=");
Serial.print(client.state());
Serial.println(" try again in 5 seconds");
// Wait 5 seconds before retrying
delay(5000);
}
}
}
void setup() {
pinMode(led, OUTPUT); // Initialize the led pin as an output
Serial.begin(115200);
setup_wifi();
client.setServer(mqtt_server, 1883);
client.setCallback(callback);
}
void loop() {
if (!client.connected()) {
reconnect();
}
client.loop();
}
Result
As a result, after compiling the sketch, we get an application that is integrated into the google assistant and manages the sensors. Instead of a smartphone, I used a web application, but tested on Android - the result is the same. The main thing is if you are testing from a smartphone do not forget to say: “Talk with the application ***”.