This article describes a simple LDAP setup for user authentication and authorization.1. Follow the link Oralce bi which opens the console (http: // address: port / console) using the administrator account (by default weblogic). Click on Security Realms -> myrealm 2. Go to the "Providers" tab. Here you will see the following three “Authentication Providers” by default.
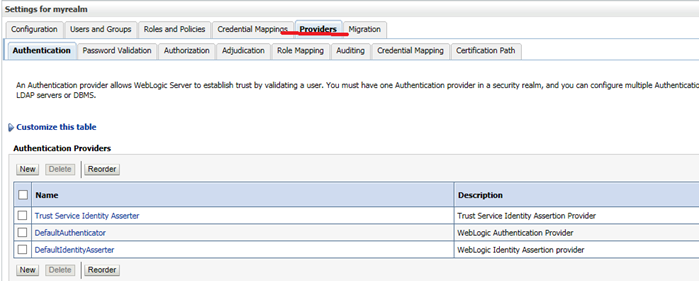 3. Click “DefaultAuthenticator”. Click “Lock and Edit” -> “Change Control Flag” from “Required” to Sufficient and then click “Save”.
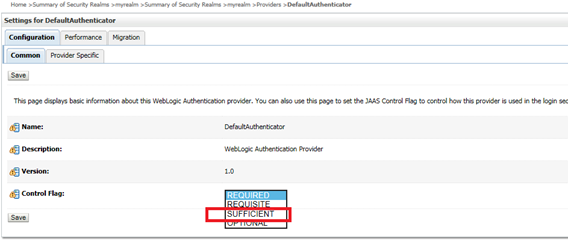 4. After the message about updating the settings appears, click “Activate Changes”.
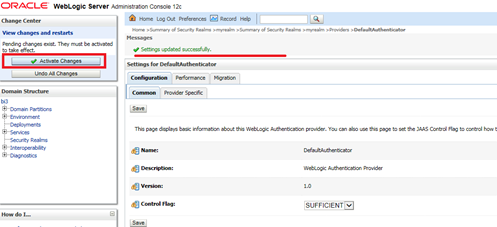 5. Go to the tab “Providers” -> “Lock and Edit” and click “New”.
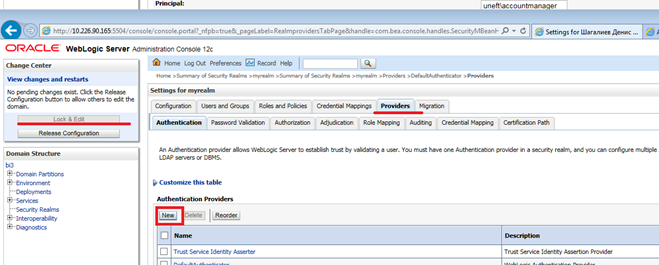 6. Name it for example “LDAP”. Select the type of Active Directory Authentication. Click OK.
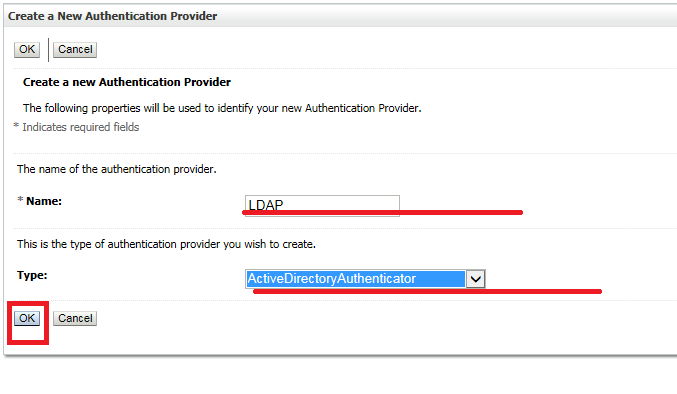 7. After that, open the LDAP provider again and change the control flag to “Sufficient”. Save it.
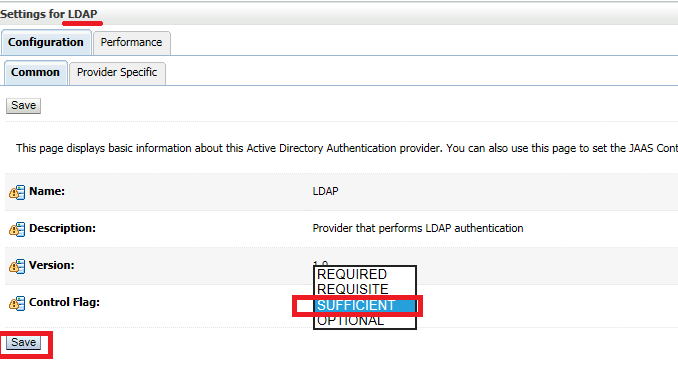 8. Enter data from your active directory on the Provider Specific tab.
Host: localhost
Port: 389
Principal: login
Credential: password
Users
User Base DN: dc=domen,dc=ru
All Users Filter: (&(sAMAccountName=*)(objectclass=user))
User From Name Filter: (&(sAMAccountName=%u)(objectclass=user))
User Search Scope: subtree
User Name Attribute: sAMAccountName
User Object class: user
Groups
Group Base DN: dc=domen,dc=ru
All Groups Filter: (&(CN=*)(objectclass=group))
Group From Name Filter: (&(CN=%g)(objectclass=group))
Group Search Scope: subtree
Group Membership Searching: unlimited
Max Group Membership Search Level: 10
General
Connect Timeout: 30
Connect Retry Limit: 1
Parallel Connect Delay: 0
Result Time Limit: 0
it will look something like this: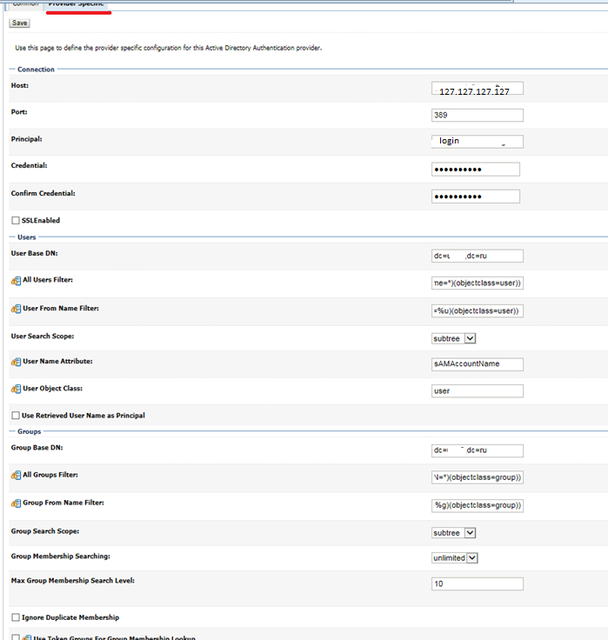 9. Click save and active changes
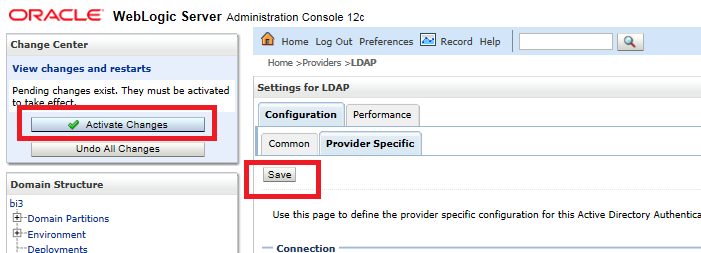 10. Restart the BI instance in this case, BI3(C: \ Oracle \ Middleware \ Oracle_Home \ user_projects \ domains \ bi3 \ bitools \ bin)
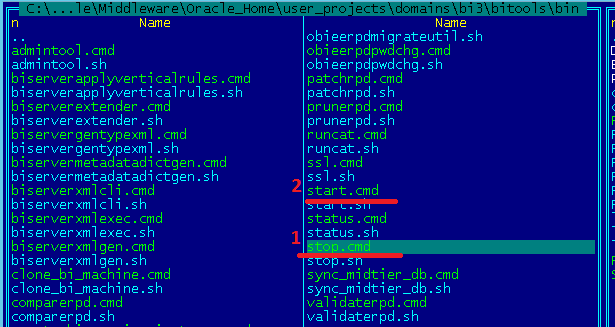 11. When the BI restarts, search for a specific user ID, returning to the weblogic console-> "mysecurityrealm" >> Users and Groups >> Group
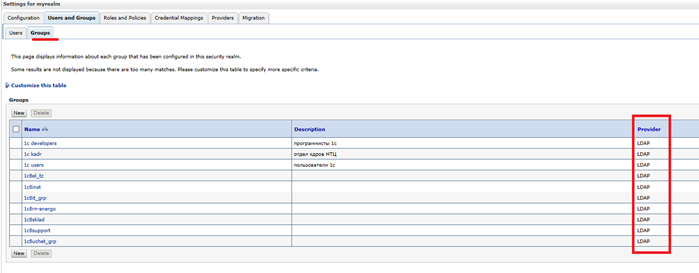 It can be seen that the groups are loaded.12. The next step is to configure OBIEE to see users from your new LDAP provider in addition to users of the weblog internal directory. To do this, you need to log in to Enterprise Manager (http: // address: port / em) with an administrator account (weblogic).After logging into the system from the Weblogic Domain drop-down menu, select Security -> Security Provider Configuration
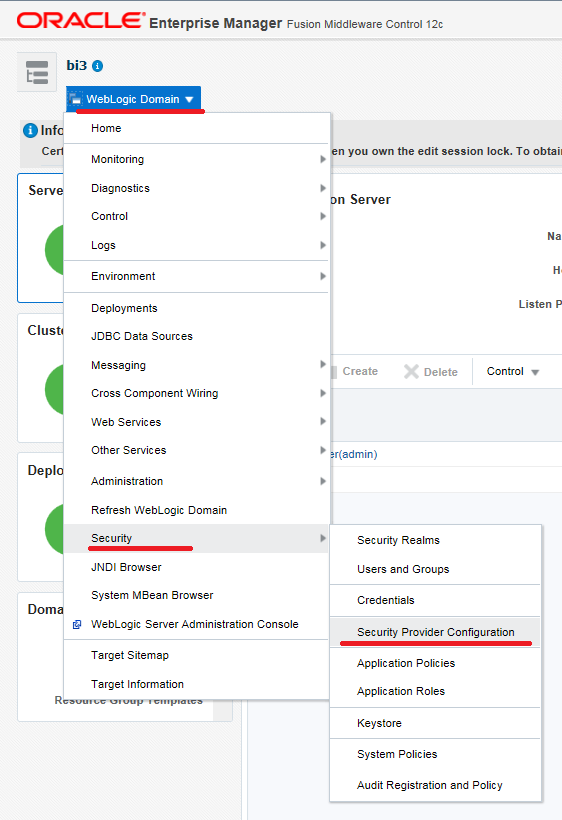 13. On the Security Provider Configuration screen, expand the Security Store Provider, then expand the Identity Store Provider node, and finally click “Configure”
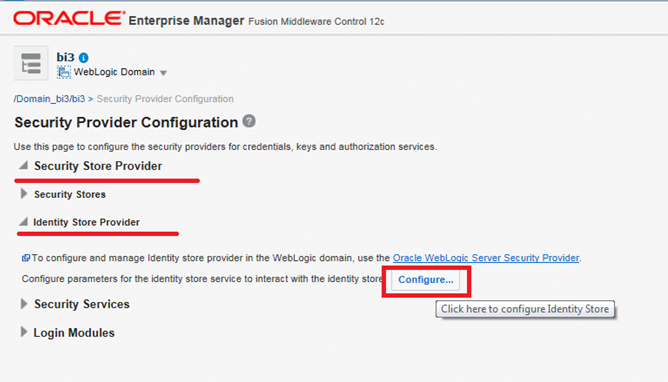 14. On this screen we need to add a new custom property. Click the + add button.
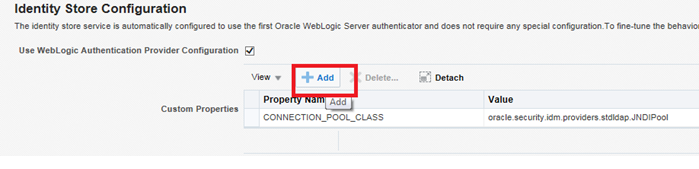 15. Then enter the property name “virtualize” and value “true”. Then click “OK” again to save:
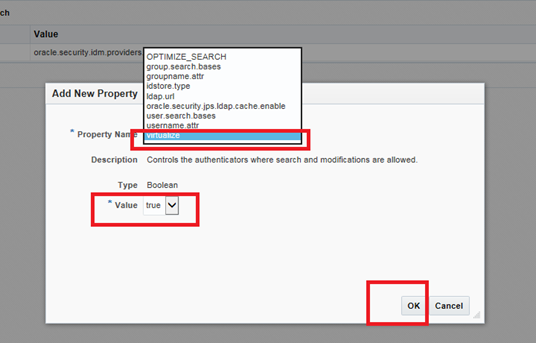 16. Click OK again.
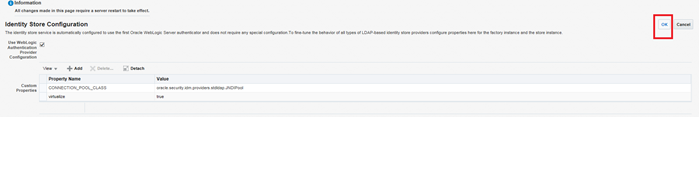 17. Similarly, add another property OPTIMIZE_SEARCH = true.
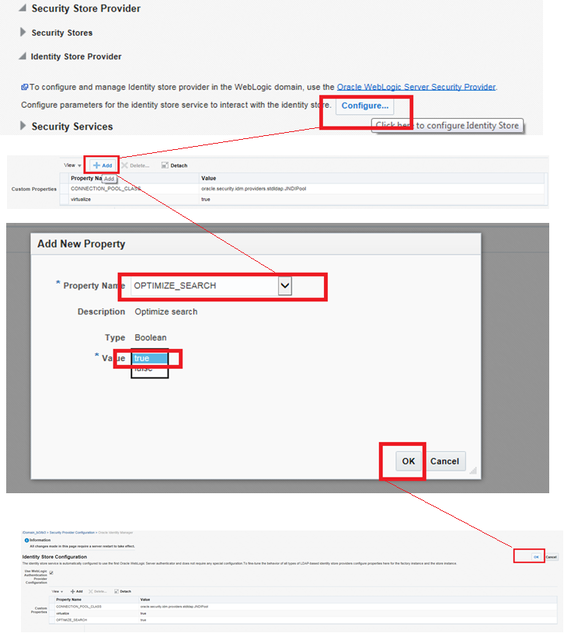 18. Restart the BI instance in this case, BI3(C: \ Oracle \ Middleware \ Oracle_Home \ user_projects \ domains \ bi3 \ bitools \ bin)19. Try logging in with your account.