Recently, I began to study the programming of the Arduino microcontroller. After I completed some basic exercises (blinking LEDs, working with discrete and analog inputs, displaying information on an LCD display, etc.), I wanted to make some sort of useful device for the home.I decided to make a temperature and humidity meter in the room, with an indication of the parameters on the LCD. I also made an adaptive display backlight, which changes the brightness depending on the level of illumination in the room. This allows you to reduce the power consumption of the device, and thereby increase the battery life.In the project, I used the following components:1. Arduino Uno board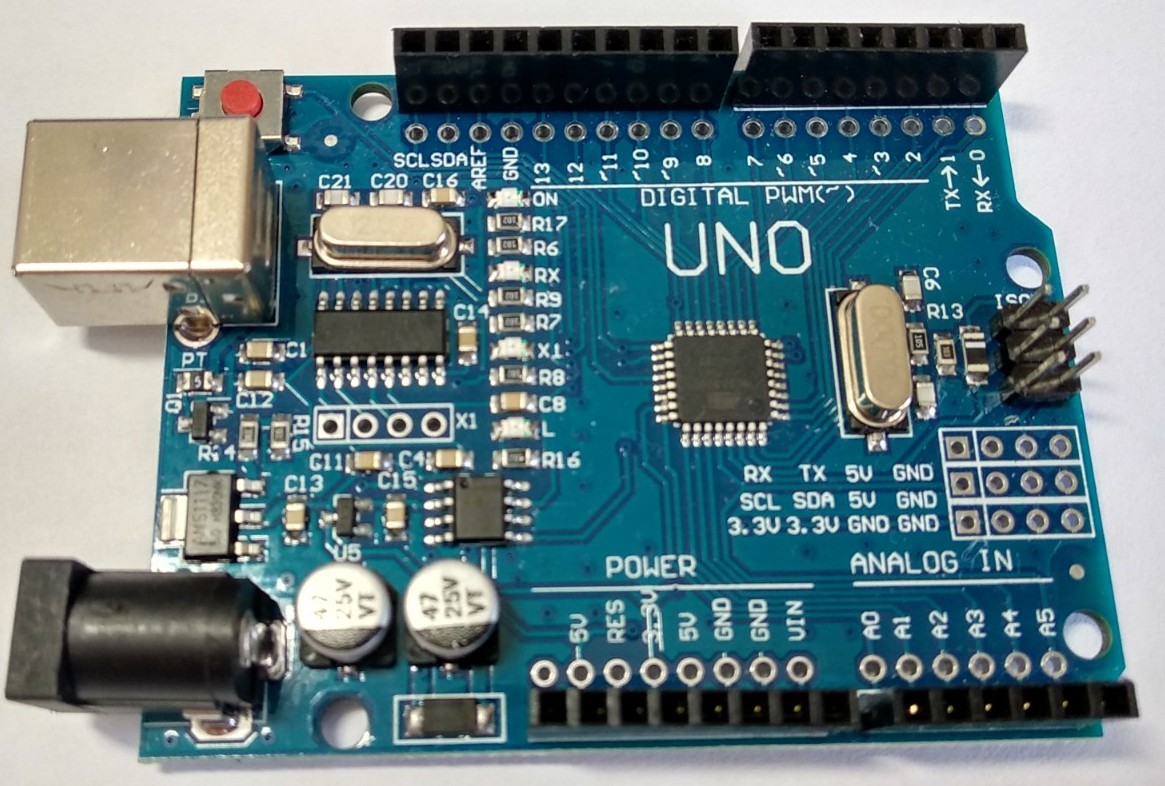 2. LCD1602 display with I2C protocol support module. In order to reduce the number of wires and simplify the connection of the display, I decided to connect it via the I2C protocol, for this I soldered a special converter module to the LCD display.
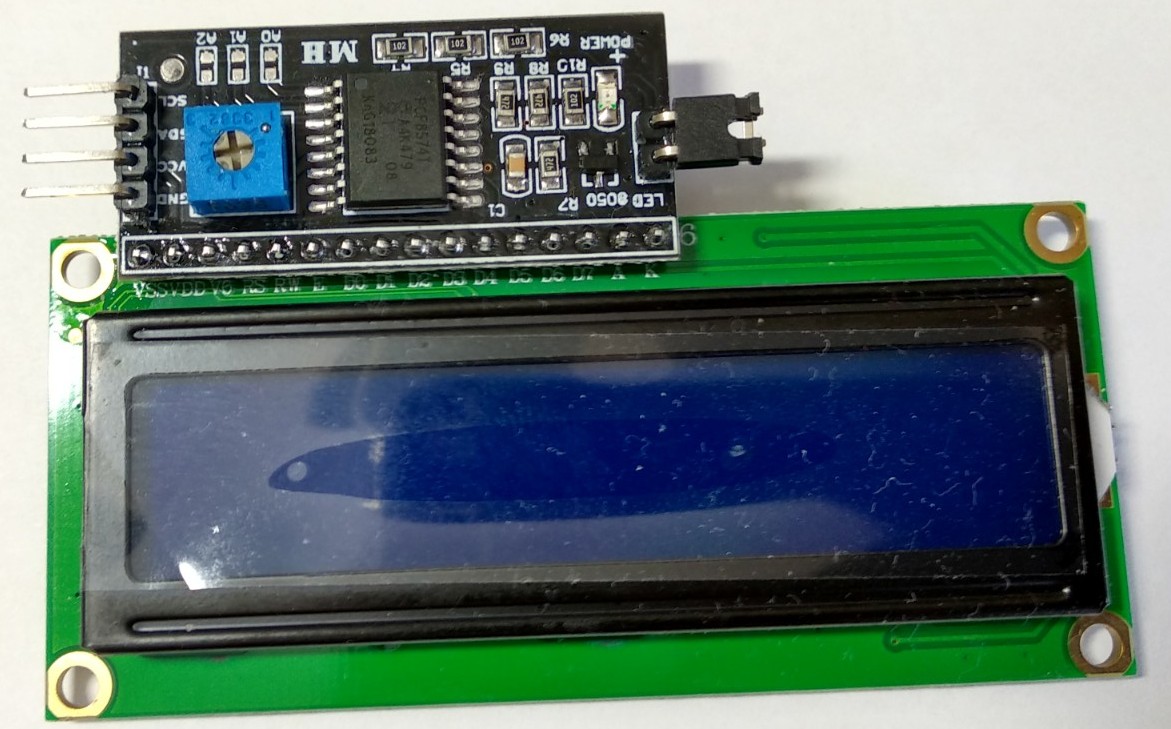 "3. Temperature and humidity sensor DHT11. It allows you to determine humidity from 20-80% and temperature from 0-50˚C. The sensor has 4 outputs, but only 3 is used. A 10k ohm resistor must be installed between the power output and the data output. I I used a ready-made sensor mounted on the board with a resistor connected, so you can safely connect it to the Arduino board.
 "4. Photoresistor. It is connected to the Arduino board with a pull-up to GND, through a 10kΩ resistor.
 The connection diagram is as follows: The
 photoresistor is connected to the analog input A0 of the Arduino board. The DHT11 sensor data line is connected to discrete pin 2, the power pin is connected to + 5V Arduino, respectively, the GND pin is connected in the ground of the Arduino board. The LCD display is connected to the board power, the SDA pin is connected to A4, the SCL pin is to A5. The backlight brightness control line is connected to pin 9, on which the PWM signal is generated.Below is the source code:
#include "DHT.h"
#include "Wire.h"
#include "LiquidCrystal_I2C.h"
int LD;
#define DHTPIN 2
#define LED 9
#define FOTO 0
DHT dht(DHTPIN, DHT11);
LiquidCrystal_I2C lcd(0x27,16,2);
void setup() {
pinMode(LED, OUTPUT);
dht.begin();
lcd.init();
lcd.backlight();
}
int light(int svet)
{
if (svet<25)
{
return 255;
}
if(svet>1020)
{
return 2;
}
else
{
int L=(int)(-0.2*svet+261.262);
return L;
}
}
void loop() {
int f = analogRead(FOTO);
LD=light(f);
delay(2000);
analogWrite(LED, LD);
float h=dht.readHumidity();
float t=dht.readTemperature();
lcd.setCursor(0,0);
lcd.print("Temp ");
lcd.print(t);
lcd.setCursor(0,1);
lcd.print("Hum ");
lcd.print(h);
}
Having compiled this code, we get such a working device: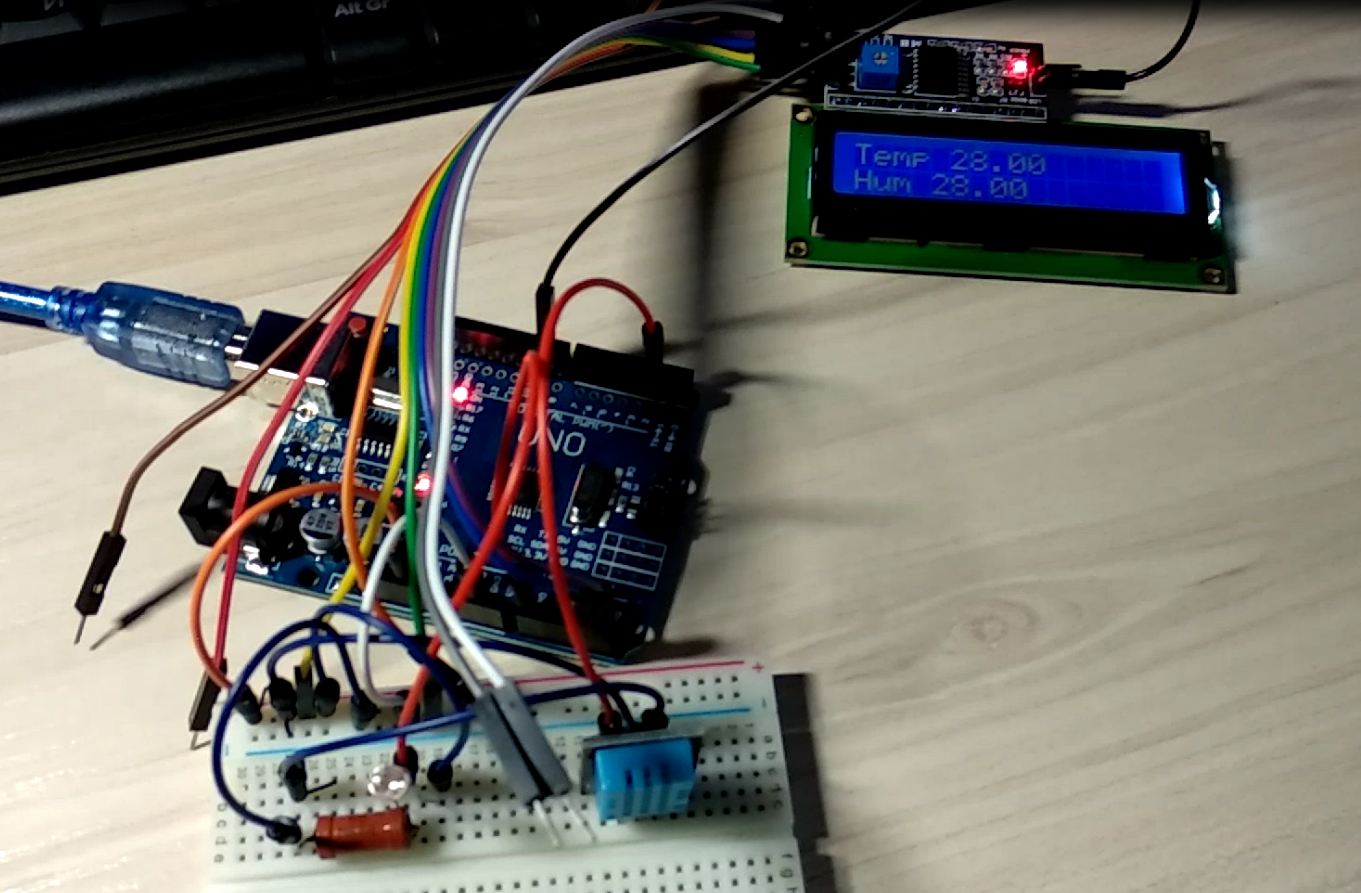 In the future I plan to make some more interesting and more complex devices on Arduino.I also made a video where I showed how the device works: