This article was written in order to expand an existing one , but talks about the features of the bundle with Microsoft ActiveDirectory, as well as complements it.In this article I will tell you how to install and configure:- Keycloak is an open source project. Which provides a single entry point for applications. It works with many protocols, including the LDAP and OpenID that interest us.
- Keycloak gatekeeper - reverse proxy application that allows you to integrate authorization through Keycloak.
- Gangway - the application that generates a config for kubectl with which you can log in and connect to the Kubernetes API via OpenID
How rights work in Kubernetes.
We can manage user / group rights using RBAC, a lot of articles have already been created about this, I will not dwell on this in detail. The problem is that you can use RBAC to restrict user rights, but Kubernetes doesn't know anything about users. It turns out that you need a user delivery mechanism in Kubernetes. To do this, we will add an OpenID provider to Kuberntes, which will say that such a user really exists, and Kubernetes itself will give rights to it.Training- You will need a Kubernetes cluster or minikube
- Active Directory
- Domains:
keycloak.example.org
kubernetes-dashboard.example.org
gangway.example.org - Certificate for domains or self-signed certificate
I will not dwell on how to create a self-signed certificate, you need to create 2 certificates, this is the root (Certificate Authority) and wildcard client for the * .example.org domainAfter you receive / write the certificates, the client must be added to Kubernetes, for this create a secret for it:kubectl create secret tls tls-keycloak --cert=example.org.crt --key=example.org.pem
Next we will use it for our Ingress controllerInstall Keycloak
I decided that the easiest way to use ready-made solutions for this, namely helm chart-s.Install the repository and update it:helm repo add codecentric https://codecentric.imtqy.com/helm-charts
helm repo update
Create the keycloak.yml file with the following contents:keycloak.ymlkeycloak:
#
username: "test_admin"
#
password: "admin"
# Keycloak web .
, .
extraArgs: "-Dkeycloak.profile.feature.script=enabled -Dkeycloak.profile.feature.upload_scripts=enabled"
# ingress, secrets
ingress:
enabled: true
path: /
annotations:
kubernetes.io/ingress.class: nginx
ingress.kubernetes.io/affinity: cookie
hosts:
- keycloak.example.org
tls:
- hosts:
- keycloak.example.org
secretName: tls-keycloak
# Keycloak , Postgresql Kuberntes, !
persistence:
deployPostgres: true
dbVendor: postgres
postgresql:
postgresUser: keycloak
postgresPassword: ""
postgresDatabase: keycloak
persistence:
enabled: true
Federation setup
Next, go to the web interface keycloak.example.orgIn the left corner, click Add realmDisable verification of user email confirmation:Client scopes -> Email -> Mappers -> Email verified (Delete) Weconfigure the federation for importing users from ActiveDirectory, I will leave screenshots below, I think it will be more clear.User federation -> Add provider ... -> ldapIf all is well, then after clicking the Synchronize all users button, you will receive a message about the successful import of users.Next, we need to map our groupsUser federation -> ldap_localhost -> Mappers -> CreateClient setup
It is necessary to create a client, in terms of Keycloak is an application that will be authorized by him. I will highlight the important points in the screenshot in red.Clients -> CreateCreate a scoupe for groups:Client Scopes -> CreateAnd configure mapper for them:Client Scopes -> groups -> Mappers -> CreateAdd the mapping of our groups to Default Client Scopes:Clients -> kubernetes -> Client Scopes -> Default Client ScopesSelect groups in Available Client Scopes , click Add selectedWe get a secret (and write it to the thread) that we will use for authorization in Keycloak:Clients -> kubernetes -> Credentials -> SecretThis is the end of the setup, but I got an error when after a successful authorization I got an error 403. Bug report .Fix:Client Scopes -> roles -> Mappers -> CreateScript code
token.addAudience(token.getIssuedFor());
token.getIssuer();
Configure Kubernetes
We need to indicate where our root certificate from the site lies, and where the OIDC provider is located.To do this, edit the file /etc/kubernetes/manifests/kube-apiserver.yamlkube-apiserver.yaml
...
spec:
  containers:
  - command:
    - kube-apiserver
...
    - --oidc-ca-file=/var/lib/minikube/certs/My_Root.crt
    - --oidc-client-id=kubernetes
    - --oidc-groups-claim=groups
    - --oidc-issuer-url=https://keycloak.example.org/auth/realms/kubernetes
    - --oidc-username-claim=email
...
Update kubeadm config in the cluster:kubeadm configkubectl edit -n kube-system configmaps kubeadm-config
...
data:
  ClusterConfiguration: |
    apiServer:
      extraArgs:
        oidc-ca-file: /var/lib/minikube/certs/My_Root.crt
        oidc-client-id: kubernetes
        oidc-groups-claim: groups
        oidc-issuer-url: https://keycloak.example.org/auth/realms/kubernetes
        oidc-username-claim: email
...
Configure auth-proxy
You can use keycloak gatekeeper to protect your web application. In addition to the fact that this reverse proxy will authorize the user before showing the page, so it will also transmit information about you in the headers to the final application. Thus, if your application supports OpenID, then the user immediately logs in. Let's look at the example of Kubernetes DashboardInstall Kubernetes Dashboard
helm install stable/kubernetes-dashboard --name dashboard -f values_dashboard.yaml
values_dashboard.yamlenableInsecureLogin: true
service:
externalPort: 80
rbac:
clusterAdminRole: true
create: true
serviceAccount:
create: true
name: 'dashboard-test'
Setting permissions:
Create a ClusterRoleBinding that will give cluster admin rights (standard ClusterRole cluster-admin) for users in the DataOPS group.
kubectl apply -f rbac.yaml
rbac.yaml
apiVersion: rbac.authorization.k8s.io/v1
kind: ClusterRoleBinding
metadata:
  name: dataops_group
roleRef:
  apiGroup: rbac.authorization.k8s.io
  kind: ClusterRole
  name: cluster-admin
subjects:
- apiGroup: rbac.authorization.k8s.io
  kind: Group
  name: DataOPS
Install keycloak gatekeeper:
helm repo add gabibbo97 https://gabibbo97.imtqy.com/charts/
helm repo update
helm install gabibbo97/keycloak-gatekeeper --version 2.1.0 --name keycloak-gatekeeper -f values_proxy.yaml
values_proxy.yaml
ingress:
enabled: true
annotations:
kubernetes.io/ingress.class: nginx
path: /
hosts:
- kubernetes-dashboard.example.org
tls:
- secretName: tls-keycloak
hosts:
- kubernetes-dashboard.example.org
discoveryURL: "https://keycloak.example.org/auth/realms/kubernetes"
ClientID: "kubernetes"
ClientSecret: "c6ec03b8-d0b8-4cb6-97a0-03becba1d727"
upstreamURL: "http://dashboard-kubernetes-dashboard.default.svc.cluster.local"
skipOpenidProviderTlsVerify: true
rules:
- "uri=/*|groups=DataOPS"
After that, when you try to go to kubernetes-dashboard.example.org , you will be redirected to Keycloak and, if authorization is successful, we will already be logged into Dashboard.Gangway installation
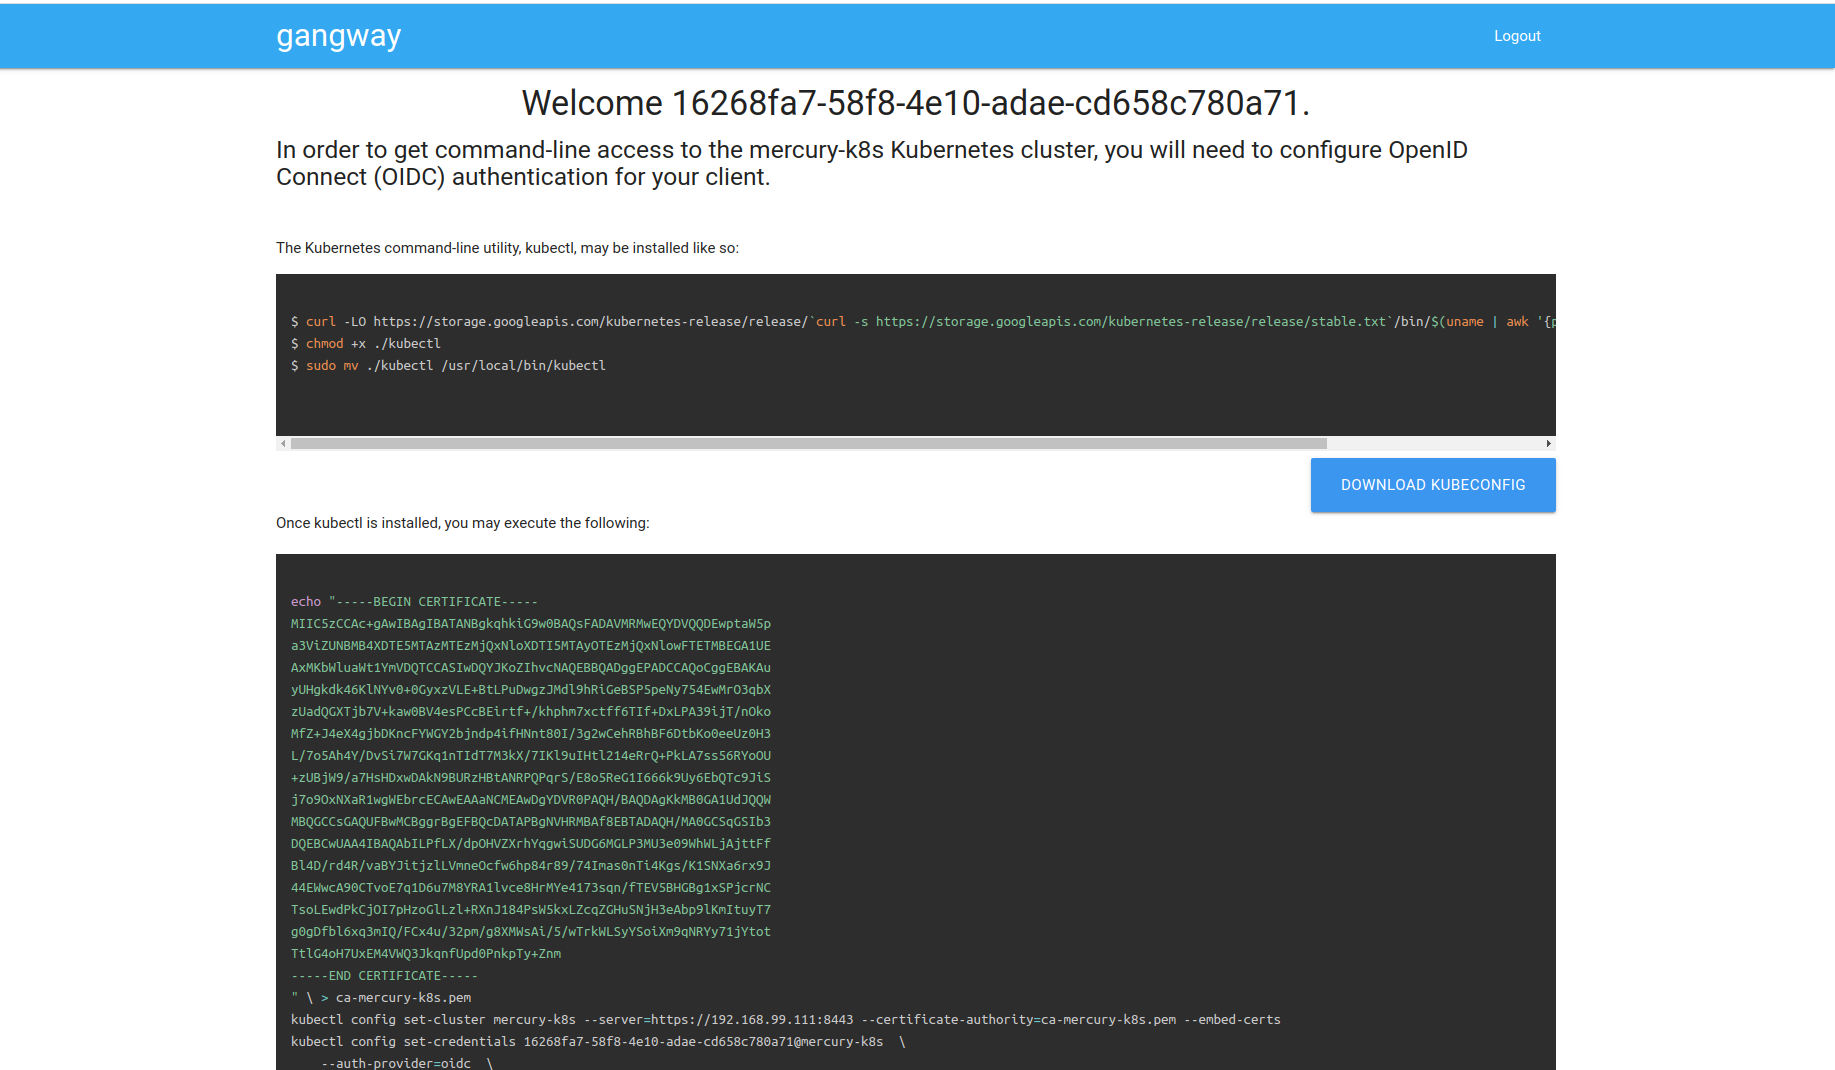
For convenience, you can add gangway which will generate a config file for kubectl, with which we will already get into Kubernetes under our user.
helm install --name gangway stable/gangway -f values_gangway.yaml
values_gangway.yaml
gangway:
clusterName: "my-k8s"
authorizeURL: "https://keycloak.example.org/auth/realms/kubernetes/protocol/openid-connect/auth"
tokenURL: "https://keycloak.example.org/auth/realms/kubernetes/protocol/openid-connect/token"
audience: "https://keycloak.example.org/auth/realms/kubernetes/protocol/openid-connect/userinfo"
scopes: ["openid", "profile", "email", "offline_access"]
redirectURL: "https://gangway.example.org/callback"
clientID: "kubernetes"
clientSecret: "c6ec03b8-d0b8-4cb6-97a0-03becba1d727"
usernameClaim: "sub"
apiServerURL: "https://192.168.99.111:8443"
ingress:
enabled: true
annotations:
kubernetes.io/ingress.class: nginx
nginx.ingress.kubernetes.io/proxy-buffer-size: "64k"
path: /
hosts:
- gangway.example.org
tls:
- secretName: tls-keycloak
hosts:
- gangway.example.org
trustedCACert: |-
-----BEGIN CERTIFICATE-----
MIIDVzCCAj+gAwIBAgIBATANBgkqhkiG9w0BAQsFADA1MQswCQYDVQQGEwJVUzEQMA4GA1UEChMHRGF0YU9QUzEUMBIGA1UEAxMLbXkgcm9vdCBrZXkwHhcNMjAwMjE0MDkxODAwWhcNMzAwMjE0MDkxODAwWjA1MQswCQYDVQQGEwJVUzEQMA4GA1UEChMHRGF0YU9QUzEUMBIGA1UEAxMLbXkgcm9vdCBrZXkwggEiMA0GCSqGSIb3DQEBAQUAA4IBDwAwggEKAoIBAQDyP749PqqIRwNSqaK6qr0Zsi03G4PTCUlgaYTPZuMrwUVPK8xX2dWWs9MPRMOdXpgr8aSTZnVfmelIlVz4D7o2vK5rfmAe9GPcK0WbwKwXyhFU0flS9sU/g46ogHFrk03SZxQAeJhMLfEmAJm8LF5HghtGDs3t4uwGsB95o+lqPLiBvxRB8ZS3jSpYpvPgXAuZWKdZUQ3UUZf0X3hGLp7uIcIwJ7i4MduOGaQEO4cePeEJy9aDAO6qV78YmHbyh9kaW+1DL/Sgq8NmTgHGV6UOnAPKHTnMKXl6KkyUz8uLBGIdVhPxrlzG1EzXresJbJenSZ+FZqm3oLqZbw54Yp5hAgMBAAGjcjBwMA8GA1UdEwEB/wQFMAMBAf8wHQYDVR0OBBYEFHISTOU/6BQqqnOZj+1xJfxpjiG0MAsGA1UdDwQEAwIBBjARBglghkgBhvhCAQEEBAMCAAcwHgYJYIZIAYb4QgENBBEWD3hjYSBjZXJ0aWZpY2F0ZTANBgkqhkiG9w0BAQsFAAOCAQEAj7HC8ObibwOLT4ZYmISJZwub9lcE0AZ5cWkPW39j/syhdbbqjK/6jy2D3WUEbR+s1Vson5Ov7JhN5In2yfZ/ByDvBnoj7CP8Q/ZMjTJgwN7j0rgmEb3CTZvnDPAz8Ijw3FP0cjxfoZ1Z0V2F44Ry7gtLJWr06+MztXVyto3aIz1/XbMQnXYlzc3c3B5yUQIy44Ce5aLRVsAjmXNqVRmDJ2QPNLicvrhnUJsO0zFWI+zZ2hc4Ge1RotCrjfOc9hQY63jZJ17myCZ6QCD7yzMzAob4vrgmkD4q7tpGrhPY/gDcE+lUNhC7DO3l0oPy2wsnT2TEn87eyWmDiTFG9zWDew==
-----END CERTIFICATE-----
It looks something like this. Allows you to immediately download the config file and create it using a set of commands: