Opening ports 4321 and 9898 on Xiaomi Gateway 2
Introduction
Resting on New Year's holidays, I got excited about the idea of creating a “Smart Home”. Among the "popular" ecosystems, the most popular due to the cheapness and abundance of all kinds of connected devices seemed to me a solution from Xiaomi. Immediately abandoning the management of my house through Chinese servers (possible delays, security and binding to devices of the same manufacturer), I began to study all kinds of smart home control systems and select compatible equipment for them.After hours of searching, I decided that the Home Assistant is right for me. I decided to build everything at the initial stage using the Raspberry Pi 4 Model B (2GB) and sensors from Xiaomi. Having bought a gateway (you need a version with the article number DGNWG02LM) and turning on the LAN communication protocol, I was faced with the fact that ports 4321 and 9898, which are necessary for integration into the Home Assistant, still remained closed.You could verify this through Nmap using the command nmap -sU -Pn <Gateway IP> -p 9898,4321,54321 : In this article I will describe how to open these ports and what it will take.
Training
I'm not sure that you can post links to specific stores, so I’ll only indicate the prices at which I bought everything I needed in Moscow. We will need:- U6 screwdriver head (aka SP6) - 36 rubles
- USB-to-TTL converter based on CH340 - 84 rubles
- Connecting cable mom-dad - you need at least 3 pieces, but I took a set of 40 pieces for 110 rubles
- Soldering iron - I had :)
Getting to the fun part
You carry out all further actions at your own risk. Opening the gateway will void your warranty.The first step is to remove the three rubber pads that cover the screws. The pads are not glued, just pry them with something thin: I used a knife. Under one of the pads there will be a warranty seal. This is the point of no return .Unscrewing the screws, gently open the gateway. In its upper part there is a speaker connected by wires to the board on the lower part. We disconnect the wires so that nothing interferes.
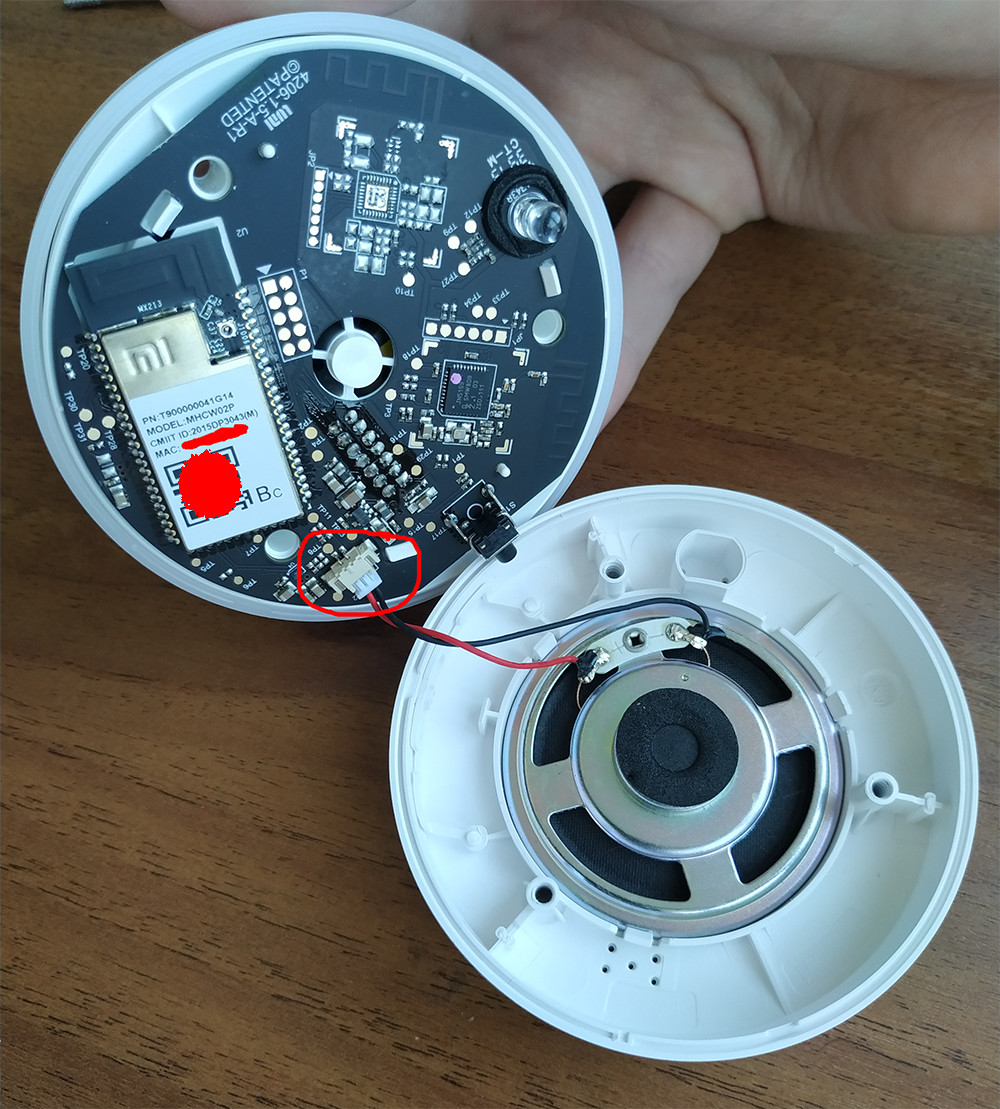 You need to solder three cables to the gateway board. With two points everything is clear, the third is on the side of the button. Places are indicated in the picture:
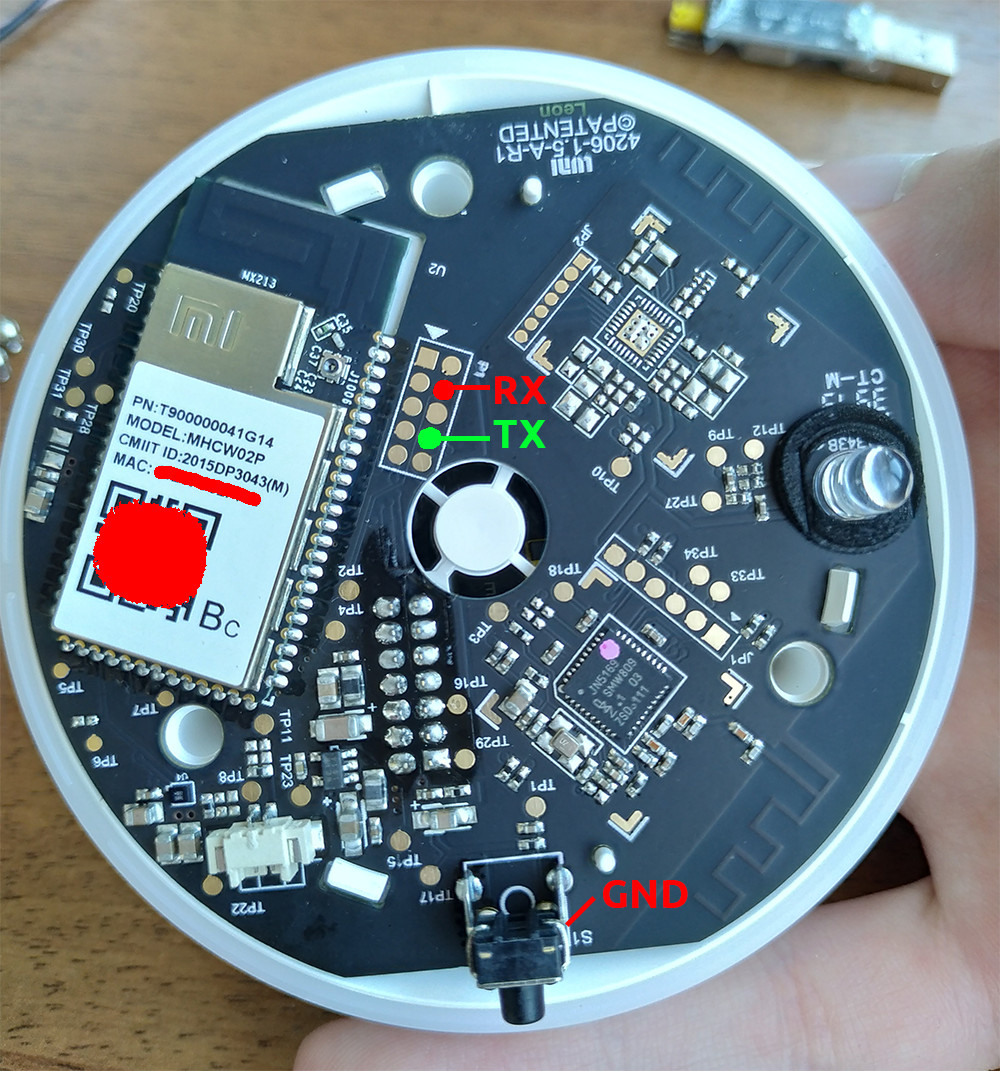 We get something like this:
 The next step is to configure the connection for the converter. We remove the jumpers from the converter (when I bought it, it stood on VCC and 3V3), we connect it to the USB 2.0 port .On Windows 10, the drivers loaded themselves, a connection on the COM3 port appeared in the device manager (remember it, it will come in handy later).
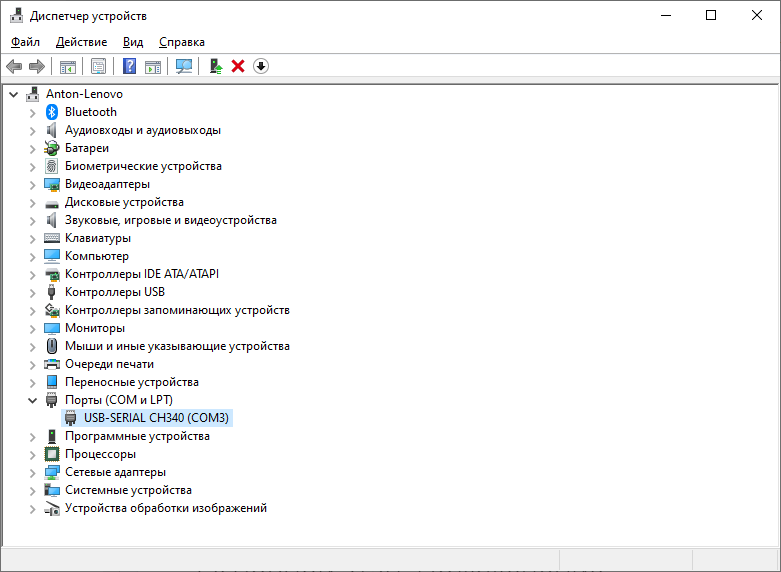 In the properties of our device, go to the "Port Settings" tab and change the values:
- "Bit per second" at 115200
- "Flow Control" to No
Just in case, you can check the screenshot: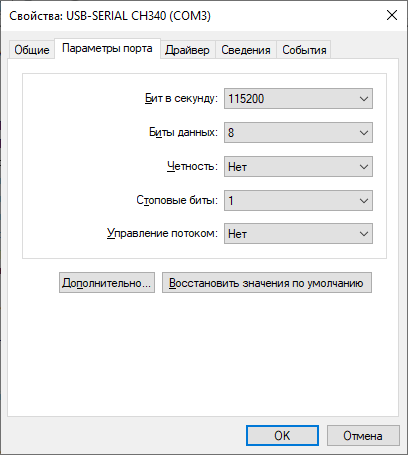 With the configuration of the converter we are done, we pull it out of the USB port. We proceed to the connection of the gateway: we connect its TX to the RX converter, and GND to GND . We do not connect the RX gateway yet .Plug the gateway into a power outlet. If everything is done correctly, it will start flashing blue. We wait for the full download (blinking will stop) and connect the converter to the same USB port as at the setup stage.Run PuTTY as administrator. In the "Session" section, change the "Connection type" to Serial . In the fields "Serial line" and“Speed” indicate the port that we remembered earlier (in my case - COM3), and 115200 :
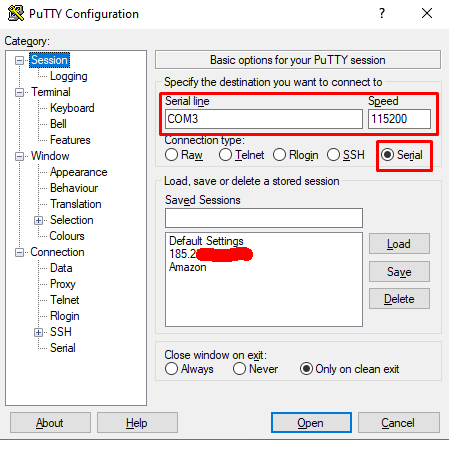 In the “Serial” section, check that our COM port is specified, “Speed (baud)” - 115200 and “Flow control” - none .
 We return to the "Session" section and connect to the gateway. If everything was done correctly, readable text will appear in the console. It looked like this for me:
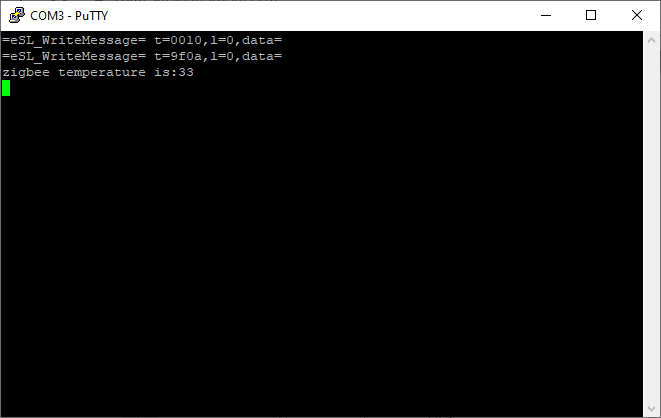 Next, you need to connect the RX gateway to the TX converter. There should be no errors in the console. Readable text continued to appear, this time in JSON format.Enter the psm-set network.open_pf 3 commandand press Enter.In some videos and articles that I followed, it is written that some answer should appear in the console. After entering the command, I waited about a minute, but there was no answer. In the console, only occasionally flashed new entries. Therefore, just in case, I tried three other options for the command:
- psm-get network open_pf 3 (space instead of period )
- # psm-get network.open_pf 3 (after any entry in the console, press Enter, so that # appears, and write the command)
- # psm-get network open_pf 3 (analogous to the previous one, but with a space)
After four attempts to answer, I did not wait and decided to check if the ports were open. To do this, turn off the converter and reboot the gateway by pulling it out of the socket. Without connecting the converter to the computer, turn on the gateway and wait for the download. After that, use the nmap command -sU -Pn <Gateway IP> -p 9898,4321,54321 to check the ports. In my case, they were open!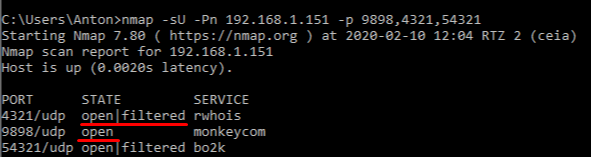
Source: https://habr.com/ru/post/undefined/
All Articles