 The final result is a key the size of a USB flash drive.Widespread encryption and, as a result, an abundance of keys makes you think about their reliable storage. Storing keys on external devices, from where they cannot be copied, has long been considered good practice. I will talk about how to make such a device for $ 3 and 2 hours.
What does the picture mean?. . : « — , … , ...». , , )
Briefly about the principles of work
Cryptography gives us the opportunity to hide what we want to send, to make sure that we communicate with the one with whom we think and many other interesting things. Usually, in order for all this to work well, they ask us only one thing - to keep our encryption keys secret . Sounds easy, doesn't it? Well, let's see how we can hide our keys:- Save to a file on your desktop is an old and proven way to record something over the years. The problem is that in addition to the user himself, a bunch of other programs have access to files on your desktop. And if you are absolutely sure that they all do what they are intended for, do not collect any data about you and simply do not merge them into the network - this article is not for you.
- — - , . , , , - -
- — , . , . , . , ( ssh-) .
As you can see, the main problem is that the keys are either directly stored on your computer or entered there using a keyboard, flash drive, etc. But, you object, how then will my computer encrypt data if it does not know the key? The correct answer is no way. The solution has long been invented. The main idea is to connect a special device to the computer, which will itself encrypt the data. And the computer will only send data and receive the result. So, for example, many smart cards work.
Required Components
So let's get started. We will assemble our device on an inexpensive and fairly popular microcontroller of the STM32 series. Of course, you can make a printed circuit board yourself, but we want to manage in 2 hours? So let's take a ready-made solution - the ST-Link v2 programmer. This device looks like this.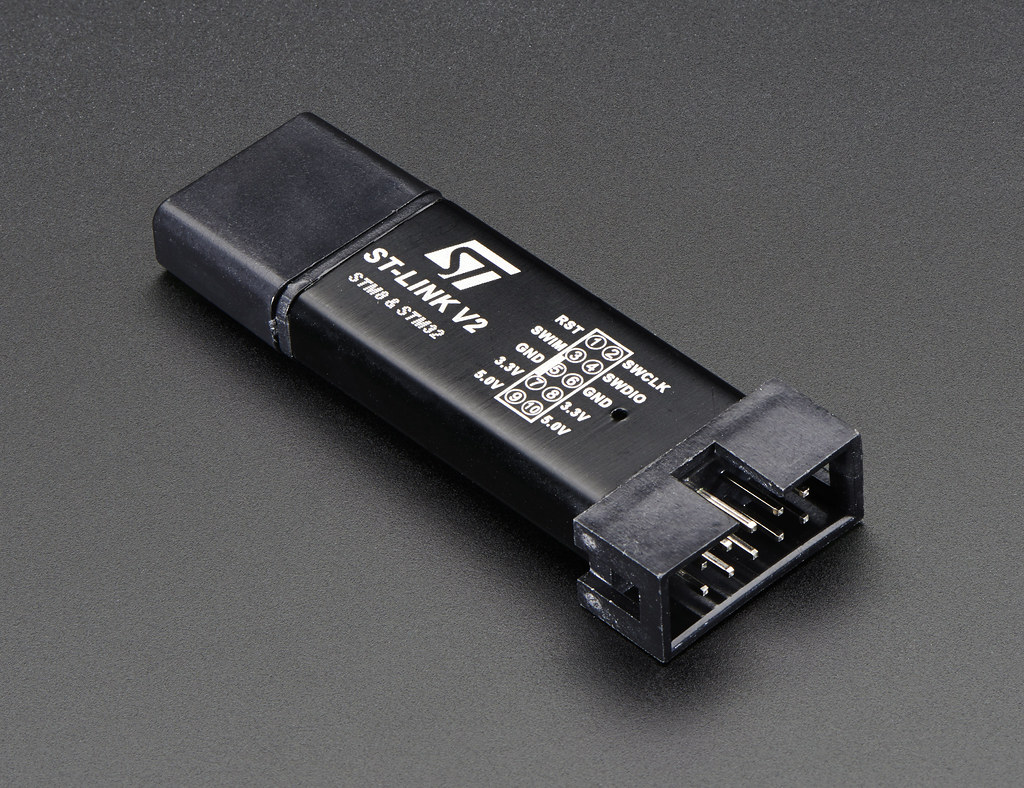 Oddly enough, the programmer for STM32 microcontrollers is assembled on the STM32 microcontroller. This device looks very much like a flash drive, which is just what we can do. Moreover, its body is made of aluminum, so you can not worry that it will be damaged. It costs a miracle for aliexpress 1.5-3 dollars. We will need two of these things. We will remake one of them on a turn-key basis, and we will use the second to upload firmware to the first. If you already have an STM32 programmer, you can do one thing.Total, we need:
- Programmer ST-Link v2 - 2 pieces
- Soldering iron
- Few wires - as a rule suitable wires are already included with ST-Link
- Linux, in order to compile and upload firmware
Compile the firmware
So, let's start with the software part - assembling the firmware for our key. Firmware source codes can be found in this repository . I would suggest downloading the latest stable version (you can find it in the tags tab). You can clone the repository or download as a zip archive. Kneading fingers, launch the terminal and go to the project folder. Go to the src folder$ cd src
In order to compile and download the firmware, we need to install several packages:- arm-none-eabi-gcc
- arm-none-eabi-newlib
- openocd
I use the pacman package manager, in my case it looks like this
$ sudo pacman -S arm-none-eabi-gcc
$ sudo pacman -S arm-none-eabi-newlib
$ sudo pacman -S openocd
If you are sitting on Ubuntu - use apt.Let me remind you that we are in the src folder of the project.Run configure script
$ ./configure --vidpid=234b:0000
We run the make utility and observe how our firmware is compiled.$ make
After compilation, the build folder appears, and in it the gnuk.elf file - we need it.Download firmware to device
Now that we have the finished file with the firmware, we only need to download it to the device. For this, we have to work a little with a soldering iron. Don’t worry, you don’t need any special skills, just solder 4 wires.So, we take one of the programmers and pull off the case from it. The selected programmer will be our donor. Here's what we find inside.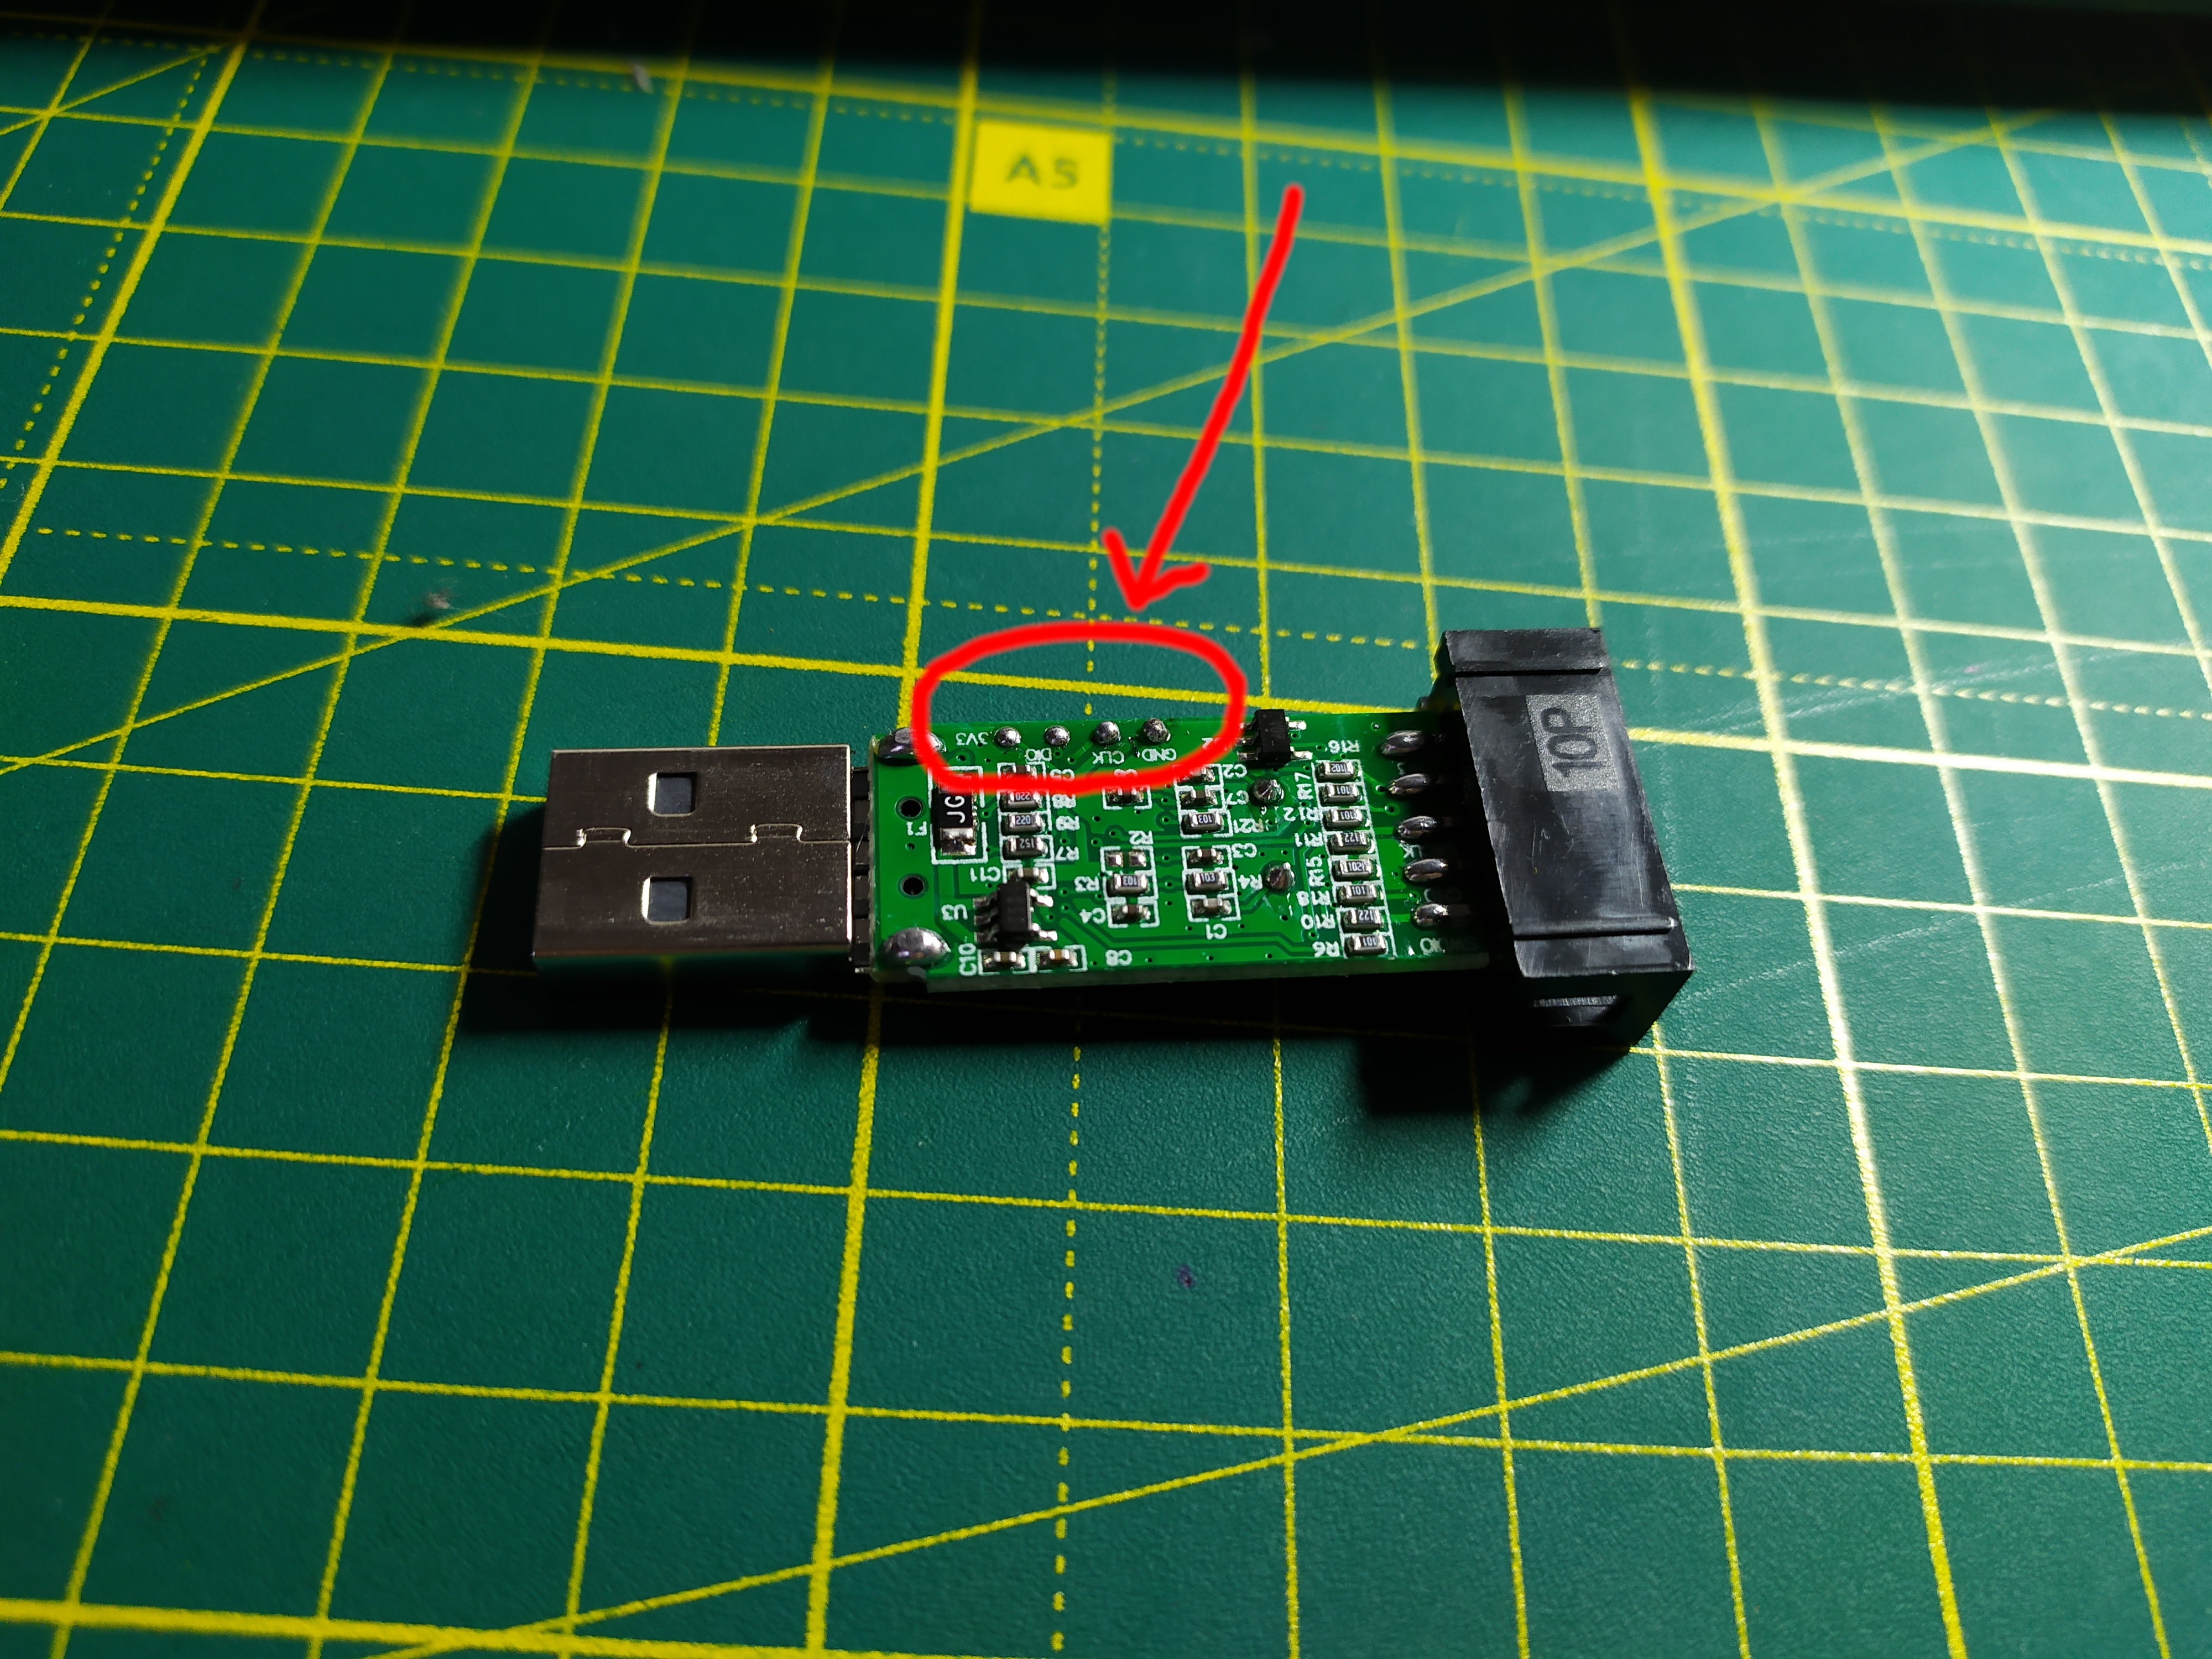 Pay attention to the 4 pins on the board. We will need to solder to them. I recommend using the wires that come with ST-Link for this. We clean the wires from one end and solder them to the contacts. If we are lucky, then on the board there will be signs of these contacts.
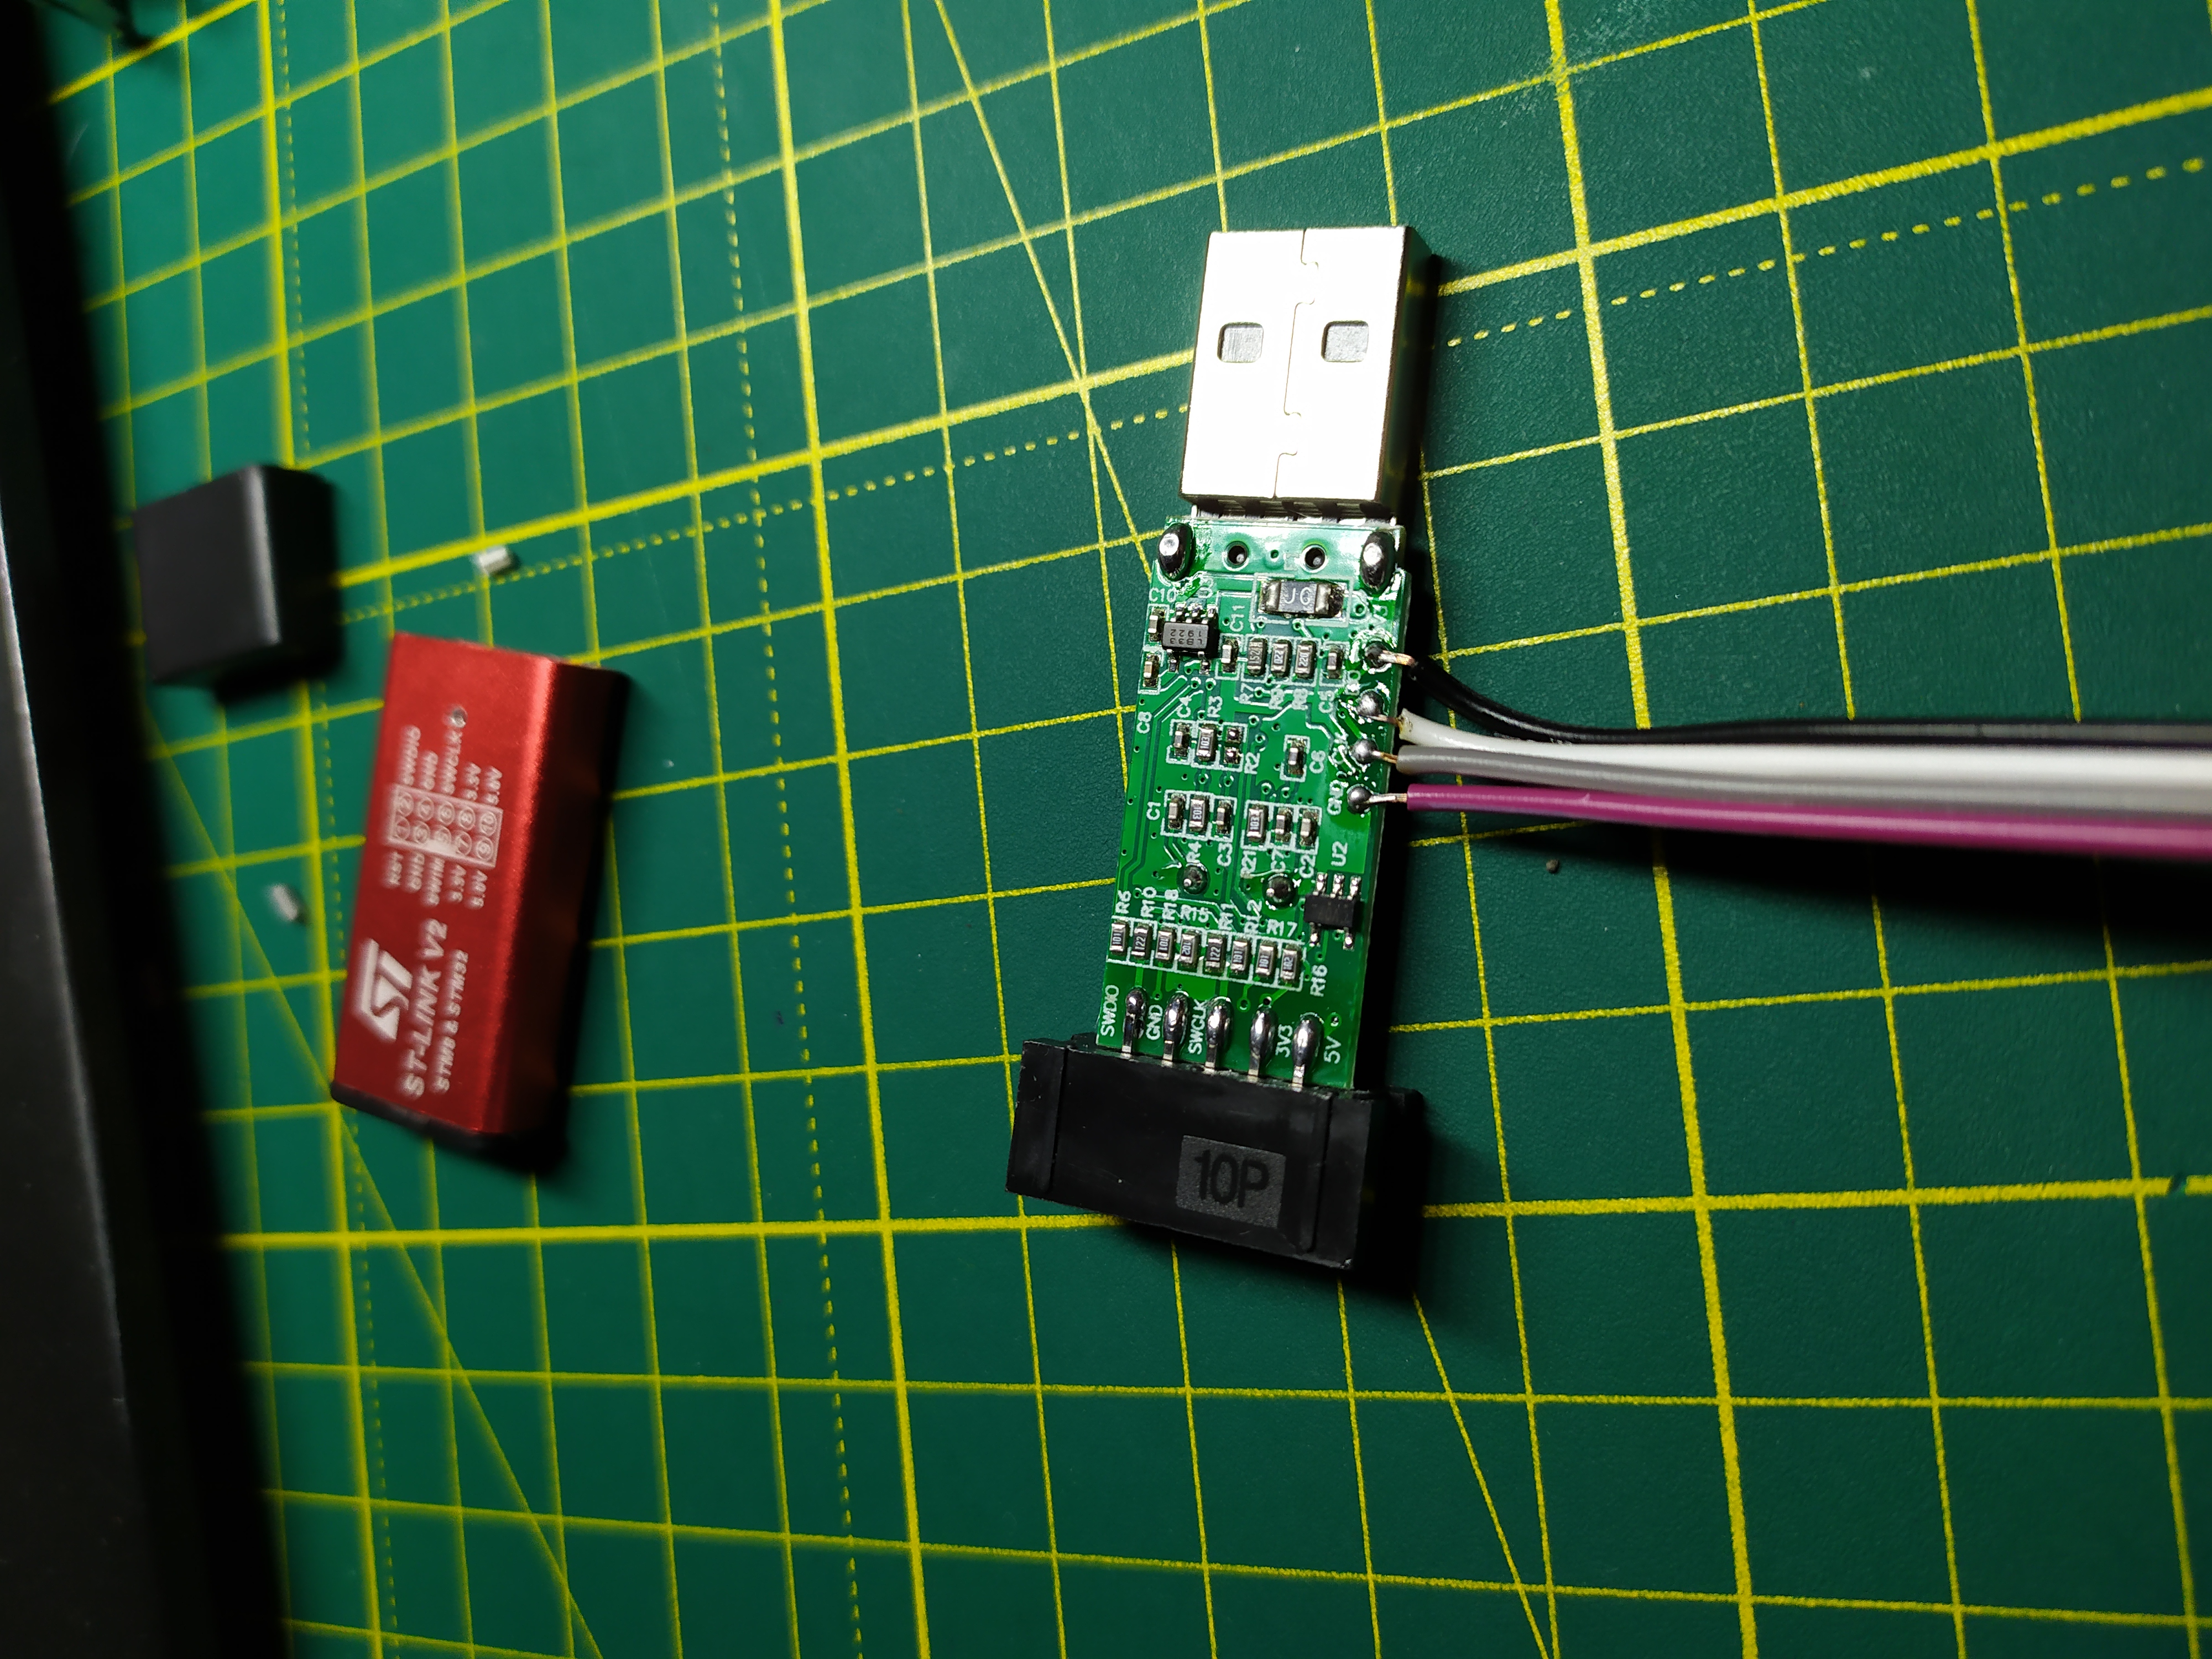 "Now, we connect the second end of the wires to the remaining whole programmer. If you are lucky, then just connect the wires in accordance with the inscriptions:GND to GND3.3V to 3.3VSWDIO to SWDIOSWCLK to SWCLKIf there are no labels on the board, you will have to
 poke at random to use the tester. Using it, you can easily find GND (it is connected to GND at the terminals of the donor programmer), similar to 3.3V. The remaining two wires will have to be connected at random. Fortunately, there are only 2 options. As a result, we get something similar to this.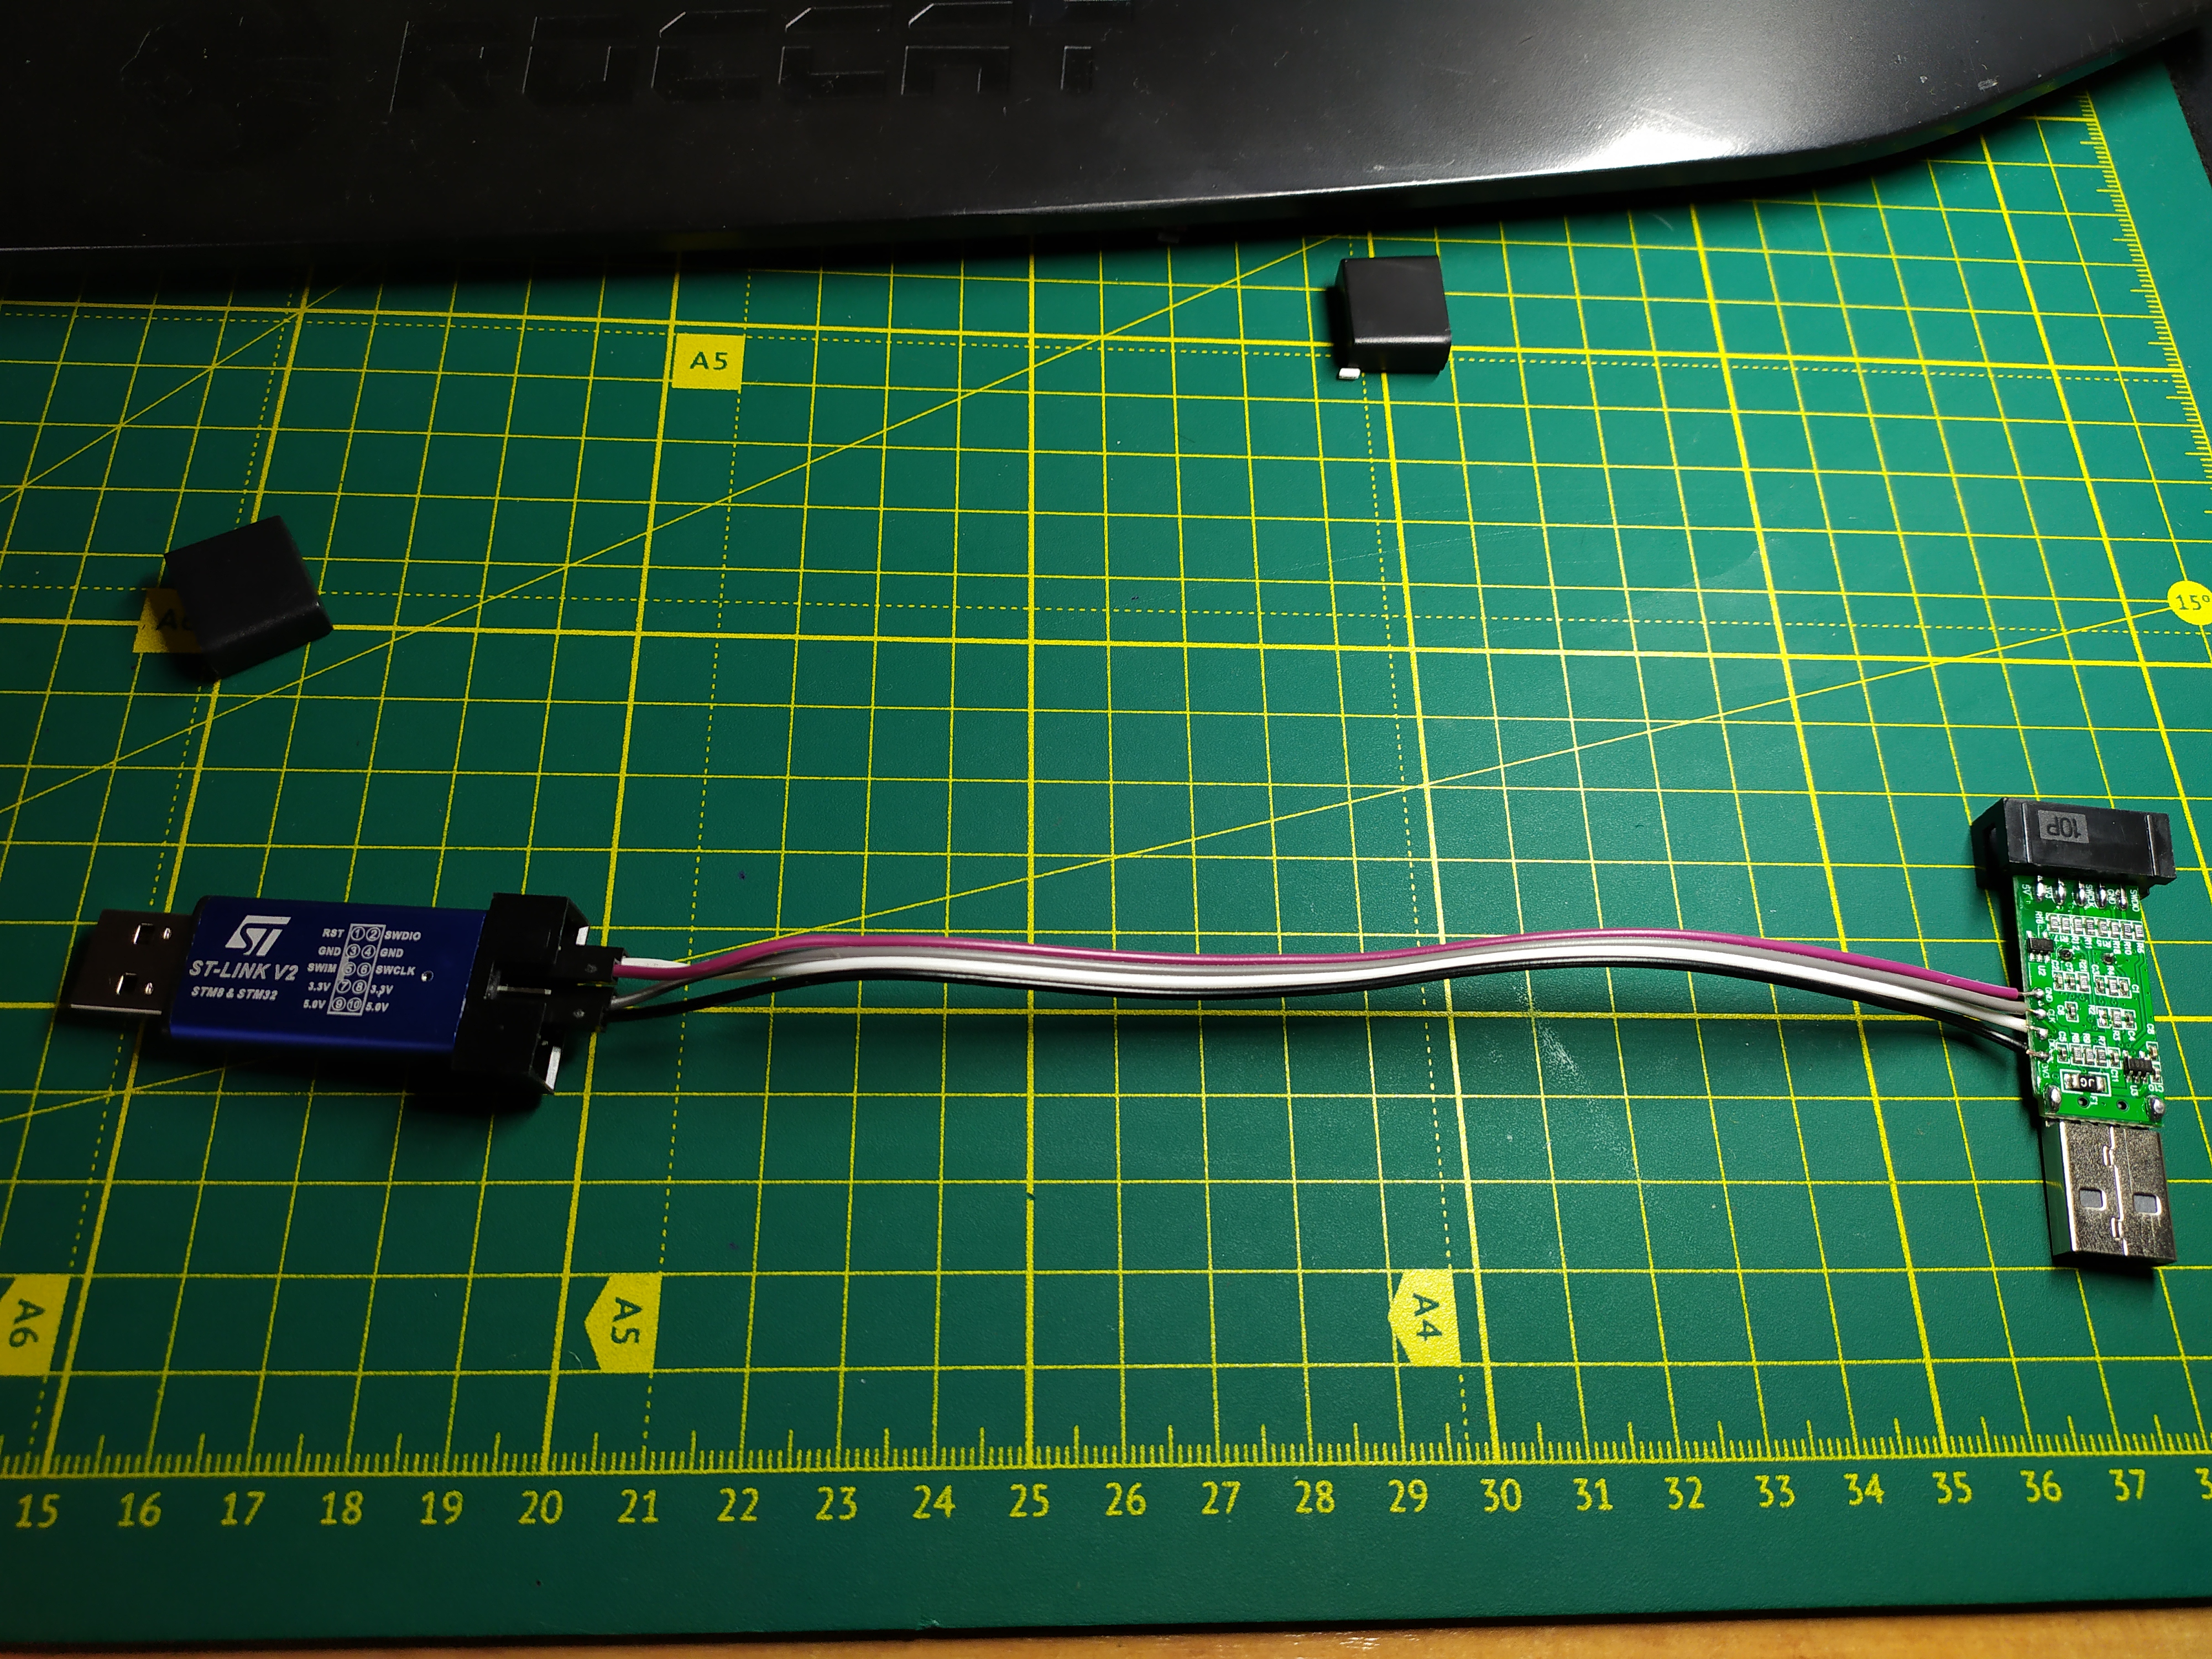 In this photo, the blue device is the programmer, which we use only as the programmer. Do not be confused by the fact that in the photo at the beginning of the article, the final device has a blue body color. It's not him. The future device is on the right.
Download firmware
We are a step away from success, it remains only to download the firmware. Open the terminal, go to the folder with our firmware (gnuk.elf).Run the command:$ openocd -f interface/stlink-v2.cfg -f target/stm32f1x.cfg -c 'program build/gnuk.elf verify reset exit'
So, now we have uploaded the firmware to our device. There was one step left - to prohibit reading the memory of the microcontroller. ATTENTION! This is a very important stage, which will not allow the person who stole your key to extract secret information from it.To do this, run the command:openocd -f interface/stlink-v2.cfg -f target/stm32f1x.cfg -c init -c "reset halt" -c "stm32f1x lock 0" -c reset -c exit
Now everything is ready.Putting it all back
Now that all the steps are behind, it remains to take care of the appearance of our device. We solder the wires. We also no longer need the original contact bar, so you can safely unsolder it.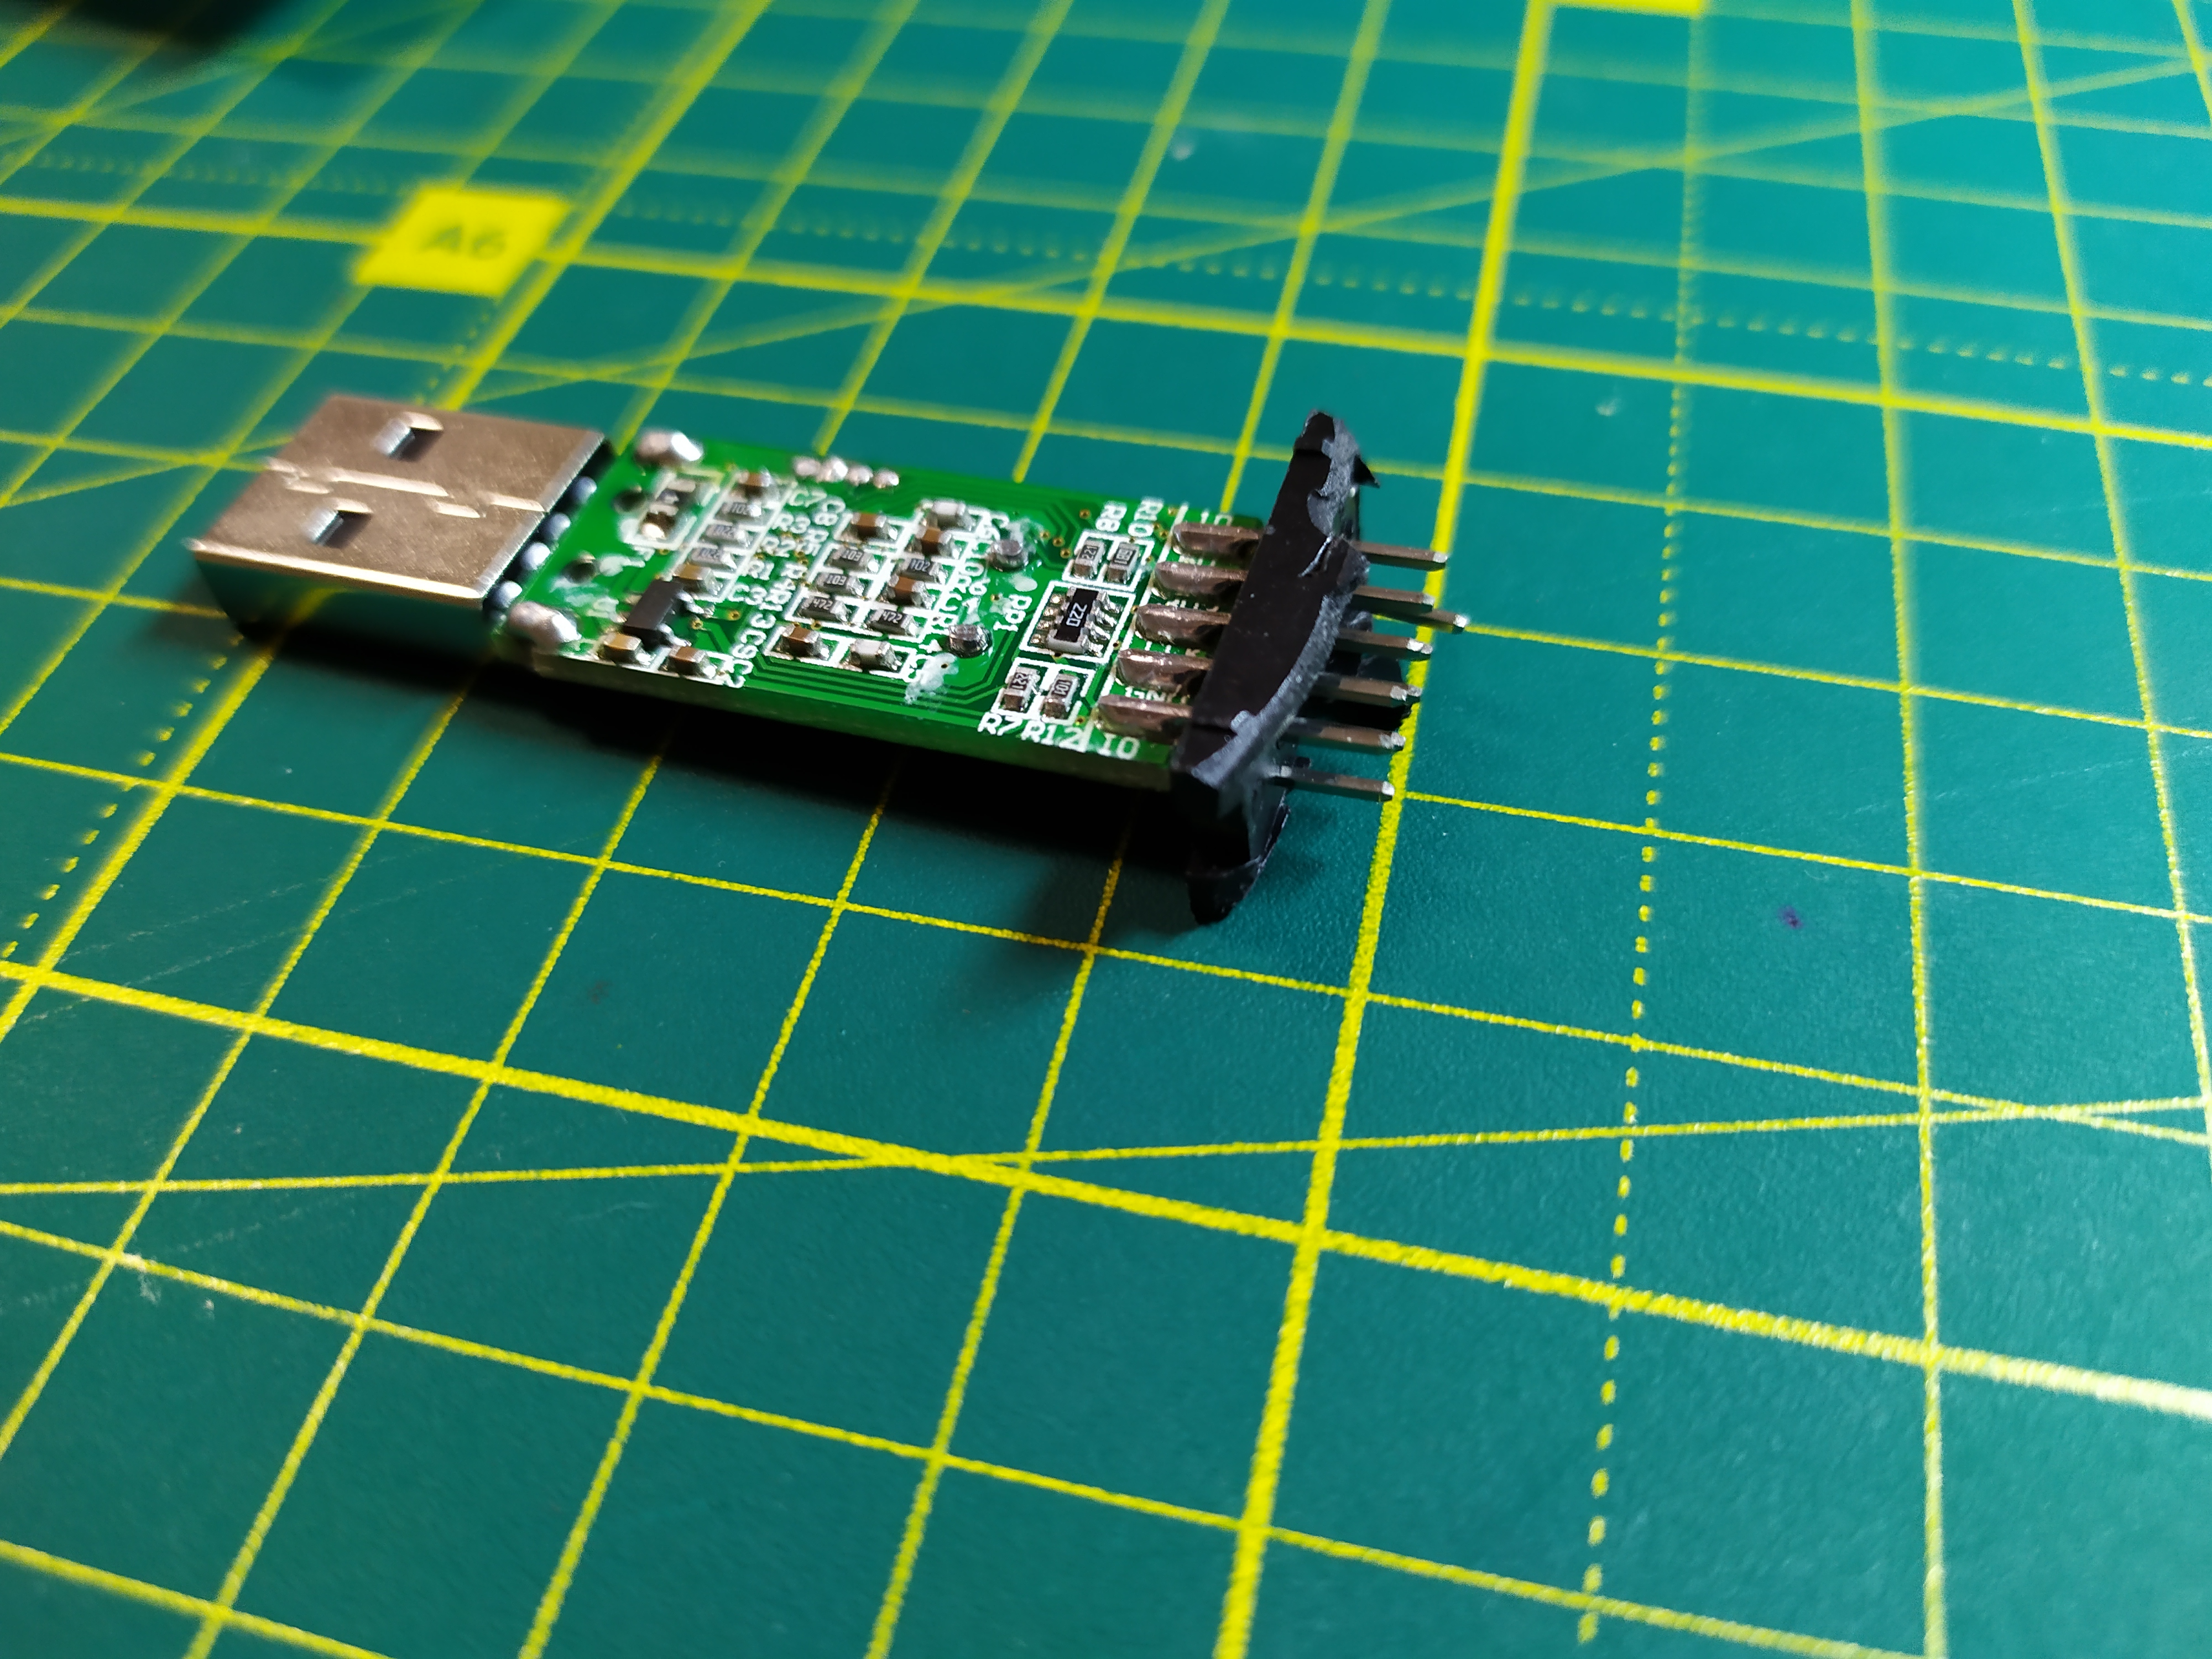 Break the mount and solder the contacts one at a time.
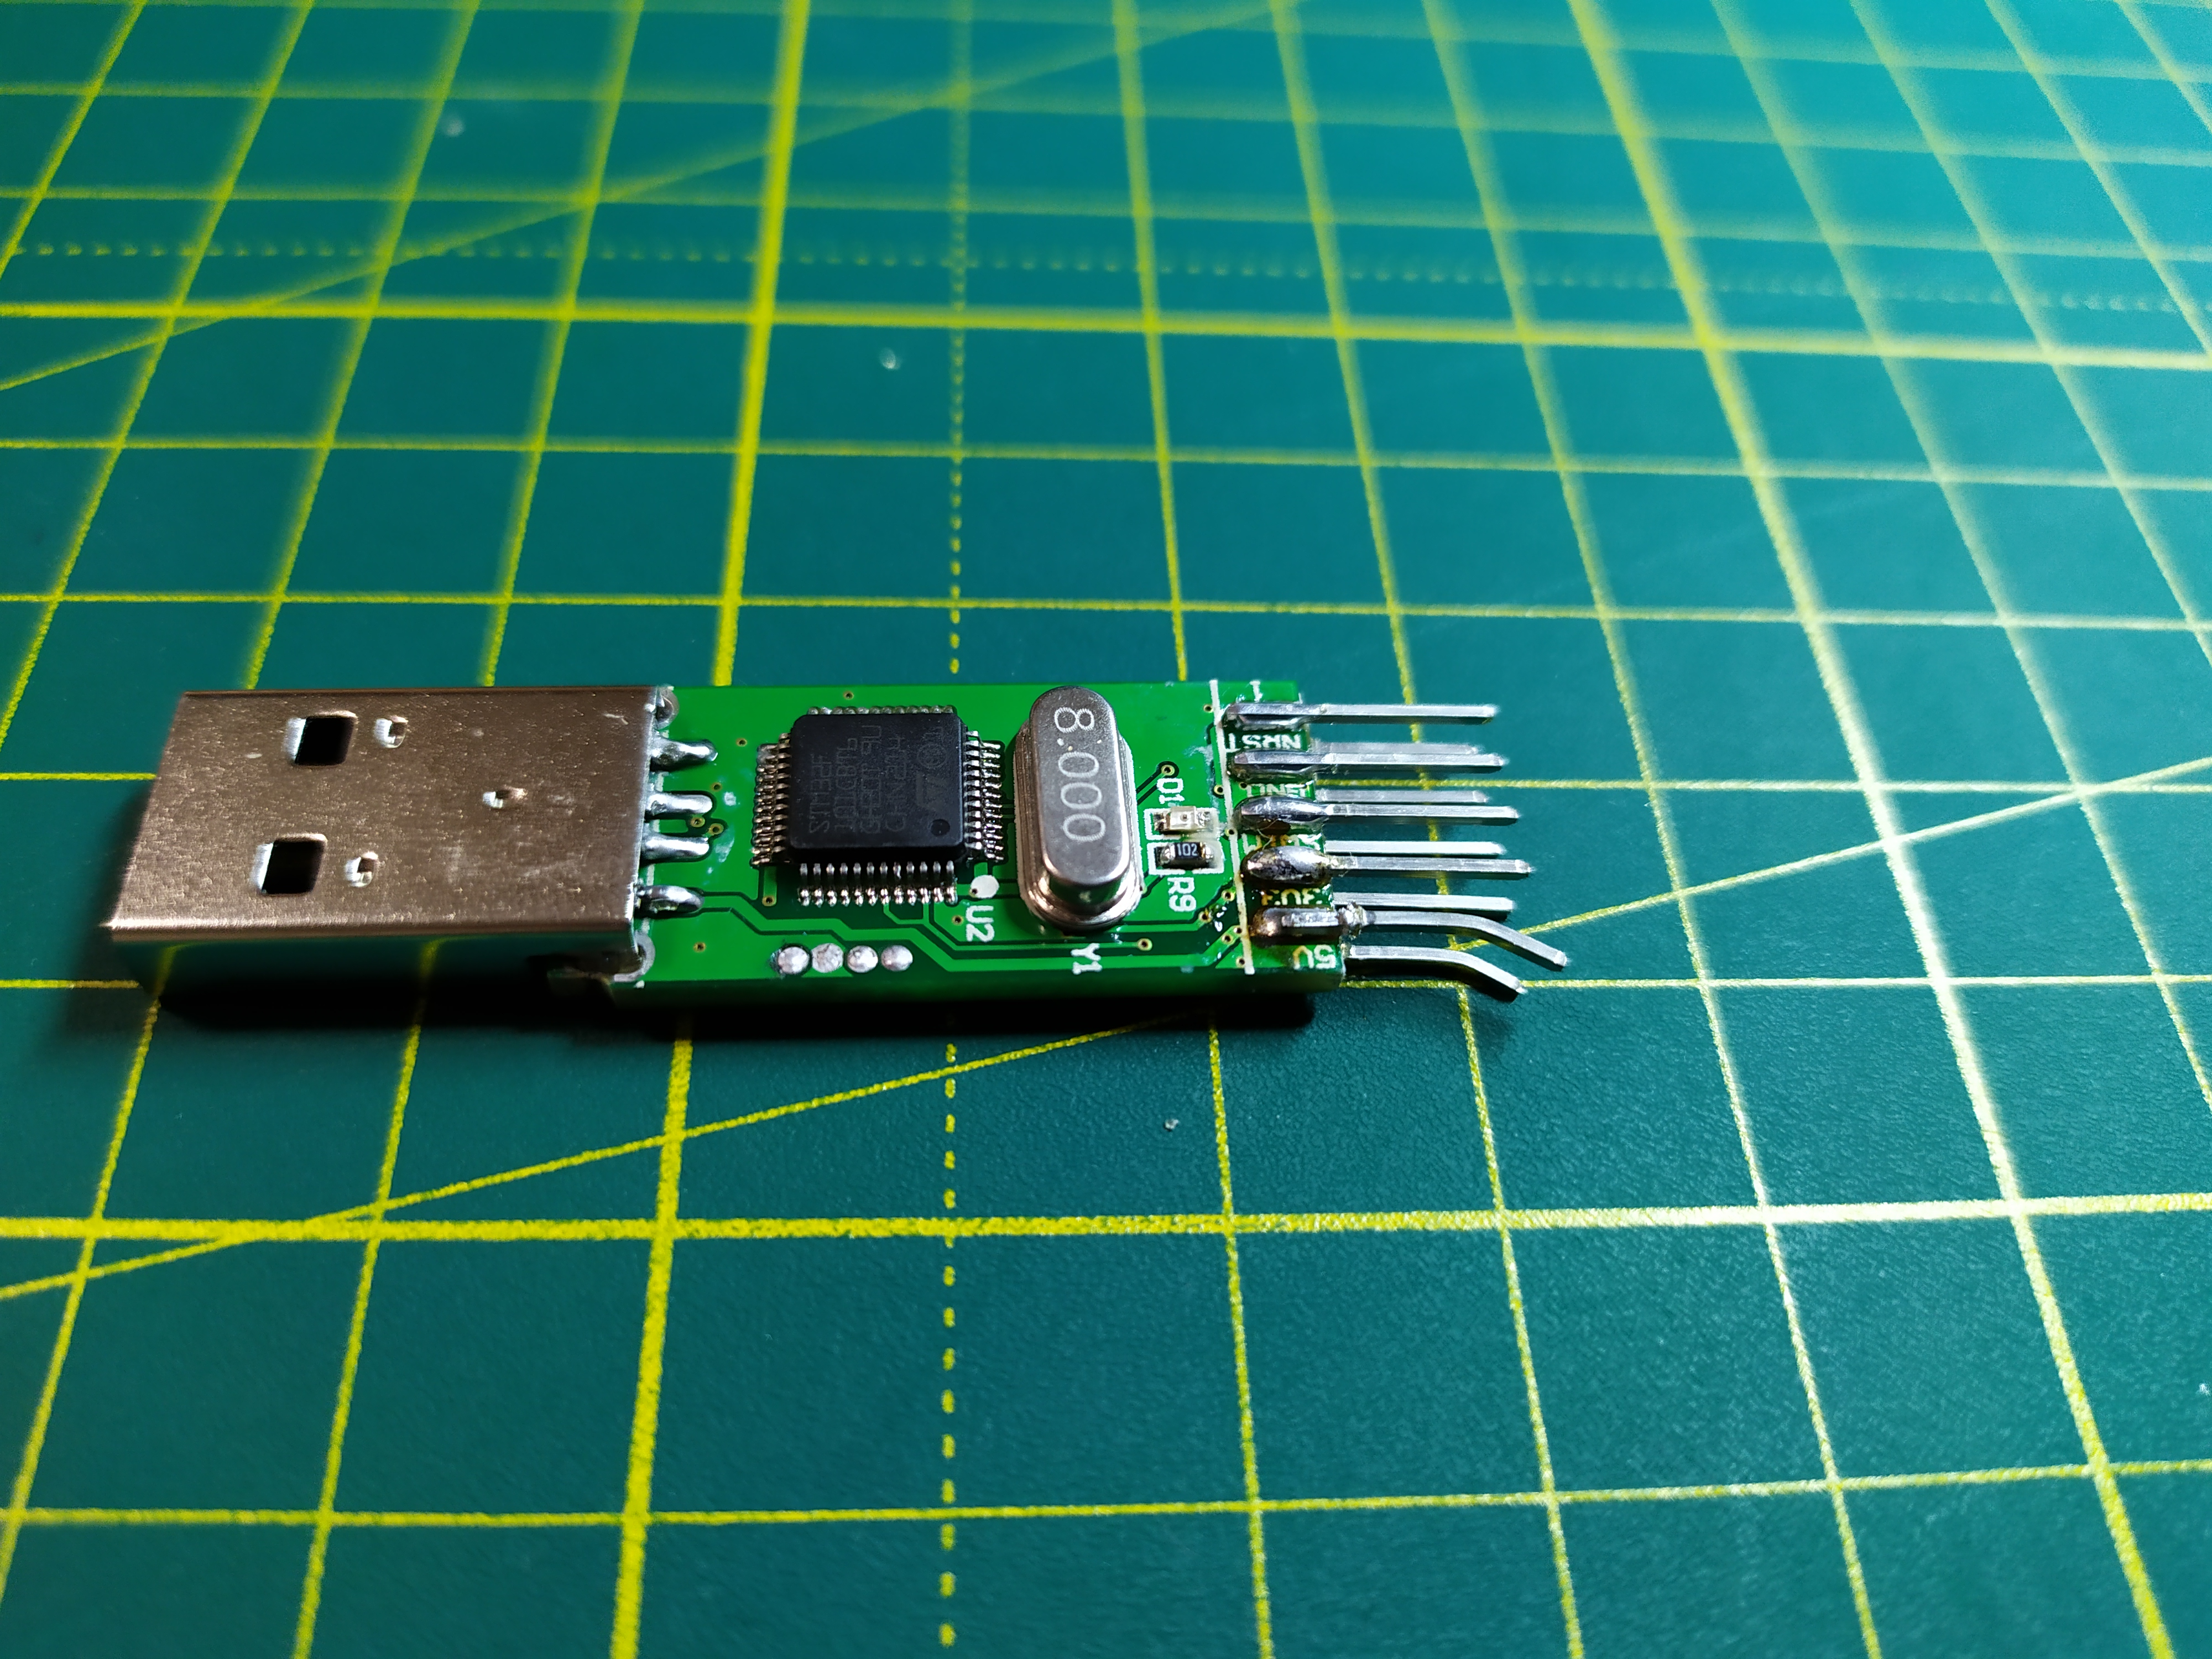 Now we put the case back on and seal the back wall with a suitable piece of plastic.
How can i use
What we have assembled is an OpenPGP smart card emulator . Such a card can store GPG, SSH keys. The scope is quite large, for example:- Signing git commits - a security issue has already been raised here
- SSH key storage
- S / MIME email encryption and signing - did not check, but they write that it works
- Entering the OS without a password - a good guide is already on the hub
As you can see, you can do a lot of interesting and useful things.Usage example for ssh
And in the end, let's see how you can use this key to store ssh keys and connect to a remote server.There are two ways - to generate a new key or import an existing key into a token.Let's see both options. We insert the token into USB. In dmesg you can see information about the connected device.
$ dmesg
[11073.599862] usb 1-3: USB disconnect, device number 11
[11311.647551] usb 1-3: new full-speed USB device number 12 using xhci_hcd
[11311.796881] usb 1-3: New USB device found, idVendor=234b, idProduct=0000, bcdDevice= 2.00
[11311.796884] usb 1-3: New USB device strings: Mfr=1, Product=2, SerialNumber=3
[11311.796885] usb 1-3: Product: Gnuk Token
[11311.796887] usb 1-3: Manufacturer: Free Software Initiative of Japan
New ssh key generation
It is important to understand that the key is generated on the device itself , and not on your computer. So, such a key never leaves the device at all.Go to gpg:
$ gpg --card-edit
The gpg interactive mode opens, enable admin mode with the admin command:
gpg/card> admin
Next, run the new key generation command:
gpg/card> generate
The following is the standard gpg key generation procedure. During which you will be asked to save the backup key to disk. Developers recommend making backups, but you decide.The only thing is that hardware generation of RSA keys up to 2048 bits is supported. If you need 4096, you will have to generate the key on the computer, and then import it to the device itself.Next you will need pin codes. By default, the following PIN codes are protected in the firmware:CARD PIN - 123456ADMIN PIN - 12345678In the future, they must be changed.The key can be generated a little longer than if it was generated directly on the computer, so we have some patience.Import an existing key
Now let's see what to do if you already have an ssh key that you would like to use.To do this, import the key in gpg:
$ pem2openpgp temporary_id < id_rsa | gpg --import
Now we need to find out the id of the key. To do this, list all available in gpg:
$ gpg -K
And we find the imported key:
sec>  rsa2048 2020-02-05 [C]
      DFEFF02E226560B7F5A5F2CAB19534F88F8FE4EC
      Card serial no. = FFFE 87144751
uid           [ unknown] temporary_id
In my case, the key id is DFEFF02E226560B7F5A5F2CAB19534F88F8FE4ECGo to the interactive mode for editing the gpg key:
$ gpg --edit-key DFEFF02E226560B7F5A5F2CAB19534F88F8FE4EC
And we give the command to copy the key to the smart card:
gpg> keytocard
Everything, the key is recorded.Export public key in ssh format
We get the desired public key from the token in order to put it on the server:$ pkcs15-tool --list-keys
In my case, the output looks like this:
Using reader with a card: Free Software Initiative of Japan Gnuk (FSIJ-1.2.15-87144751) 00 00
Private RSA Key [Signature key]
	Object Flags   : [0x03], private, modifiable
	Usage          : [0x20C], sign, signRecover, nonRepudiation
	Access Flags   : [0x1D], sensitive, alwaysSensitive, neverExtract, local
	ModLength      : 2048
	Key ref        : 0 (0x00)
	Native         : yes
	Auth ID        : 01
	ID             : 01
	MD:guid        : f3de5f55-d100-4973-d572-40d67e20f033
Here we are interested in the ID-key of the key, in my case 01. Now we export the public key:
$ pkcs15-tool --read-public-key 01
Copy the public key into the pub.key file:
-----BEGIN PUBLIC KEY-----
MIIBIjANBgkqhkiG9w0BAQEFAAOCAQ8AMIIBCgKCAQEAyzHQIWEApliWYaf0T8jb
Vh2nc5+LklKXeuJFTN3BW2VqdrTw1rpKXiANWpi+qbtZhZ2nP3CJX6qoGobXyCOd
/iAiygFlyW4BwTQpnAm81IE9lPzfasOK7SBuKJ+ZbB4WpuYJRozgtt/gpWzmnWnW
84/CU9Lqbhz95v/C/DImSf6LiwVdmiEj4CUNInl5pY4trguDsSfkw1u8gGqSPEsD
ZXtlVRx8iBGi0JR02g9KTL4dDGocUtcTK8W0eY+BDbQSXfTGCy93v8sEyhdQjHs8
oDiwkvFQ86gYqwL5DJ7U/rFSO3A5X6zmkFFV8nJZjxB2qfE5aommtXxow4iPml3x
YwIDAQAB
-----END PUBLIC KEY-----
And convert it to ssh-rsa format:
$ ssh-keygen -f pub.key -i -mPKCS8
It turns out the public key in the desired format:
ssh-rsa AAAAB3NzaC1yc2EAAAADAQABAAABAQDLMdAhYQCmWJZhp/RPyNtWHadzn4uSUpd64kVM3cFbZWp2tPDWukpeIA1amL6pu1mFnac/cIlfqqgahtfII53+ICLKAWXJbgHBNCmcCbzUgT2U/N9qw4rtIG4on5lsHham5glGjOC23+ClbOadadbzj8JT0upuHP3m/8L8MiZJ/ouLBV2aISPgJQ0ieXmlji2uC4OxJ+TDW7yAapI8SwNle2VVHHyIEaLQlHTaD0pMvh0MahxS1xMrxbR5j4ENtBJd9MYLL3e/ywTKF1CMezygOLCS8VDzqBirAvkMntT+sVI7cDlfrOaQUVXyclmPEHap8Tlqiaa1fGjDiI+aXfFj
Next is the standard procedure for configuring ssh to log on with a given key - you need to add the key to the ~ / .ssh / authorized_keys file on the remote server.Ssh configuration
Now, in order to enter the server using our token, you need to call ssh with the -I switch and pass the path to the token driver. Our token is compatible with one of the standard drivers, so we will use it
$ ssh -I /usr/lib/opensc-pkcs11.so martin@remotehost
However, it will be more convenient to use the config file (~ / .ssh / config).Add the following lines to it.
Host digitalOceanServer
        HostName 192.168.0.1
        User root
        PKCS11Provider /usr/lib/opensc-pkcs11.so
The ssh call is now even easier:
$ ssh digitalOceanServer
How to change standard pin codes
An equally important step will be to install your own pin codes. First you need to understand that there are two different pin codes used:- PIN-code - this code is used for routine operations with a smart card - to encrypt something, sign, etc.
- Admin Pin-code - this code is needed in order to change / delete keys and do all sorts of such “admin” things
- Reset code - a code that will allow you to unlock the token after three incorrect attempts to enter the PIN code. Its use is optional, so you decide
You have only 3 attempts for each of the codes. After which the token is blocked.Now let's get started. To do this, we again go into the interactive GPG mode:
$ gpg --card-edit
And enter the passwd command:
gpg/card> passwd
A window will open where you can change the pin code from the token.Now you need to change the administrator PIN. To do this, go to administrator mode:
gpg/card> admin
Enter the passwd command again:
gpg/card> passwd
However, now it works in advanced mode and we will be offered several options:
1 - change PIN
2 - unblock PIN
3 - change Admin PIN
4 - set the Reset Code
Q - quit

Your selection?
We select change Admin PIN and set the administrator password according to the standard scheme. Let me remind you that the default Admin PIN is 12345678.About device security
Of course, for $ 3 you can’t achieve a key level security for 200+ dollars. However, the assembled device can be considered as an entry-level key. As far as I know, Nitrokey Start factory keys use the same firmware. In any case, the use of such a device will raise security by at least a level higher. So this is a great way to start using hardware keys.Now let's talk a little about what will happen if you lose this key. The key itself is protected by a pin code. After several unsuccessful attempts, the key is locked. The memory of the device itself is protected from reading, so it will not work directly to read the keys written into it.There are some types of attacks on the chip itself (for example, the preparation and connection of microelectrodes to it, which will measure the voltage anywhere in the chip, including memory), but they are quite expensive.So, I repeat once again, this is a great entry-level option, and even with it, security will reach a whole new level.Links to useful materials
In the process of using the device, there will certainly be a need for additional information. I put together a list of good sources.- Debian page
- Token Documentation
- Manual for the Nitrokey Start token - it uses the same firmware, so the tips will suit us too
The device that we have assembled is being developed by the open source GNUK project (actually, it’s called a token), so more information can be found in Google at the request of “GNUK”.Upd. The comments suggested that there are firmware that allows you to use the device for two-factor authentication. The firmware code can be found hereUpd. 2 02/15/2020 The comments suggested that for this particular chip there is a vulnerability that could drain the contents of the memory. As I understand it, it has not yet been published, but it has been announced. So for now, everything is not clear. They also suggested a good solution - pour epoxy into the device’s bodymixed with aluminum powder. This method was described in the book of Kevin Mitnick, “The Art of Deception.” Thus, in order to gain access to the chip, it will be necessary to crack the glue, which, if handled carelessly, can permanently damage the chip. Of course, this method can be circumvented, this increases the cost of hacking even more. Of course, if necessary, Mossad will make its Mossad things and this will not stop him, but only delay it.Upd. 3Many messages came to the PM that people cannot get ST-Link firmware. Having figured it out, we found out that now Chinese manufacturers began to actively save on components and use chips with 64Kb of memory on board. And this is not enough for firmware, look for a 128Kb chip on board. Therefore, I recommend that when buying, check which chip is installed (if possible), or check with the seller / in the reviews.Upd. 4 It turns out that you can still use Chinese programmers with a 64 KB chip (although you will have to use the latest firmware version) - an interesting article about this appeared on the hub .