Hello everybody! To all those who want to learn a little more about Blazor. Today we will continue to create our site for a pizzeria, namely, we will create a web api controller and try to display the data that comes from it on the Blazor component.Since our application is about pizza, it would be logical to immediately add a class representing our main product. Callit BasePizza and add it to the BlazingPizza.DomainModels project . In my opinion, adding a new class is very cool implemented in Rider, a non-blocking dialog pops up, enter the class name and then we can choose what we need to create: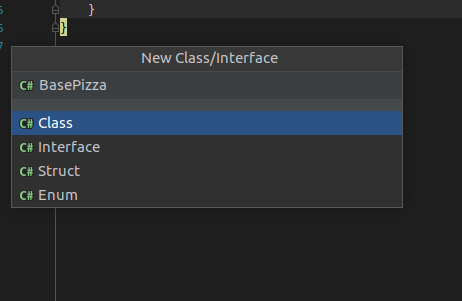 After that, a dialog will appear with a request to add a file to git, we will answer in the affirmative.Class Content:
public class BasePizza
{
  public int Id { get; set; }

    public string Name { get; set; }

    public decimal BasePrice { get; set; }

    public string Description { get; set; }

    public string ImageUrl { get; set; }
}
It is a template for some type of pizza, later it can be configured as we like, resize, add toppings and more. The name of the fields seems to me to speak for itself.In the BlazingPizza.DomainPizza project , we will have classes representing the business domain of our application. That is, they should not and will not know anything about how our data is stored or how they are displayed. Only information about the business object, that is, pizza.Next, we need something to somehow get this data to the client. To do this, go to the BlazingPizza.Server project and add the PizzasController to the Controllers folder :public class PizzasController : Controller
{
public IActionResult Index()
{
return View();
}
}
We need a method that gives us a list of all the basics for pizza.In addition to adding a method, you need to do some simple steps:- We mark the controller with the [ApiController] attribute which gives some advantages, in particular, the automatic return of 400 code if the model does not pass validation, without it it is a normal MVC controller that gives View.
- [Route(«pizzas»)]. Attribute Routing, , Conventional Routing, . “pizzas” ? http{s}://hostName/pizzas/{}
. - Controller ControllerBase, MVC .
Ok, for example, we made a localhost : 5000 / pizzas request in the hope of getting a list of all the pizzas and nothing happened. Again, the deal is in the agreements.If it was a Get request, then we either have to have a method ( Action in terms of Asp.Net ) marked with the [HttpGet] attribute or, even more obvious, just a method called Get and that’s it! Everything else .Net and reflection will do for us.And so rename the only Index method to Get. Change the type of the return value to IEnumerable <BasePizza>, do not forget to add the necessary using. Well, temporarily insert a stub that the method is not implemented in order to somehow compile the code and make sure that there are no errors.As a result, PizzasController.cs will look like this:using System;
using System.Collections.Generic;
using Microsoft.AspNetCore.Mvc;
using BlazingPizza.DomainModels;
namespace BlazingPizza.Server.Controllers
{
[ApiController]
[Route("pizzas")]
public class PizzasController : ControllerBase
{
public IEnumerable<BasePizza> Get()
{
throw new NotImplementedException();
}
}
}
Right now, launch the debugging application, a button with a green bug.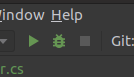 and make sure that the routes are configured correctly. The port on which you need to make requests can be seen on the Console tab :
 in our case, it is 5000, if you make a request along the localhost : 5000 / pizzas path, we will get into the Get action and catch a NotImplementedException. That is, while our controller does nothing useful, it simply accepts requests and fails with an error.
We return data from the controller
It's time to get our code to do something useful, like returning pizzas. So far, we have not implemented a data layer, so we just return a couple of pizzas from our action . To do this, return an array consisting of two BasePizza objects . The Get method will look like the example below:
public IEnumerable<BasePizza> Get()
{
return new[]
{
new BasePizza()
{
BasePrice = 500,
Description = " ",
Id = 0,
ImageUrl = "img/pizzas/pepperoni.jpg"
},
new BasePizza()
{
BasePrice = 400,
Description = " ",
Id = 1,
ImageUrl = "img/pizzas/meaty.jpg"
},
};
}
The result of the request in the browser will be like this:
Set up the home page
The visible part of the application is in the .razor components in the BlazingPizza.Client project . We are interested in Index.razor in the Pages folder , open it and delete all its contents that we inherited from the default project. And let's start adding what we really need.1. Add:page"/" This directive is used to configure client routing and says that this control will be loaded by default, that is, if we just go to the localhost application address : 5000 / without any / Index, / Pizzas or something else.2.injectHttpClient HttpClient Using the Directiveinject add a service like HttpClient to our page and call the object HttpClient too . An object of type HttpClient is already configured for us by the Blazor framework, so we can just make the requests we need. This type of injection is called Property Injection , a more familiar implementation through the constructor is not supported, and as the developers say, it is unlikely that it will ever appear, but is it needed here?3. Add a directive @code{
}
It is specifically needed in order to host client C # code, the same one that is a replacement for JavaScript. Inside this block we place a collection of objects of type BasePizzaViewModelIEnumerable<BasePizzaViewModel> PizzaViewModels;
4. As you already understood, BasePizzaViewModel does not exist, it's time to create it, this model will be completely analogous to the BasePizza domain model, except that it will have expression body GetFormattedBasePrice that returns the price of the base pizza in the format we need. The model will add to the root of the project BlazingPizza.ViewModels file BasePizzaViewModel.cs :public class BasePizzaViewModel
{
public int Id { get; set; }
public string Name { get; set; }
public decimal BasePrice { get; set; }
public string Description { get; set; }
public string ImageUrl { get; set; }
public string GetFormattedBasePrice() => BasePrice.ToString("0.00");
}
5. Back to our Index.razor and blockcode, add a code to get all available pizzas. We will place this code in the async OnInitializedAsync method :protected async override Task OnInitializedAsync() {
}
This method is called after the component is initialized and at the time of the call, all its parameters are already initialized by the parent component. In it, you can perform some asynchronous operations, after which a state update is required. Later I will talk about this in more detail. The method is called only once when the component is created.Finally, add the getting pizzas inside this method:var queryResult = await HttpClient.GetJsonAsync<IEnumerable<BasePizza>>("pizzas");
pizzas - a relative path that is added to the base and has already been set for us by Blazor . As follows from the method signature, the data is requested by the get request and then the client tries to serialize them into IEnumerable <BasePizza> .6. Since we received data of the wrong type that we want to display in the component, we need to get objects of the BasePizzaViewModel type , Linq and its Select method will use it to convert objects from the incoming collection to objects of the type that we plan to use. Add the OnInitializedAsync method to the end :PizzaViewModels = queryResult.Select(i => new BasePizzaViewModel()
{
BasePrice = i.BasePrice,
Description = i.Description,
Id = i.Id,
ImageUrl = i.ImageUrl,
Name = i.Name
});
Later I will show how to do without writing this template code, but for now, let's leave it as it is. It seems that we have everything that we need and we can proceed to display the received data.7. Above the code directive, add the html code, inside which will be the pizzas themselves:<div class="main">
<ul class="pizza-cards">
</ul>
</div>
As you can see, the list ul with the talking class name “pizza-cards” is empty so far, we’ll fix this oversight:@foreach (var pizza in PizzaViewModels)
{
<li style="background-image: url('@pizza.ImageUrl')">
<div class="pizza-info">
<span class="title">@pizza.Name</span>
@pizza.Description
<span class="price">@pizza.GetFormattedBasePrice()</span>
</div>
</li>
}
All the fun here is inside the loop foreach(var {item} in {items})This is a typical Razor markup that allows us to use the power of C # on the same page as regular html code. The main thing is to put the “@” symbol before the language keywords and variables .Inside the loop, we simply access the properties of the pizza object .In the end, we display the formatted base price of the pizza using the GetFormattedBasePrice method . This, by the way, is the difference between the BasePizza domain model and its ViewModel representations, since this method contains the simplest logic for displaying the price in the required format, which we do not need at the service level, where we somehow manipulate the price, but do not show it anywhere.We display the received data in the browser
We got all the necessary data to display. It's time to launch our application and make sure that everything works. We click on the Debug button (in Rider, the Run button just launches the application without Debug capability ).And ooh-ho, nothing works either :) Open the console ( F12 ) and see that it is all red, something obviously went wrong. Blazor is not so hopeless in debugging and the entire call stack can be seen in the Console , and in my opinion this is done even better than in the same Angular . No need to guess by indirect signs where the error occurred, just look at the call stack: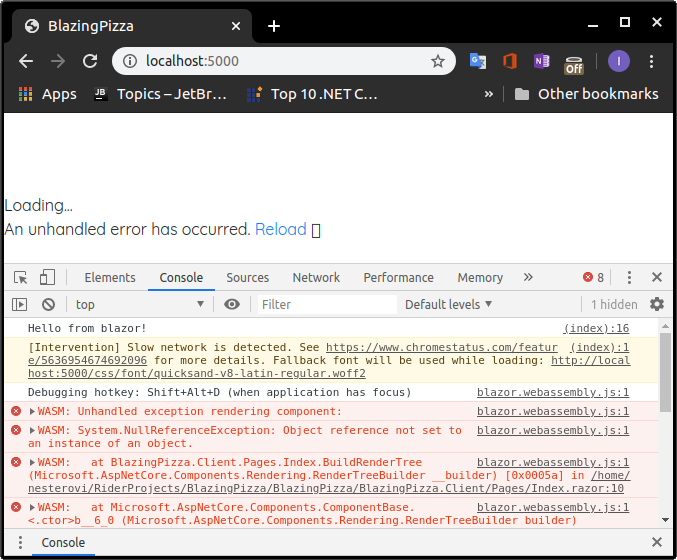 A NullReferenceException message occurred while rendering the page . How could this happen, because we initialized the only collection we use in the OnInitializedAsync method .To understand a little better, insert the time output in the right places to see the timeframe of what happened:
Console.WriteLine($"Time from markup block: {DateTime.Now.ToString()}:{DateTime.Now.Millisecond.ToString()}");
Console.WriteLine($"Time from cycle: {DateTime.Now.ToString()}:{DateTime.Now.Millisecond.ToString()}");
Console.WriteLine($"Time from code block, before await: {DateTime.Now.ToString()}:{DateTime.Now.Millisecond.ToString()}");
Console.WriteLine($"Time from code block, after await: {DateTime.Now.ToString()}:{DateTime.Now.Millisecond.ToString()}");
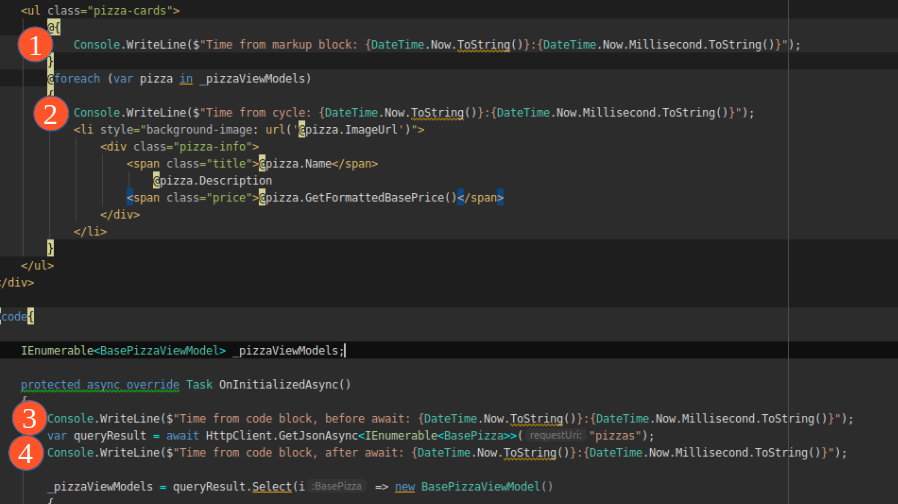 In the screenshot below, in the console, what happened at the time of the page rendering. It can be seen that the page begins to render even before the completion of the asynchronous methods.At the first pass, PizzaViewModels was not yet initialized and we caught a NullReferenceException . Then, as expected after the Task returned the OnInitializedAsync method to the RanToCompletion status, the control was re-engineered. What is noteworthy, during the second pass, we got into a cycle, which is visible from the messages in the console. But at this point, the UI is no longer being updated and we do not see any visible changes.
 In fact, the problem is very easy to solve, you just need to run a null check asynchronously before executing the loop , then the exception will not occur for the first time and during the second pass we will see the data we need.
@if (PizzaViewModels != null)
{
@foreach (var pizza in PizzaViewModels)
{
………………………..
}
}
It seems a little better now, there are no more error messages in the console and you can see the information that came to us from the server: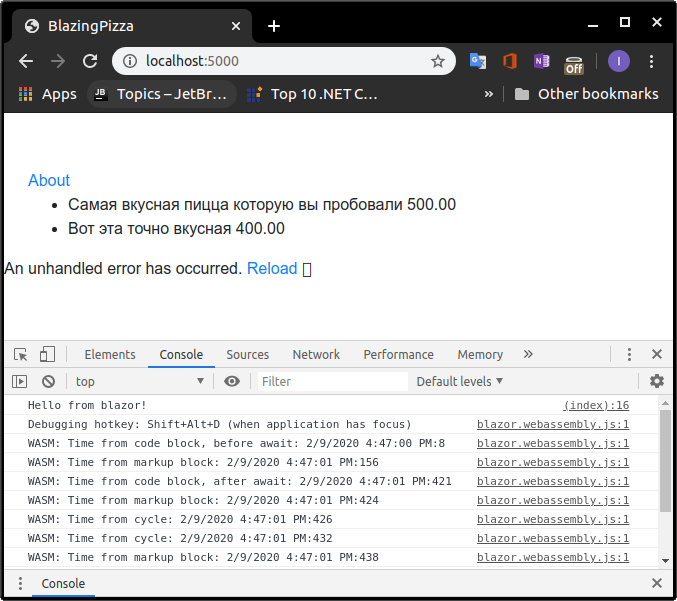 It’s much better, but there are not enough styles and resources, in particular pictures, replace the contents of the wwwroot folder with the contents from the folder ~ ~ Articles / Part2 /BlazingPizza.Client/wwwroot "repository (link at the end of the article) and run the project again, so much better. Although still far from ideal:
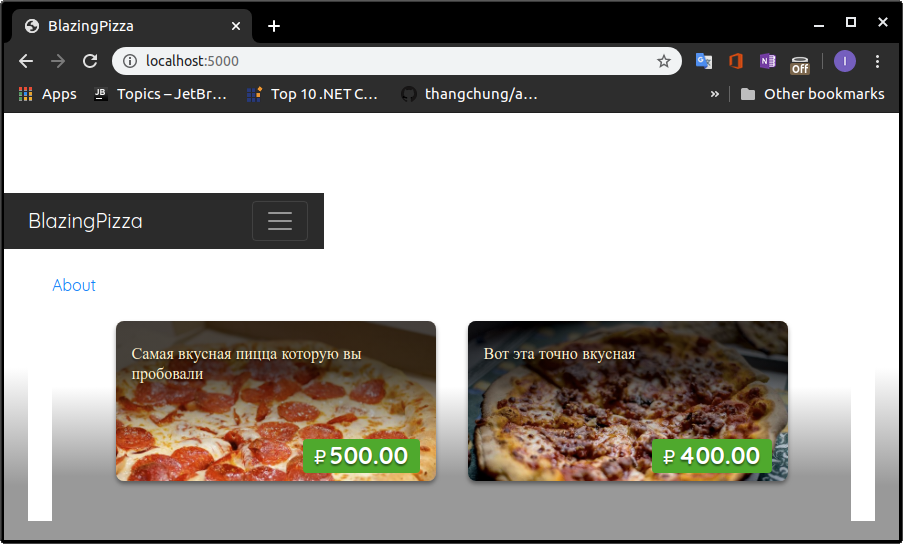
Component Life Events
Since we already met one of the OnInitializedAsync component life events, it would be logical to mention the others:In this part, we learned how to receive data from the controller and display it to the user.In the next part, we will tidy up the Layout and add a data access layer to display real data on the main page.Link to the repository of this series of articles.Link to the original source.