Test tube neutron star. Sonoluminescence
Hamsters welcome you friends.Today's post will be devoted to an interesting physical phenomenon that gives rise to light in ordinary water. Some call it a "neutron star", others call it "sonoluminescence."If in a test tube to create certain conditions, then there will be born a small luminous bubble. His physics is described by various properties that are difficult to imagine. In the course we will learn how to assemble an installation for obtaining sonoluminescence at home, how to properly configure the system and consider the difficulties that may arise in creating such a star.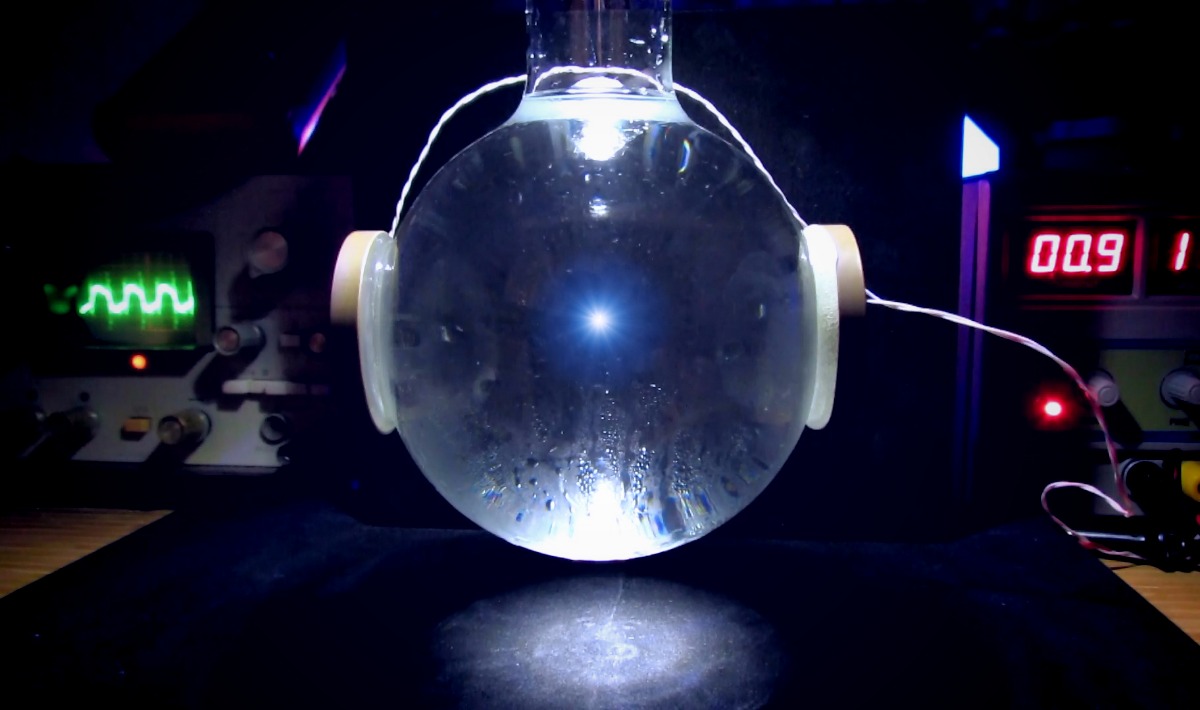 It all started with the fact that one fine day sitting out my ass in the vastness of YouTube, I found a video on the channel of Sergey Matyushenkoabout an interesting phenomenon which is based on the glow of the bubble due to the acoustic effect. After reviewing the video several times, I realized that repeating a similar phenomenon just spit. A week later, on my desk were all the necessary parts for assembling an existing installation.The principle of the device is quite simple. The signal from the generator is fed to piezoceramic emitters, which are glued to a test tube with water. The system is a spherical acoustic chamber, where a standing wave in a liquid is formed. The wave amplitude in the system is regulated by a variable inductor connected in series with piezoceramics, a resonant LC circuit is formed. Then we place an air bubble in the chamber, we find the resonance, the shock waves act on the bubble and it glows.But in reality, everything turned out to be not so simple, as my dad says - "everything is just on paper, but forgot about the ravines." The experiment is similar to the Schrödinger box, which took six months to solve. Let's try to consider in detail each element of the installation.
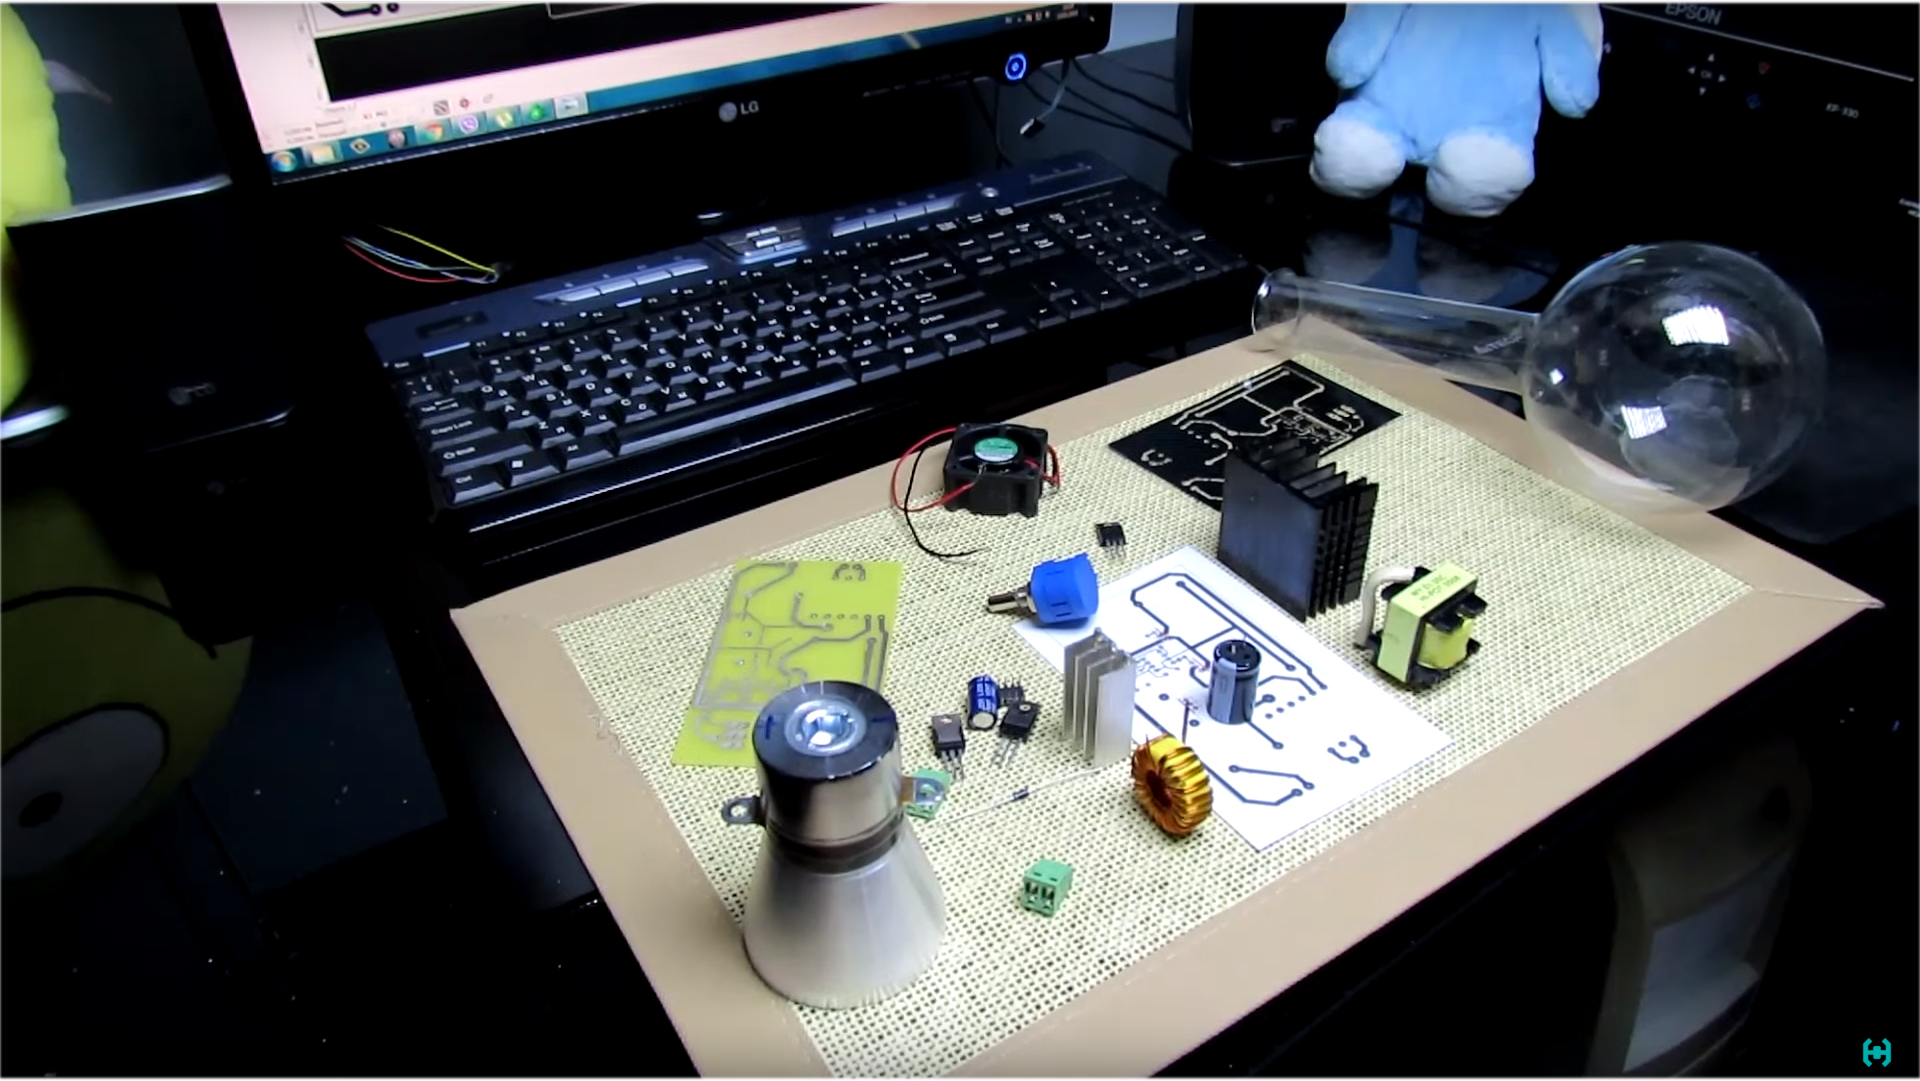 Test tubes.In this case, we are interested in round-bottom flasks. They will act as an acoustic camera. Theoretically, a test tube should have a high quality factor, but only God knows how to calculate it by looking at a picture of chemical glassware on the Internet. The solution is to order several types of such containers at once from different manufacturers, from Soviet options to modern foreign-bourgeois ones.The best result was shown by a round-bottom test tube of the Czech company Simax, with a volume of 100 ml. It is a bit oval in appearance, but its glass is everywhere the same in thickness. Soviet test tubes lost this parameter, as it is visually visible how the glass shimmers in the light. No matter how I tried, in such samples I was not able to fix sonoluminescence.
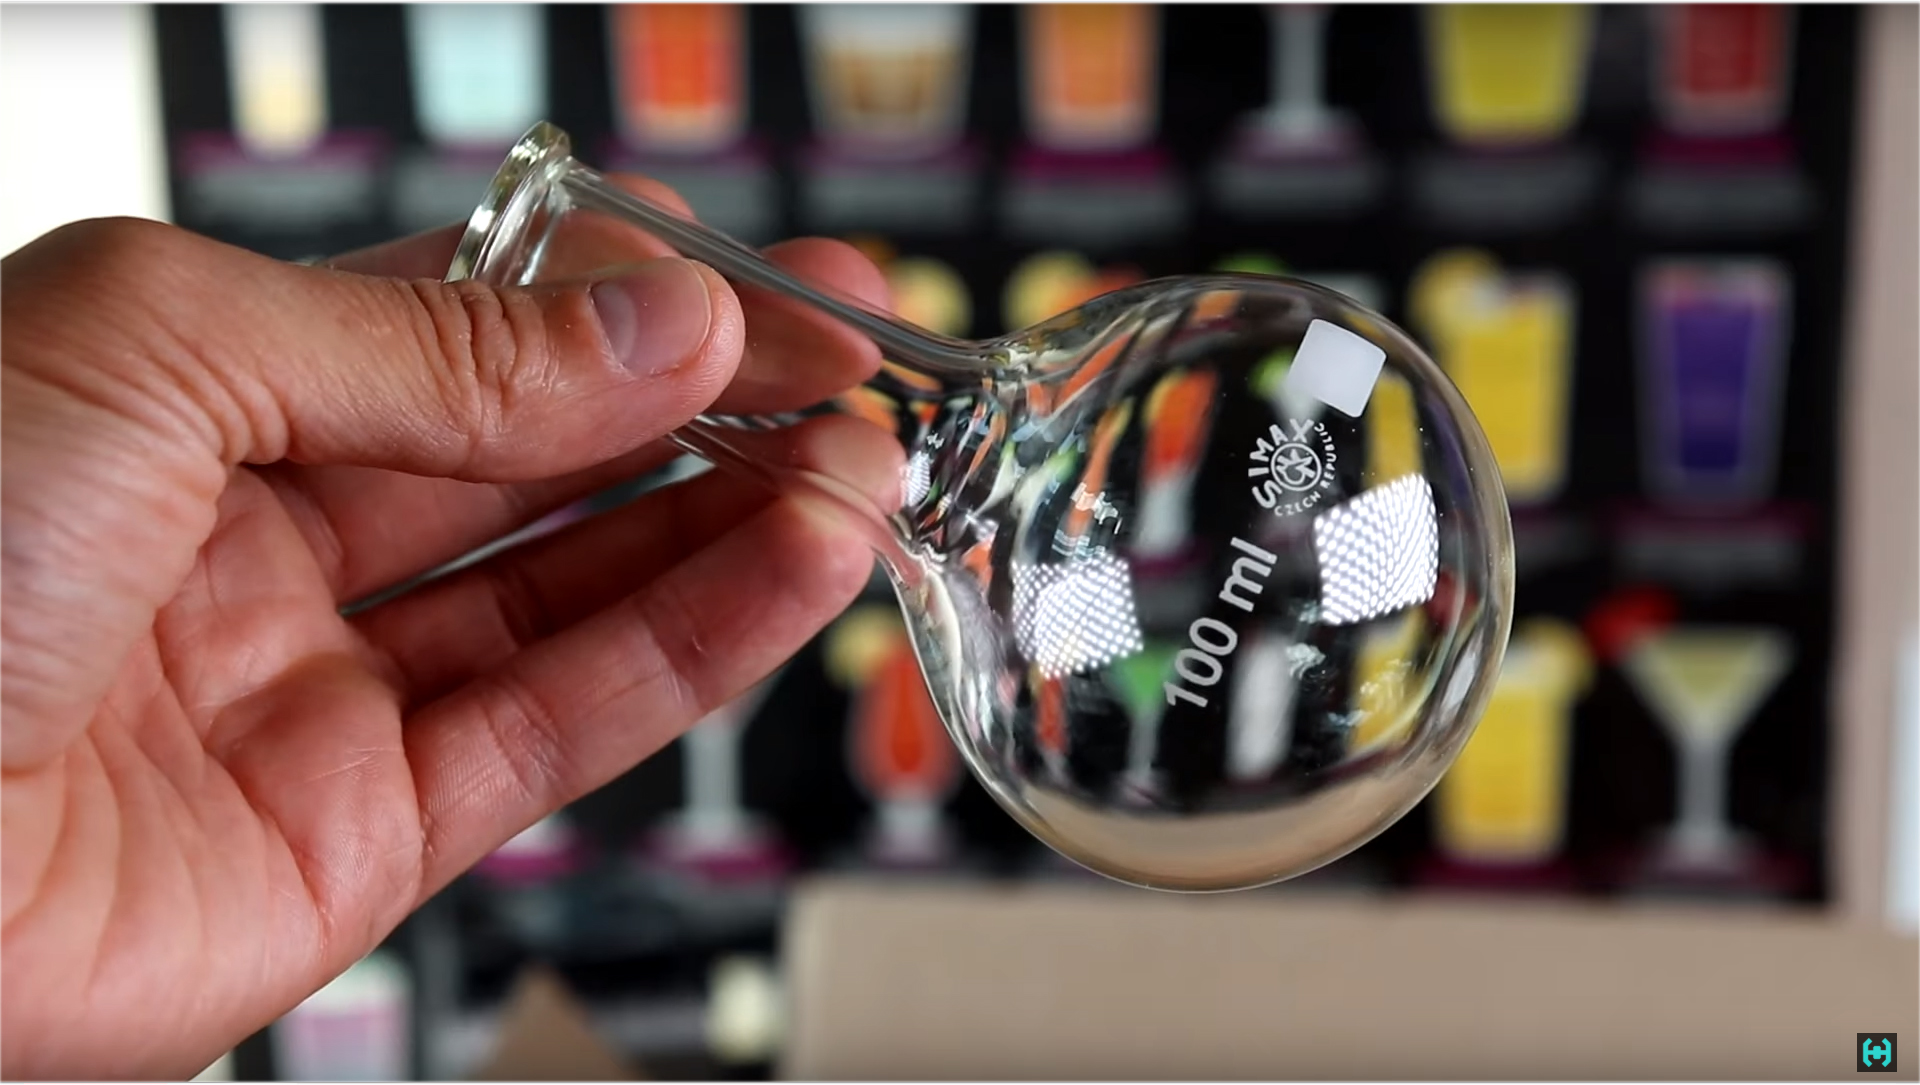 The very first experiments were carried out with flasks half a liter. They were sold at the grandfather's market, so I did not have to choose with volume. The manufacturer is the Druzhnaya Gorka plant, the oldest enterprise in its industry, which has existed since 1801. From practice, it’s good to boil grandmother’s milk in such dishes, and get alcohol, which is what he did in his free time.By comparing the tubes, you can observe the difference in size. We figured out the dishes for the acoustic chamber.
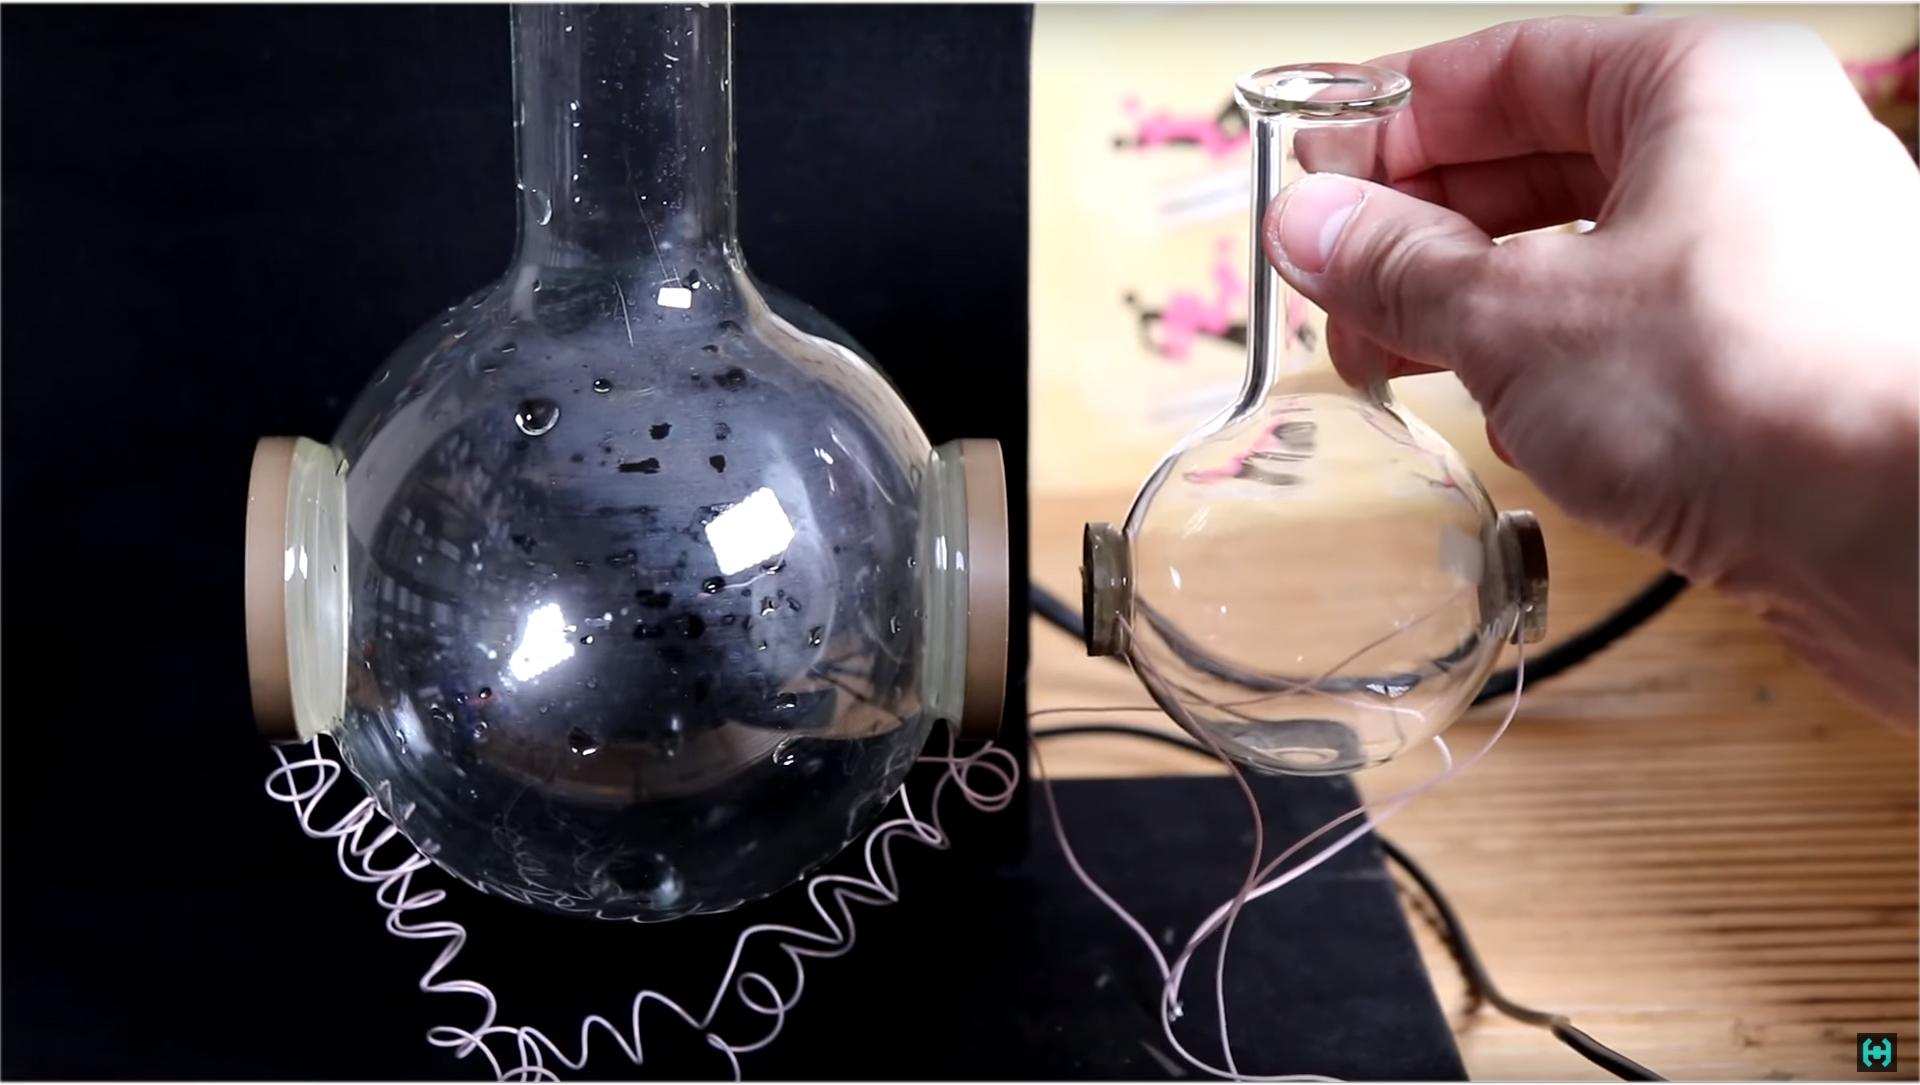 Next, we consider piezoceramics, which, like dynamics, will swing a crowd of atoms and molecules in the volume of water.For reference:the piezoelectric effect was discovered by Jacks and Pierre Curie in 1880. The effect is manifested in the deformation of a material placed in an electric field, and vice versa. These phenomena are also called the direct and inverse piezoelectric effect. Therefore, it is possible to extract electricity from these washers, which was used by the manufacturer of lighters for gas stoves, having patented his invention. Interestingly, the children of Pierre Curie receive a fee from these patentees ?!On the market, piezoceramics vary in size and shape.The ideal option was a solid washer without any holes of Soviet manufacture, with a diameter of 22 mm and a thickness of 4 mm. During the experiments, a large piezoceramic with a diameter of 50 mm and a thickness of 6.5 mm was tested; similar rings can be found in the construction of Langevin emitters, which are used in the manufacture of ultrasonic baths. A powerful thing, you can swing up to hundreds of watts.
 The next step in creating an acoustic chamber is the connection of piezoceramics with a test tube. Before doing this, solder the wires to the washers. The contacts in the Soviet samples are silver-plated or even silver; therefore, they darkened somewhat from time to time. We clean the surface to a mirror shine. A little work with a drill, and the result will not be long in coming. All markings and inscriptions on the metal are visible.We will solder the wires using acid and a powerful soldering iron, you need to do this with one quick touch so that nothing is overheated. Here you can see small grooves for soldering, a rather convenient solution from the manufacturer. Wires must be flexible. Fine silver spraying is very delicate to external loads. Hard conclusions are not acceptable, except that the metal will vomit, so even the ceramics themselves can be damaged.
 For symmetrical placement of piezo emitters, you need to mark the flask.We create tools for descriptive geometry from improvised means: a square, a marker, twist the flask and mark the middle. In any convenient place we put a mark. Cut a small piece of wire or thread, which is equal to the circumference of our bulb. Now we measure the length of the thread and fix the result, 34 cm. Divide this length by two and get 17 cm. Put a mark. Next, combine it with the mark on the flask. Now, on one of the free ends of the wire, it remains to mark the place where emitters will be placed strictly symmetrically relative to each other. This example is shown on a 500 ml flask, since the first experiments were carried out on it.
 It's time to attach the emitters. We will do this using two-component epoxy adhesive such as “Araldite”, it has
 goodadhesion to various materials. The time of complete solidification is about a day, despite the fact that the packaging says 90 minutes. Such an epoxy resin is used by the Chinese in the production of ultrasonic baths, and this is no accident. We squeeze out the contents of the tubes in the proportions one to one. Using a spatula, thoroughly mix the composition until a homogeneous mass is formed. It will become similar in color and consistency to condensed milk from the nearest supermarket. It is as thick and stretches as nutella.The plus of such a mass is that it does not spread, the minus is a milky color. In my understanding, the epoxy should be transparent, because during the experiments at least three types of such two-component resins were tried, and all of them showed a good result. The main thing is to beat this nogogol-mogul slowly so that there are no bubbles, they impede good acoustic contact between the emitter and the tube. Prior to application, surfaces must be degreased with alcohol-gasoline or acetone. It’s not an easy task to guess the amount of resin on the emitter; I often spread it. With small flasks, the situation is simpler, there is less need for epoxide, and therefore, the surroundings, hands, clothes and so on will be less soiled. Let me remind you that washing such a muck is still an occupation.
 So, the acoustic cameras are ready. Work on creating each takes about 2 days. Now these vessels can be filled with water and try to get neutron stars. But here lies another very important point!
 Water. It is needed here not simple, but special, prepared in advance with a certain temperature. Understanding only this stage took about 3 months of my life. Yes, and figs with her, her life is still 9 pieces, just like cats, but that’s not certain ... Imainly used water for the experiment after osmosis, I also recommend that you get such a filter. As they say - “we are what we drink”, for example, I have beer, and you ?!If there is no filter, you can use distilled water, if everything is completely tight, then tap water will go, this option will also work, but I do not recommend it!Pour liquid with a margin into a clean, pre-washed pan. The remnants of the old soup should not be in our water. This stage can be called degassing. Ideally, it is good to use a vacuum chamber, but it is not on the farm, because we boil the liquid for 30 minutes, this will be more than enough.Pour water into a container for food, it must be leakproof, it is important that in the process of cooling water does not pump air from the outside.We close the lid and see how in the first seconds of a sudoku it tends to expand and explode altogether at the first suitable opportunity. But wait, you need to cool! Place the container in cold water for about 10 minutes. At this time, carefully wash the acoustic chamber, it should be transparent like a tear. Shampoo, fairies, we use all detergents. During this time, when cooling, flattened the container, what is needed, it is now under vacuum. We place the contents in the freezer, we need to get a temperature of about 5 degrees. If you miss the moment before the appearance of the ice crust, the water preparation procedure must be repeated again, since in this case it was not possible to observe sonoluminescence. What is the reason for this - I do not know.Pure evacuated water.Fill the tube to the neck. Lying on a tangent so as not to capture the extra air bubbles. So, here it is, the right resonant chamber with the right water. A perfectly transparent, cold and spherical lens, in which 10 out of 10 attempts were successful in creating and observing single-bubble sonoluminescence.
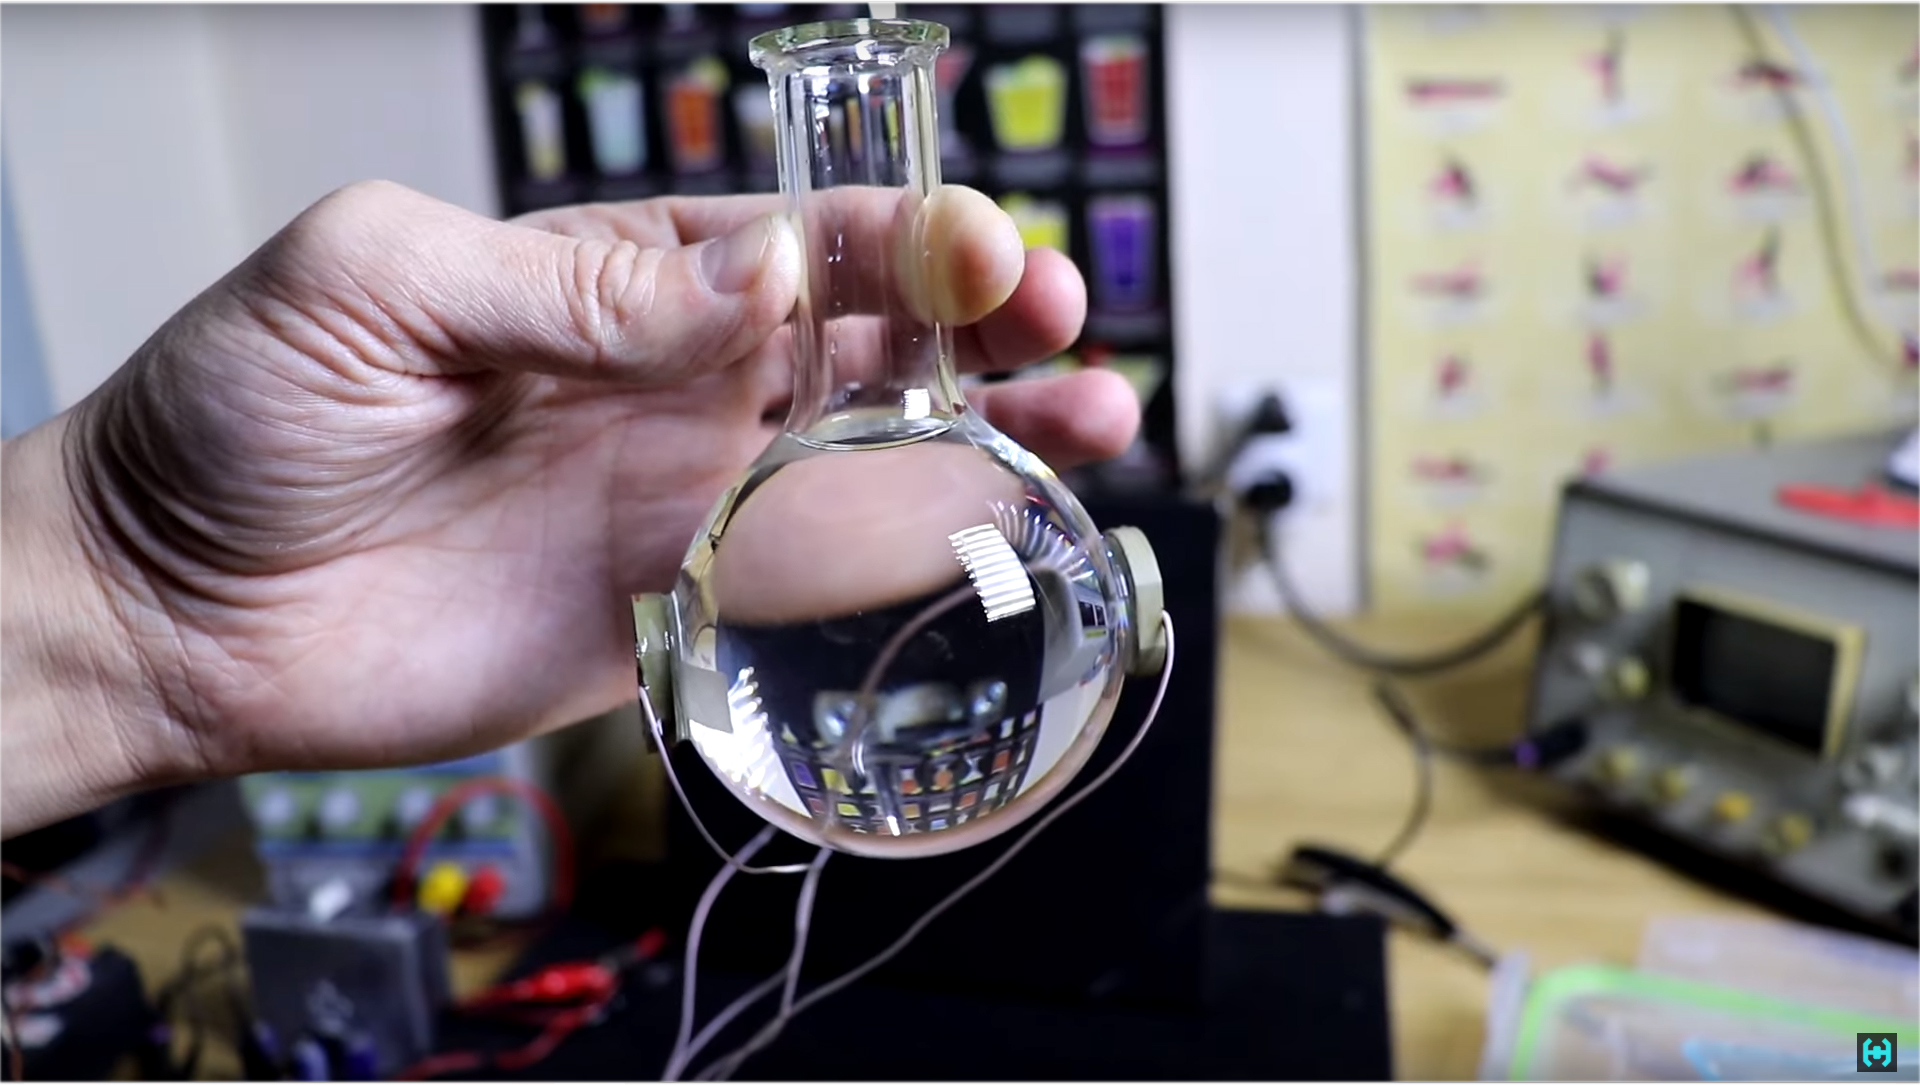 Now how to do it is not necessary and how it usually ends.If you simply collect water from the tap or from the filter without further degassing, and even pour it on anyhow, then as a result we will see just such an unsatisfactory picture. It is unacceptable! Since our task is to get one single balanced bubble, which is placed in the volume of liquid from the outside. But if soda appeared in the test tube, take out the phone and start taking a picture, you can get beautiful shots with the effect of lensing bubbles.
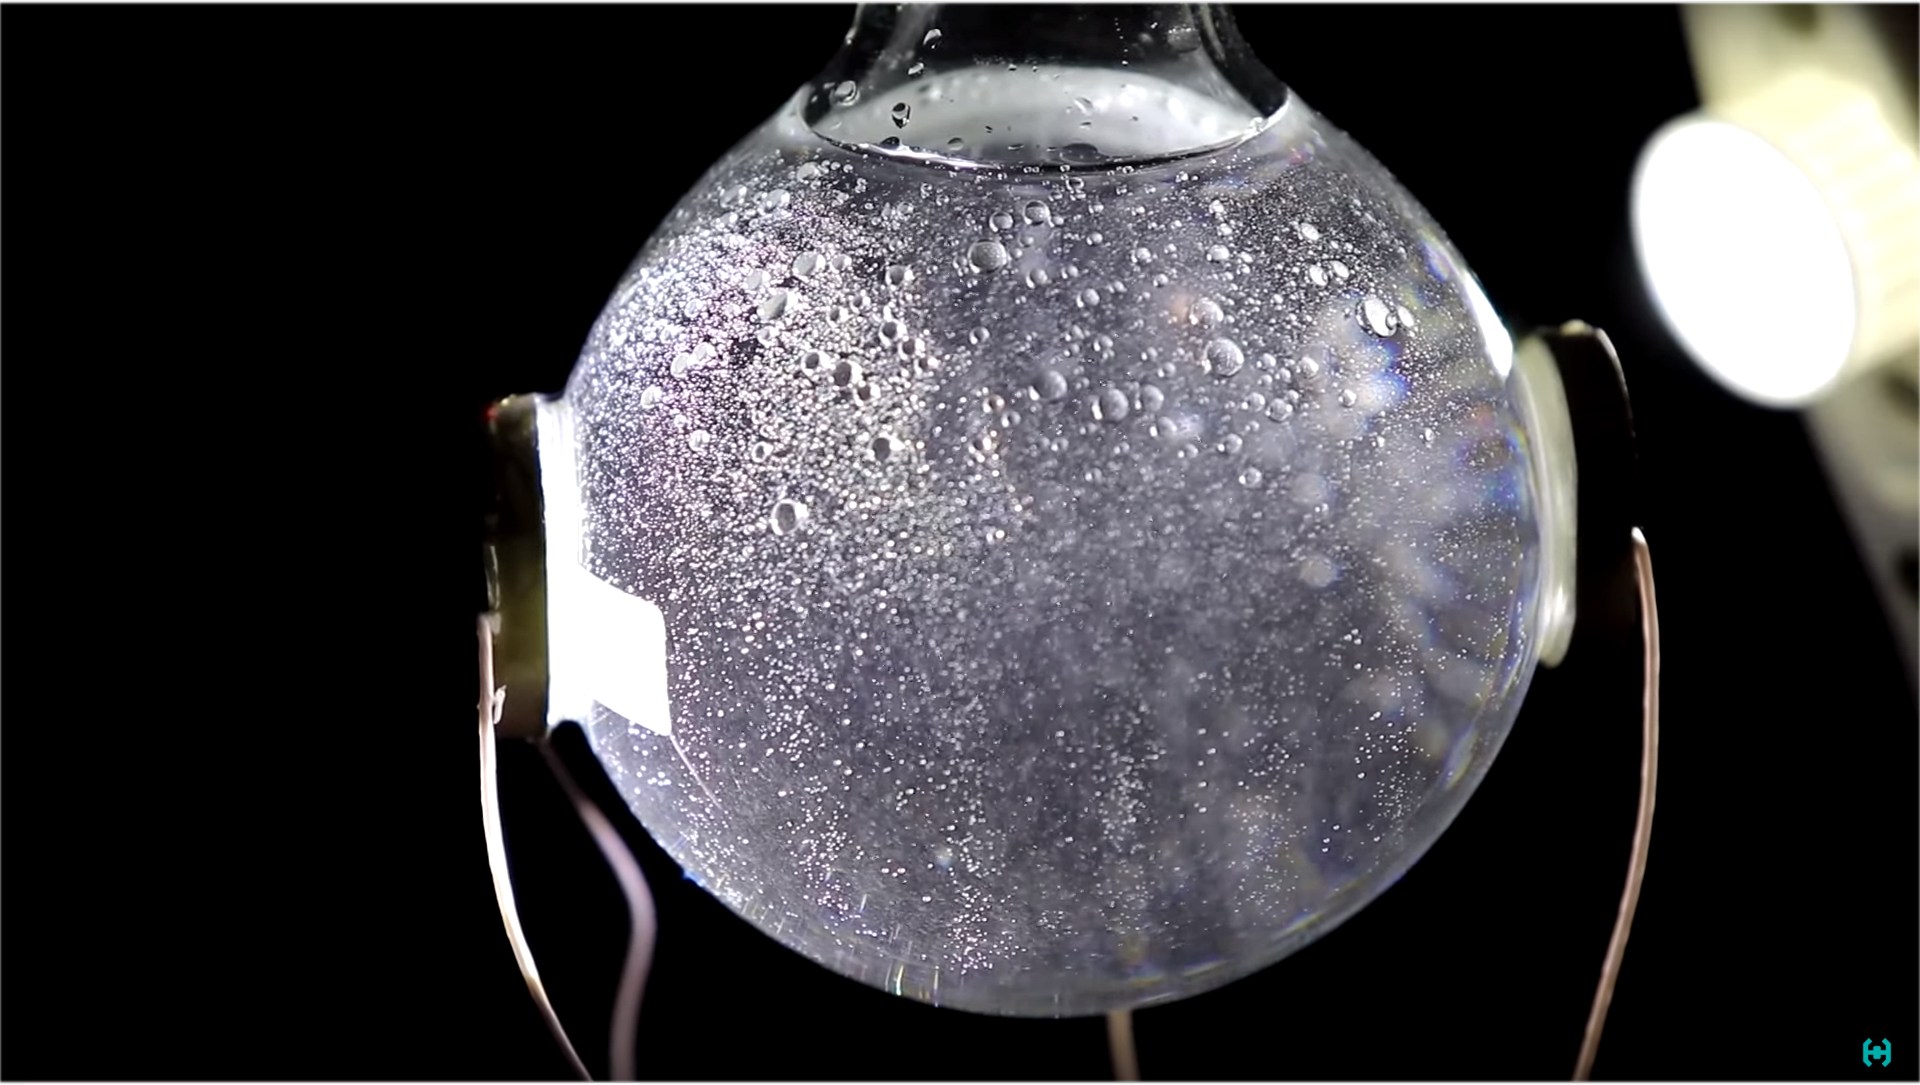 The first attempts to degass water were carried out on a previously prepared stand with the participation of distillate and dry alcohol. To prevent dust particles from entering the water, a cap was put on top. Boiling water is still an exciting phenomenon, here you can see all the ascending flows of the heated substance ...The result of such boiling naturally did not lead to anything good, since the neck of the tube was not hermetically closed, and during cooling, the water again pumped air and became unsuitable for further experiments. But then I did not know this, poured water and observed a similar picture of widespread bubble formation. They were on the inner walls, in the innermost volume and, in general, everywhere no matter where.
 So, we already know how to prepare water.At a low water temperature, condensation will begin to form on the walls of the flask, it will interfere, therefore, we stock up on napkins and absorbent rags. We managed to get a neutron star from our own practice at temperatures from 5 to 15 degrees Celsius. At 10, the glow was brighter than anything, at below 5 and above 15, there was practically no glow. When water was cooled to form ice crystals, there was no glow at all over the entire temperature range.
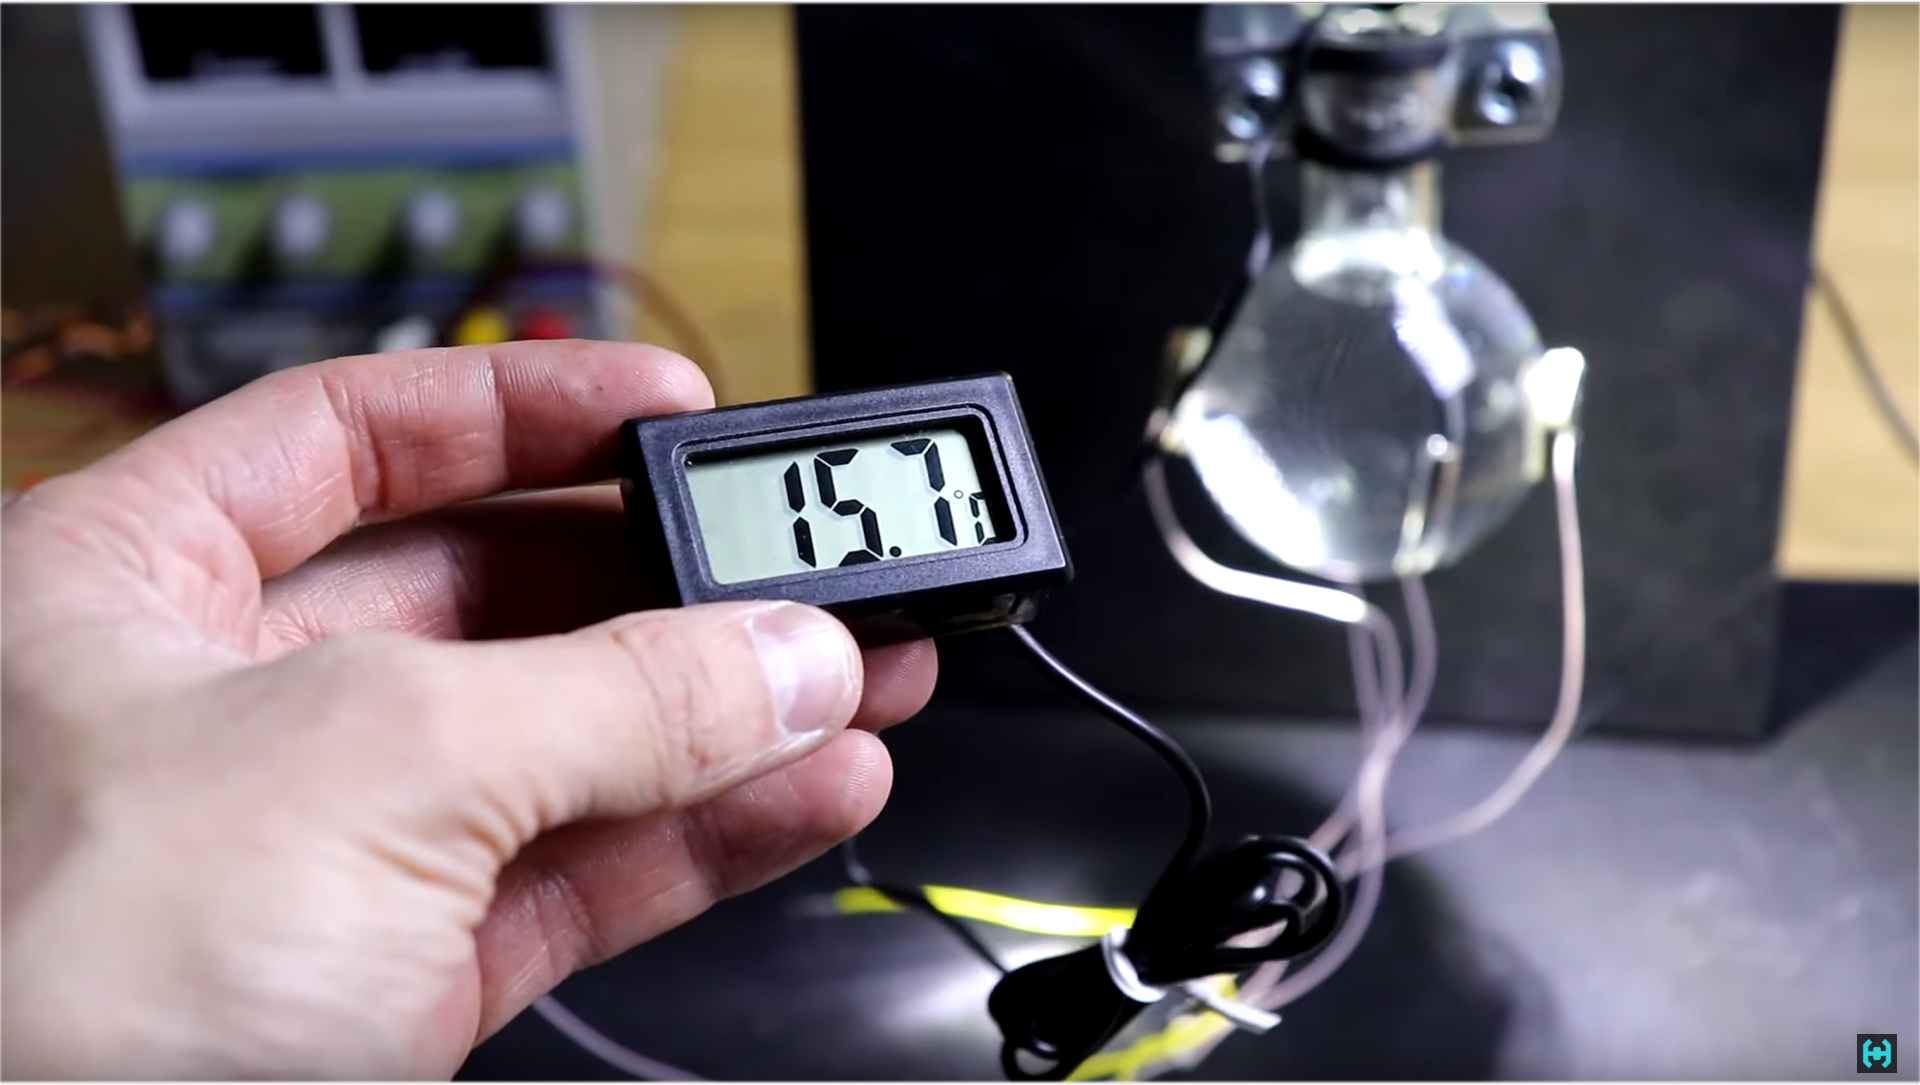 A resonance chamber is installed, acoustic waves act on the bubble, turn off the light and see a rare phenomenon with the formation of a tiny neutron star.To register the phenomenon on the camera, you need to install a black background, and get hold of a fast lens, my old ultrasound turned out to be almost blind when shooting this phenomenon. This I am silent about the focus at one point in space. For this reason, the project was frozen for about six months before the advent of new filming equipment.The acoustic chamber at the initial stage of obtaining sonoluminescence must be highlighted in order to understand whether the bubble has stabilized in the center of the bulb. At this stage, the information on the creation and preparation of an acoustic chamber can be considered exhaustive, therefore, we turn to the generator and control system of this experimental setup.
 At first, I decided to take a proven circuit from an ultrasonic bath, here both the frequency can be adjusted, and the power to get about 60 watts is what you need. He bred the circuit under the parts at hand. The compactness of the board with this approach is guaranteed. When working at large capacities, problems arose immediately.The first inclusion of the installation for health checks, by mistake made with an empty test tube. When tuning the frequency, the glass at some point went into resonance and cracked. To make a new flask was laziness, you need to repair the old one, insert a piece of glass to where it fell, and fill it with epoxy on top. We return the soldier to the ranks, and continue to observe.
 Not possessing enough information, it seemed to me that the acoustic resonance in the flask is directly related to the mechanical resonance of the piezoceramic itself, but the fact is that the mechanical resonance of each type of piezoceramic will be different. This did not stop for 5 nights sitting and trying to find a needle in a haystack.All initial calculations were taken from the ceiling, from here the inductance coil, the frequency on the generator and so on were incorrectly selected. Despite this, somehow, we still managed to achieve a stable bubble in the center of the flask.Under the influence of acoustic waves, it contracted to such an extent that sometimes it simply disappeared from the field of view.Sometimes it began to reflect light like a silver droplet of metal. The amplitudes of the voltage at the emitters reached such values that ordinary ferrite inside the inductor began to shock, leaving behind itself small traces of burns on the fingers. At the same time, a neon bulb starts to shine even before touching the emitter. Such strong fields around.
 After numerous and unsuccessful attempts to obtain a neutron star, I wondered what would happen if I pumped the maximum possible power for this system into the acoustic chamber. Unscrew the voltage on the power supply to the maximum, and look at the result. From the first seconds you can observe strong cavitation in the water, which changes its shape ...During frequency tuning, the glass bulb came into resonance and cracked, sacrificing itself for the sake of science. The contents of the flask, as it empties, gradually leaves its mark on the ceiling of the neighbors below. There is a flood around, but the flask is still holding. I leave the real sounds of this experiment in the video .We observe the right piezoelectric element on the resonant chamber. At that moment, he probably cracked, and flashes of plasma appeared on it.Further verification showed that the element is dead. Judging by the testimony of the power supply, the power on the surviving piezoelectric element is approximately 180 watts. At this stage of filming, I was sure that it was impossible to get sonoluminescence at home and there was nothing more to lose. A lot of time spent, resources and sleepless nights, since it was after sunset that work began in this direction ...Araldite, praised by many, does not withstand large vibration loads, several times it was necessary to glue the piezo-emitters, but now we are talking about a large acoustic camera, which never earned properly.
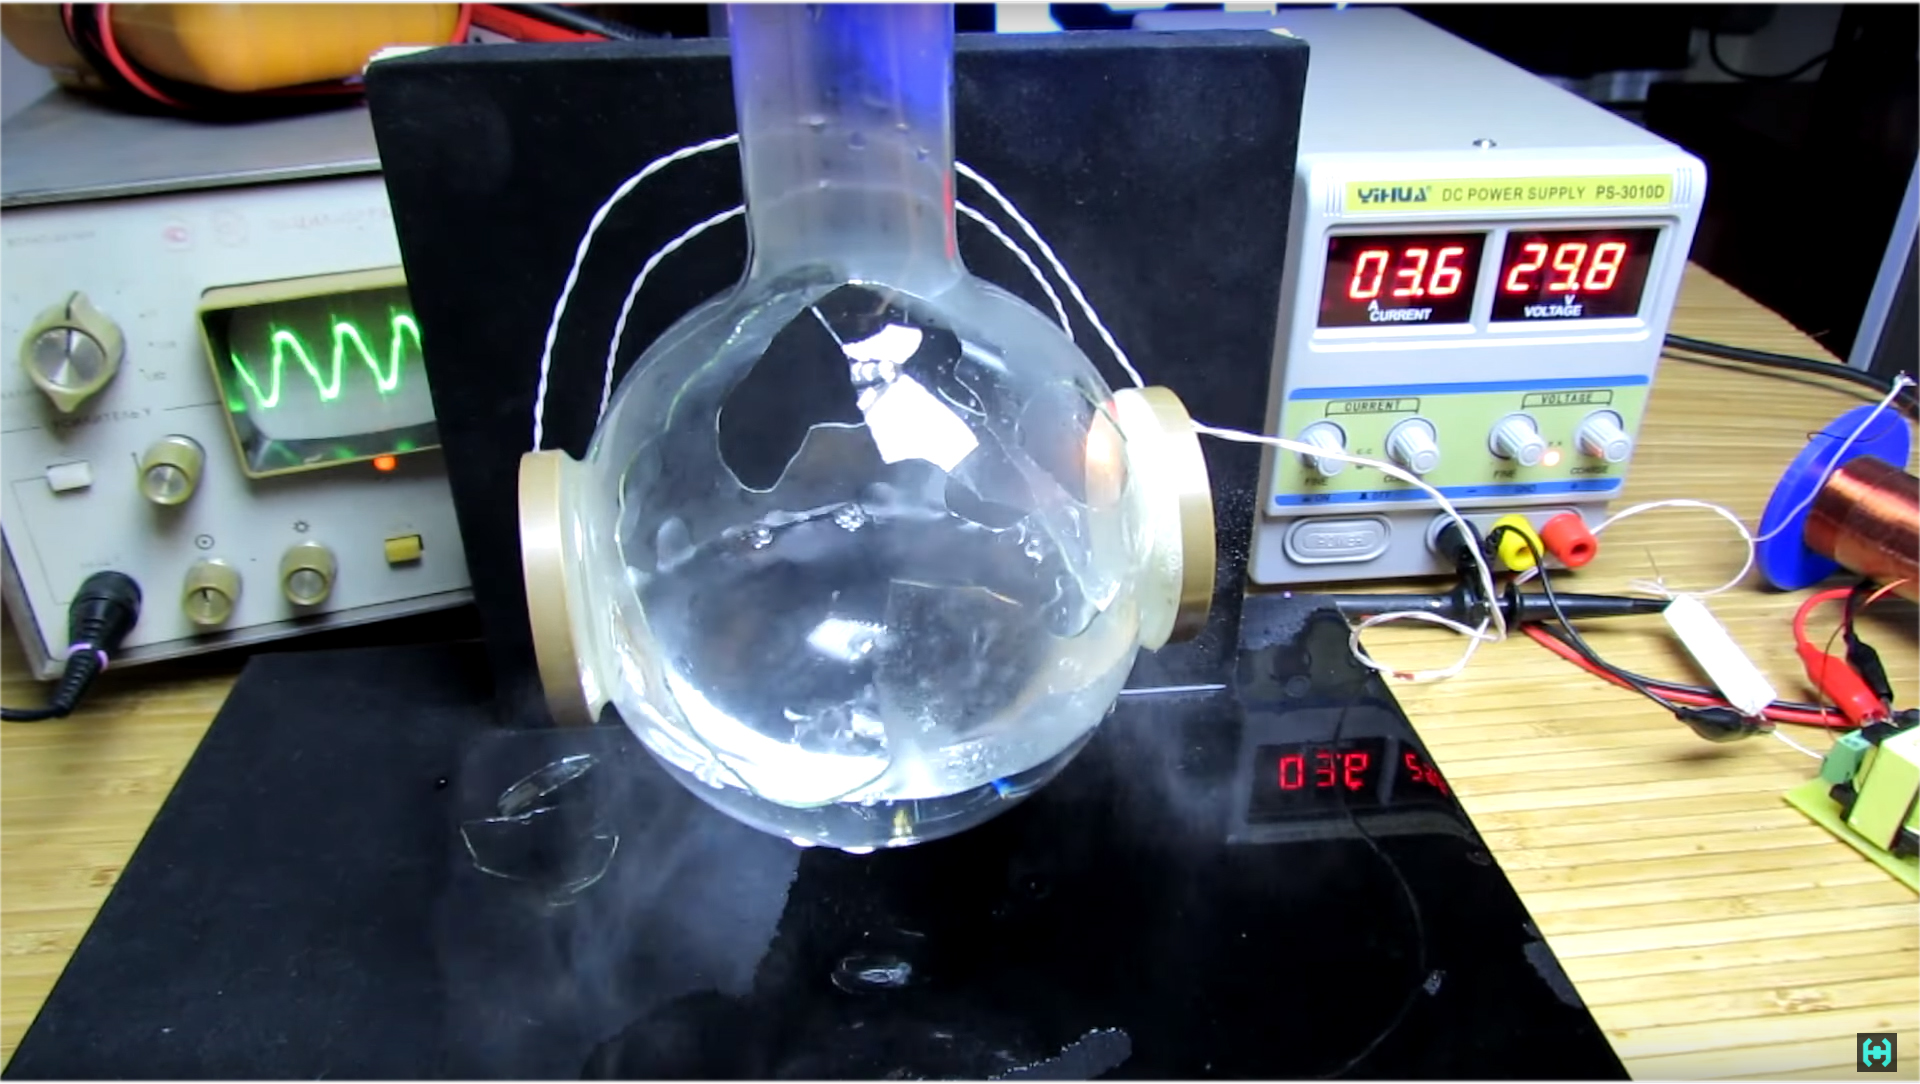 A further decision was to contact Sergey Matyushenko himself , who, like no one else, knew how the principles of this experiment worked.As it turned out, he defended his thesis on this subject, so he kindly told all the nuances when receiving sonoluminescence, for which many thanks to him.So, for starters, we need an accurate master oscillator, in which the frequency does not float from the ambient temperature, for these purposes, a frequency synthesizer on the ad9850 chip is perfect. At its output, we obtain a pure sine with an adjustment step of 1 Hz. On the farm, such a device is simply irreplaceable, with its help you can find resonances, check the working range of audio systems and use in other different experimental directions. The frequency range varies from 1 Hz to 40 MHz. But, the amplitude of the sine output signal of the device is very small and equals only 2 volts. To amplify the signal, it is rational to use an amplifier.
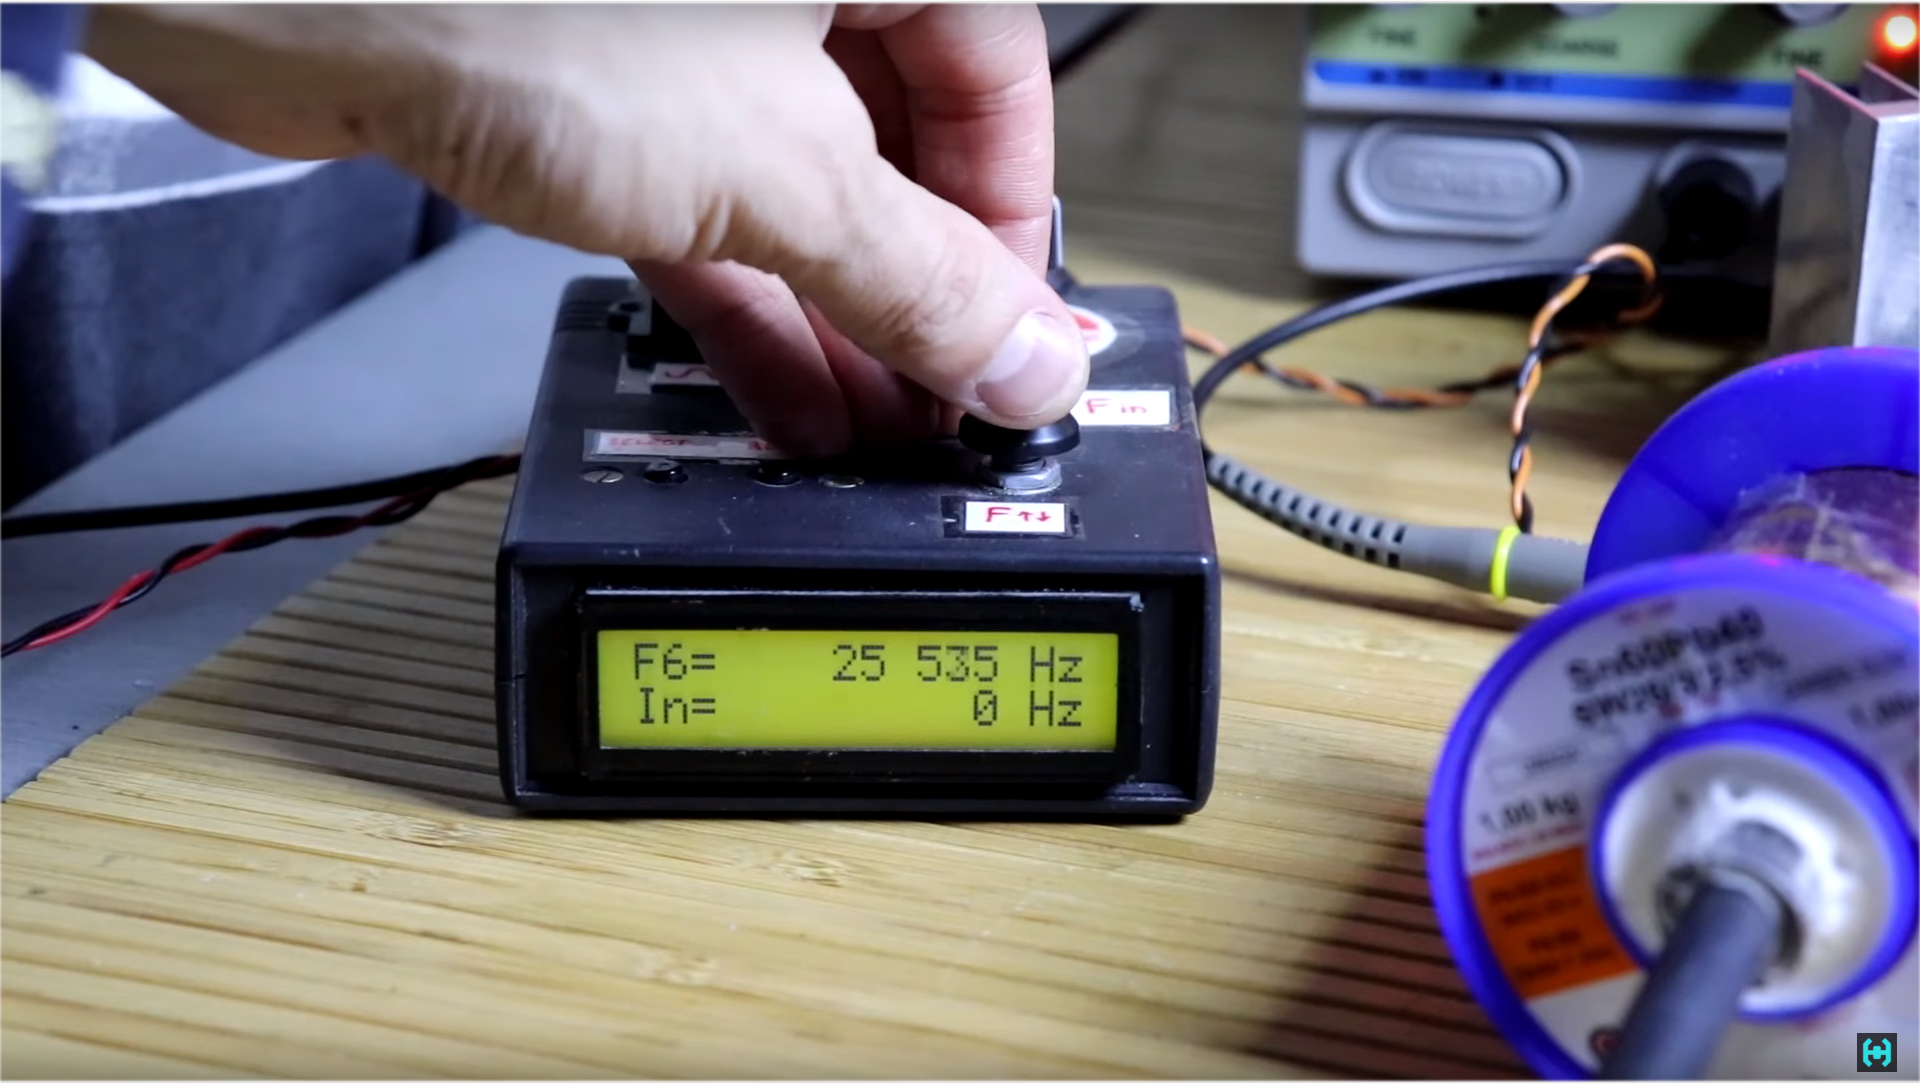 Since the frequencies within the experiment are small, it is rational to use an audio frequency amplifier. In this case, a single-channel Class H amplifier is used on the TDA1562Q chip. It is quite high quality, and plays amazing music.
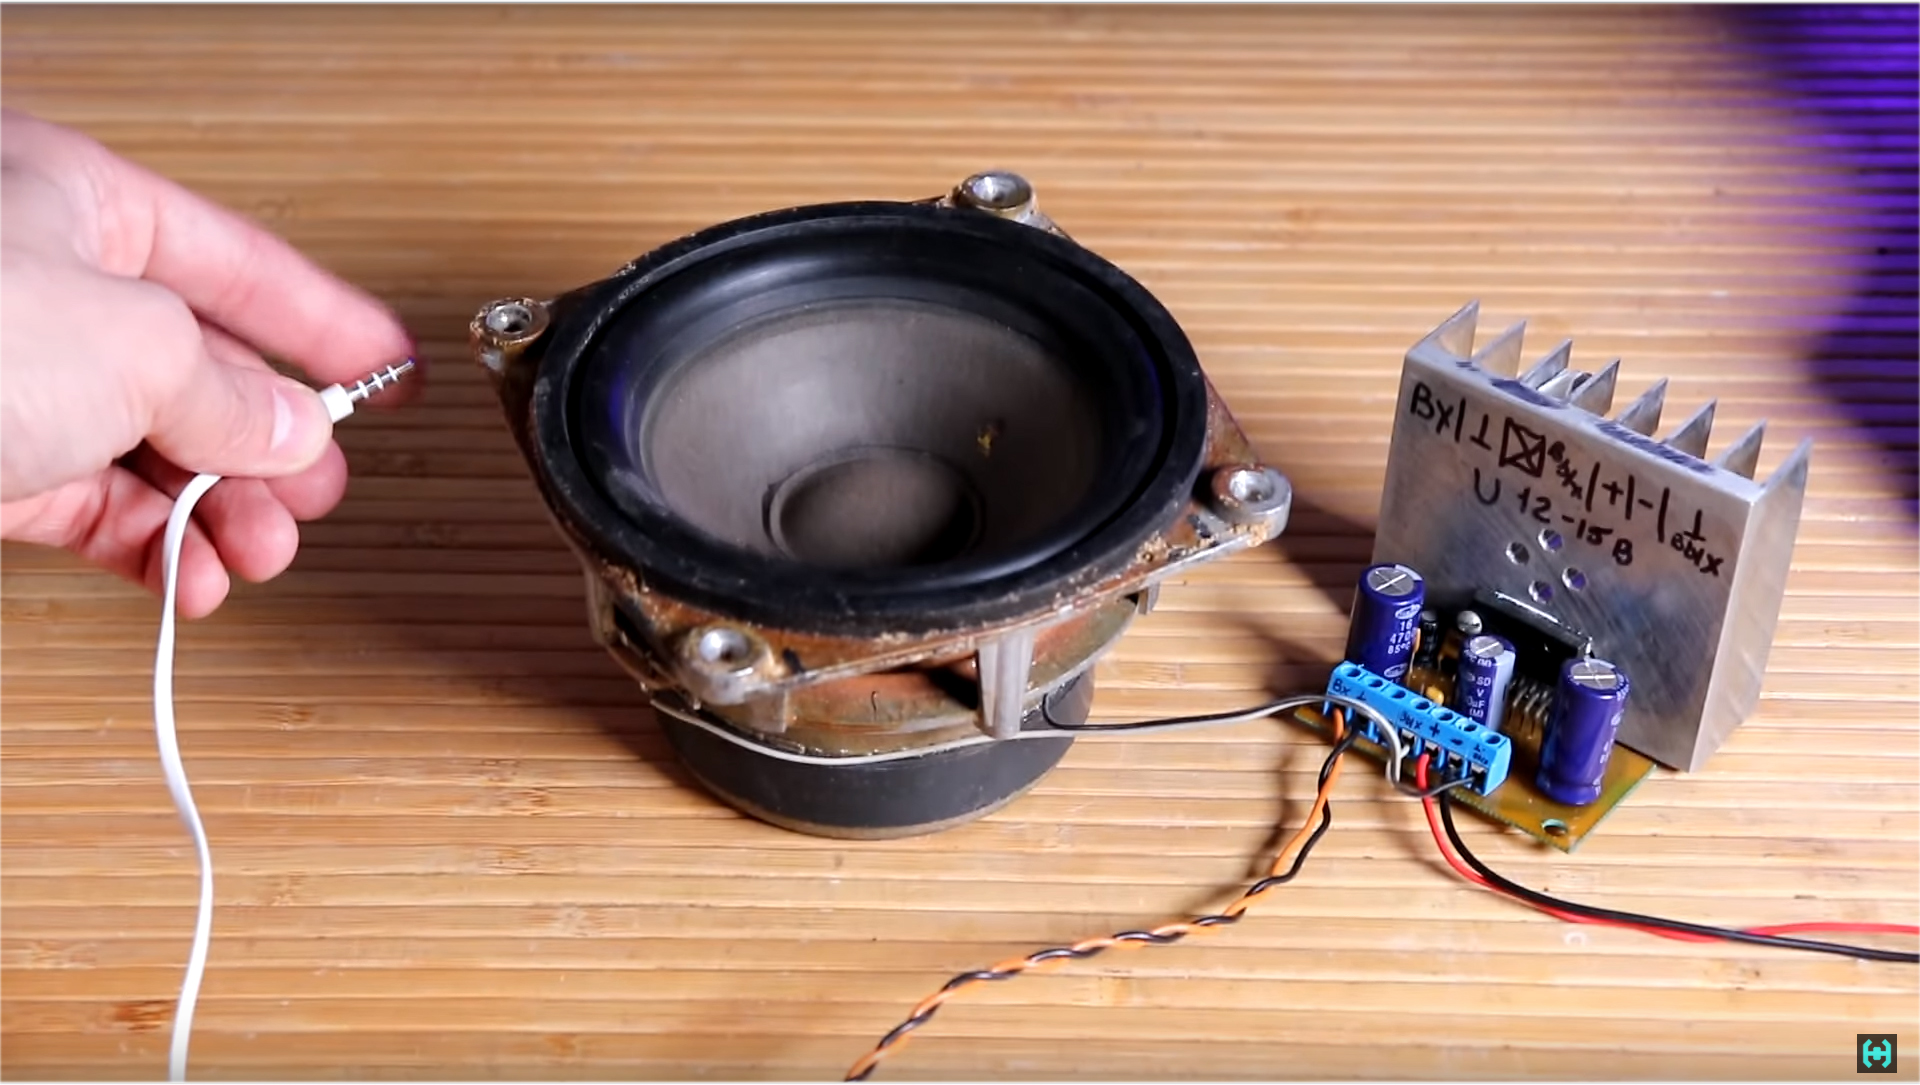 For the operation of piezoelectric emitters, a high voltage is required, the source of which is absent in this circuit. One way to obtain a sufficiently high voltage is to use an oscillatory circuit tuned to resonance.In this work, we use a sequential oscillatory circuit in which the role of the capacitance is played by piezoelectric emitters, and in the role of an inductor, an inductor, which can change its parameters by introducing a ferrite rod into it. Indications here can vary from 8 to 50 mH depending on the length and permeability of ferrite. I used a copper 0.68 wire wound in 8 layers. The thicker the wire, the less loss.The presence of resonance in the circuit will be determined by connecting a 1-ohm resistor to the circuit, in parallel with which we connect the oscilloscope circuit.If the frequency of the generator and the natural frequency of the resonance of the circuit formed by the inductor and the capacitance of the piezoceramic emitters coincide, the maximum voltage amplitude is observed on the resistor, which corresponds to the maximum current of the circuit, which in turn indicates the presence of resonance.The complete scheme for obtaining single-bubble sonoluminescence looks something like this. The signal from the reference generator is fed to an audio frequency amplifier, at the output of which a sine of a given frequency is formed with an amplitude of say 12 volts. This signal is fed to an LC circuit consisting of a variable inductor and an acoustic chamber where piezoceramic emitters act as capacitors. A standing wave forms in the volume of the liquid, in the middle of which a luminous bubble of interest to us forms.
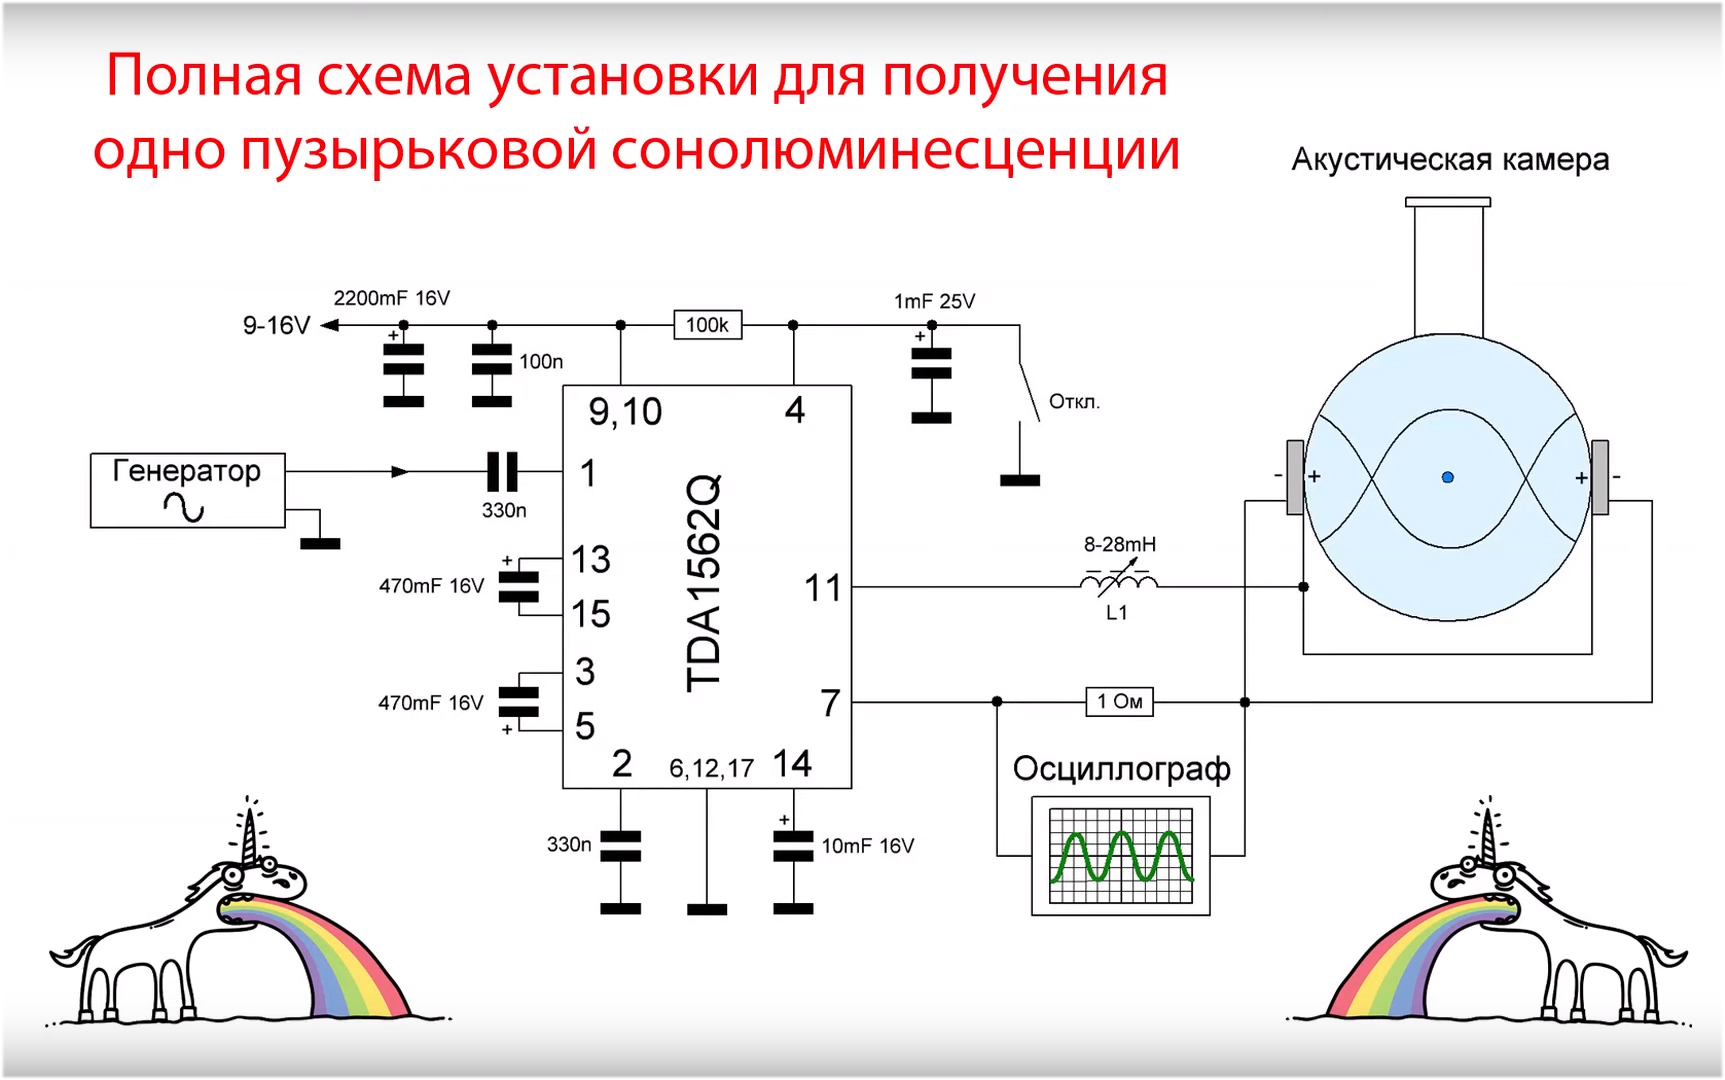 We start the installation and place a small air bubble with a syringe in the volume of liquid. But how do you know the desired frequency at which a standing wave is formed inside the acoustic chamber !? Everything is simple.If we take it approximately, then resonance is achieved when the acoustic wavelength is equal to the distance between the piezoelectric emitters. If we measure the diameter of our 100 ml tube, then it will be equal to 65 mm, this is a figure and will be equal to the length of the acoustic wave necessary for our calculations. As you know, the wavelength propagates in a certain medium at a certain speed, and is determined by the expression: the wavelength is equal to the speed divided by the frequency. From here we express the frequency, which is equal to the speed divided by the wavelength, which is also equal to the speed divided by the distance between the piezoelectric emitters.The speed of sound propagation in water at t = 0 is equal to c = 1402.7 m / s. We divide this figure by the distance between the emitters of 65 mm, and we obtain a frequency of 22.270 Hz.It is also worth considering the change in the speed of sound propagation in a liquid with a change in temperature. With increasing temperature, the speed of sound in a liquid increases, so the frequency also increases. In the future, the calculated resonant frequency will differ from the actual due to the complex geometry of the bulb.
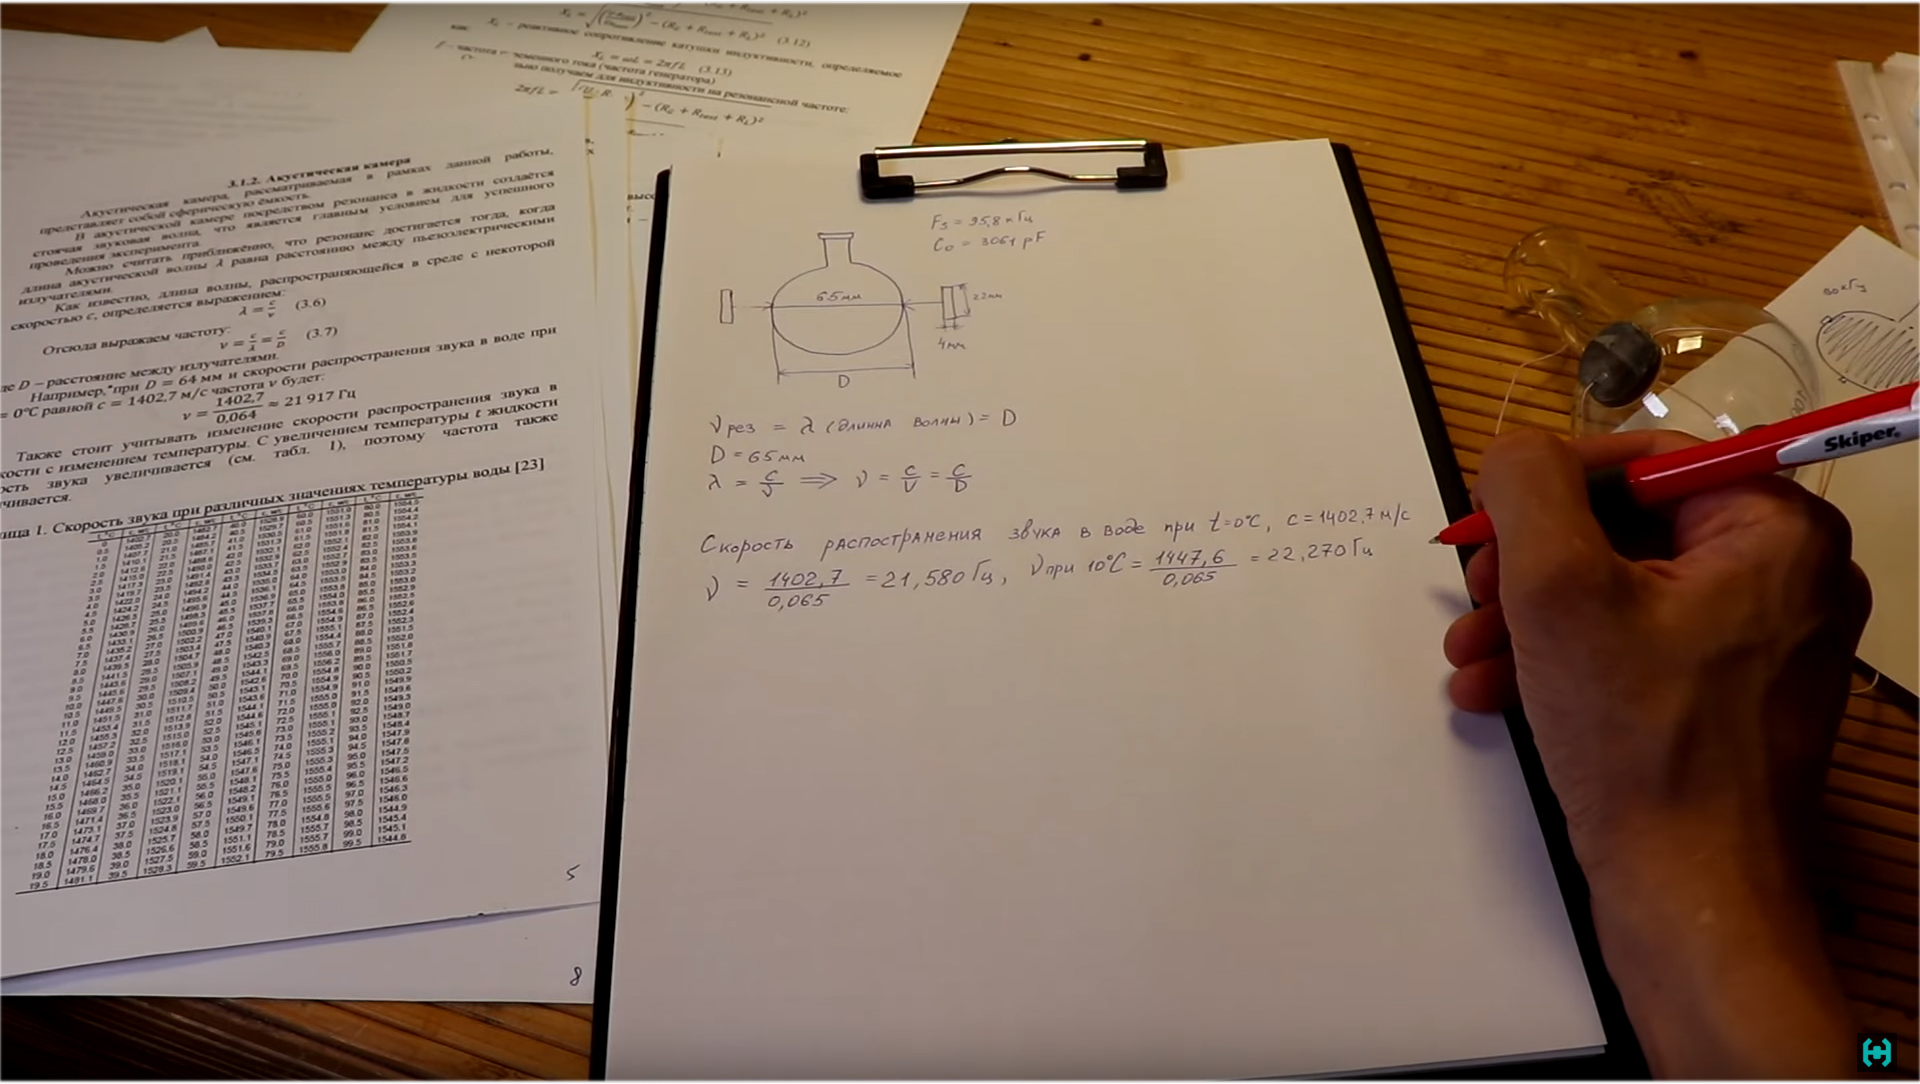 So, the calculations are made.We begin to select the frequency and observe how the signal changes on a 1-ohm resistor connected in series to the circuit. Regardless of the frequency, the amplitude of the signal can be changed by introducing a ferrite rod into the inductor. Very comfortably. Using a syringe, place a bubble in the volume of fluid. They will be squeezed out more than necessary, but due to the acoustic wave they will all be attracted to the center of the bulb.Piezoelectric emitters are glued to epoxy glue, their centers are located on the same axis. The voltage applied to the two conducting surfaces of the piezoelectric emitters parallel to each other, causes mechanical deformation (inverse piezoelectric effect). The greater the amplitude of the voltage, the greater the amplitude of the deformation of the piezoelectric element, which is transmitted to the acoustic chamber..Then, due to the Bjerknes forces, if the ultrasound frequency is close to or equal to the resonance, the bubbles will begin to move to the central part of the bulb. We wait until the bubble stabilizes and, as it were, hangs in the center of the acoustic chamber. If the bubble jumps from side to side, we try to shift the frequency up or down, we have achieved stability, then we slowly raise the signal amplitude by introducing a ferrite rod into the variable inductance coil. Here it is important not to sort out, since the bubble can destabilize, which will lead to the disappearance of the glow, or it can completely disappear. If there is still no glow, try to add or vice versa to take a couple of milliliters of water from the acoustic chamber. It also helps to offset the position of the tube relative to the clamp that holds the neck., . .
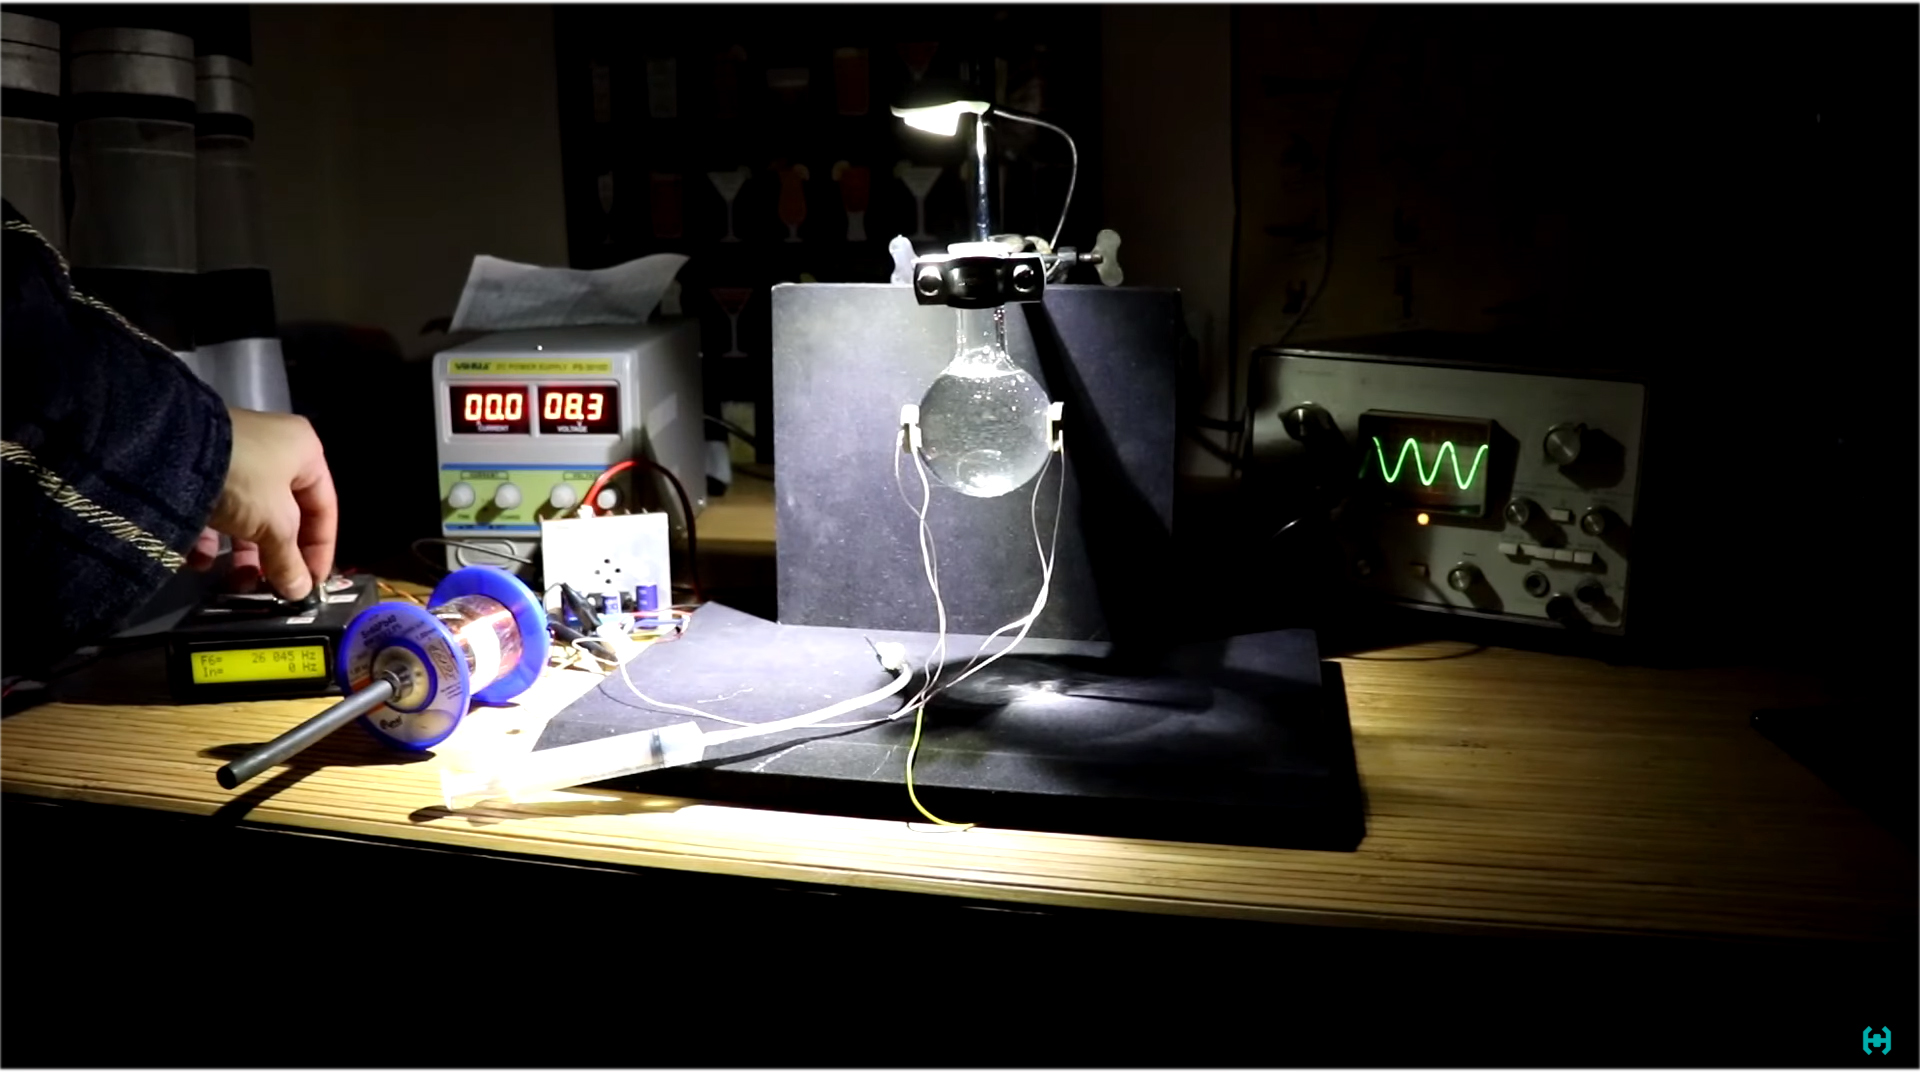 , 20- , , .Sonoluminescence, a cavitation bubble hanging in the central part of the flask, began to emit visible bluish light. It seemed something unattainable and truly amazing. A rare physical phenomenon that, due to acoustic exposure, generates light in a small air bubble. The color of the glow and brightness in the future could be slightly different. The bubble could emit both a white glow and a bluish one. In some scientific papers I read about the existence of a red glow, but in the framework of this experiment, it was not possible to fix such a glow. Here, the temperature of the water, the presence of salts dissolved in it, the resonance frequency, the amplitude of the effect on the bubble, and other factors, the existence of which is difficult to guess, affect it.The physics of a flash of light arises here due to the fact that a powerful ultrasonic wave in water leads to cavitation. After all, a sound wave is an alternation of high and low pressure, and if the pressure decreases to such an extent that it becomes very negative, then the sound wave will literally rip the water and create a gas bubble at that moment. Then, after half a period of sound oscillation, when the pressure, on the contrary, becomes large, this bubble collapses quickly - and in the process of sharp compression it heats up.It is in the last moment of its collapse, when the temperature inside the cavitation bubble reaches thousands of degrees, it emits a short flash of light. In our case, the bubble remains in place, contracting and expanding to the beat of the ultrasonic wave, and, emitting thousands of flashes per second, generates a stable glow.
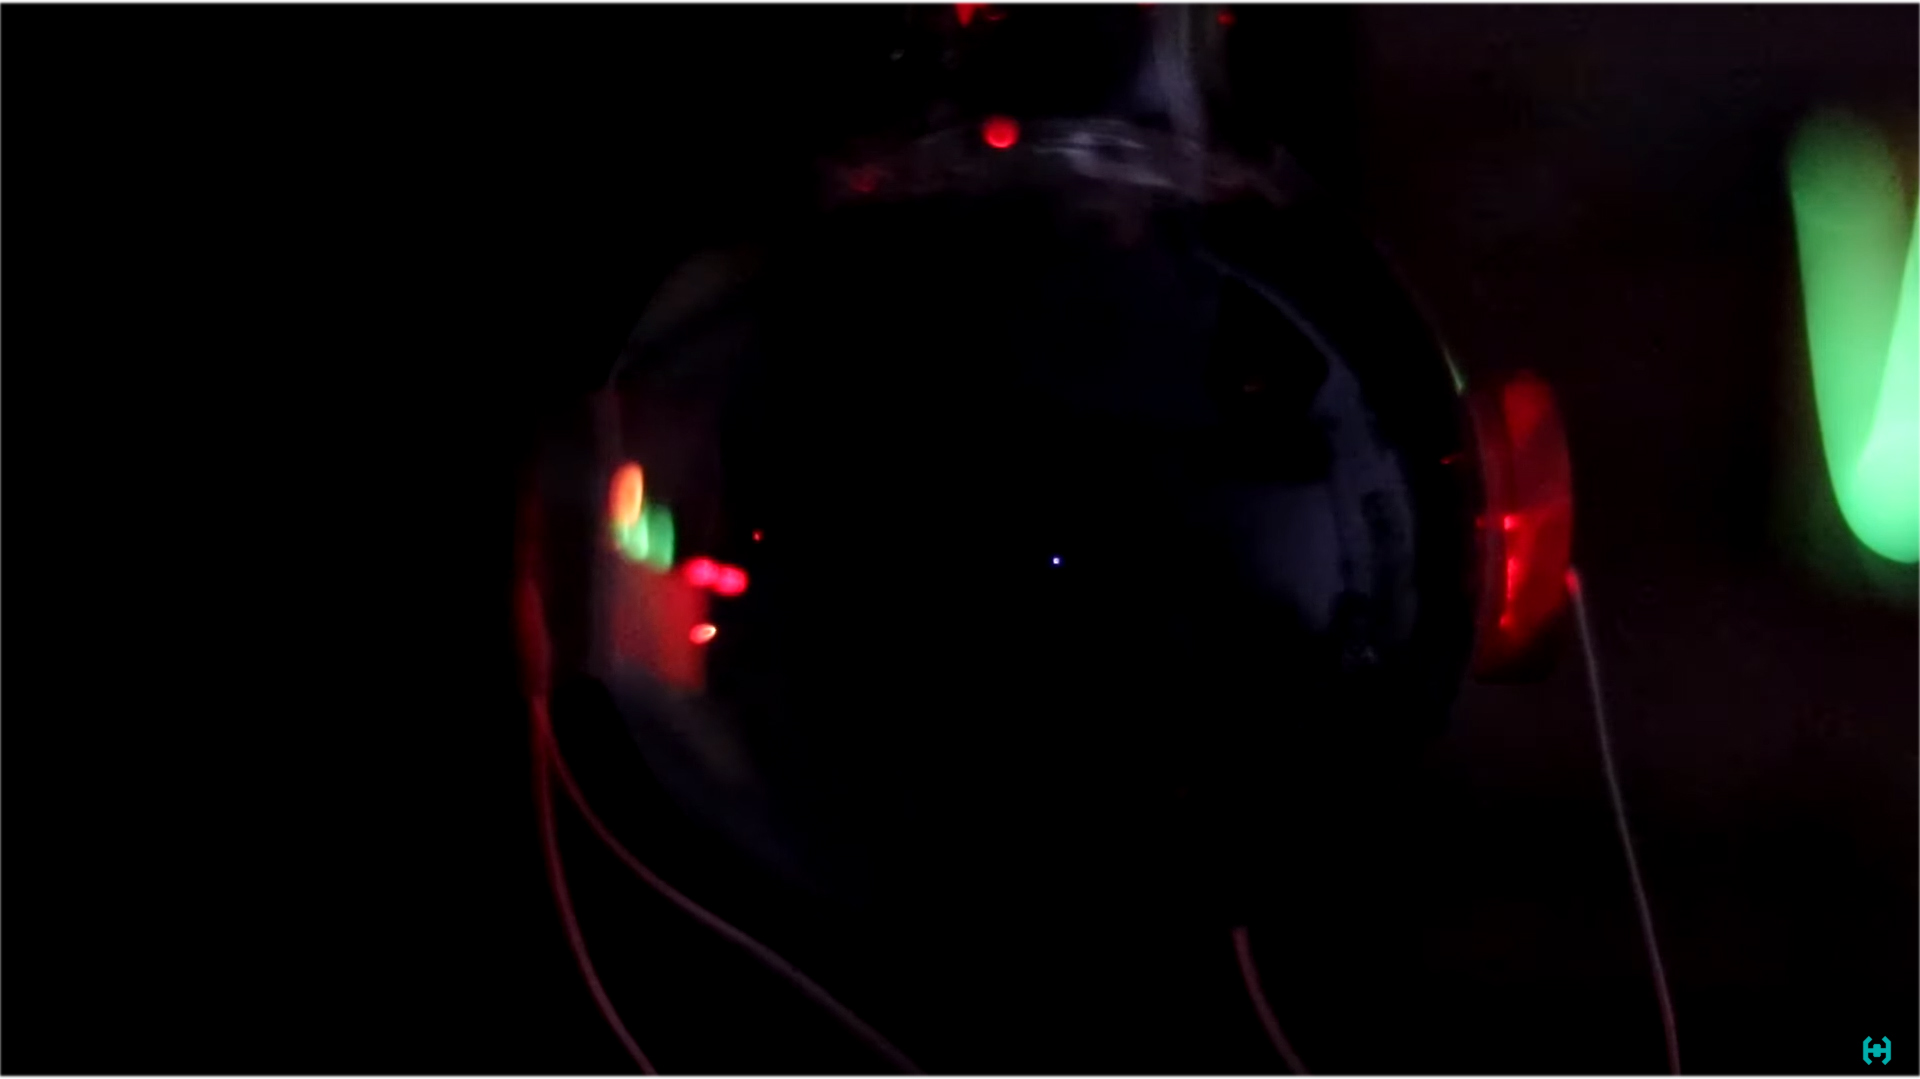 For reference. The creation of this issue took a record one and a half years. Many people write in the comments why the video on the channel is so rare, I answer because! If someone asks what benefit this experiment can bring, I answer - no. You and I just gained experience in yet another craft.
As they say - everything ingenious is simple!
Utility archiveFull project video on YouTubeOur Instagram Source: https://habr.com/ru/post/undefined/
All Articles