 Good day, friends!I want to share experience with audio. By "audio" I mean HTMLAudioElement and Web Audio API.What do we do?We will create something like a player for one track (about a full-fledged player - in one of the following articles).Conditions:
- The ability to download a file from anywhere on the hard drive, either at the click of a button or by dragging and dropping.
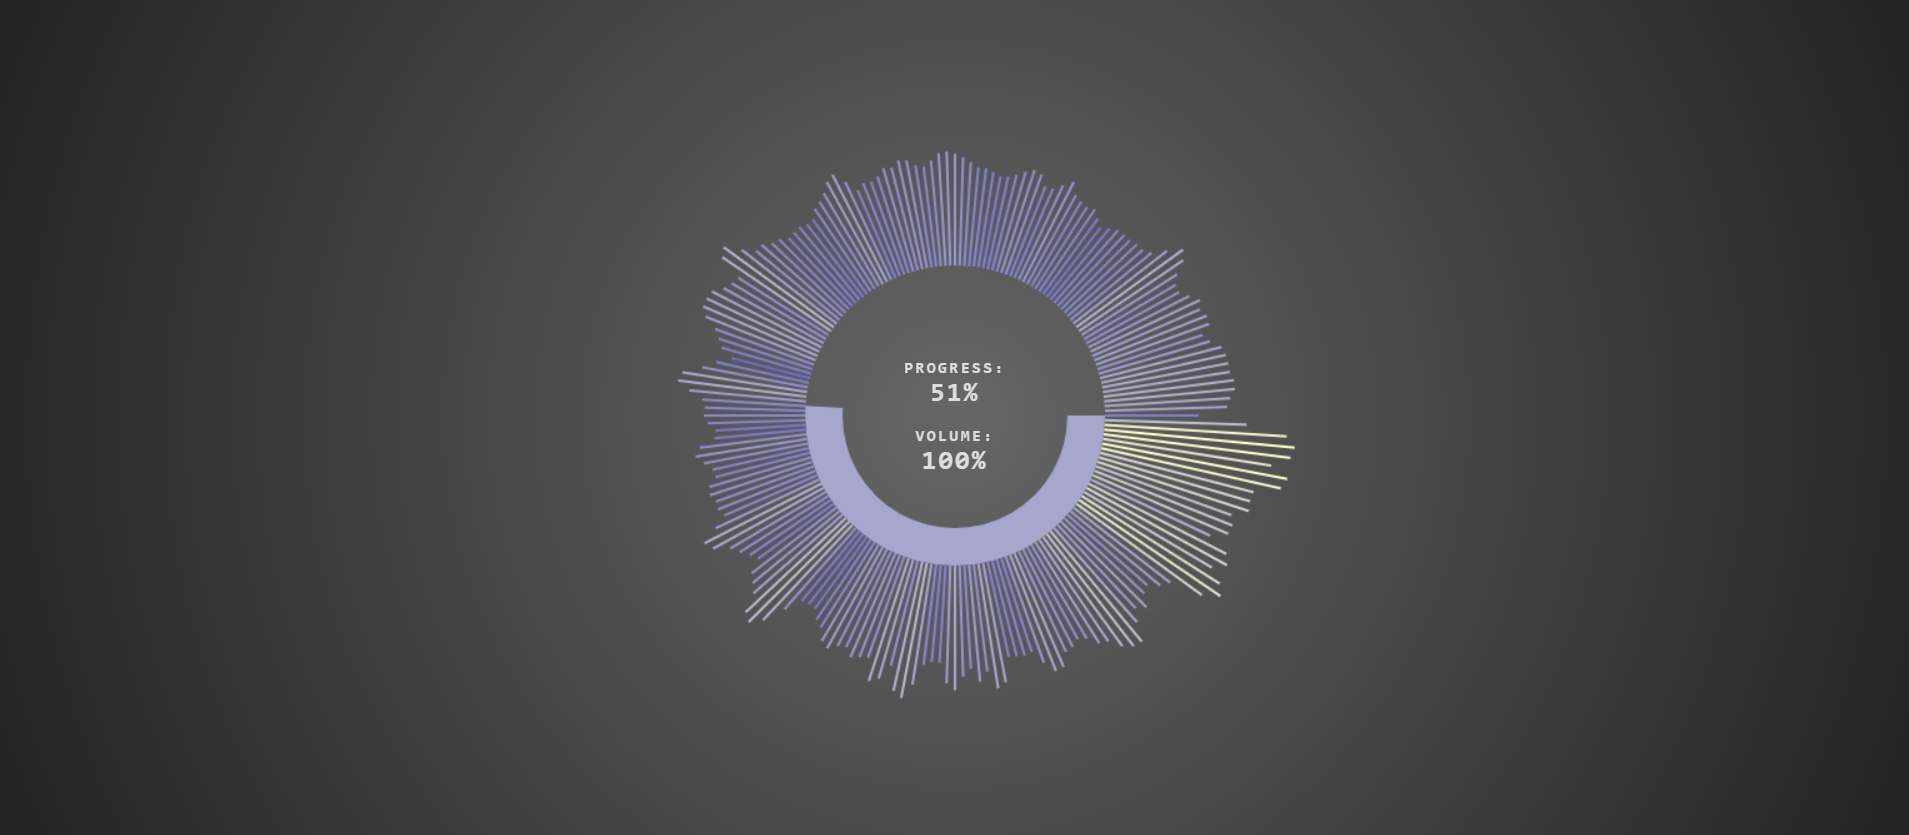
- Circular graphical and text progress indicators.
- Text indicator of sound volume.
- Visualization of audio data.
- Control the player using the keyboard.
The network is full of materials on both HTMLAudioElement and WAAPI , so I will focus on the practical component. In addition to audio, we will work with drag-drop and canvas .Without further introduction ...Yes, I almost forgot: I took the work of one of the Habrovsk citizens as the basis of the “visualizer”. I can not find it by search. I would be grateful for the reference.Here is what our markup looks like:<p>click or drag</p>
<div dropzone>
<img src="https://thebestcode.ru/media/audioProgress&Visualizer/plus.png" alt="#">
<input type="file" accept="audio/*">
</div>
<canvas></canvas>
We have a hint (paragraph), a button (picture + "input" with the accept attribute in the container with the dropzone attribute )and a canvas.As you can see, nothing unusual.Nothing supernatural in styles either.CSS:@font-face {
font-family: "Nova Mono", monospace;
src: url("https://thebestcode.ru/media/audioProgress&Visualizer/font.ttf");
}
* {
margin: 0;
padding: 0;
box-sizing: border-box;
}
body {
height: 100vh;
background: radial-gradient(circle, #666, #222);
display: flex;
justify-content: center;
align-items: center;
}
p {
position: absolute;
top: 50%;
left: 50%;
transform: translate(-50%, -70px);
color: #ddd;
text-align: center;
text-transform: uppercase;
font-family: "Nova Mono", monospace;
font-size: 0.8em;
font-weight: bold;
letter-spacing: 2px;
user-select: none;
}
span {
display: block;
font-size: 1.6em;
}
div {
width: 100px;
height: 100px;
display: flex;
justify-content: center;
align-items: center;
border: 1px dashed #ddd;
border-radius: 10%;
cursor: pointer;
}
img {
width: 70px;
height: 70px;
filter: invert();
}
input {
display: none;
}
canvas {
display: none;
}
We pass to JS.We declare the main variables:let dropZone = document.querySelector("div"),
input = document.querySelector("input"),
file,
text,
progress,
volume,
audio,
frequencyArray;
We work with drag-drop:
dropZone.ondrop = e => {
e.preventDefault();
if (e.dataTransfer.items[0].kind == "file") {
file = e.dataTransfer.items[0].getAsFile();
} else return;
playTrack(file);
};
dropZone.ondragover = e => {
e.preventDefault();
};
dropZone.onclick = () => {
input.click();
input.onchange = () => {
file = input.files[0];
playTrack(file);
};
};
We move on.Declare variables for the canvas:let C = document.querySelector("canvas"),
$ = C.getContext("2d"),
W = (C.width = innerWidth),
H = (C.height = innerHeight),
centerX = W / 2,
centerY = H / 2,
radius,
piece,
bars = 200,
x,
y,
xEnd,
yEnd,
barWidth = 2,
barHeight,
lineColor;
We proceed to the main function (all our further code will be in this function):function playTrack(file) {
}
We remove the zone (we no longer need it), change the text of the paragraph, initialize the variables for sound and progress:dropZone.style.display = "none";
text = document.querySelector("p");
text.style.transform = "translate(-50%,-50%)";
text.innerHTML = `progress: <span class="progress"></span> <br> volume: <span class="volume"></span>`;
volume = document.querySelector(".volume");
progress = document.querySelector(".progress");
Conjuring with sound:audio = new Audio();
context = new AudioContext();
analyser = context.createAnalyser();
audio.src = URL.createObjectURL(file);
source = context.createMediaElementSource(audio);
source.connect(analyser);
analyser.connect(context.destination);
frequencyArray = new Uint8Array(analyser.frequencyBinCount);
audio.play();
audio.loop = true;
Add the ability to control the player (we do not have buttons, so you can control the player only using the keyboard):document.addEventListener("keydown", e => {
try {
e.preventDefault()
if (e.keyCode == 32) {
audio.paused ? audio.play() : audio.pause();
} else if (e.keyCode == 13) {
audio.load();
} else if (e.keyCode == 39) {
audio.currentTime += 10;
} else if (e.keyCode == 37) {
audio.currentTime -= 10;
} else if (e.keyCode == 40) {
audio.volume -= 0.1;
} else if (e.keyCode == 38) {
audio.volume += 0.1;
}
} catch {
return;
}
});
console.log(
" Use Keyboard: \n Space to Play/Pause \n Enter to Stop \n Arrows to Change \n Time and Volume"
);
The next part is animation. We call the corresponding function:startAnimation();
The function itself is as follows:function startAnimation() {
C.style.display = "block";
piece = audio.currentTime / audio.duration;
radius = 105;
$.clearRect(0, 0, W, H);
$.beginPath();
$.arc(centerX, centerY, radius, 0, Math.PI * (2 * piece));
$.lineWidth = 30;
$.stroke();
volume.innerText = Math.trunc(audio.volume * 100) + "%";
progress.innerText = Math.trunc(piece * 100) + "%";
analyser.getByteFrequencyData(frequencyArray);
for (let i = 0; i < bars; i++) {
radius = 120;
rads = Math.PI * 2 / bars;
barHeight = frequencyArray[i] * 0.6;
x = centerX + Math.cos(rads * i) * radius;
y = centerY + Math.sin(rads * i) * radius;
xEnd = centerX + Math.cos(rads * i) * (radius + barHeight);
yEnd = centerY + Math.sin(rads * i) * (radius + barHeight);
drawBar(x, y, xEnd, yEnd, barWidth, frequencyArray[i]);
}
requestAnimationFrame(startAnimation);
}
And finally - rendering columns:
function drawBar(x1, y1, x2, y2, width, frequency) {
lineColor = "rgb(" + frequency + ", " + frequency + ", " + 205 + ")";
$.strokeStyle = lineColor;
$.lineWidth = width;
$.beginPath();
$.moveTo(x1, y1);
$.lineTo(x2, y2);
$.stroke();
}
The result can be seen here .Thank you for attention.