Today, from the materials at hand, we will assemble a Telegram bot in Yandex.Cloud using Yandex Cloud Functions (or Yandex functions for short) and Yandex Object Storage (or Object Storage for clarity). The code will be on Node.js . However, there is one circumstance spicy - a kind of organization called, say, RossKomTsenzur (censorship is forbidden by Article 29 of the Constitution), does not allow Internet service providers to send requests to Russia Telegram API at:
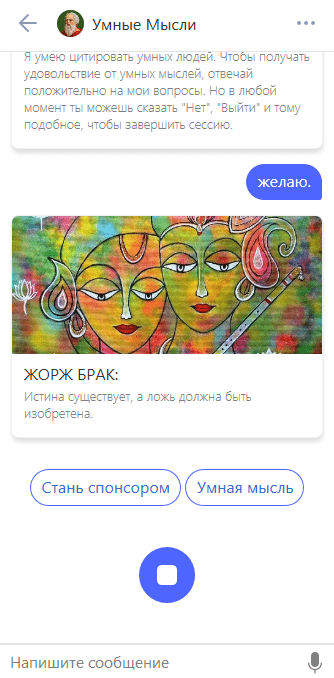
 https://api.telegram.org/. Well, we won’t - no, no, no. Indeed, in our bag there are so-called webhooks- with their help, we do not make requests to a specific address, but just send your request as an answer to any request to us. That is, as in Odessa - we answer the question with a question. Therefore, the Telegram API will not appear in our code.So, we will make a bot that will supply us with clever thoughts. Just like in the picture: You can try it out in action - here is the name: @SmartThoughtsBot . Have you noticed the Alice Skill button ? This is because the bot is a kind of “companion” for Alice’s skill of the same name , that is, it performs the same functions as Alice’s skill and it is possible that they can coexist peacefully by advertising each other. How to create the skill Clever Thoughts is described in the article Alice gains the skill . Now (after making some changes after the publication of the above article) on a smartphone, this skill will look something like this: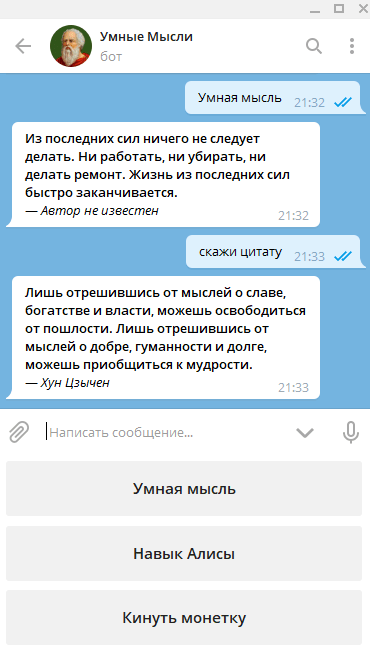
Bot creation
I would like this tutorial to be useful to everyone, including and beginner "botanists." Therefore, in this section I will describe in quite some detail how to create bots in Telegram ’s at all . For those who do not need this information - go to the next sections.We open the Telegaram application , call the father of all bots (they have everything like people have) - @BotFather - and first we give him the / help command to refresh what we can do. Now we will be interested in the / newbot command .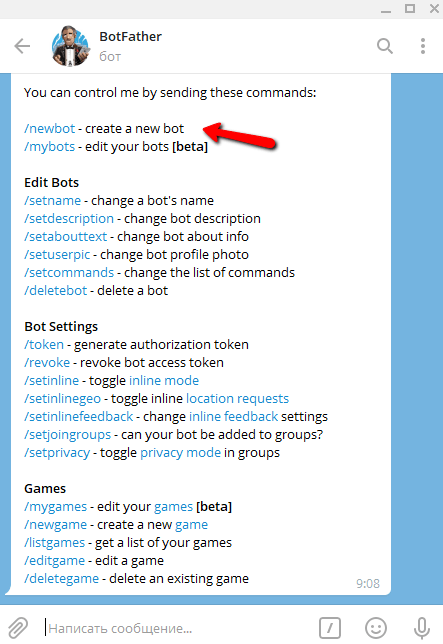 Since the bot described here has already been created, for demonstration purposes I will create another bot for a short time (then I will delete it). I will call it DemoHabrBot . Names ( username) all telegram bots must end with the word bot , for example: MyCoolBot or my_cool_bot - this is for bots. But first, give the bot a name ( name ) - and this is for people. The name can be in any language, contain spaces, does not have to end with the word bot , and does not even have to be unique. In this example, I called this bot Demo Habr .
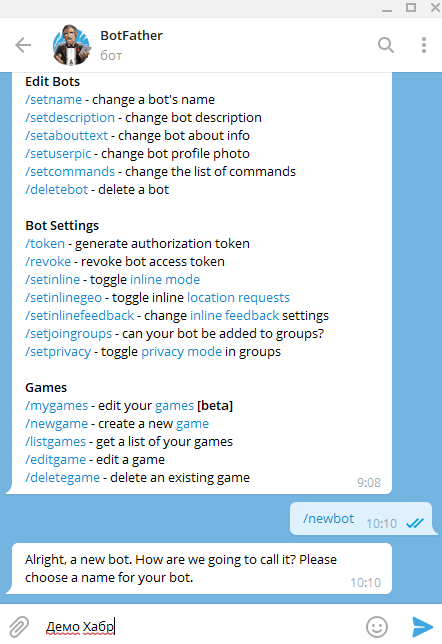 Now select the bot name ( username , the one for bots). Let's call it DemoHabrBot . Everything that related to the name of the bot ( name ) does not apply to its name at all - username(or applies, but exactly the opposite). After successfully creating a unique bot name, we need to copy and save (in the strictest confidence!) The token shown in the screenshot with a red arrow. With it, a little later we will install the webhook coming from Telegram on our Yandex-function .
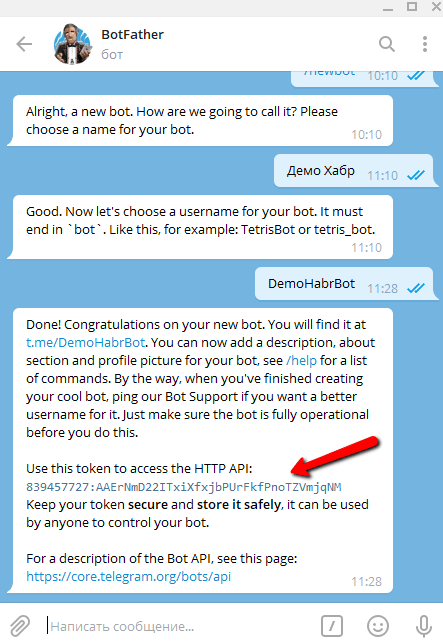 Now let's give the command to the father of all bots: / mybots , and he will show us a list of all the bots we created. Let's just leave the freshly baked bot Demo Habr alone (it was created to show how to create bots, but we will use it today for other demonstration purposes), and consider the Smart Thoughts bot ( @SmartThoughtsBot ). Press the button with his name in the list of bots.
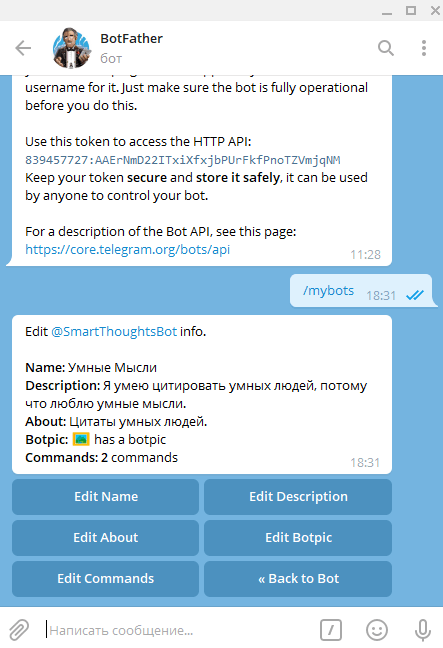 Here we can configure our bot. By clicking the Edit button ... we will go on to edit this or that option. For example, by clicking on the Edit Name button we can change the name of the bot, say instead of Clever Thoughts , write Delusional Ideas . Botpic is a bot avatar, must be at least 150 x 150 px . Description is a short description that the user sees when he first starts the bot, as an answer to the question: What can this bot do? About - an even shorter description that is transmitted with a link to the bot (
 https://t.me/SmartThoughtsBot) or when viewing information about it.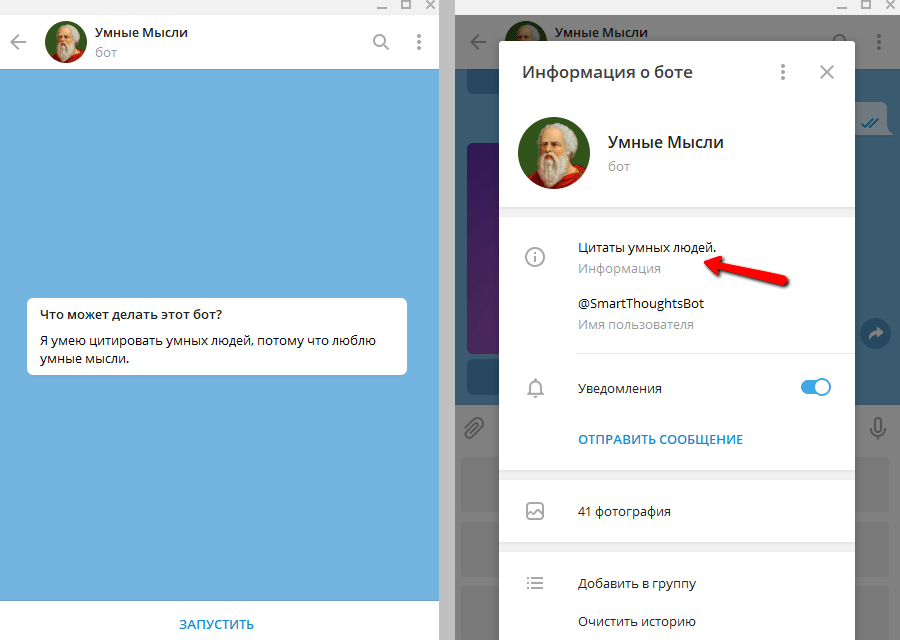 We only need to configure the team. To do this, click the Edit Commands button . To standardize user practice, Telegram recommends always using two commands: / start and / help , and if the bot needs settings, an additional command / settings. Our bot is simple as a ball, so it does not need settings yet. We write the first two commands, which we then process in the code. Now, if the user enters a slash (slash: /) in the input field, a list of commands for their quick selection will appear. Everything is as in the picture: on the left - we set the commands through the bot-father; on the right, these commands are already available to users in our bot.
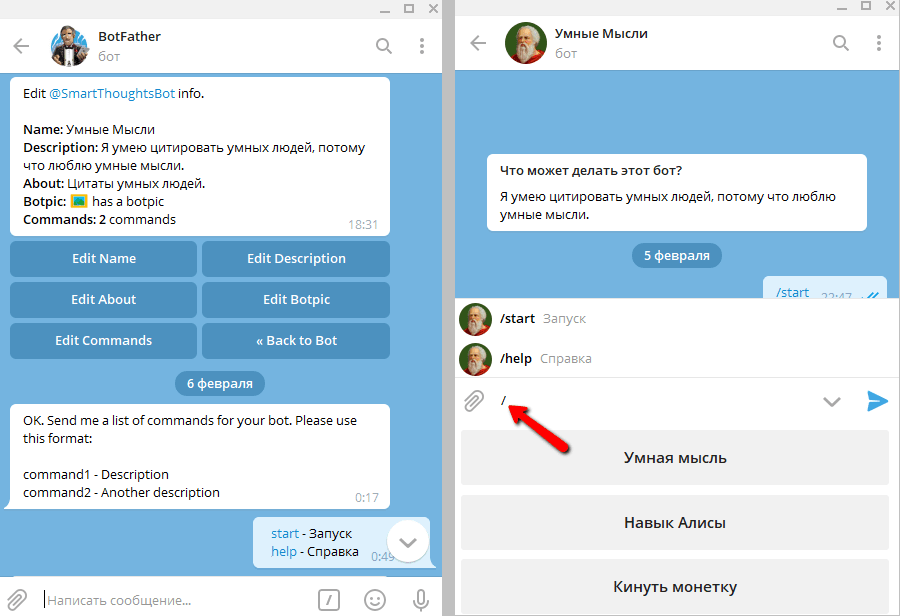
Yandex function
Now that our bot is created, go to Yandex. Cloud to create a function that will execute the code of our bot. If you have not worked with Yandex.Cloud yet, read Alice's material in the country of Bitrix , and then Yandex functions send mail . I am pretty sure that these two relatively small articles will be enough for you to have a basic understanding of the subject.So, in the Yandex.Cloud console in the left navigation menu, select Cloud Functions , and then click the Create function button . We give her a name, and for herself a short description.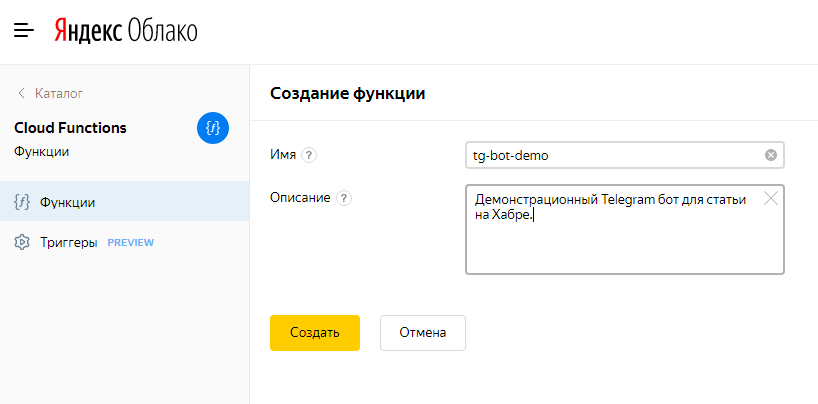 After clicking Createand after a couple of seconds, a new function will appear in the list of all functions. Click on her name - this will lead us to the Overview page of our function. Here you need to enable ( On ) the Public function switch so that it becomes available from the outside (for Yandex.Cloud ) world, and the value of the Link and Identifier fields is kept in secret from everyone except yourself and Telegram so that your function various swindlers could not call.
 Now, using the left menu, go to the Function Editor . Let us put aside our Smart Thoughts for a short time., and create a minimal template function to test the performance of our bot ... However, in this context, this function is our bot ... In short, now and right here we will make a simple bot that will "mirror" (that is, send back ) user requests. This template can always be used when creating new telegram bots to make sure that communication with Telegram is working properly. Click Create a file , call it index.js , and in the online Code Editor, paste the following code into this file:
module.exports.bot = async (event) => {

  const body = JSON.parse(event.body);

  const msg = {
    'method': 'sendMessage',
    'chat_id': body.message.chat.id,
    'text': body.message.text
  };

  return {
    'statusCode': 200,
    'headers': {
      'Content-Type': 'application/json'
    },
    'body': JSON.stringify(msg),
    'isBase64Encoded': false
  };
};
In the Yandex.Cloud console, it should look something like this: Next, just below we specify the Entry Point - index.bot , where index is the name of the file ( index.js ) and bot is the name of the function ( module.exports.bot ). We leave all other fields “as is”, and in the upper right corner click the Create version button . After a few seconds, this version of the function will be created. Soon, after testing the webhook , we will create a new version - Smart Thoughts .
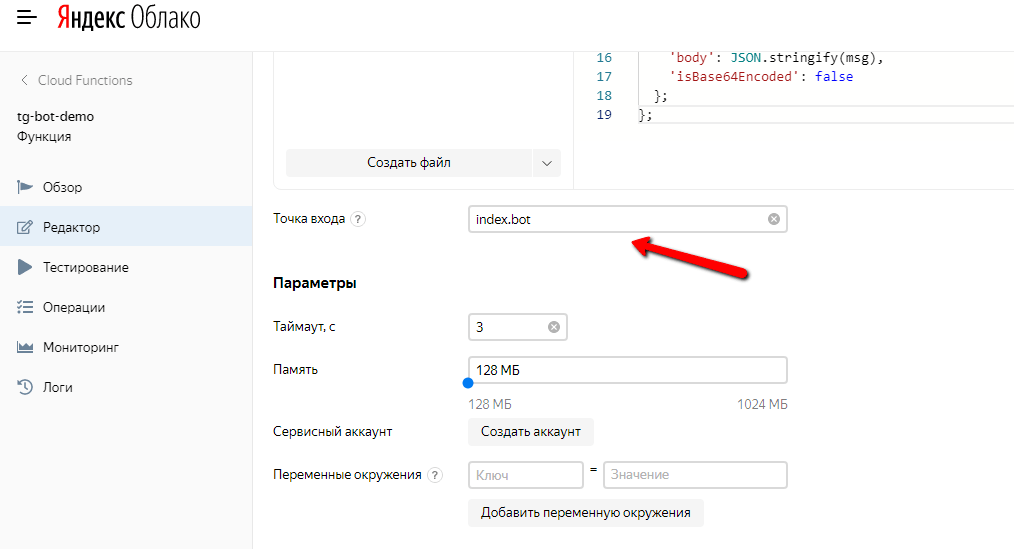
Object storage
Now that we have established Yandex function , let us while we are in the console Yandeks.Oblaka , create a so-called a bucket ( bucket , i.e. a bucket in Russian, by no means a bouquet) for storing image files that will be used in our Smart Thoughts bot . In the left navigation menu, select the Object Storage item , click the Create Bucket button , come up with a name for it, for example, img-bucket , and, most importantly, we make access to read objects public - otherwise Telegram can’t see our pictures. All other fields are left unchanged. Click the Create Bucket button .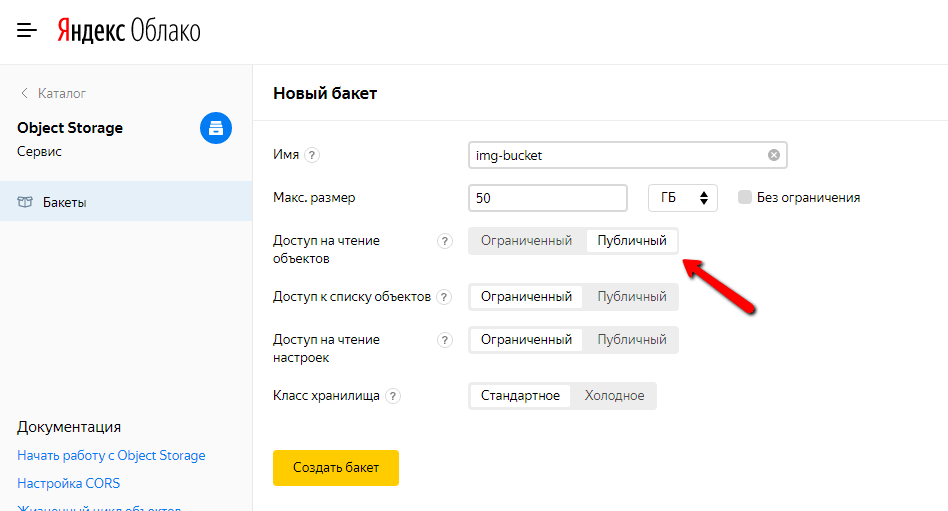 After that, the list of all buckets may look something like this (if this is your only bucket):
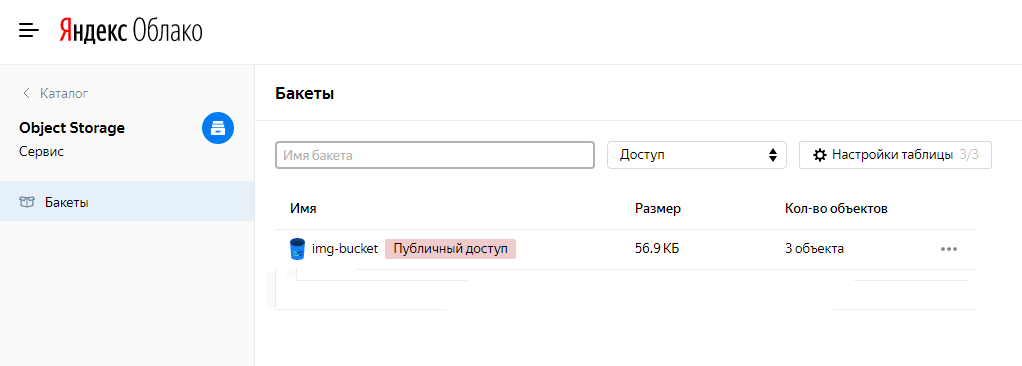 Now I suggest clicking on the name of the bucket and creating a folder inside it to organize the storage of pictures for different applications. For example, for the telegram bot Smart Thoughts, I created a folder called tg-bot-smart-thoughts (nothing, I understand this cipher). Create some of you too.
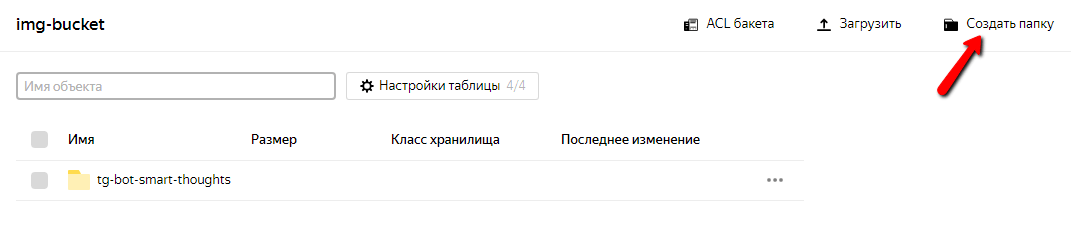 Now you can click on the name of the folder, go into it and upload files:
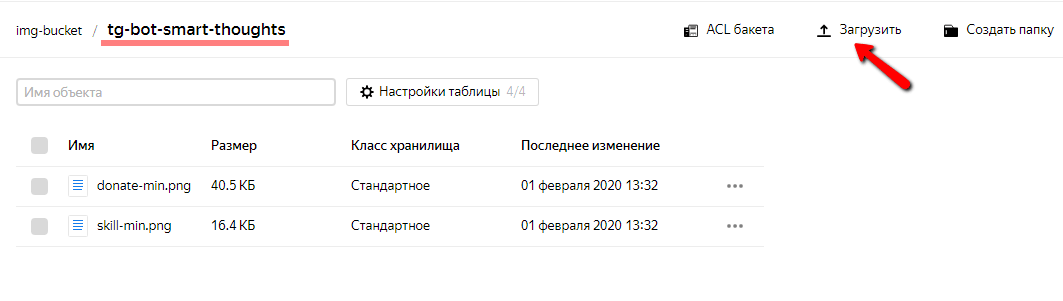 And by clicking on the file name - get its URL for use in our bot, and generally somewhere (but, do not publish this URL unnecessarily, since traffic from the Object storage is charged )
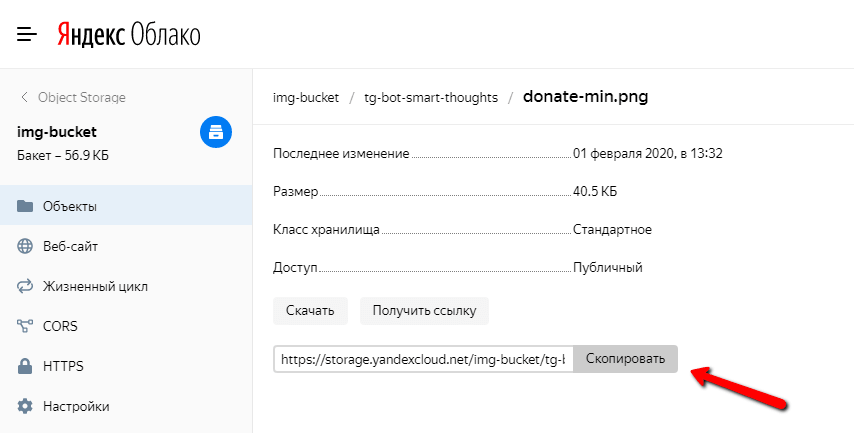 That, in fact, is all withObject storage . Now you will know what to do when you see a call to upload files there.
Webhook
Now we will install a webhook - i.e. when the bot receives an update (for example, a message from the user), a request with data will be sent from our Telegram server to our Yandex function . Here is a line that you can simply insert into the address field of the browser and then refresh the page (this needs to be done only once): Just replace {bot_token} with the token we received from the bot father when creating our bot, and {webhook_url} with the URL our Yandex function . Just a moment! But RossKomTsensur prohibits providers in the Russian Federation from serving the addresshttps://api.telegram.org/bot{bot_token}/setWebHook?url={webhook_url}https://api.telegram.org. Yes, that's right. But you come up with something. After all, you can, for example, ask your grandmother about it in Ukraine, Israel or Canada - there are no “Russian commentaries” there, and one god knows how people live without it. As a result, the request-response when installing a web hook should look like this: Testing. It should "mirror".
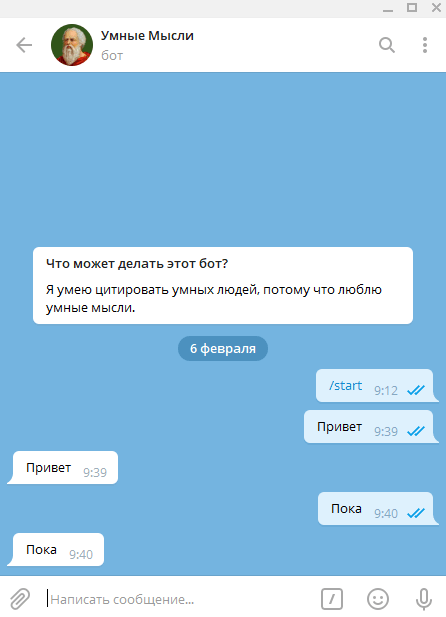 And there is. Congratulations - now the Yandex function has become a Telegram bot!
Clever Thoughts
And now we make Clever Thoughts. The code is open and lies on GitHub . It is quite well commented, and there are only a hundred lines in it. Read it like an opera diva libretto!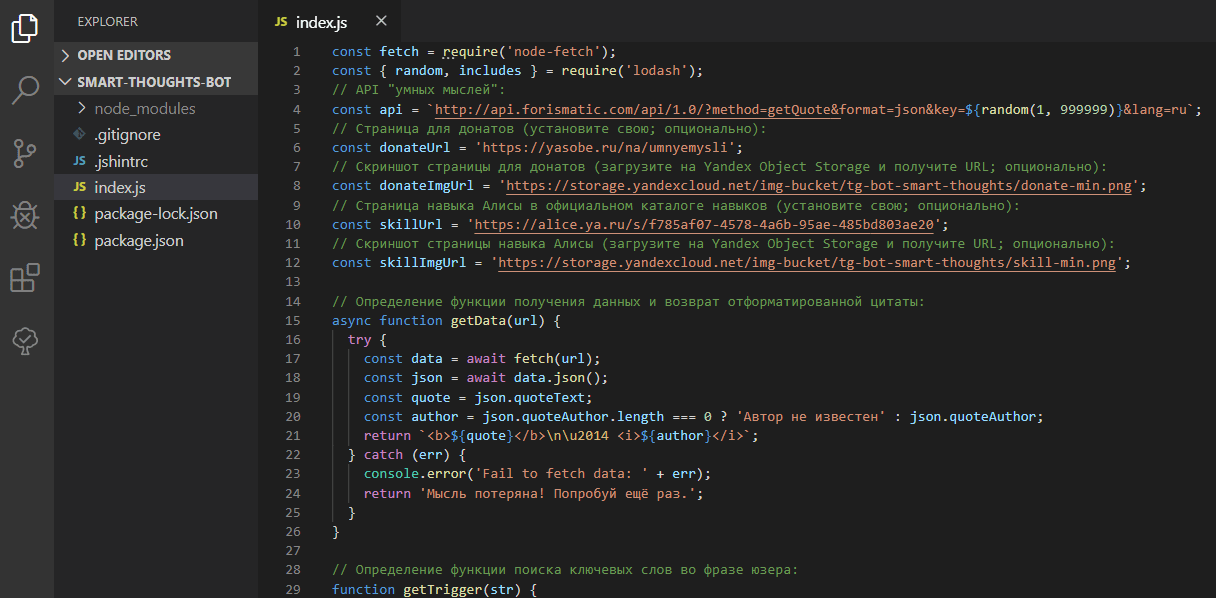 Clone the project and install the dependencies:
git clone https://github.com/stmike/tg-bot-smart-thoughts.git
cd tg-bot-smart-thoughts
npm i
Make the necessary changes to the index.js file (optional; you can change nothing). Create zip --Secondary, the file index.js and folder node_modules in, for example, under the name smart.zip .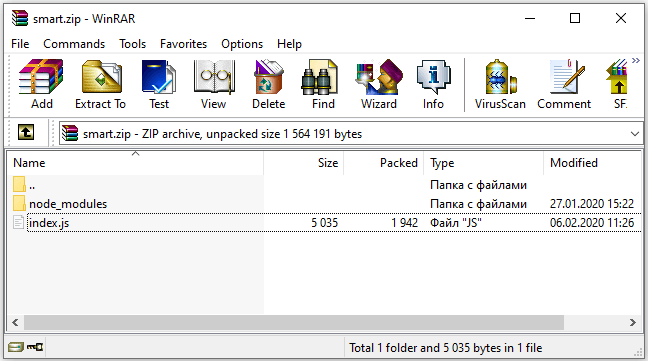 Now go to our Yandex functions in the console , select the ZIP archive tab , click the Select file button , and download our smart.zip archive . Finally, in the upper right corner, click the Create Version button .
 After a few seconds, when the function is updated, we will test our bot again. Now he no longer “mirrors”, but delivers smart thoughts!
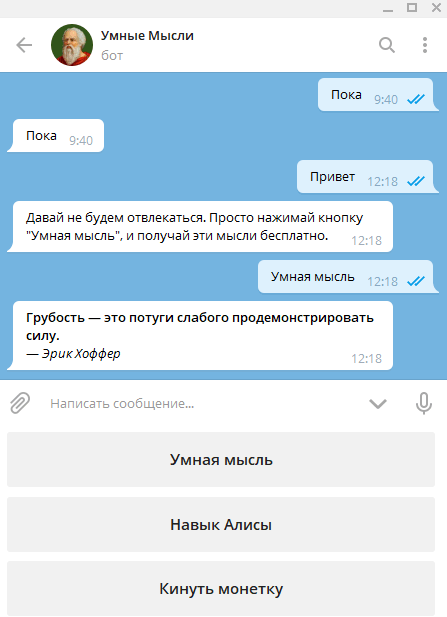
References
GitHubYandex Cloud FunctionsYandex Object StorageBots: An introduction for developers Telegram Bot API codeConclusion
That's all for today. Other materials follow. To whom it is interesting to read, subscribe to notifications of new publications. You can subscribe on this site (the Subscribe button below), or on the Telegram channel IT Tutorial Zakhar , or on the community of the same name on VK , or Twitter @mikezaharov .Donuts