 Good day, friends!
Instead of introduction (problem statement)
It all started with the study of other people's sliders (ready-made solutions on the network, such as bxslider , owlcarousel and slick ). Someday I will write detailed tutorials on working with these tools (sweet dreams). There was a desire to write your slider. However, soon (including after reading several articles on Habré), it came to the realization that just a slider is for wimps. Something more radical is needed.As a result, I came up with the following task: to write an adaptive gallery generator with a built-in slider.Conditions:- Ability to upload any number of images (from anywhere on your hard drive).
- The gallery consists of uploaded images, the markup is formed "on the fly" in compliance with HTML5 semantics.
- The gallery looks equally good on screens with different resolutions.
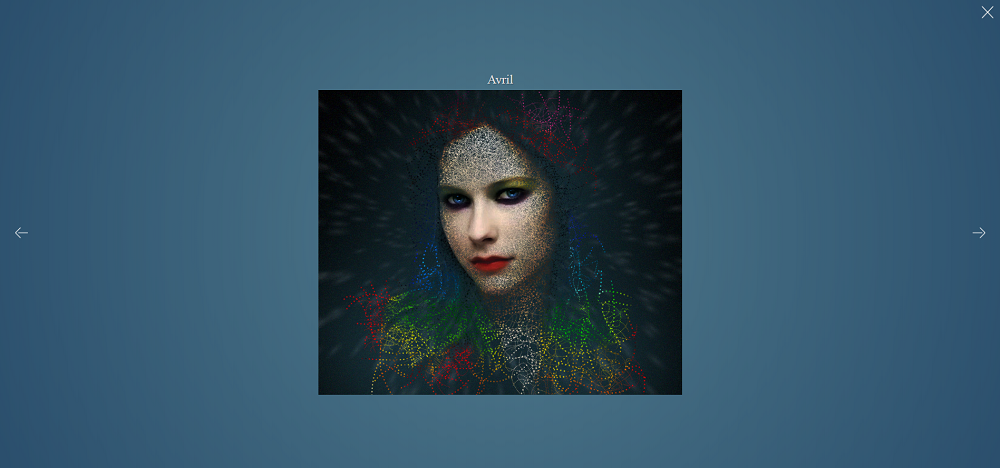
- When you click on any image, a slider is generated.
- When generating a slider, the background is darkened.
- Clicked image is the first slide.
- Slide switching is implemented through the DOM.
- Slides switch smoothly.
- Ability to control slide switching using buttons and keyboard.
- The ability to return to the gallery by clicking on the current slide and button, as well as using the keyboard.
- Pure JavaScript (all markup via JS).
- Minimum code.
So, let's go (as Gagarin said, going to space).The markup looks like this:<div class="wrap">
<input type="file" multiple accept="image/*">
<button>generate gallery</button>
</div>
Of the interesting things, perhaps, the multiple and accept attributes of the input tag. The first attribute allows you to upload multiple files, the second - sets a filter on the types of files that can be downloaded. In this case, accept has the value “image / *”, meaning that only images (any) can be uploaded.Immediately bring beauty (add styles):* {
margin: 0;
padding: 0;
box-sizing: border-box;
}
body {
min-height: 100vh;
background: radial-gradient(circle, skyblue, steelblue);
display: flex;
flex-direction: column;
justify-content: center;
align-items: center;
}
button {
padding: 0.25em;
font-family: monospace;
text-transform: uppercase;
cursor: pointer;
}
.darken {
position: absolute;
width: 100%;
height: 100%;
background: rgba(0, 0, 0, 0.4);
z-index: -1;
}
.slider {
width: 100%;
display: inherit;
flex-wrap: wrap;
justify-content: center;
align-items: center;
}
figure {
margin: 0.5em;
width: 300px;
display: inherit;
flex-direction: column;
justify-content: center;
align-items: center;
transition: 0.2s;
}
figcaption {
font-size: 1.2em;
text-transform: capitalize;
text-align: center;
margin-bottom: 0.25em;
color: #ddd;
text-shadow: 1px 1px rgba(0, 0, 0, 0.4);
}
img {
max-width: 80%;
max-height: 80vh;
cursor: pointer;
}
.button {
position: absolute;
top: 50%;
transform: translateY(-50%);
width: 30px;
background: none;
border: none;
outline: none;
filter: invert();
}
.left {
left: 2em;
}
.right {
right: 2em;
}
.close {
top: 2em;
right: 1em;
}
There’s nothing to talk about (.darken - dimming).Moving on ... to JS.We find the button and hang the listener on it:let button = document.querySelector("button");
button.addEventListener("click", generateGallery);
All further code will be in the generateGallery function in order to avoid "not defined" without return:function generateGallery() {
}
We find input, check that it is not empty, get a collection of downloaded files, delete .wrap and create a container for the gallery:let input = document.querySelector("input");
if(input.files.length == 0) return;
let files = input.files;
let i;
let wrap = document.querySelector(".wrap");
document.body.removeChild(wrap);
let slider = document.createElement("div");
slider.className = "slider";
document.body.appendChild(slider);
We sort through the collection of files, get the name and address of each file, create markup, create image captions and the images themselves:for (i = 0; i < files.length; i++) {
let file = files[i];
let name = file.name;
let src = `img/${name}`;
let figure = document.createElement("figure");
slider.appendChild(figure);
let figcaption = document.createElement("figcaption");
let regexp = /.+(?=\.)/;
name = name.match(regexp);
figcaption.innerText = name[0];
figure.appendChild(figcaption);
let img = document.createElement("img");
img.src = src;
figure.appendChild(img);
}
We want to generate a slider when clicking on the image. To do this, we find the whole figure and hang it on each listener:let figures = document.querySelectorAll("figure");
for (i = 0; i < figures.length; i++) {
let figure = figures[i];
figure.addEventListener("click", () => {
generateSlider(figure);
});
}
Next, we work inside the generateSlider function:function generateSlider(figure) {
}
Darken the background:darkenBack();
function darkenBack() {
if (document.querySelector(".darken") == null) {
let div = document.createElement("div");
div.className = "darken";
document.body.appendChild(div);
} else {
let div = document.querySelector(".darken");
document.body.removeChild(div);
}
}
We will display one slide at a time. Do not forget that the slide switch should be smooth. This is easy to achieve with transparency and a small transition. Therefore, we superimpose the images on top of each other, place them in the center, and make all the images, except for the “clicked” one, transparent:for (i = 0; i < figures.length; i++) {
if (figures[i].hasAttribute("style")) {
figures[i].removeAttribute("style");
} else {
figures[i].setAttribute("style", "margin: 0; width: auto; position: absolute; opacity: 0;");
}
}
if (figure.hasAttribute("style")) {
figure.style.opacity = 1;
generateButtons();
} else generateButtons();
Next, create buttons to switch slides and close the gallery. The code turned out to be long and boring (maybe generating buttons every time you start the slider was not a good idea):Button creation code:function generateButtons() {
if (document.querySelector(".buttons") == null) {
let buttons = document.createElement("div");
buttons.className = "buttons";
slider.appendChild(buttons);
let leftButton = document.createElement("button");
leftButton.className = "button left";
let leftImg = document.createElement("img");
leftImg.src = "https://thebestcode.ru/media/sliderGenerator/buttons/left.png";
leftButton.appendChild(leftImg);
buttons.appendChild(leftButton);
leftButton.addEventListener("click", () => changeSlide("-"));
let rightButton = document.createElement("button");
rightButton.className = "button right";
let rightImg = document.createElement("img");
rightImg.src = "https://thebestcode.ru/media/sliderGenerator/buttons/right.png";
rightButton.appendChild(rightImg);
buttons.appendChild(rightButton);
rightButton.addEventListener("click", () => changeSlide("+"));
let closeButton = document.createElement("button");
closeButton.className = "button close";
let closeImg = document.createElement("img");
closeImg.src = "https://thebestcode.ru/media/sliderGenerator/buttons/close.png";
closeButton.appendChild(closeImg);
buttons.appendChild(closeButton);
closeButton.addEventListener("click", () => generateSlider(figure));
} else {
let buttons = document.querySelector(".buttons");
slider.removeChild(buttons);
}
}
Switching slides is implemented using the function changeSlide, which is passed as a parameter, respectively, "+" or "-":function changeSlide(e) {
for (i = 0; i < figures.length; i++) {
figures[i].style.opacity = 0;
}
if (e == "-") {
if (figure == figures[0]) {
figure = figures[figures.length - 1];
} else {
figure = figure.previousElementSibling;
}
} else if (e == "+") {
if (figure == figures[figures.length - 1]) {
figure = figures[0];
} else {
figure = figure.nextElementSibling;
}
}
figure.style.opacity = 1;
}
Add the ability to switch slides and close the gallery using the keyboard:document.addEventListener("keydown", e => {
if (e.keyCode == 37 || e.keyCode == 189) {
changeSlide("-");
} else if (e.keyCode == 39 || e.keyCode == 187) {
changeSlide("+");
} else if(e.keyCode == 27) {
generateSlider(figure);
}
});
That's all, the adaptive gallery generator with the built-in slider is ready. Mission accomplished. The conditions are met. Toward the end, I realized that “minimum code” and “all markup is formed on the fly using JS” contradict each other, but it was too late (is it too late to apologize or what is One Republic?).The result can be seen here .Note that on Codepen we use URL.createObjectURL to link to images, because Codepen does not see the img folder.Thank you for attention.