Hello everyone! If you've heard of Blazor , but still don't understand what it is. Then you are at the address. This is the first article in a series of 12 articles that takes you through all the circles of hell the whole process of creating an application on Blazor . In the end, we will have a ready-made site for a small pizzeria, quite at the level of ready-made sites for some pizzerias. Therefore, you will be proud of;)This will be a bit out of the ordinary HelloWorld . I deliberately went to some complications that are best taken immediately as rules, in particular, this is a typical three-layer architecture: View-Domain-DataAccess .I believe that it is better to follow it immediately than to show something artificial, not related to life. As practice shows, many developers get stuck at the HelloWorld level and then use what they saw when designing a priori large applications (hello to my ex-Most Green Bank of the Country and his Service.cs with all the application code in one file, I'm not joking).I will tell you how to map data between layers without pain and without the need to write many lines of code. We will also deploy the whole thing in Azure DevOps. Yes, now this is a necessary part of any development process, we all fly in the clouds today, some on-premises , some in Azure or AWS .Also, so that the first article would not be a banal story about how to click one button in Visual Studio, and then another, I thought it would be nice to arrange a small challenge and try to do something on Linux for the first time .I expect you to have minimal knowledge of ASP.NET, C #. Although this is HelloWorld, I will not talk about what Program.cs is.Next, we discuss what else is needed for programming under Linux .Attention: In the following couple of paragraphs, my impression is received from real work with Linux, which installed it from the best of intentions, if Linux gives you enthusiastic feelings and you can’t live a single day without opening the command line, then you can ruin your mood, Continuing reading this article!Distribution: Ubuntu
In truth, you won't be comfortable programming under Linux, but if you want to focus on business, install Ubuntu 19.10 . I managed to put it the second time, it’s good that at least the second time. And all the teams completed the first time, almost all. I strongly advise against installing any other distributions, I spent the whole day setting up the latest OpenSuse , and then just demolished it.Why do you even need to develop under Linux ? Well, at least because .Net Core supports it and perhaps your employer will decide to save money and run everything on Linux on the prod. And in my opinion, writing is better under the OS on which your application will actually run.IDE Winner: Rider
As I said, it’s still not possible to write comfortably under Linux ; for all the evils, let’s choose the smaller one, Rider.In addition to it, there are also two more popular IDEs, such as the text editors MonoDevelop and Visual Studio Code . I’ll tell you about the disadvantages of each solution in more detail.Monodevelop
The cutest of the three editors. Readable fonts (low-quality fonts are the first thing that will catch your eye when moving to Linux). But unfortunately behind the beautiful shell there is a void, despite the installed .Net Core 2.1 and 3.1 , MonoDevelop persistently created ConsoleApplication for me with the target .Net Core 1.1. Blazor did not manage to create the project, nor to launch the manually created one.Visual studio code
Strictly speaking, this is not an IDE , it is a text editor with syntax highlighting and build capability. Of the advantages from the 3rd or 4th attempt, VS Code miraculously launched the WebAssembly project that I created when MonoDevelop and Rider refused to do this. This is a plus. I list further the minuses: an unreadable and small default font, I think after a few months of regular work, your eyes will simply go crazy.The next minus follows from the fact that this is a text editor, such a simple action as renaming, moving projects? Everything that Visual Studio does automatically, and we take it for granted, is done manually here.Rider
Everything is much better here than the comrades above, Rider even picked up the template I installed for Blazor WebAssembly . And he even created an application, but for some reason this IDE refused to launch it. For the sake of fairness, the Blazor Server assembled and started without any problems. Rideralso allows you to add a repository when creating a git project. But at the same time .gitignore somehow turned out to be empty. That is, again, manual intervention is required, and Rider, just in case, I remind you, competes with VS and JetBrainstakes money for his product. Well, and as usual the problem, in general on Linux, in principle, these are bad fonts, they are some very thin, poorly readable. Elements are also all small, they still need to be aimed. Also, several times, in two days of work, Rider hung the system when loading a simple solution. The computer had to be rebooted with a reset, which of course is not good (update: by the time this article was written, this had happened five times already).Winner in the nomination Best C # IDE for Linux :Rider - despite all the shortcomings, I managed to ensure that this IDE consistently assembled and launched the project, again, for some reason, the browser did not start by default, this must be done manually.Below in the screenshot, Rider (pay attention to the fonts), and an attempt to run the Blazor WebAssembly project, created by himself, with MonoDevelop a similar situation.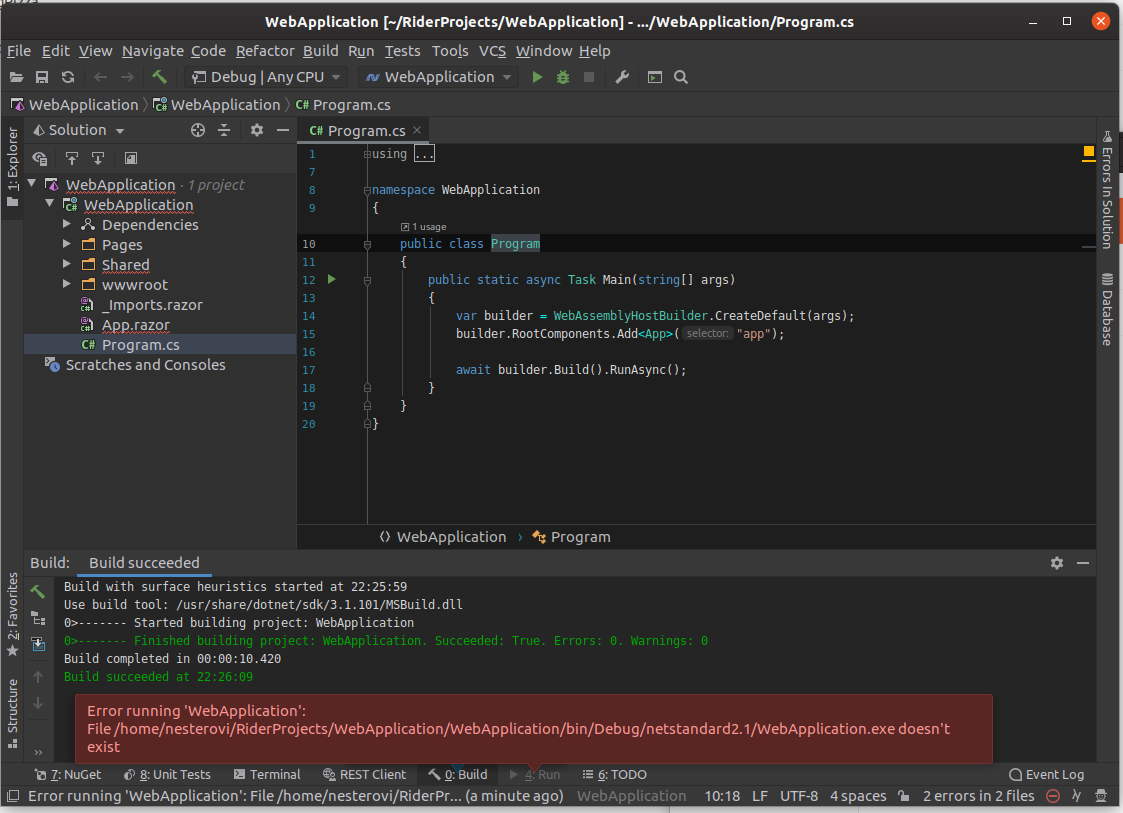
If everything is so bad, why use Linux ?
Let me remind you that this is a training project, the goal was to show that you can still work on Linux.In addition, the imperfection of development tools for Linux pushes us to a lot of manual actions that will allow us to learn a little more about how .Net works under the hood and understand how much work the Visual Studio does for us.What do we want to get?
In the end, we get a nice application, as in the example below: And now for the case. Let's start by installing .Net Core 3.1
Install .Net Core 3.1
.Net Core 3.1.1 SDK is the latest available version of the SDK , it is available in the Ubuntu repository . Blazor changes very quickly, therefore, to work with Blazor WebAssembly, use 3.1.1, the latest stable version.In the beginning we need to register the Microsoft key and their repository, this is done with the following commands in the Terminal application (click the Win button and enter Term , it should appear in the list of available ones):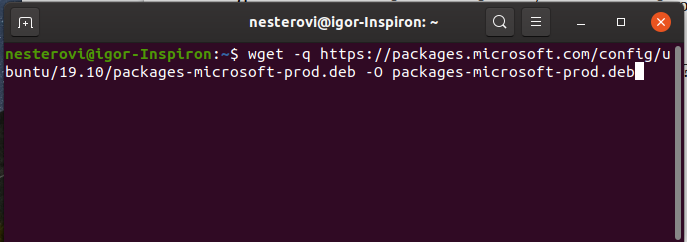
wget -q https://packages.microsoft.com/config/ubuntu/19.10/packages-microsoft-prod.deb -O packages-microsoft-prod.deb
sudo dpkg -i packages-microsoft-prod.deb
Now go directly to the installation of .Net Core SDK:sudo apt-get update
sudo apt-get install apt-transport-https
sudo apt-get update
sudo apt-get install dotnet-sdk-3.1
Install Blazor WebAssembly template
With the installation of .Net Core finished, now you need to install the Blazor WebAssembly Template , which I will remind you while it is in the Preview stage from which it will be released immediately in May. Just the day before I started writing the article, the updated version 3.2.0-preview1.20073.1 (h) was released on January 28thdotnet new -i Microsoft.AspNetCore.Blazor.Templates::3.2.0-preview1.20073.1
Git installation
If you still haven’t installed Git , then it's time to do it. Strictly speaking, the first command is not necessary at all, Ubuntu will ask you to enter a password, if privileges are required to execute the command, we will anticipate it =):sudo su
add-apt-repository ppa:git-core/ppa
apt update; apt install git
That’s not all, Blazor uses Mono when executed in the browser , which means we need to install it as well.Mono Installation
First, add the Mono repositories to the system:sudo apt install gnupg ca-certificates
sudo apt-key adv --keyserver hkp://keyserver.ubuntu.com:80 --recv-keys 3FA7E0328081BFF6A14DA29AA6A19B38D3D831EF
echo "deb https://download.mono-project.com/repo/ubuntu stable-bionic main" | sudo tee /etc/apt/sources.list.d/mono-official-stable.list
sudo apt update
Now install directly Mono itself :sudo apt install mono-complete
This is a quick process that took about 10 minutes on my laptop with a Core-i5 6200U processor, because the source compilation takes place right on your computer.Congratulations! We have installed everything you need to develop Blazor WebAssembly projects.Now you can go directly to the project itself.But before that, take a break from entering commands and refresh in memory what Blazor WebAssembly is.Blazor WebAssembly and what it is eaten with
Blazor is a web framework designed to run either on the client side in the browser via WebAssembly technology (using .Net runtime , or rather Mono implementations, which recently, thanks to the opening of .Net sources, is almost no different from the original platform), or on the server side with hosting in the Asp.Net Core application and exchanging data through SignalR technology (through the creation of Circuits connections).As you can see from the description above, Blazor! = .Net WebAssembly implementation.If you throw WebAssembly out of this bundle , you can develop a Blazor Server application and it will work even in IE 11who never heard anything about modern technology and thank God he will never hear again.Since we are making an application based on the Blazor WebAssembly approach . Then we will consider it a little more.- index.html
app, . blazor.webassembly.js . Blazor , ( AutoMapper, AutoFac) Mono .
Blazor , .
Blazor(3.1.0-preview4.19579.2, ) .Net, Blazor, .
Blazor , , , . - Perhaps the main disadvantage of this approach is complicated debugging, you can’t set breakpoints, you just won’t fall into them, although I think this is temporary, because it was possible to connect to IE and debug JS code earlier in the studio .
Well, perhaps the second obvious minus is the need to download all the sources, again I think there are still many opportunities for optimization. - Actually, after downloading and all the preparatory processes, our application runs in the browser UI stream and begins its execution. You can call any JS code from C # and vice versa.
There have been no pictures for a long time, so here is one below :)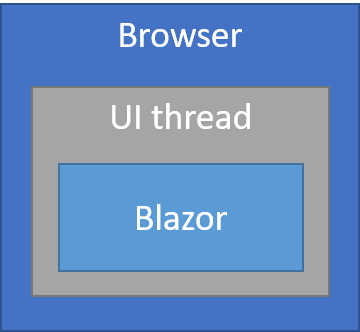
Dotnet utility
Further we will actively use the utility from the .Net Core SDK - dotnet.It allows you to do many useful things, we are only interested in a few:dotnet build
The command above collects the solution, if you start from the folder with the solution, no arguments are required.dotnet new blazorwasm -ho -o BlazingPizza
It allows you to create a new project based on the template that comes after the word new, in our case it is blazorwasm , here for example you could specify classlib or console .Next are the specific parameters of the template, in this case -ho , this parameter indicates that our application will be hosted on the server side in the ASP.NET Core application, also .Net will create Controllers for us, which we can use in particular to create web api and access it not only from the Blazor application, but also from other clients.The last option -o indicates the folder in which the created solution will be placed, by default, this is the current directory.dotnet run
Another team that comes in handy, as the name implies, launches our application.Project creation
And so we will execute the familiar team to generate our solution. For this, select a place you know, for example, the RiderProjects folder that the Rider IDE created and which is located on the path / home / {userName}:dotnet new blazorwasm -ho -o BlazingPizza
After creating, we’ll build the project and finally run it to enjoy what kind of result (the first command is executed at the BlazingPizza.sln file level):dotnet build
Everything should have passed without problems, go to the Server folder and execute:dotnet run
And finally, we see the cherished result: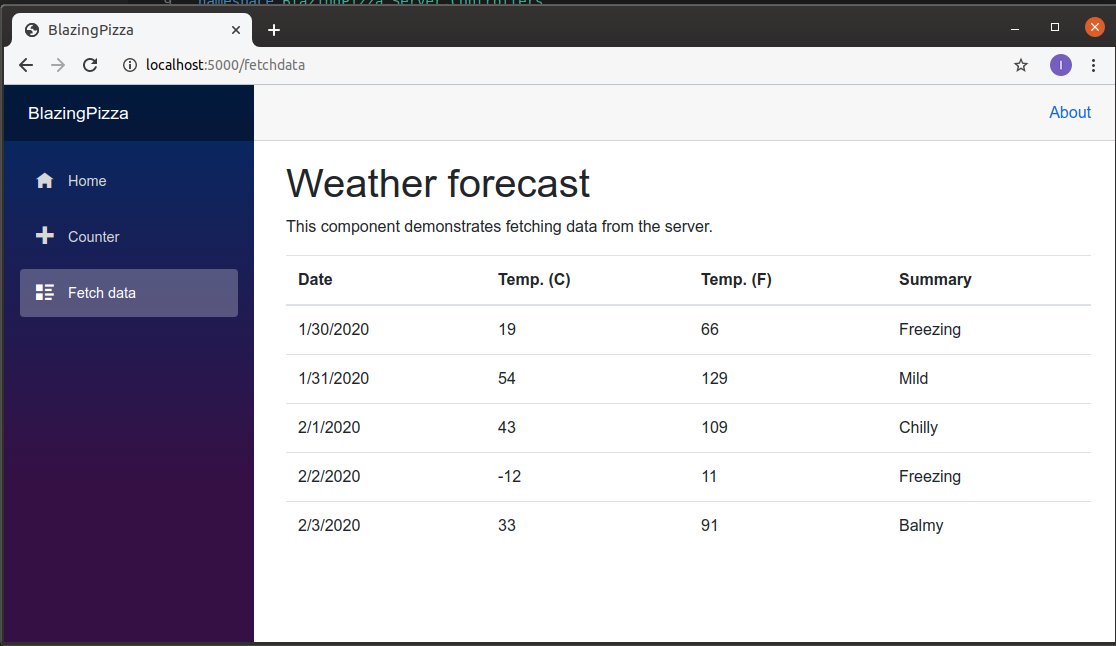 Great, everything works. Now let's not forget about the appearance of the site for a long time and switch to its contents.The result of the first command (dotnet new) was such a folder structure:
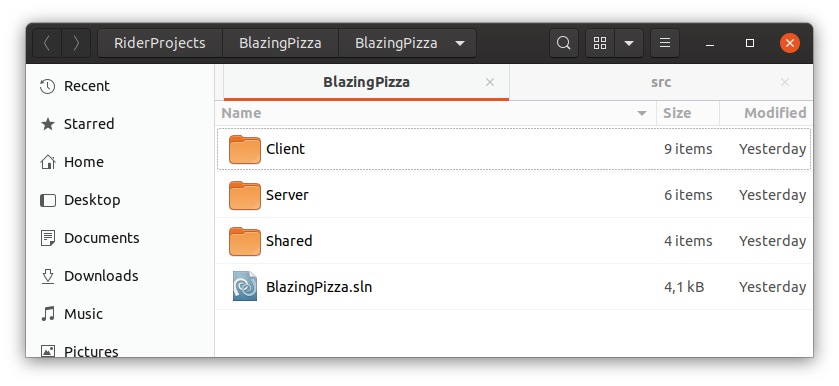 In my opinion, this is not a good scheme, it is better if the folders have a prefix with the name of the solution, it’s more familiar (this is what VisaulStudio does when creating new projects) and make it clear that this is not some kind of ext. service folder. Over time, the project can grow into many folders that do not contain C # code, and if you go to Explorer , it will be difficult to navigate where what, besides, there may be some deployscripts based on the fact that in each folder the name of which begins with the name of the solution, the project is located, this is normal, because this is the long-term behavior of Visual Studio and you can rely on it.And so we rename the existing projects and folders that contain them (so far we don’t know anything about the IDE , we are on Linux , and for the first time it won’t help, because folders and projects are named differently):Client => BlazingPizza.Client
Server => BlazingPizza.Server
Shared => BlazingPizza.Shared Thecorresponding changes must be displayed in the solution file BlazingPizza.sln . Where the path to the project “[Server] \ ~” is indicated and below we will replace accordingly with“BlazingPizza. [Server] \ ~” as in the screenshot below: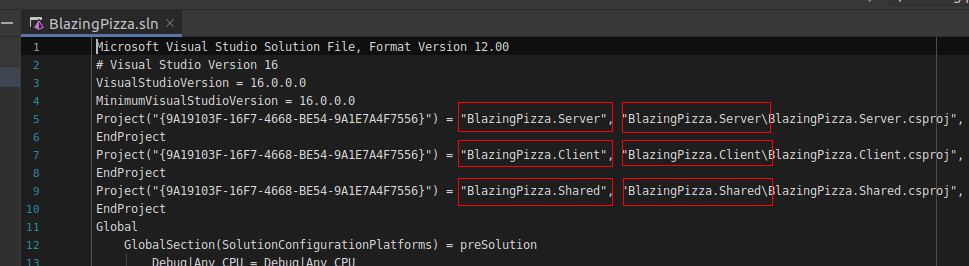 Let's make similar changes in the file BlazingPizza.Server.csproj:
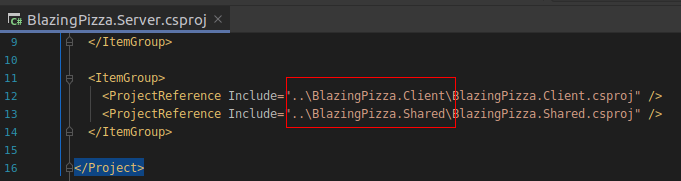 And finally, BlazingPizza.Client.csproj should look like the screenshot below:
 With the changes for now, we have enough enough has accumulated that it would be a shame to lose, so we’ll connect a version control system to our solution. To do this, finally open our IDE Rider and solutions, here everything is the same as in Visual Studio, you can open by selecting a solution file.Once everything is loaded, go to the menu VCS => Enable Version Control Integration . And here we connect Git. Rider will add service files to the folder with the solution and highlight all the files in red, which means that these files are not fixed in the version control system.The first time Rider will offer to commit everything that is in the project including the contents of the bin and obj folders , we certainly do not need this, all because the .gitignore file that was added by default is empty. Move it to the root one level with the BlazingPizza.sln file and replace its contents with the contents from under the kata.
The contents of the .gitignore file# Default ignored files
/workspace.xml
## Ignore Visual Studio temporary files, build results, and
## files generated by popular Visual Studio add-ons.
##
## Get latest from https://github.com/github/gitignore/blob/master/VisualStudio.gitignore
# User-specific files
*.suo
*.user
*.userosscache
*.sln.docstates
# User-specific files (MonoDevelop/Xamarin Studio)
*.userprefs
# Build results
[Dd]ebug/
[Dd]ebugPublic/
[Rr]elease/
[Rr]eleases/
x64/
x86/
bld/
[Bb]in/
[Oo]bj/
[Ll]og/
# Visual Studio 2015/2017 cache/options directory
.vs/
# Uncomment if you have tasks that create the project's static files in wwwroot
#wwwroot/
# Visual Studio 2017 auto generated files
Generated\ Files/
# MSTest test Results
[Tt]est[Rr]esult*/
[Bb]uild[Ll]og.*
# NUNIT
*.VisualState.xml
TestResult.xml
# Build Results of an ATL Project
[Dd]ebugPS/
[Rr]eleasePS/
dlldata.c
# Benchmark Results
BenchmarkDotNet.Artifacts/
# .NET Core
project.lock.json
project.fragment.lock.json
artifacts/
**/Properties/launchSettings.json
# StyleCop
StyleCopReport.xml
# Files built by Visual Studio
*_i.c
*_p.c
*_i.h
*.ilk
*.meta
*.obj
*.iobj
*.pch
*.pdb
*.ipdb
*.pgc
*.pgd
*.rsp
*.sbr
*.tlb
*.tli
*.tlh
*.tmp
*.tmp_proj
*.log
*.vspscc
*.vssscc
.builds
*.pidb
*.svclog
*.scc
# Chutzpah Test files
_Chutzpah*
# Visual C++ cache files
ipch/
*.aps
*.ncb
*.opendb
*.opensdf
*.sdf
*.cachefile
*.VC.db
*.VC.VC.opendb
# Visual Studio profiler
*.psess
*.vsp
*.vspx
*.sap
# Visual Studio Trace Files
*.e2e
# TFS 2012 Local Workspace
$tf/
# Guidance Automation Toolkit
*.gpState
# ReSharper is a .NET coding add-in
_ReSharper*/
*.[Rr]e[Ss]harper
*.DotSettings.user
# JustCode is a .NET coding add-in
.JustCode
# TeamCity is a build add-in
_TeamCity*
# DotCover is a Code Coverage Tool
*.dotCover
# AxoCover is a Code Coverage Tool
.axoCover/*
!.axoCover/settings.json
# Visual Studio code coverage results
*.coverage
*.coveragexml
# NCrunch
_NCrunch_*
.*crunch*.local.xml
nCrunchTemp_*
# MightyMoose
*.mm.*
AutoTest.Net/
# Web workbench (sass)
.sass-cache/
# Installshield output folder
[Ee]xpress/
# DocProject is a documentation generator add-in
DocProject/buildhelp/
DocProject/Help/*.HxT
DocProject/Help/*.HxC
DocProject/Help/*.hhc
DocProject/Help/*.hhk
DocProject/Help/*.hhp
DocProject/Help/Html2
DocProject/Help/html
# Click-Once directory
publish/
# Publish Web Output
*.[Pp]ublish.xml
*.azurePubxml
# Note: Comment the next line if you want to checkin your web deploy settings,
# but database connection strings (with potential passwords) will be unencrypted
*.pubxml
*.publishproj
# Microsoft Azure Web App publish settings. Comment the next line if you want to
# checkin your Azure Web App publish settings, but sensitive information contained
# in these scripts will be unencrypted
PublishScripts/
# NuGet Packages
*.nupkg
# The packages folder can be ignored because of Package Restore
**/[Pp]ackages/*
# except build/, which is used as an MSBuild target.
!**/[Pp]ackages/build/
# Uncomment if necessary however generally it will be regenerated when needed
#!**/[Pp]ackages/repositories.config
# NuGet v3's project.json files produces more ignorable files
*.nuget.props
*.nuget.targets
# Microsoft Azure Build Output
csx/
*.build.csdef
# Microsoft Azure Emulator
ecf/
rcf/
# Windows Store app package directories and files
AppPackages/
BundleArtifacts/
Package.StoreAssociation.xml
_pkginfo.txt
*.appx
# Visual Studio cache files
# files ending in .cache can be ignored
*.[Cc]ache
# but keep track of directories ending in .cache
!*.[Cc]ache/
# Others
ClientBin/
~$*
*~
*.dbmdl
*.dbproj.schemaview
*.jfm
*.pfx
*.publishsettings
orleans.codegen.cs
# Including strong name files can present a security risk
# (https://github.com/github/gitignore/pull/2483#issue-259490424)
#*.snk
# Since there are multiple workflows, uncomment next line to ignore bower_components
# (https://github.com/github/gitignore/pull/1529#issuecomment-104372622)
#bower_components/
# RIA/Silverlight projects
Generated_Code/
# Backup & report files from converting an old project file
# to a newer Visual Studio version. Backup files are not needed,
# because we have git ;-)
_UpgradeReport_Files/
Backup*/
UpgradeLog*.XML
UpgradeLog*.htm
ServiceFabricBackup/
*.rptproj.bak
# SQL Server files
*.mdf
*.ldf
*.ndf
# Business Intelligence projects
*.rdl.data
*.bim.layout
*.bim_*.settings
*.rptproj.rsuser
# Microsoft Fakes
FakesAssemblies/
# GhostDoc plugin setting file
*.GhostDoc.xml
# Node.js Tools for Visual Studio
.ntvs_analysis.dat
node_modules/
# Visual Studio 6 build log
*.plg
# Visual Studio 6 workspace options file
*.opt
# Visual Studio 6 auto-generated workspace file (contains which files were open etc.)
*.vbw
# Visual Studio LightSwitch build output
**/*.HTMLClient/GeneratedArtifacts
**/*.DesktopClient/GeneratedArtifacts
**/*.DesktopClient/ModelManifest.xml
**/*.Server/GeneratedArtifacts
**/*.Server/ModelManifest.xml
_Pvt_Extensions
# Paket dependency manager
.paket/paket.exe
paket-files/
# FAKE - F# Make
.fake/
# JetBrains Rider
.idea/
*.sln.iml
# CodeRush
.cr/
# Python Tools for Visual Studio (PTVS)
__pycache__/
*.pyc
# Cake - Uncomment if you are using it
# tools/**
# !tools/packages.config
# Tabs Studio
*.tss
# Telerik's JustMock configuration file
*.jmconfig
# BizTalk build output
*.btp.cs
*.btm.cs
*.odx.cs
*.xsd.cs
# OpenCover UI analysis results
OpenCover/
# Azure Stream Analytics local run output
ASALocalRun/
# MSBuild Binary and Structured Log
*.binlog
# NVidia Nsight GPU debugger configuration file
*.nvuser
# MFractors (Xamarin productivity tool) working folder
.mfractor/
# sqlite
*.db
# Don't ignore server launchSettings.json. We need a specific port number for auth to work.
!**/BlazingPizza.Server/Properties/launchSettings.json
After that, the number of non-committed files will have to sharply decrease to 31.Create our first commit on the Repository tab: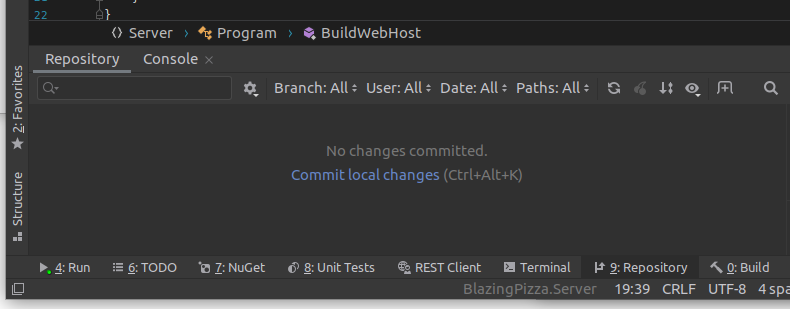 Enter the initial commit in the description of the commit and include all the files in the commit by clicking on “Unversioned files” => “Add to VCS” :
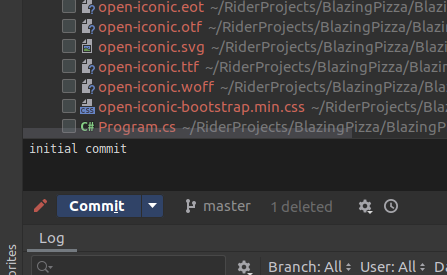 C the infrastructure is more or less ready, let's talk a little about the contents of the solution.
Solution Content
Rename the project BlazingPizza.Shared right now to BlazingPizza.DomainModels . Here it must be said that Rider, despite the experimental mark, did an excellent job. Run the project and make sure everything is functioning and nothing is broken.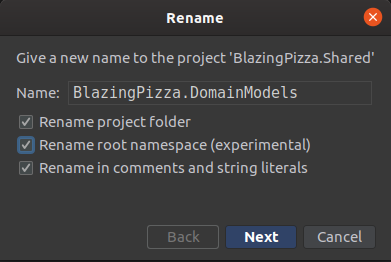 It would be nice to create a commit with changes, if only to just see how much Rider did for us, let me remind you if it was Visual Studio Code , you would have to do all this with pens yourself, look at the diff files by clicking on them.
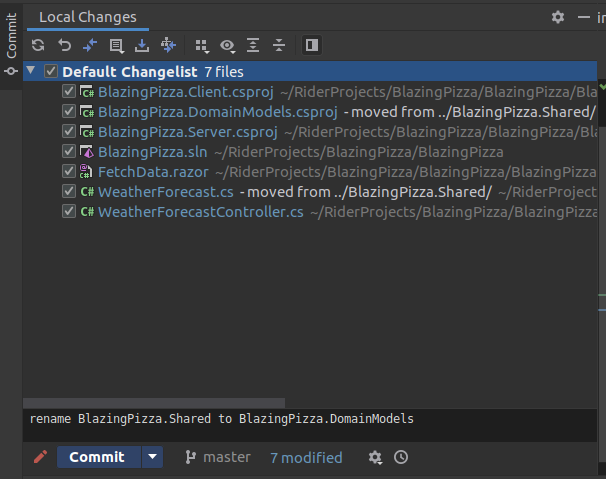
Add New Projects
Add a few more projects, start with BlazingPizza.ViewModels . It will display the display models on the client. To add, right-click on the solution and select Add => New Project (the type of project in this and in the next in this part of the Class Library )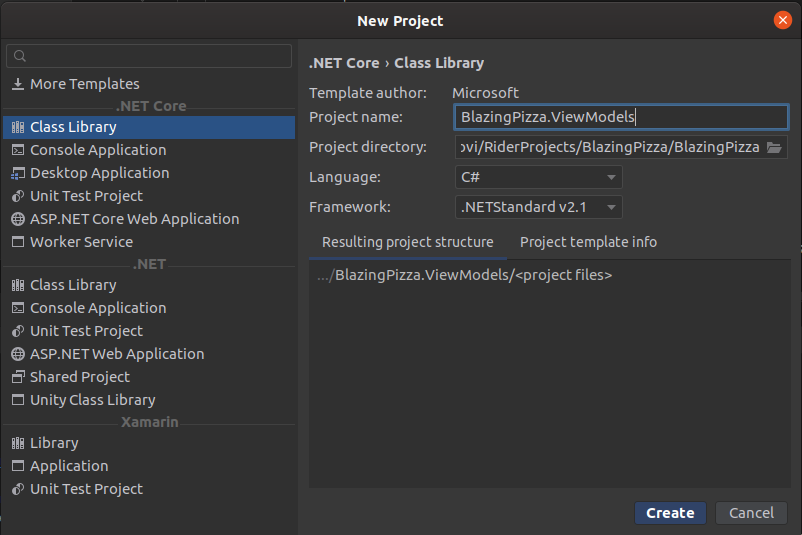 If something went wrong, or just do not want to waste time setting up and starting right away from the second lesson, the source is here .Oh yes, I almost forgot :) Link to the original project (MIT License) .