Task
When developing our game The Unliving, we set ourselves the task of displaying various messages, such as damage done, lack of health or energy, reward value, the number of health points restored, etc., using the Particle System. It was decided to do this in order to get more opportunities for customizing the effects of the appearance and further behavior of such messages, which is problematic when using standard elements of the Unity UI system.In addition, this approach implies the use of only one Particle System instance for each type of message, which gives a huge increase in productivity compared to the output of the same messages using Unity UI.Damage ReportShortage Text MessageDecision algorithm
Using the shader, we display the pre-prepared texture using the correct UV coordinates. Information with UV-coordinates is transmitted by two streams (vertex streams) to ParticleSystem using ParticleSystem.SetCustomParticleData in the form of a Vector4 list.Our implementation involves the use of textures containing 10 rows and 10 columns of characters. Any monospace font can be used as a font. This is to avoid different spacing between message characters.→ Texture source in PSDStep by step implementation
Creating Vector4 for transfer to Vertex StreamTo describe the character set, we will use the SymbolsTextureData structure.The chars array must be filled manually, in order by adding all the font texture symbols to it starting from the upper left corner.[Serializable]
public struct SymbolsTextureData
{
public Texture texture;
public char[] chars;
private Dictionary<char, Vector2> charsDict;
public void Initialize()
{
charsDict = new Dictionary<char, Vector2>();
for (int i = 0; i < chars.Length; i++)
{
var c = char.ToLowerInvariant(chars[i]);
if (charsDict.ContainsKey(c)) continue;
var uv = new Vector2(i % 10, 9 - i / 10);
charsDict.Add(c, uv);
}
}
public Vector2 GetTextureCoordinates(char c)
{
c = char.ToLowerInvariant(c);
if (charsDict == null) Initialize();
if (charsDict.TryGetValue(c, out Vector2 texCoord))
return texCoord;
return Vector2.zero;
}
}
As a result, we get the TextRendererParticleSystem class. When you call the public SpawnParticle method, one particle of the Particle System will spawn to the desired position, with the desired value, color and size.[RequireComponent(typeof(ParticleSystem))]
public class TextRendererParticleSystem : MonoBehaviour
{
private ParticleSystemRenderer particleSystemRenderer;
private new ParticleSystem particleSystem;
public void SpawnParticle(Vector3 position, string message, Color color, float? startSize = null)
{
}
}
Particle System in Unity allows you to transfer custom data in the form of 2 Vector4 streams.We intentionally added an extra stream with UV2 to avoid a shift in the coordinates of the streams. If this is not done, then the X and Y coordinates of the Custom1-vector in C # will correspond to the Z and W TEXCOORD0 shaders. And accordingly, Custom1.z = TEXCOORD1.x, Custom1.w = TEXCOORD1.y. Which will cause a lot of inconvenience in the future.As described earlier, we will use two Vector4s to convey the message length and UV-coordinates of characters. Since Vector4 contains 4 elements of type float, by default we can pack 4 * 4 = 16 bytes of data into it. Because Since our message will contain only the length of the message (two-digit number) and the coordinates of the characters (two-digit number for each character), then the range of type byte (0-255) is redundant for us. While using decimal places will do just fine.Float accuracy is 6-9 characters, which means we can safely use 6 bits of each Vector4 coordinate and not worry about the integrity and accuracy of the data. Actually, we tried to pack 7, 8 and 9 characters, but float accuracy is not enough.It turns out that in each float, using decimal places, we will pack as many as 6 digits, in contrast to the standard version with four bytes. Total, one Vector4 will contain 24 single-digit numbers.We can transfer 2 vectors in the stream, so we will use both to transmit messages up to 23 characters long:Custom1.xyzw - the first 12 characters of the message.Custom2.xyzw - another 11 characters of the message + message length (last 2 characters).For example, the message “Hello” would look like this.The character coordinates correspond to the column number and the character position line in the texture.In the code, wrapping a string in two Vector4 will look like this:
public float PackFloat(Vector2[] vecs)
{
if (vecs == null || vecs.Length == 0) return 0;
var result = vecs[0].y * 10000 + vecs[0].x * 100000;
if (vecs.Length > 1) result += vecs[1].y * 100 + vecs[1].x * 1000;
if (vecs.Length > 2) result += vecs[2].y + vecs[2].x * 10;
return result;
}
private Vector4 CreateCustomData(Vector2[] texCoords, int offset = 0)
{
var data = Vector4.zero;
for (int i = 0; i < 4; i++)
{
var vecs = new Vector2[3];
for (int j = 0; j < 3; j++)
{
var ind = i * 3 + j + offset;
if (texCoords.Length > ind)
{
vecs[j] = texCoords[ind];
}
else
{
data[i] = PackFloat(vecs);
i = 5;
break;
}
}
if (i < 4) data[i] = PackFloat(vecs);
}
return data;
}
public void SpawnParticle(Vector3 position, string message, Color color, float? startSize = null)
{
var texCords = new Vector2[24];
var messageLenght = Mathf.Min(23, message.Length);
texCords[texCords.Length - 1] = new Vector2(0, messageLenght);
for (int i = 0; i < texCords.Length; i++)
{
if (i >= messageLenght) break;
texCords[i] = textureData.GetTextureCoordinates(message[i]);
}
var custom1Data = CreateCustomData(texCords);
var custom2Data = CreateCustomData(texCords, 12);
}
Vector with CustomData ready. It's time to manually spawn a new particle with the desired parameters.Particlespawn The first thing we need to do is make sure that CustomData streams are activated in the Renderer settings of the particle system:
if (particleSystem == null) particleSystem = GetComponent<ParticleSystem>();
if (particleSystemRenderer == null)
{
particleSystemRenderer = particleSystem.GetComponent<ParticleSystemRenderer>();
var streams = new List<ParticleSystemVertexStream>();
particleSystemRenderer.GetActiveVertexStreams(streams);
if (!streams.Contains(ParticleSystemVertexStream.UV2)) streams.Add(ParticleSystemVertexStream.UV2);
if (!streams.Contains(ParticleSystemVertexStream.Custom1XYZW)) streams.Add(ParticleSystemVertexStream.Custom1XYZW);
if (!streams.Contains(ParticleSystemVertexStream.Custom2XYZW)) streams.Add(ParticleSystemVertexStream.Custom2XYZW);
particleSystemRenderer.SetActiveVertexStreams(streams);
}
To create a particle, we use the Emit () method of the ParticleSystem class.
var emitParams = new ParticleSystem.EmitParams
{
startColor = color,
position = position,
applyShapeToPosition = true,
startSize3D = new Vector3(messageLenght, 1, 1)
};
if (startSize.HasValue) emitParams.startSize3D *= startSize.Value * particleSystem.main.startSizeMultiplier;
particleSystem.Emit(emitParams, 1);
var customData = new List<Vector4>();
particleSystem.GetCustomParticleData(customData, ParticleSystemCustomData.Custom1);
customData[customData.Count - 1] = custom1Data;
particleSystem.SetCustomParticleData(customData, ParticleSystemCustomData.Custom1);
particleSystem.GetCustomParticleData(customData, ParticleSystemCustomData.Custom2);
customData[customData.Count - 1] = custom2Data;
particleSystem.SetCustomParticleData(customData, ParticleSystemCustomData.Custom2);
Add both blocks to the SpawnParticle () method and the C # part is ready: the message is packed and transmitted by the GPU in the form of two Vector4 in Vertex Stream. The most interesting thing left is to accept this data and display it correctly.Shader codeShader "Custom/TextParticles"
{
Properties
{
_MainTex ("Texture", 2D) = "white" {}
// 10,
_Cols ("Columns Count", Int) = 10
_Rows ("Rows Count", Int) = 10
}
SubShader
{
Tags { "RenderType"="Opaque" "PreviewType"="Plane" "Queue" = "Transparent+1"}
LOD 100
ZWrite Off
Blend SrcAlpha OneMinusSrcAlpha
Pass
{
CGPROGRAM
#pragma vertex vert
#pragma fragment frag
#include "UnityCG.cginc"
struct appdata
{
float4 vertex : POSITION;
fixed4 color : COLOR;
float4 uv : TEXCOORD0;
// customData
float4 customData1 : TEXCOORD1;
float4 customData2 : TEXCOORD2;
};
struct v2f
{
float4 vertex : SV_POSITION;
fixed4 color : COLOR;
float4 uv : TEXCOORD0;
float4 customData1 : TEXCOORD1;
float4 customData2 : TEXCOORD2;
};
uniform sampler2D _MainTex;
uniform uint _Cols;
uniform uint _Rows;
v2f vert (appdata v)
{
v2f o;
// w- ?
// .
// 100.
float textLength = ceil(fmod(v.customData2.w, 100));
o.vertex = UnityObjectToClipPos(v.vertex);
// UV , -
o.uv.xy = v.uv.xy * fixed2(textLength / _Cols, 1.0 / _Rows);
o.uv.zw = v.uv.zw;
o.color = v.color;
o.customData1 = floor(v.customData1);
o.customData2 = floor(v.customData2);
return o;
}
fixed4 frag (v2f v) : SV_Target
{
fixed2 uv = v.uv.xy;
//
uint ind = floor(uv.x * _Cols);
uint x = 0;
uint y = 0;
// ,
//0-3 - customData1
//4-7 - customData2
uint dataInd = ind / 3;
// 6 float
uint sum = dataInd < 4 ? v.customData1[dataInd] : v.customData2[dataInd - 4];
// float
for(int i = 0; i < 3; ++i)
{
if (dataInd > 3 & i == 3) break;
// , 10^2 = 99 ..
uint val = ceil(pow(10, 5 - i * 2));
x = sum / val;
sum -= x * val;
val = ceil(pow(10, 4 - i * 2));
y = sum / val;
sum -= floor(y * val);
if (dataInd * 3 + i == ind) i = 3;
}
float cols = 1.0 / _Cols;
float rows = 1.0 / _Rows;
// UV-, - , ,
//
uv.x += x * cols - ind * rows;
uv.y += y * rows;
return tex2D(_MainTex, uv.xy) * v.color;
}
ENDCG
}
}
}
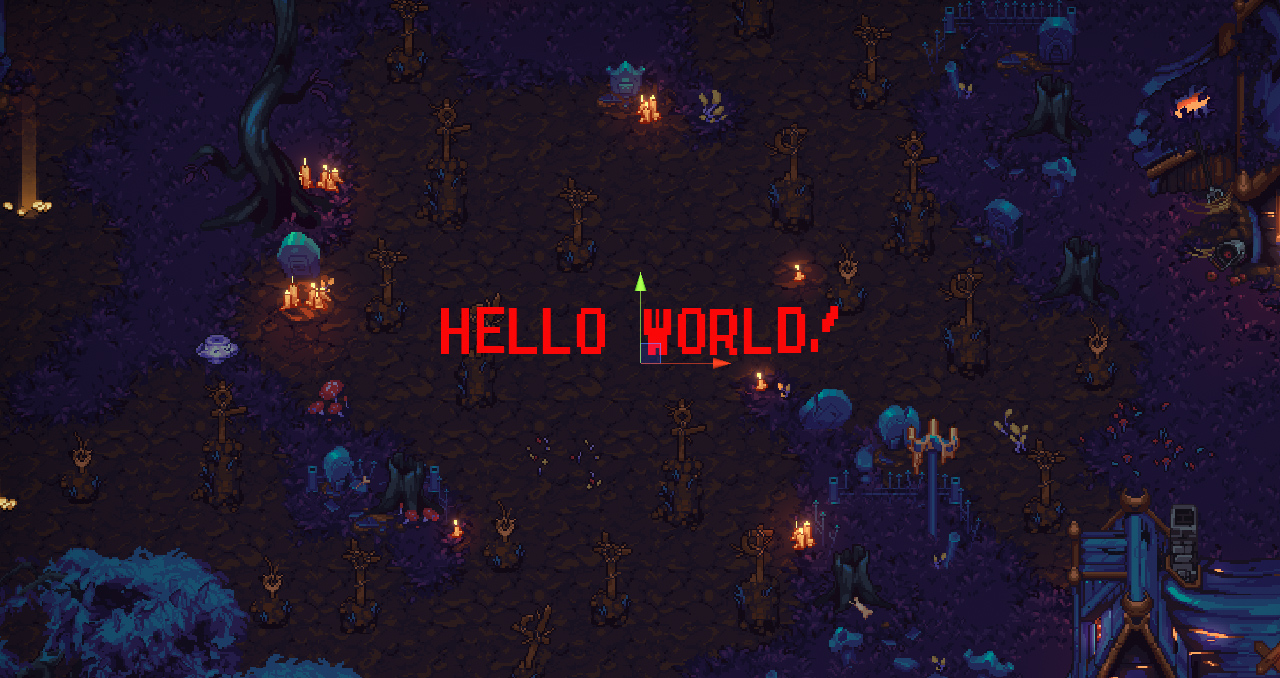
Unity EditorCreate material and assign it to our shader. On the scene, create an object with the ParticleSystem component, assign the created material. Then we adjust the particle behavior and turn off the Play On Awake parameter. From any class, we call the RendererParticleSystem.SpawnParticle () method or use the bargain method.[ContextMenu("TestText")]
public void TestText()
{
SpawnParticle(transform.position, "Hello world!", Color.red);
}
Source code, resources, and usage examples can be found here .Message system in actionThat's all. Message Output Using Particle System Ready! We hope this solution will benefit Unity game developers.UPD: Performance of the proposed solutionIn the comments of several people, a question arose about the performance of this method. Specially made measurements by the profiler of unity. The conditions are the same - 1000 moving, color-changing objects.The result of using the standard UI (the only canvas on which there are only 1000 UI Text objects): The total time for building the frame is at least 50ms, of which 40ms is spent on updating the canvas. At the same time, objects do not even spawn, but simply move.The result of a spawn of 1000 particles using our solution:
 All magic happens at the GPU, even at the time of spawn of 1000 particles, the frame is calculated in less than 5ms.